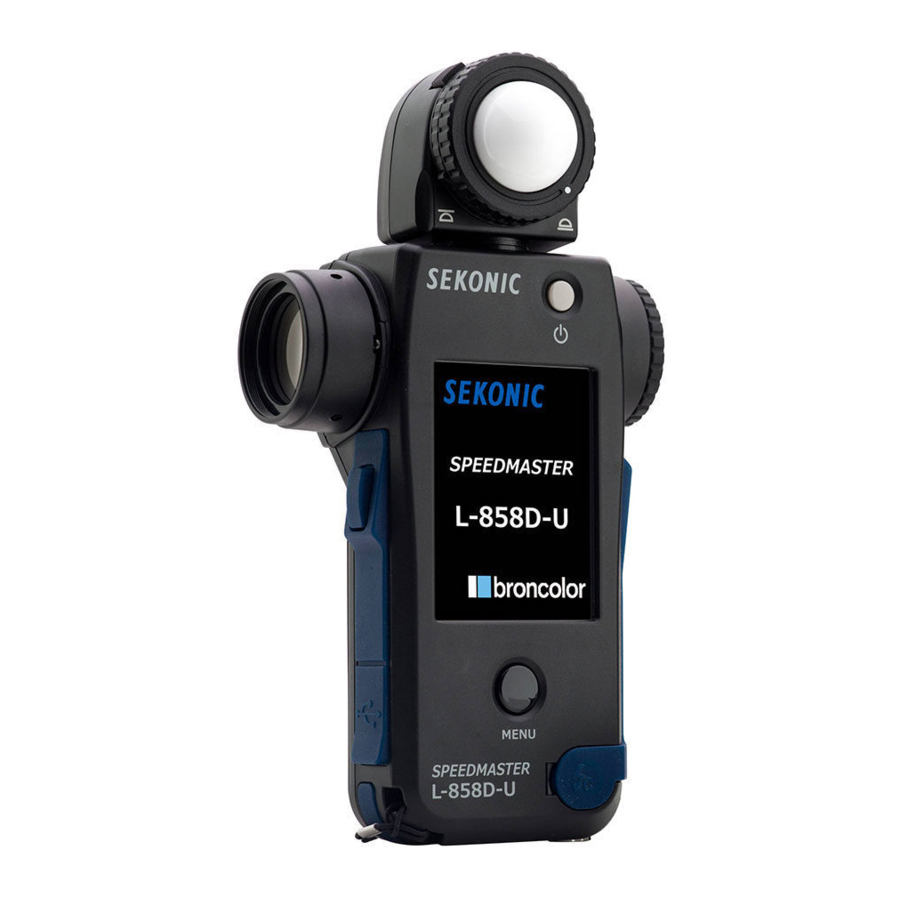
SEKONIC Speedmaster L-858D/L-858D-U - Light Meter Startup Guide
- Operating manual (237 pages) ,
- Startup manual (16 pages) ,
- Manual (7 pages)
Advertisement
Check Included Items
The following items are included with the meter in the package. Please be sure to check that all noted items are included.
* If any items are missing, please contact the distributor or the reseller you purchased the meter from.
* The USB cable (that has the A connector and Micro-B connector) is not included in the package. Please obtain this separately.
* Batteries (two AA, Alkaline and manganese batteries are recommended) are not included in the package. Please obtain these separately.
| Meter | Startup Guide (this document) | Strap | Lens Cap (Installed on the meter) |
 |  |  |  |
| Soft Case | Anti-glare Sheet for LCD Screen | Safety Precaution | |
 |  |  |
Names of Parts
The following is a list of names of buttons and parts on the meter.

* The function of the Measuring button  and Memory button
  can be interchanged using the Custom Setting function.
Turn the Power ON/OFF
After installing batteries, press the power button  to start up the meter. The Startup screen appears on the LCD for 1 second. Then the settings for the Measuring button (MEASURE) and Memory button (MEMORY) are displayed on the Measuring screen for 2 seconds. To turn the power off, press and hold down the Power button for at least 1 second. The meter power turns off after the display disappears. Please wait 3 seconds between repeated power on and power off sessions.

* By touching the Startup screen, you can Measuring button 6 immediately skip the screen.
NOTICE
- The blue lettered "SEKONIC" logo screen is displayed after battery replacement and 24 hours after power OFF.
- Movement of the blue status bar indicates that the meter is checking its memory and preparing to operate. Do not turn the power OFF. Otherwise, the meter may be damaged.
![]()

Screen Operations
This section explains how to operate the touch panel on the meter.
Touch an icon with your finger to select a desired menu or item.

Slide operations
Slide a finger up or down on the setting value areas at any time to change setting values.
Touch operations
Touch each icon to change the display to a desired screen.
Setting value increases when  is touched.
Setting value decreases when  is touched.

Scroll bars
Slide the vertical or horizontal scroll bars to view a different part of the screen.
Radio button operations
Radio buttons are displayed when you can only select one item. Touch a desired item to select.

Check box operations
Check boxes are displayed when multiple selections are available. Touch a desired item(s) to select.

Input Numbers or Characters
How to input a numerical value (Numeric Number Input screen)

| No. | Key | Description |
| 1 | 0-9, Decimal point, Sign (+/-) | Inputs a numeric value. When touched, the input value is displayed at the top of screen. |
| 2 | DEL | Deletes the input value. |
| 3 | OK | Applies the input value, and returns to the previous screen. |
| 4 | Cancel | Cancels the input value, and returns to the previous screen. |
How to input characters and numbers (Character Input screen)

| No. | Key | Description |
| 1 |  | The cursor indicates the position at which to enter a character. |
| 2 | ABC, abc, 0-9, Decimal point, Space, Hyphen | When touched, the input value is displayed at the top of screen. Repeated touching of the same button for alphabet (ABC/abc) will change the alphabet character in order. |
| 3 | 1/A/a | Switches between numbers, upper-case characters, and lower-case characters. |
| 4 | ← → | Moves the input position. |
| 5 | DEL | Deletes the input value. |
| 6 | OK | Applies the input value, and returns to the previous screen. |
| 7 | Cancel | Cancels the input value, and returns to the previous screen. |
Measuring Preparations
The mode and other settings required to make a measurement can be selected from the Measuring screen. For information on how to switch the display to each screen, see the relevant item.

* When another function has been assigned by using the custom setting, select Incident/Spot from Tool Box.
Select Measuring Mode
Different measuring modes can be selected to meet various requirements.
* In the custom setting, you can select whether to display or hide the measuring modes. Content to be displayed differs depending on which transmitter (sold separately) is installed.

<Ambient Mode>
| No. | Description of mode |
| 1 | Ambient light T (shutter speed) priority mode Displays F-stop value (aperture) for input shutter speed and ISO values. |
| 2 | Ambient light F-stop (aperture) priority mode Displays shutter speed value for input F-stop and ISO values. |
| 3 | Ambient light TF (shutter speed and F-stop) priority mode Displays ISO sensitivity for input shutter speed and F-stop values. |
| 4 | Ambient light HD Cine mode Displays F-stop value for input shutter speed, frame rate and ISO values. |
| 5 | Ambient light Cine mode Displays F-stop value for input frame rate, ISO and shutter angle values. |
| 6 | Ambient light Illuminance (lux or fc) mode (Incident light measurement) Displays brightness value in lux or foot-candle unit. |
| Ambient light Luminance (cd/m2 or fl) mode (Reflected light measurement) Displays brightness value in cd/m2 or foot-lambert unit. |

<Flash Mode>

| No. | Description of mode |
| 7 | Cordless flash mode Detects flash brightness without meter-flash connection after Measuring button pressed to arm meter for 90 seconds and flash fired separately, and displays F-stop value. |
| 8 | Cordless multi (cumulative) flash mode Detects and accumulates flash brightness without meter-flash connection after Measuring button pressed to arm meter for 90 seconds and flash fired separately, and displays F-stop value. |
| 9 | Cord flash mode Detects flash brightness with synchro cord meter-flash connection, and displays F-stop value. |
| 10 | Cord multi (cumulative) flash mode Detects and accumulates flash brightness with synchro cord meterflash connection, and displays F-stop value. |
| 11 | Radio triggering flash mode Detects flash brightness after Measuring button is pressed to send radio transmitted signal to radio receiver connected to flash. Displays F-stop value (When a transmitter sold separately is installed). |
| 12 | Radio triggering multi (cumulative) flash mode Detects and accumulates flash brightness after Measuring button is pressed to send radio transmitted signal to radio receiver connected to flash. Displays F-stop value (When a transmitter sold separately is installed). |

* Switching analog scales in Flash mode

<HSS Flash Mode/Flash Duration Analysis Mode>

| No. | Description of mode |
| 13 | HSS (High Speed Synchro) flash cordless mode Select this mode to measure the brightness of a flash activated in HSS (High Speed Synchro) mode. Detects flash brightness without meter-flash connection after Measuring button pressed to arm meter for 90 seconds and flash fired separately, and displays F-stop value. |
| 14 | HSS (High Speed Synchro) flash radio triggering mode (for RT-GX only) Select this mode to measure the brightness of a flash activated in HSS (High Speed Synchro) mode. Detects flash brightness after Measuring button is pressed to send radio transmitted signal to radio receiver connected to flash. Displays F-Stop value (When a transmitter sold separately is installed). |
| 15 | Flash duration analysis cordless mode Detects flash brightness without meter-flash connection after Measuring button pressed to arm meter for 90 seconds and flash fired separately, and displays flash duration time, graph of flash wave form and F-stop value. |
| 16 | Flash duration analysis cord mode Detects flash brightness with synchro cord meter-flash connection, and displays flash duration time, graph of flash wave form and F-stop value. |
| 17 | Flash duration analysis radio triggering mode Detects flash brightness after Measuring button is pressed to send radio transmitted signal to radio receiver connected to flash. Displays flash duration time, graph of flash wave form and F-stop value (When a transmitter sold separately is installed). |

Switching between measured value screens (numeric value  graph) in Flash duration analysis mode

Tool Box
Touch the [Tool Box] icon ( ) on the Measuring screen to display settings of functions frequently used.

| No. | Item name | Description |
| 1 | Set Average/Contrast Function | Selects On/Off. |
| 2 | Select Incident/Spot | Selects the light receiving method (Incident/Spot). |
| 3 | Set Exposure Compensation | Inputs a Exposure compensation value. |
| 4 | Set Filter Compensation | Inputs a filter compensation value or select a filter. |
| 5 | Set Mid. Tone | Sets or edits the Mid. Tone from the measurement or memorized value. |
| 6 | Mid. Tone Clear | Deletes Mid. tone value. |
| 7 | Mid. Tone Recall | Recalls Mid. tone value. |
| 8 | Set Exposure Profile | Selects an exposure profile. |
| 9 | Memory Clear | Deletes measurements stored in the memory. (Not displayed in multi flash mode.) |
| 10 | Memory Recall | Redisplays data stored in the memory. (Not displayed in multi flash mode.) |
| 11 | Multi Clear | Deletes accumulated data. (Displayed in multi flash mode only.) |
| 12 | Number of Pre-flash | Selects the number of times before pre-flashing is canceled. |
| 13 | Flash Duration Analysis t Value | Inputs t value of Flash duration analysis. |
| 14 | Radio CH/Zone *1 | Selects a radio channel/zone. |
| 15 | ▼/▲ | Moves to the previous or next page. |
| 16 | Close | Closes Tool Box and returns to the Measuring screen. |
*1 Content to be displayed differs depending on which transmitter (sold separately) is installed.
Menu Screen and Custom Settings
The Menu screen enables you to previously customize or edit the function or display settings.
Press the Menu button  on the meter to display the screen.

* The "Radio System Preference" in the Custom Setting is only displayed when a transmitter (sold separately) is installed.
Download
- Operating Manual
- Data Transfer Software (DTS)
Please visit www.sekonic.com to download the latest version of DTS software and the operating manual as follows:


You can also use the URLs below for direct access to both DTS and the operating manual.
https://www.sekonic.com/support/downloads
Optional Radio Transmitters
Sekonic makes five radio transmitters for use with the L-858D that can be purchased separately.
When purchasing and/or installing a radio transmitter, make sure that the meter, transmitter and radio receiver are designed for use in your location and have the proper frequency to comply with local broadcast regulations.
| L-858D Serial # | Transmitter Model # | Operating Frequency |
| JY11-XXXXXX (Canada IC) JY1L-XXXXXX (FCC) | RT-20PW | PocketWizard (FCC & Canada IC): 344.0 to 354.00 MHz |
| JY11-XXXXXX (CE) JY1G-XXXXXX (NCC) | RT-3PW | PocketWizard (CE & NCC): 433.42 to 434.42MHz |
| JY10-XXXXXX (Japan) | RT-BR | broncolor (FCC, Canada IC, CE, SRRC, Japan): 2.4GHz |
| JY11-XXXXXX (CE) JY1G-XXXXXX (SRRC, NCC) | RT-EL/PX | Elinchrom and Phottix (FCC, Canada IC, CE, NCC, SRRC, Japan): 2.4GHz |
| JY1L-XXXXXX (FCC) | RT-GX | Godox (FCC, Canada IC, CE, SRRC, Japan): 2.4GHz |

* PocketWizard® is the registered trademark of LPA Design.
* broncolor® is the registered trademark of Bron Elektronik AG.
* Elinchrom is the registered trademark of Elinchrom SA.
* Phottix® is the registered trademark of Phottix Hong Kong Ltd.
* Godox® is the registered trademark of Godox Photo Equipment Co. Ltd.
* The contents of this manual may be subject to change for the product's specification modifications and other reasons without prior notice.
7-24-14, Oizumi-Gakuen-cho, Nerima-ku Tokyo 178-8686 JAPAN
TEL +81-3-3978-2335
FAX +81-3-3978-5229
https://www.sekonic.com

Documents / Resources
References
Download manual
Here you can download full pdf version of manual, it may contain additional safety instructions, warranty information, FCC rules, etc.
Download SEKONIC Speedmaster L-858D/L-858D-U - Light Meter Startup Guide
Advertisement
Thank you! Your question has been received!


Need Assistance?
Do you have a question about the Speedmaster L-858D that isn't answered in the manual? Leave your question here.