Table of Contents
Advertisement
L-308X
L-308X-U
Operating Manual
Thank you for purchasing our product.
Please read this operating manual so that you will fully understand the features and
operation of this product. Then keep the operating manual in a safe place for future use.
Please see the Startup Guide for information about the basic operations.
Light Meter
Advertisement
Table of Contents

Related Manuals for Sekonic FLASHMATE L-308X


Summary of Contents for Sekonic FLASHMATE L-308X
-
Page 1: Operating Manual
Light Meter L-308X L-308X-U Operating Manual Thank you for purchasing our product. Please read this operating manual so that you will fully understand the features and operation of this product. Then keep the operating manual in a safe place for future use. Please see the Startup Guide for information about the basic operations. -
Page 2: Safety Precautions
■ Safety Precautions Before using this product, please read this "Safety Precautions" for proper operation. WARNING The WARNING symbol indicates the possibility of death or serious injury if the product is not used properly. The CAUTION symbol indicates the possibility of minor to CAUTION moderate personal injury or product damage if the product is not used properly. - Page 3 CAUTION ● Do not handle this product with wet hands, or leave it in the rain or in a location where it may be splashed with water, submerged, or come into contact with moisture. There is a danger of electric shock if the "Cord Flash Mode"...
- Page 4 NOTICE ● The reproduction of all or any part of this document without permission is strictly forbidden. ● The product concerned and/or this manual may be subject to changes without prior notification. ● The screens in this operating manual may differ from the actual displays of the meter you are using.
-
Page 5: Intended Usage
We recommend that you download the latest operating manual from our website and use this product. URL : www.sekonic.com/support/instructionmanualuserguidedownload.aspx ● The safety-related precautions such as “Safety Guide and Maintenance” and “Safety Precautions” conform to the legal and industry standards that were applicable at the time this operating manual was created. -
Page 6: Accompanying Accessories
■ Accompanying Accessories The following items are included with the meter in the package. Please be sure to check that all noted items are included. If any items are missing, please contact the distributor or the reseller you purchased the meter from. -
Page 7: Table Of Contents
Table of Contents ■ Safety Precautions ................................WARNING ..................................CAUTION ..................................NOTICE ..................................... NOTE ......................................■ Intended Usage ..................................■ Features of the L-308X ..............................■ Intended Users ..................................■ Restrictions ....................................■ Accompanying Accessories ............................Parts Designation ..............................1-1 Parts Designation ............................ - Page 8 Measurement ................................5-1 PHOTO Mode ............................... <Measuring in Ambient Light Mode> ......................5-1-1 Shutter Speed Priority Mode ......................... 5-1-2 Aperture Priority Mode ..........................5-1-3 EV Mode ................................. <Measuring in Flash Light Mode> ........................5-1-4 Cordless Flash Mode ..........................5-1-5 Cord Flash Mode ............................
- Page 9 7-2 Shutter Speed .............................. 7-3 F-stop (Aperture) ............................7-4 Frame Rate ..............................7-5 Shutter Angle ..............................Optional Accessories ............................Specifications ................................. 10. Legal Requirements ............................11. Troubleshooting ..............................12. After-Sales Services ............................viii...
-
Page 10: Parts Designation
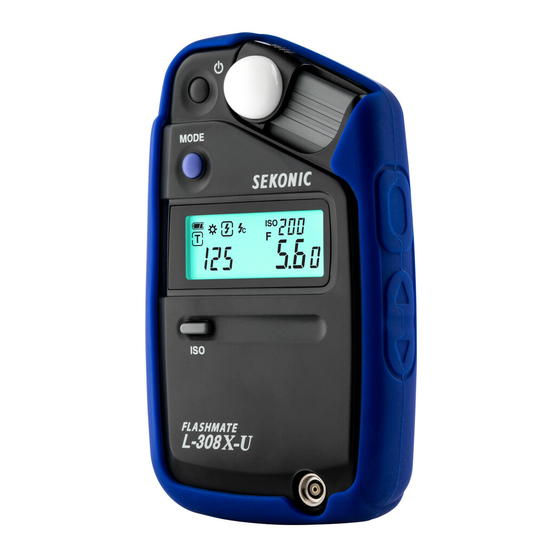
1. Parts Designation ● Parts Designation 1-1 Parts Designation POWER Button Lens Lumisphere (Light Receptor) Lumisphere (Not removable) MODE Button MEASURING Button Liquid Crystal Display (LCD) UP Button DOWN Button ISO Button Strap Eyelet Battery Synchro Terminal Compartment Cover Synchro Terminal Cap (Installed on the meter)... -
Page 11: Explanation Of The Liquid Crystal Display (Lcd)
2. Explanation of the Liquid Crystal Display (LCD) ● Explanation of the Liquid Crystal Display (LCD) 2-1 Contents of Display For explanation purposes, the display illustrated here shows icons and readouts simultaneously. Actual display will never appear like this. 1 Measuring Mode icons (for PHOTO Mode only) Ambient ( ➡... - Page 12 2. Explanation of the Liquid Crystal Display (LCD) ● 6 Battery Power Indicator ( ➡ P7) Backlight LCD If the lighting condition is dark (under EV5), the LCD screen will automatically illuminate after measurement with sensing the brightness. While measuring or stand-by in Cordless flash mode, the LCD screen will not illuminate to avoid interference with the measurement.
-
Page 13: Before Use
3. Before Use ● Before Use 3-1 Attaching the Strap Pass the strap (included) through the outer hole of the Strap Eyelet. Pass the opposite end of the strap through the loop at the end of the strap. WARNING ● Infants or toddlers may accidentally wrap the strap around their neck, so please place it in a location out of their reach. -
Page 14: Inserting The Batteries
3. Before Use ● 3-2 Inserting the Batteries Prepare a single AA battery. Slide down the battery compartment cover in the direction of the arrow to remove. Insert the battery observing the polarity w i t h t h e + , - m a r k s i n t h e b a t t e r y compartment. -
Page 15: Power On/Off
3. Before Use ● 3-3 Power ON/OFF Power ON POWER Button Press the POWER Button. Power OFF Press and hold the POWER Button in for 1 second or longer and the meter will turn off. NOTICE ● Please wait 3 seconds between repeated power on and off sessions. NOTE ●... -
Page 16: Checking The Battery Capacity
3. Before Use ● 3-5 Checking the Battery Capacity When the meter is turned ON, the battery power indicator on the LCD is displayed. (Displayed) Battery power level is good. (Displayed) Battery power level is low. Have a spare battery ready. (Blinking) Replace battery immediately. -
Page 17: Basic Operation
4. Basic Operation ● Basic Operation 4-1 Basic Measurement Workflow Power ON ( ➡ P6) Incident light ( ➡ P9) Switch the light receiving method ( ➡ P9) Reflected light ( ➡ P11) PHOTO Mode Ambient T Priority Mode ( ➡ P14) Select the Display mode ( ➡... -
Page 18: Incident And Reflected Light Measurement
4. Basic Operation ● 4-2 Incident and Reflected Light Measurement To set for either incident or reflected light operation, slide the Lumisphere mounting until it clicks. Mounting Incident light Mode Reflected light Mode Setting operation NOTICE ● Always use the Lumisphere mounting for setting. Hand operation of the Lumisphere may cause damage.(Lumisphere and mounting can not be removed.)... -
Page 19: Using Lumidisc (Optional Accessory)
4. Basic Operation ● 2) Using Lumidisc (Optional Accessory) The Lumidisc is used to measure the light falling on green-screen walls, paintings or flat art. It is also used to adjust lighting ratios with multiple light sources ( ➡ P28) or when taking Lux and Footcandle measurements ( ➡... -
Page 20: Reflected Light System
4. Basic Operation ● 4-2-2 Reflected Light System Switch the light receiving method to the reflected light system to make a measurement. The reflected light system measures the brightness (luminance) of the light reflected from the subject. It is useful to meter distant objects such as landscapes, if you cannot go to the location of the subject, or to meter subjects that generate light (neon signs, etc.), highly Reflected light Mode... -
Page 21: Select Measuring Mode
4. Basic Operation ● 4-4 Select Measuring Mode Mode The following Measuring modes in each Display are available. Mode Press the MODE Button to select the Measuring . ( ➡ P8) MODE Button PHOTO Mode: • Shutter Speed Priority Mode (Ambient mode) •... -
Page 22: Setting Iso Sensitivity
4. Basic Operation ● 4-5 Setting ISO Sensitivity Hold down the ISO Button and press either the UP Button or DOWN Button to select ISO sensitivity being used. You can also change the ISO sensitivity after taking measurements. The new value is automatically displayed. -
Page 23: Measurement
5. Measurement ● Measurement 5-1 PHOTO Mode Use this mode to obtain exposure settings when taking single images with adjustable film or digital cameras. Measuring Mode choices include Ambient, Cordless Flash and Cord Flash. When measurements are taken, the meter will indicate the aperture value required for proper exposure. -
Page 24: Aperture Priority Mode
5. Measurement ● NOTE ● Use Custom Setting to display shutter speed step increment in full,1/2 or 1/3 step increment ( ➡ P31). ● Shutter speed can be set from 60 sec. to 1/8000 sec. ● After the measurement, the aperture value will be automatically adjusted to maintain proper exposure when changes in shutter speed and/or ISO are made. -
Page 25: Ev Mode
5. Measurement ● 5-1-3 EV Mode Operation Press MODE Button to select MODE Button Mode. Press MEASURING Button to take a MODE measurement. Measurements will be taken continuously and displayed as EV values as long as the button is pressed. Releasing the MEASURING Button will hold and display the last measured value. - Page 26 5. Measurement ● ★ Aperture Value & Shutter Speed Value, EV Contrast Table EV=AV+TV (At ISO100) AV 0 1 2 3 4 5 6 7 8 9 10 TV 0 1 2 3 4 5 6 7 8 9 1 0 0...
-
Page 27: Measuring In Flash Light Mode
5. Measurement ● <Measuring in Flash Light Mode> Flash illumination is light that is produced by the very brief light pulse of an electronic flash unit or flash bulb. This measuring method includes the cord and cordless flash modes. When measurements are taken, the meter will indicate the aperture value required for proper exposure. - Page 28 5. Measurement ● Fire the flash to take a measurement. 1/10 step measured value (f stop) Measured Set shutter value (f stop) speed NOTE ● If the icon stops blinking before the flash fires, repeat Steps 4 and 5. NOTICE In case of the following, please follow "Cord Flash Mode"( ➡...
-
Page 29: Cord Flash Mode
5. Measurement ● 5-1-5 Cord Flash Mode In this Measuring Mode, a synchro cord (sold separately) is used to connect the flash to the meter. Use this Cord Flash Mode when you need to ensure synchronization with the flash or use a flash bulb. After pressing the Measuring Button, the meter trigger the flash unit and displays F-stop value. - Page 30 5. Measurement ● NOTICE ● The electronic flash unit may trigger when you connect the synchro cord or operate the POWER Button. ● A cord-connected flash may not fire if the flash unit has an extremely low trigger voltage. If this happens, use the Cordless Flash Mode ( ➡ P18). NOTE ●...
-
Page 31: Hd_Cine Mode
5. Measurement ● 5-2 HD_CINE Mode Use this mode to obtain exposure settings when using DSLR and digital video cameras that record images using frame rate and shutter speed settings. When measurements are taken, the meter will indicate the aperture value required for proper exposure. This mode also enables taking Simplified Illuminance readings (Selectable in Custom setting). -
Page 32: Frame Rate Setting
5. Measurement ● NOTE ● Use Custom Setting to display shutter speed values in full, 1/2 or 1/3 step increment ( ➡ P31). ● Shutter speeds can be set from 1/8 to 1/8000 sec. A special grouping of commonly used Cine Shutter speeds will appear above 1/8000 second (1/24, 1/25, 1/30, 1/48, 1/50, 1/60, 1/96, 1/100, 1/120 sec.). -
Page 33: Simplified Illuminance Mode
5. Measurement ● 5-2-3 Simplified Illuminance Mode Illuminance Mode can be selected in Custom Setting ( ➡ P31). Operation Slide the Lumisphere all the way to the right Lumidisc and attach the Lumidisc (optional accessory) ( ➡ P10). Press MODE Button to select the Simplified Illuminance Mode. -
Page 34: Cine Mode
5. Measurement ● 5-3 CINE Mode Use this mode to obtain exposure settings when using film or digital motion-picture cameras that record images using frame rate and shutter angle settings. When measurements are taken, the meter will indicate the aperture value required for proper exposure. -
Page 35: Shutter Angle Setting
5. Measurement ● NOTE ● Available frame rates include 8, 12, 16, 18, 24, 25, 30, 32, 48, 50, 60, 64, 96, 100, 120 and 128 f/s. ● After the measurement, the aperture value will be automatically adjusted to maintain proper exposure when changes in frame rate and/or ISO are made. -
Page 36: Simplified Illuminance Mode
5. Measurement ● 5-3-3 Simplified Illuminance Mode Illuminance mode can be selected in Custom setting ( ➡ P31). Operation Slide the Lumisphere all the way to the right Lumidisc and attach the Lumidisc (optional accessory) ( ➡ P10). Press MODE Button to select the Simplified Illuminance Mode. -
Page 37: Measuring Contrast Of Light
5. Measurement ● 5-4 Measuring Contrast of Light This method is useful for setting brightness levels (ratios) of key, line, hair, and eye lights for cinematography applications or evaluating studio lighting for Photo applications. It is also useful to check the evenness of illumination across a subject area or background such as a green screen. -
Page 38: Out Of Display Range / Measurement Range
5. Measurement ● 5-5 Out of Display Range / Measurement Range 5-5-1 Out of Display Range 1) When “E.o” (Exposure Over) appears on the display If the measured value higher than the maximum display range, “E.o” (Exposure over) will appear even though measured value is within the meter’s measuring range. In this case, make one of the following adjustments to display the measured value. -
Page 39: Out Of Measurement Range
5. Measurement ● If possible, raise the output power of light source, and take another measurement. 5-5-2 Out of Measurement Range 1) When “E.o” (Exposure over) blinks on the display If the brightness exceeds the measuring range of the meter, “E.o” will blink to indicate that measurements cannot be made. -
Page 40: Advanced Functions
6. Advanced Functions ● Advanced Functions 6-1 Custom Setting Function Use these settings to customize meter operations and displays to fit your camera and metering requirements. CS number Custom setting group Custom setting item PHOTO mode HD_CINE mode CINE mode Display mode CS1... -
Page 41: Display Mode Group
6. Advanced Functions ● The Custom setting item will change each time the MODE Button is pressed. <Display Mode Group> PHOTO Mode HD_CINE Mode CINE Mode Press MODE Mode <Increments of Aperture and Shutter Speed Group> 1 step (in 1/10 step) 1/2 step 1/3 step Press MODE Button... -
Page 42: Calibration Compensation Function
6-2 Calibration Compensation Function This meter has been calibrated to Sekonic standards. However, compensation may be necessary to calibrate the meter to camera specifications or to match the display to another exposure meter. Calibration compensation can be made in precise 1/10 step increments in a +/-1.0 EV range. -
Page 43: Various Setting Values
7. Various Setting Values ● Various Setting Values 7-1 ISO Sensitivity Setting values are basically defined in 1/3 step increments. However, ISO850 used in Cine camera is displayed between ISO800 and ISO1000. 3, 4, 5, 6, 8, 10, 12, 16, 20, 25, 32, 40, 50, 64, 80, 100, 125, 160, 200, 250, 320, 400, 500, 640, 800, 850, 1,000, 1,250, 1,600, 2,000, 2,500, 3,200, 4,000, 5,000, 6,400, 8,000 7-2 ... -
Page 44: F-Stop (Aperture)
7. Various Setting Values ● 7-3 F-stop (Aperture) You can select the desired value in Custom Setting to suit the camera settings. 1 step 0.5, 0.7, 1.0, 1.4, 2.0, 2.8, 4.0, 5.6, 8.0, 11, 16, 22, 32, 45, 64, 90 increments (Default) 1/2 step... -
Page 45: Optional Accessories
8. Optional Accessories ● Optional Accessories Synchro Cord ■ This is a five-meter (16.4 feet) long cord with three plugs. An exposure meter, a camera and a flash can all be connected at the same time without having to plug or unplug the cord during shooting. -
Page 46: Specifications
9. Specifications ● Specifications Type ● Digital light meter for ambient and flash light Light Receiving Method ● Incident light and reflected light Light receiving section ● Incident light Lumisphere, Lumidisc (optional accessory) ● Reflected light Lens (light receiving angle of 40°) Light Receptor ●... -
Page 47: Standard Accessories
9. Specifications ● Display Range ● ISO sensitivity ISO 3 to ISO 8,000 (in 1/3 steps), ISO 850 Ambient light :60 sec. to 1/8000 sec. • PHOTO Mode ● Shutter speed (in 1, 1/2, 1/3 step) Flash light :1 sec. to 1/500 sec. (in 1, 1/2, 1/3 step) plus 1/75, 1/80, 1/90, 1/100 sec. -
Page 48: Legal Requirements
10. Legal Requirements ● Legal Requirements This product complies with the following legal requirements. Destination Standard Details Europe SAFETY Low Voltage (LVD) Directive 2014/35/EU Directive 2014/30/EU Environmental WEEE RoHS Directive 2011/65/EU REACH North FCC (US) FCC Part15 SubpartB ClassB America IC (Canada) ICES-003 Japan... -
Page 49: Troubleshooting
Troubleshooting If your meter is not operating properly, as you expect, please consult the following conditions and attempt the suggested solutions before contacting Sekonic. Non- operation can be due to incorrect, mis-setting of the meter or battery condition. Should your meter be malfunctioning, please contact place where meter was purchased or Sekonic for service and repair. -
Page 50: After-Sales Services
12. After-Sales Services ● After-Sales Services Contact your local distributor or camera store that you purchased from for 伪 warranty and service. Even within the warranty period, repair services may be provided on a paid 伪 basis. Check the conditions of warranty provided by local distributor or retailer. The warranty is not valid unless the copy of proof of purchase with the date 伪... - Page 52 7-24-14, Oizumi-Gakuen-Cho, Nerima-Ku Tokyo 178-8686 JAPAN Tel +81-3-3978-2335 Fax +81-3-3978-5229 http://www.sekonic.com JE6197560 December 2017...