Advertisement
Available languages
Available languages
Quick Links
SLFS1AM1B
SLFS1AM1W
SLFS07AM2B
SLFS07AM2W
SLFS1AM2B
SLFS1AM2W
SLFS15AM2B
SLFS15AM2W
SLFS2AM2B
SLFS2AM2W
SLFS2AM3B
SLFS2AM3W
ENGLISH
ITEMS REQUIRED
(Purchase separately)
• Phillips screwdriver
HOW IT WORKS
During the daylight hours, the solar panel turns the sunlight into energy that is stored in the
rechargeable battery pack. Your light features a motion sensor that turns the light ON at night
when motion is detected. This light is equipped with a photocell, which only allows the fixture
to turn ON during the night time hours.
WARNINGS AND CAUTIONS
IMPORTANT: READ CAREFULLY BEFORE INSTALLING FIXTURE. FAILURE TO COMPLY WITH THESE
INSTRUCTIONS MAY RESULT IN SERIOUS BODILY INJURY, DEATH, OR PROPERTY DAMAGE.
SAVE THESE INSTRUCTIONS.
RISK OF FIRE OR INJURY
• DO NOT replace batteries.
• DO NOT puncture this battery pack. DO NOT work on this battery pack.
• DO NOT disassemble fixture. The fixture does not have any user serviceable parts.
• DO NOT dispose of this product in fire. Batteries inside this product may explode or leak.
• Lithium-Ion batteries must be disposed of in accordance with local waste ordinances and
regulations.
• Do not operate luminaire with a missing or damaged lens.
Fixture is suitable for wall and eave mount only. NOT suitable for ground mount installation
FOR BEST RESULTS
• Allow fixture to receive three full days of sunlight before turning fixture ON.
• Locate solar panel in an area that will receive the maximum amount of sunlight
during the daylight hours. Panel must receive at least 3-4 hours of direct sunlight daily.
The solar panel should be within 16 feet from the fixture.
• Test your charged unit before installing.
• Locate fixture so motion moves across the detection zone (Fig. 1).
• Locate fixture away from heat producing sources to prevent false triggering. Also be
very careful not to include objects such as windows, white walls and water in the
detection zone.
Questions?/ Des questions?/ ¿Preguntas? 1-800-334-6871 ConsumerProducts@cooperlighting.com
PACKAGING CONTENTS /CONTENU DE L'EMBALLAGE/CONTENIDO DEL PAQUETE
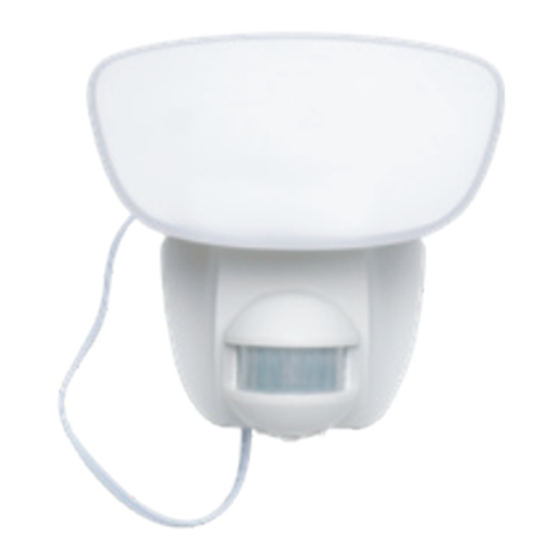
A.
Luminaire (lumière d'ambiance)
C. (6) Fixture Mounting Screws
(6) Vis de montage du luminaire
(6) Tornillos de montaje del luminario
B. Mounting Bracket
Support de montage
Soporte de montaje
Quick Release Tab
Languette à dégagement rapide
Lengüeta de liberación rápida
NOTE:
SLFS07AM2*, SLFS1AM2* & SLFS1AM1*
will have only (5) Screws
Fig. 1
• Locate fixture away from moving objects such as trees, large shrubs and street traffic.
• Keep solar panel clear of any objects that will block the sunlight. It will be necessary to
periodically clean the solar panel with soft wet cloth.
• During periods of several cloudy days, the battery may fall below the operating level
and will need to be recharged with sunlight.
MOUNTING YOUR FIXTURE
1. Locate area in which you would like to install your light fixture.
NOTE: For fixture to operate properly, the solar panel must be located in an area that will
receive the maximum amount of sunlight and is free from obstructions.
2. Using the fixture mounting screws (C) provided, mount the snap-in mounting bracket
(B) to a solid surface (Wall/Eave) by placing the screws through the center holes of the
bracket. Make sure the tab on the bracket is pointing down. (Fig. B).
3. On the bottom side of the sensor, rotate power knob to AUTO position.
4. Slide fixture down over the snap-in mounting bracket, making sure that the fixture
engages the guide ribs. Continue sliding down until the fixture snaps into the locking tab.
5. Using the solar panel mounting screws provided, mount solar panel (D) to a solid surface.
Adjust the angle of the solar panel (D) so that it will receive the maximum amount of
direct sunlight during the daylight hours.
NOTE: For best results, locate panel to receive at least 3-4 hours of direct sunlight daily.
6. Carefully route the wire from the solar panel (D) to the fixture (A) and plug it into the con-
nector extending from the bottom of the fixture housing (A). Make sure to push the con-
nector plugs tightly together until you hear two clicks to ensure they are fully engaged.
D. Solar Panels (with 16 feet cord):
a.700Lm
b.1000Lm
81 X 81mm
79 X 119mm
99 X 160mm
E. (6) Wall Anchors
(6) Ancrages muraux
(6) Anclajes de pared
c.1500Lm
d.2000Lm
116 X 160mm
NOTE:
SLFS07AM2*,
SLFS1AM2* & SLFS1AM1*
will have only (5) Anchors
Advertisement

Related Manuals for Cooper HALO SLFS1AM1B


Summary of Contents for Cooper HALO SLFS1AM1B
- Page 1 Questions?/ Des questions?/ ¿Preguntas? 1-800-334-6871 ConsumerProducts@cooperlighting.com PACKAGING CONTENTS /CONTENU DE L’EMBALLAGE/CONTENIDO DEL PAQUETE B. Mounting Bracket D. Solar Panels (with 16 feet cord): Luminaire (lumière d’ambiance) Support de montage Soporte de montaje a.700Lm b.1000Lm c.1500Lm d.2000Lm 81 X 81mm 79 X 119mm 99 X 160mm 116 X 160mm SLFS1AM1B...
-
Page 2: Troubleshooting
ER EXPRESS, IMPLIED OR STATUTORY INCLUDING, BUT NOT LIMITED TO, ANY WARRANTY OF MERCHANTABILITY OR FITNESS FOR ANY PARTICULAR PURPOSE. Cooper Lighting Solutions (“CLS”) warrants to customers that, for a period of one year from the date of purchase, CLS products will be free from defects in materials and workmanship. - Page 3 POUR TRANSPORTER FRANÇAIS 1. Appuyer sur la languette à dégagement rapide du support de montage pour retirer le luminaire. Instruction Manual / Manuel d’instructions/ Instrucciones ARTICLES REQUIS fin de son utilisation afin de conserver l’énergie de la pile. (À acheter séparément) •...
-
Page 4: Dépannage
• Repositionnez ou déplacez l’unité pour l’éloigner de la REMPLACEMENT POUR LESDITS PRODUITS, mouvement la nuit N’EXCÉDERA PAS LE PRIX D’ACHAT DES PRODUITS COOPER LIGHTING SOLUTIONS DONNANT source lumineuse. LIEU À UNE RÉCLAMATION. TOUS LES FRAIS DE MAIN-D’ŒUVRE NÉCESSAIRE À LA DÉSINSTAL- Le luminaire ne se charge pas pendant la journée. - Page 5 PARA USO PORTÁTIL ESPAÑOL 1. Presione la lengüeta de liberación rápida en el soporte de montaje para quitar el lumi- nario. ELEMENTOS NECESARIOS NOTA: Para no gastar la batería, asegúrese de mantener el luminario en la posición OFF (APAGADO) cuando no esté en uso. (Se compran por separado) 2.
-
Page 6: Resolución De Problemas
CUALQUIER GARANTÍA DE COMERCIABILIDAD O IDONEIDAD PARA CUALQUIER PROPÓSITO EN PARTICULAR. Cooper Lighting Solutions (“CLS”) garantiza a los clientes que, durante un período de un año desde la fecha de compra, los productos CLS estarán libres de defectos en cuanto a materiales y mano de obra.