Table of Contents
Advertisement
Quick Links
Advertisement
Chapters
Table of Contents

Related Manuals for Roland FP-E50


Summary of Contents for Roland FP-E50
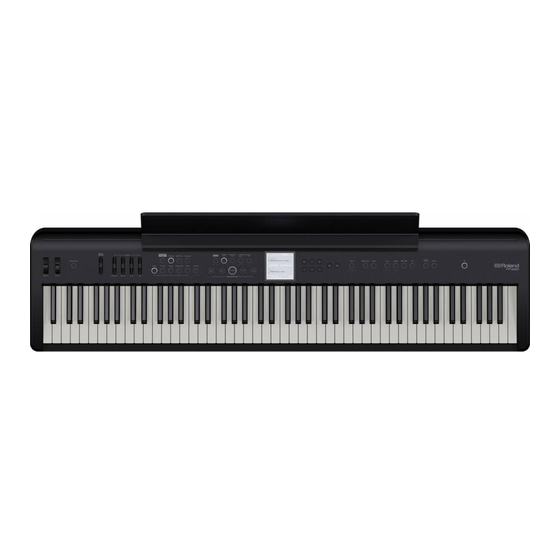
- Page 1 Reference Manual * This product does not include a stand or pedals. The photo shows an example of this product used in combination with a dedicated stand (KSFE50, sold separately) and dedicated pedals (KPD-70, sold separately). © 2023 Roland Corporation...
-
Page 2: Table Of Contents
......Placing the FP-E50 on a Stand ........ - Page 3 Contents Center Cancel Using the Chord Sequencer ....... . . Turning the Chord Sequencer On/Off .
-
Page 4: Introduction
Placing the FP-E50 on a Stand ........ -
Page 5: Getting Ready To Play
Placing the FP-E50 on a Stand Be careful not to pinch your fingers when setting up the stand. Please use one of the following Roland stands to support your FP-E50: KSFE50, KS-10Z, KS-12 or KS-20X. Refer to the following when using a stand. -
Page 6: Attaching The Music Rest
For details, refer to “KPD-70 Owner’s Manual (Installing the Pedal Board)”. NOTE ¹ When moving the FP-E50, be sure to remove the music rest as a safety precaution . ¹ Do not apply excessive force to the music rest . -
Page 7: Using The Headphones
If you’re using only one set of headphones, you may connect them to either of the two headphone jacks. NOTE If headphones are connected, no sound will be output from the FP-E50’s speakers . Use the [Master Volume] slider (p . 9) to adjust the headphone volume . -
Page 8: Basic Operations Of The Fp-E50
Basic Operations of the FP-E50 Basic Operations of the FP-E50 Panel Descriptions . . . . . . . . . . . . . . . . . . . . . . . . . . . . . . . . . . . . . . . . . . . . . . . .9 Top Panel . -
Page 9: Panel Descriptions
Panel Descriptions Top Panel Tone Accompaniment (Keyboard part) (Accomp part) [One Touch Piano] [Transpose] [Accomp On] [Sync Start] button button button (*1) button Use this when you want to switch to playing a To transpose the key in semitones, hold down Turns the accompaniment parts on/off except The auto-accompaniment starts at the same piano tone only. -
Page 10: Rear Panel
Panel Descriptions Menu/Metronome/Tempo Song player Center Cancel/Mic FX Power Supply Use these buttons to play back audio files [ Ā ] [Menu] [Center Cancel] button button (power) button (songs). Press this button to show the menu. Select Reduces the volume of sounds that are Turns the power on/off. -
Page 11: Basic Operations And The Screen
¹ Never turn off the power of the FP-E50 during playback or recording, or when loading/saving data to or from the USB flash drive . ¹ When you turn off the power of the FP-E50, the contents of the loaded (currently edited) scene are lost . Save any important data before you turn off the power . -
Page 12: Making The Power Automatically Turn Off After A Time (Auto Off )
Basic Operations and the Screen Making the Power Automatically Turn Off Basic Operation After a Time (Auto Off ) The power to this unit will be turned off automatically after a predetermined amount of time has passed since it was last used for playing music, or its buttons or controls were operated (Auto Off function). -
Page 13: Top Screen
Top Screen Dual Mode The top screen for Dual mode. The layout of the top screen on the FP-E50 changes depending on the keyboard mode used (Single/Split/Dual). Press the [Exit] button several times to show the top screen. Scene Name... -
Page 14: Tone Category
There are a total of 50 tone categories, and each tone has its own tone category. The tones for each bank are numbered, beginning with “001”. On the FP-E50, the tone categories are assigned to the five tone buttons. How to read the bank symbols... -
Page 15: Accessing The Various Functions (Menu Screen)
Basic Operations and the Screen Accessing the Various Functions Editing a Name (Rename Screen) (Menu Screen) Use this screen to edit the names of scenes and so on. Press the [Menu] button to show the Menu screen. Rename screen (used when saving a scene) You can access a variety of functions from the Menu screen. -
Page 16: Selecting A Tone
Selecting a Tone Selecting a Tone Selecting the Keyboard Mode . . . . . . . . . . . . . . . . . . . . . . . . . . . . . . . . . . . 17 Switching Between Keyboard Modes . -
Page 17: Selecting The Keyboard Mode
Selecting the Keyboard Mode Switching Between Keyboard Modes Playing with Two Parts (Dual/Split) Press the [Split/Dual] button to switch between Playing with Different Tones in the Left and keyboard modes . Right Hands (Split) Press the [Split/Dual] button to cycle between the keyboard modes in order: “Single”... -
Page 18: Playing With Two Tones Layered (Dual)
Selecting the Keyboard Mode Playing with Two Tones Layered (Dual) This mode lets you play two different tones at the same time with each key press. This is called “Dual Play”. Upper part Lower part MEMO When you hold down two tone buttons corresponding to the tones you want to layer (play at the same time), you can set the keyboard mode to “Dual”... -
Page 19: Selecting A Tone (Tone Select)
Selecting a Tone (Tone Select) There are three ways to change the tones used for the keyboard parts, Selecting with the [Dec] [Inc] Buttons as follows. On the top screen, move the cursor to the tone name, Selecting with the Tone Buttons (p. -
Page 20: Selecting From The Tone List Screen
Selecting a Tone (Tone Select) Selecting from the Tone List Screen Tone button Category Harpsichord, Clav, Celesta, Accordion, You can select a tone from the onscreen tone list. Harmonica, Bell, Mallet, Ac.Guitar, E.Guitar, Dist.Guitar, Ac.Bass, E.Bass, Synth.Bass, You can also switch between two types of screens: select by category Plucked / Stroke, Orchestral, Solo Brass, and select by bank. -
Page 21: Using Favorites
Using Favorites You can register your favorite tones that you frequently use when Registering a Favorite (Register Favorite) playing live as “favorites” for instant recall. Five tones can be registered per bank. Here’s how to register the currently selected tone as a favorite tone. You can create 10 sets (from 1–10) of banks. -
Page 22: Selecting A Standard Piano Tone (One Touch Piano)
Selecting a Standard Piano Tone (One Touch Piano) By simply pressing the [One Touch Piano] button, you can make the keyboard mode change to “Single” and the upper part tone change to “Sn001: Concert Piano”. Press the [One Touch Piano] button . The top screen appears, and the piano tone is selected in Single mode. -
Page 23: Basic Functions
Basic Functions Basic Functions . . . . . . . . . . . . . . . . . . . . . . . . . . . . . . . 24 Using the Metronome (Metronome) Starting the Metronome . -
Page 24: Using The Metronome (Metronome)
Using the Metronome (Metronome) You can play this instrument while listening to a metronome. The Parameter Value Explanation metronome’s tempo and time signature can be changed. Changes the volume of the Volume 0–10 If a song is playing, the metronome sounds at the tempo and time metronome. -
Page 25: Setting The Tempo (Tempo)
Setting the Tempo (Tempo) Changing the Tempo Making the Tempo Stay the Same When Switching Scenes or Styles (Tempo Lock) Here’s how to change the tempo. This shows how to make the tempo stay the same even when you Press the [Tempo] button . switch between scenes or styles. -
Page 26: Scene
Scene A “scene” is a collection of performance settings for the keyboard Editing a Scene (Scene Edit) parts, auto-accompaniment, chord sequencer and the mic. Press the [Menu] button . Selecting a Scene (Scene Select) The Menu screen appears. Use the [ ä ä ] [ å å ] buttons to select “Scene Edit”, and then Press the [Scene] button . -
Page 27: Saving A Scene (Scene Write)
Scene Once you’ve entered the scene name, press the [Enter] Saving a Scene (Scene Write) button . If you select a different scene or turn off the power after editing the A confirmation message appears. settings, the edited settings are lost. If you want to keep the data, you must save it. -
Page 28: Adding Ambience To The Sound (Ambience)
Adding Ambience to the Sound (Ambience) This features adds reverberation to the sound, which makes it sound Parameter Value Explanation like you’re performing in a concert hall, cathedral or other space. Adjusts the depth of ambience You can recreate the reverberation sound of playing piano in various applied to the mic part. -
Page 29: Changing The Key (Transpose)
Changing the Key (Transpose) You can transpose the keyboard in semitone steps. For instance, when you want to play a song in the key of C that’s originally in the key of E, set the keyboard transpose value to “4”. Turning Transpose On/Off Press the [Transpose] button . -
Page 30: Connecting A Mobile Device Via Bluetooth
Connecting a Mobile Device via Bluetooth Connecting a Mobile Device via Bluetooth . . . . 31 Playing Music through the Piano’s Speakers (Bluetooth Function) Making Initial Settings ............31 (Pairing) Playing Back Audio . -
Page 31: Playing Music Through The Piano's Speakers (Bluetooth Function)
Play back the music data on your mobile device . * If your mobile device is already paired with the FP-E50, there is no need to perform pairing again. Refer to “Connecting an Already-paired Mobile The sound is heard from the FP-E50’s speakers. - Page 32 * If you are pairing in an environment where there is more than one FP-E50, we recommend that you turn on the power of the mobile device and only the FP-E50 that you want to pair (turn off the power of other devices).
-
Page 33: Auto-Accompaniment And Chord Sequencer
Auto-accompaniment and Chord Sequencer Auto-accompaniment and Chord Sequencer Using the Auto-accompaniment . . . . . . . . . . . . . . . . . . . . . . . . . . . . . . . . . 34 Selecting the Styles . -
Page 34: Using The Auto-Accompaniment
Using the Auto-accompaniment Long-press the [Enter] button to switch to the Style List Selecting the Styles screen (BANK) . Selecting with the [Dec] [Inc] Buttons On the top screen, move the cursor to the style name, style category or style bank . How to read the bank symbols Symbol Explanation... -
Page 35: Playing Styles In Sync ([Sync Start] Button)
Using the Auto-accompaniment Playing Styles in Sync Turning the Interactive Function On/Off ([Sync Start] Button) ([Interactive On] Button) Press the [Sync Start] button to make it light . By enabling the interactive function, you can make the The instrument enters synchro start standby. accompaniment’s arrangement and volume change in real time In this state, the auto-accompaniment starts once you play a note on the according to what you play. -
Page 36: Configuring The Auto-Accompaniment (Arranger Setting)
Using the Auto-accompaniment Configuring the Auto-accompaniment Parameter Value Explanation In Split mode, this sets the split (Arranger Setting) Split Point B1–B6 point that defines the area where chords can be detected. This turns the bass inversion Press the [Menu] button . function on/off for the chords you The Menu screen appears. -
Page 37: Configuring The Interactive Function (Interactive Settings)
Using the Auto-accompaniment Configuring the Interactive Function Automatically Muting the Left-Hand Performance During Playback when in Split (Interactive Settings) Mode (AUTO MUTE) Press the [Menu] button . You can automatically mute what you play in the left hand when the The Menu screen appears. -
Page 38: Using The Chord Sequencer
Using the Chord Sequencer Turning the Chord Sequencer On/Off Selecting a Chord Pattern Saved by the User Here’s how to turn the chord sequencer on/off. On the Chord Pattern List screen, select the desired chord pattern from the “User” list . Press the Chord Sequencer [On] button to make it light . -
Page 39: Checking The Chord Pattern
Using the Chord Sequencer Checking the Chord Pattern Editing a Chord Pattern (Edit Menu) (Chord Pattern View Screen) Long-press the Chord Sequencer [Select] button . You can check the contents of the chord patterns on the Chord The Chord Pattern View screen appears. Pattern View screen. - Page 40 Using the Chord Sequencer Rename screen operations Setting the Chords (Chord Edit) Controller Explanation Use the Edit Menu to select “Chord”, and then press the [ ç ] [ æ ] buttons Moves the cursor. [Enter] button . [ ä ] [ å ] buttons Toggles between uppercase/lowercase.
- Page 41 Using the Chord Sequencer Setting the Variation (Variation Edit) Parameter Value Explanation Intro Type Short, Long Changes the intro type. Ending OFF, ON Turns the ending on/off. Use the Edit Menu to select “Variation”, and then press Ending Type Short, Long Changes the ending type.
- Page 42 Using the Chord Sequencer Clear (Clear Measure) Paste (Paste Measure) This erases (clears) the measures in the selected range. This pastes the measures that you cut/copied into the specified position. The number of measures that are inserted or overwritten depend on how many measures you cut or copied.
- Page 43 Using the Chord Sequencer Setting the Transposition of a Pattern Initializing a Pattern (Initialize Pattern) (Transpose) Use the Edit Menu to select “Initialize Pattern”, and then press the [Enter] button . Use the Edit Menu to select “Transpose”, and then press the [Enter] button .
- Page 44 Using a Mic Using a Mic Using the Mic Effects . . . . . . . . . . . . . . . . . . . . . . . . . . . . . . . . . . . . . . . . . . . . 45 Turning the Mic Effects On/Off .
- Page 45 Using the Mic Effects Turning the Mic Effects On/Off Common Parameter (Mic FX) Parameter Value Explanation Connect a mic to the Mic Input jack . Ø “Harmony” (p. 45) Harmony Voice Ø “Voice Transformer” (p. 46) Microphone Mic FX Type Transformer Ø...
- Page 46 Using the Mic Effects Voice Transformer Vocal Designer This effect changes the pitch and tonal character of the mic audio. The vocal designer adds effects to a human voice. Control the pitch by playing the keyboard. Parameter Value Explanation Parameter Value Explanation Adjusts the pitch of the voice.
- Page 47 Playing Back and Recording a Song Playing Back and Recording a Song . . . . . . . . . . . . . . . . . . . . . . . . . . . . . . . . . . 48 Playing Back Songs (Song Player) Playing Back the Internal Songs .
-
Page 48: Playing Back Songs (Song Player)
Playing Back Songs (Song Player) Playing Back the Internal Songs Switching to the Scene that Corresponds to an Internal Song Select a song to play back. Press the [Song] button . On the Song screen, use the [ ç ç ] [ æ æ ] buttons to select “Preset”... -
Page 49: Changing The Song Playback Position
Playing Back Songs (Song Player) Changing the Song Playback Position Here’s how to change the playback position in a song. On the Song screen, press the [ þ þ ] button . The song position window opens. Use the [ ä ä ] [ å å ] buttons to move the cursor to the playback position (top row) . -
Page 50: Recording Your Performance (Audio Rec)
Recording Your Performance (Audio Rec) The FP-E50 lets you easily record your playing on this instrument. Make the recording settings in the Recording Standby window . Since you can overdub what you play on this instrument, you can follow the steps below to record and finish up your song, even if you’re not confident about playing with both hands or singing while... -
Page 51: Erasing The Recording Of What You Played
Recording Your Performance (Audio Rec) Erasing the Recording of What You Played Recording a Center-Canceled Sound Source When recording, you can apply the center cancel effect to the input Select the recorded song on the Song screen . audio from the Input jack, the Bluetooth audio or the song that’s playing back. -
Page 52: Convenient Functions (Song Utility)
Convenient Functions (Song Utility) On this screen, you can edit the name of the songs as well as copy Editing a Song Name (Song Rename) and delete the song data. You can edit the names of songs you’ve saved. Press the [Menu] button . On the Song Utility screen, use the [ ä... -
Page 53: Copying A Recorded Song To A Usb Flash Drive (Song Copy)
Convenient Functions (Song Utility) Copying a Recorded Song to a USB Flash Selecting and Deleting Multiple Songs Drive (Song Copy) (Song Delete) This shows how to copy the songs saved in internal memory to a USB You can also delete the songs that are stored in internal memory or flash drive. -
Page 54: Deleting All Recorded Songs (Song Delete All)
Convenient Functions (Song Utility) Deleting All Recorded Songs (Song Delete All) You can delete all of the songs that are stored in internal memory. On the Song Utility screen, use the [ ä ä ] [ å å ] buttons to select “Song Delete All”... -
Page 55: Demo Mode
Demo Mode Long-press the [Song] button . The Demo screen appears, and the demo songs automatically play back. The demo songs play back in a loop. To exit Demo mode, press the [Exit] button . MEMO Scan the 2D code shown onscreen with your smartphone or other device to view information for this product. - Page 56 Center Cancel Center Cancel . . . . . . . . . . . . . . . . . . . . . . . . . . . . . . . . 57 Using Center Cancel (Center Cancel) Turning Center Cancel On/Off .
- Page 57 Using Center Cancel (Center Cancel) You can apply the center cancel effect to the input audio from the Having Fun with Karaoke Input jack, the Bluetooth audio or the song that’s playing back. Smartphone Microphone Turning Center Cancel On/Off Press the [Center Cancel] button . The [Center Cancel] button lights up, and center cancel turns on.
- Page 58 Various Menus (Menu) Various Menus (Menu) . . . . . . . . . . . . . . . . . . 59 Adjusting the Input Audio Volume (Input Volume) Personalizing Your Piano Sound...
-
Page 59: Adjusting The Input Audio Volume (Input Volume)
Adjusting the Input Audio Volume (Input Volume) Press the [Menu] button . The Menu screen appears. Use the [ ä ä ] [ å å ] buttons to select “Input Volume”, and then press the [Enter] button . The Input Volume screen appears. Use the [ ä... -
Page 60: Personalizing Your Piano Sound (Piano Designer)
Personalizing Your Piano Sound (Piano Designer) What Is Piano Designer? Parameter Value Explanation Adjusts the resonance of the subtle This unit allows you to personalize your piano sound by adjusting sounds that occur when a key of an Key Off various factors that affect the sound, such as the piano’s strings, the 0–10 acoustic piano is released. -
Page 61: Editing A Scene (Scene Edit)
Editing a Scene (Scene Edit) Press the [Menu] button . Overall Settings (Scene (Common)) The Menu screen appears. Use the [ ä ä ] [ å å ] buttons to select “Scene Edit”, and then On the Scene Edit screen, use the [ ä ä ] [ å å ] buttons to press the [Enter] button . -
Page 62: Changing The Tuning Method (Scale Tuning)
Editing a Scene (Scene Edit) Changing the Tuning Method Parameter Value Explanation (Scale Tuning) This temperament slightly narrows the fifth relative to Just On the Scene Edit screen, use the [ ä ä ] [ å å ] buttons to temperaments. -
Page 63: Assigning Functions To The Wheels (Wheel Setting)
Editing a Scene (Scene Edit) Assigning Functions to the Wheels Parameter Value Explanation No function set (Wheel Setting) Bend Up Controls the pitch bend up. You can assign the functions you want to control to wheels 1 and 2. Bend Down Controls the pitch bend down. -
Page 64: Assigning Functions To The Pedals (Pedal Setting)
Editing a Scene (Scene Edit) Assigning Functions to the Pedals Parameter Value Explanation Pedal 2-R This sets the parts controlled by Pedal 2-R. (Pedal Setting) Part (Same as the Pedal 1 Part parameter) Pedal 2-C This assigns the functions to Pedal 2-C. You can assign the functions you want to control to pedals 1 and 2. -
Page 65: Configuring The Midi Transmit Channel Settings (Midi Setting)
Editing a Scene (Scene Edit) Configuring the MIDI Transmit Channel Settings (MIDI Setting) Here’s how to specify the MIDI transmit channel. On the Scene Edit screen, use the [ ä ä ] [ å å ] buttons to select “MIDI Setting” and press the [Enter] button . The MIDI Setting screen appears. -
Page 66: System Settings (System)
System Settings (System) Use the [ ä ä ] [ å å ] buttons to select the parameter, and Here’s where you set the system parameters. then use the [Dec] [Inc] buttons to change the value . Press the [Menu] button . Parameter Value Explanation... -
Page 67: Sound-Related Settings (Sound)
System Settings (System) Sound-related Settings Parameter Value Explanation (Sound) This configures the speaker EQ (equalizer) to produce the optimum tonal character for where the On the System screen, use the [ ä ä ] [ å å ] buttons to select instrument is set up. -
Page 68: Saving The System Settings (System Write)
System Settings (System) Saving the System Settings (System Write) On the System Edit screen, press the [Scene] button . A confirmation message appears. If you decide to cancel, select “Cancel” and press the [Enter] button. Use the [ ç ç ] [ æ æ ] buttons to select “OK”, and then press the [Enter] button . -
Page 69: Convenient Functions (Utility)
Use the [ ç ç ] [ æ æ ] buttons to select “OK”, and then press the [Enter] button . The display indicates “Completed!”, and then “Power Off, Then On”. Turn the FP-E50’s power off and on again . -
Page 70: Backing Up Settings To A Usb Flash Drive (Backup)
Use the [ ç ç ] [ æ æ ] buttons to select “OK”, and then press the [Enter] button . The display indicates “Completed!”, and then “Power Off, Then On”. Turn the FP-E50’s power off and on again . -
Page 71: Importing And Exporting Data (Import/Export)
(Import Scene) Adds a check mark and moves the cursor [2] Mark+ forward one scene. You can import scenes into the FP-E50 as additional scenes that were exported from the FP-E50. [3] Clear All Removes all check marks. [4] Mark All Adds all check marks. - Page 72 Convenient Functions (Utility) Press the [Enter] button . Exporting a Scene (Export Scene) A confirmation message appears. You can export the scene data to an SVD file. If you decide to cancel, select “Cancel” and press the [Enter] button. MEMO You can connect a USB flash drive here .
- Page 73 * If this is the first time you’re using the USB flash drive, format it on the FP-E50. Ø “Initializing a USB Flash Drive (Format USB Memory)” (p. 75) Save the PSF file to the “ROLAND” folder on your USB flash drive . Remove the USB flash drive from your computer and connect it to the FP-E50 .
- Page 74 Ø “Initializing a USB Flash Drive (Format USB Memory)” (p. 75) Press the [Enter] button . Save the CSV file to the “ROLAND” folder on your USB The Destination screen appears. flash drive . Empty user chord patterns (shown in gray) are automatically marked. You can select and deselect the marks.
-
Page 75: Initializing A Usb Flash Drive (Format Usb Memory)
[Enter] button . When export is finished, the message “Completed!” appears. MEMO The exported data is saved in the “ROLAND/CHORD_PTN/” subfolder on the USB flash drive. NOTE Never turn off the power or disconnect the USB flash drive while the... -
Page 76: Viewing The Program Version (Information)
Viewing the Program Version (Information) Displays the version of the instrument’s system program. Press the [Menu] button . The Menu screen appears. Use the [ ä ä ] [ å å ] buttons to select “Information” and press the [Enter] button . The version information is shown. - Page 77 Other Other List of Shortcut Keys . . . . . . . . . . . . . . . . . . . . . . . . . . . . . . . . . . . . . . . . . . . . 78 Main Specifications .
- Page 78 List of Shortcut Keys Shortcut Operation Long-press [Wheel Mode] The Wheel Setting screen appears. Long-press [Ambience] The Ambience Setting screen appears. When in split mode, the Split Setting screen appears. When in dual mode, the Dual Setting screen appears. Long-press [Split/Dual] * The shortcut function is disabled when this instrument is not in split or dual mode.
- Page 79 * This document explains the specifications of the product at the time that the document was issued. For the latest information, refer to the Roland website. * Please be aware that in some countries or regions, it might not be possible to use Roland Cloud at this time.
- Page 80 The Sheet Music for the Internal Songs The Sheet Music for the Internal Songs...
- Page 81 œ œ & œ œ œ ú ú w w w ú ú œ œ œ œ œ œ œ œ œ œ œ œ ú ‰ œ " Œ ú œ œ œ œ œ © 2023 Roland Corporation...
- Page 82 FIL-D > œ /D³ œ 9sus4 œ œ œ œ œ œ ú œ œ ‰ œ œ œ œ œ & œ œ œ œ œ œ ú œ œ œ œ b b > ú ú ú ú œ...
- Page 83 œ œ œ œ . œ œ œ œ ‰ œ & œ œ œ Œ & œ # œ œ œ œ œ œ œ œ œ " œ œ ú œ œ œ œ œ b © 2023 Roland Corporation...
- Page 84 VAR1 AL3 œ œ n œ œ œ ‰ œ b œ œ œ œ œ Œ & œ œ œ œ œ œ œ œ œ œ b œ FIL-U D7/C 7sus4 œ œ œ œ Œ œ œ œ œ œ œ...
- Page 85 . ú Œ Œ . ú œ & œ Ending Short ú . . ú ú œ . . ú ú œ œ œ ú ú œ œ œ œ œ sus4 ú ú Œ & © 2023 Roland Corporation...