Table of Contents
Advertisement
®
Before using this unit,
carefully read the sections
entitled: "USING THE
UNIT SAFELY" and
"IMPORTANT NOTES"
(p. 2; p. 4). These sections
provide important
information concerning the
proper operation of the unit.
Additionally, in order to feel
assured that you have
gained a good grasp of every
feature provided by your
new unit, Owner's manual
should be read in its
entirety. The manual should
be saved and kept on hand
as a convenient reference.
Owner's Manual
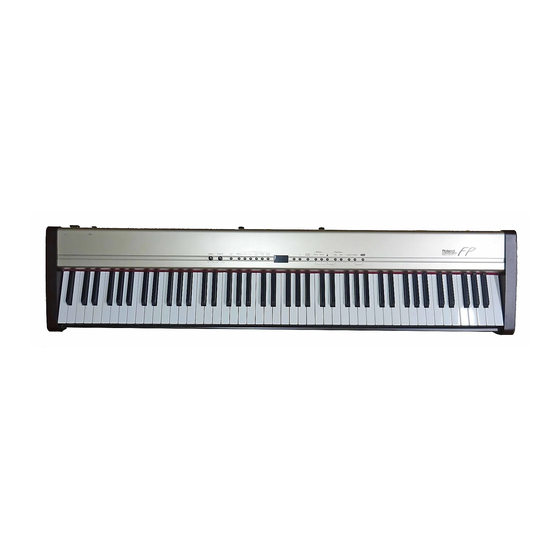
Thank you, and congratulations on your choice of the Roland Digital Piano FP-3.
Main Features
Stylish, Light, Compact Design
The refined design fits in anywhere; and since it is so lightweight and compact, it's
easy to take the instrument with you wherever you go.
Authentic Piano Performances
High-quality concert grand piano tones, along with the Progressive Hammer Action
keyboard, which gives more realistic piano touch by providing a heavier feel in the
low end and a lighter feel in the upper notes, let you enjoy truly authentic piano
performances.
Wide Variety of Tones For Use in Many Musical Genres
In addition to piano tones, the FP-3 offers 40 different onboard tones, which can be
used for almost every conceivable style of music.
You can also play Drum Sets with the instrument.
"Session Partner" Lets You Enjoy Playing with a Session-Like Feel
Enjoy true session-like feel while performing along with a "Rhythm" section built
upon realistic drum and bass sounds.
You can have the "Rhythm" chord progression advance automatically, or you can
specify the chords to be played with your left hand.
Numerous Internal Songs
The FP-3 features four internal demo songs, along with a further fifty internal piano songs.
Experience a Variety of Performances with Dual and Split Functions
Layer two of the FP-3's many internal tones, play with different tones assigned to the
left and right sections of the keyboard, and enjoy many other possibilities in working
with Performances.
Keyboard Touch Can Be Set to Match Finger Strength
You can change the keyboard touch so it better suits the finger strength of the person
playing the keyboard.
Easy Recording Functions
You can easily record your own performances using simple button operations.
Two Headphone Jacks Provided
The FP-3 comes equipped with two headphone jacks, allowing two people to use
headphones simultaneously.
This is a convenient feature for use in lessons, or when playing pieces for four hands.
Includes Line In/Out Jacks
By connecting external audio equipment to the FP-3's Line Out jacks you can play
sounds from the FP-3 through your audio setup, and with a CD player or other such
device connected to the Line In jacks, you can then play internal sounds along with
FP-3 Performances.
Copyright © 2000 ROLAND CORPORATION
All rights reserved. No part of this publication may be reproduced in
any form without the written permission of ROLAND CORPORATION.
Advertisement
Table of Contents

Related Manuals for Roland FP-3


Summary of Contents for Roland FP-3
-
Page 1: Main Features
By connecting external audio equipment to the FP-3’s Line Out jacks you can play sounds from the FP-3 through your audio setup, and with a CD player or other such device connected to the Line In jacks, you can then play internal sounds along with FP-3 Performances. -
Page 2: Using The Unit Safely
Roland. • When using the unit with a rack or stand recom- mended by Roland, the rack or stand must be carefully placed so it is level and sure to remain stable. If not using a rack or stand, you still need... - Page 3 012b • Immediately turn the power off, remove the AC adaptor from the outlet, and request servicing by your retailer, the nearest Roland Service Center, or an authorized Roland distributor, as listed on the “Information” page when: • The AC adaptor, the power-supply cord, or the plug has been damaged;...
-
Page 4: Important Notes
• Use only the specified expression pedal (EV-5; sold separately). By connecting any other expression pedals, you risk causing malfunction and/or damage to the unit. • Use a cable from Roland to make the connection. If using some other make of connection cable, please note the following precautions. -
Page 5: Table Of Contents
Contents USING THE UNIT SAFELY ... 2 IMPORTANT NOTES ... 4 Contents... 5 Panel Descriptions ... 6 Before You Play ... 8 Making Connections... 8 Installing the Music Stand ... 9 Connecting Pedals... 10 Turning the Power On and Off ... 10 Adjusting the Sound’s Volume and Brilliance... -
Page 6: Panel Descriptions
Panel Descriptions Front Panel [Volume] Knob Adjusts the overall volume level (p. 11). [Brilliance] Knob Adjusts the tone brightness (p. 11). [Split] Button Allows you to play different tones in the left and right sides of the keyboard (p. 16) and specify Rhythm chords with the left hand (p. -
Page 7: Rear Panel
Line Out Jacks Provide output of the audio signals. Also used for connecting audio equipment and other such devices (p. 8). These allow you to play sounds from the FP-3 through other audio devices. [Power] Switch This switch turns the unit on/off (p. 10). -
Page 8: Before You Play
(DP-2, DP-6, etc.) Before you begin making connections, confirm the following. Is the volume level of the FP-3 or connected amp turned all the way down? Is the power to the FP-3 or connected amp turned off? L ( Mono ) -
Page 9: Installing The Music Stand
Connect the amp or audio gear to the Line Out jacks as shown in the diagram. In order to take full advantage of the FP-3’s sound we recommend that you play it in stereo. When using the system in mono, connect to the Line Out L (Mono) jack. -
Page 10: Connecting Pedals
* Unplugging a pedal cord from the unit while the power is on may cause the pedal’s effect to be applied without stopping. The power of the FP-3 must be turned off before inserting or removing a pedal cord. Damper Pedal Use this pedal to sustain the sound. -
Page 11: Adjusting The Sound's Volume And Brilliance
Plug the headphones into the Phones jack at the Upper position front, on the left side of the piano. Use the [Volume] knob on the FP-3 to adjust the volume of the headphones. * Make sure to use stereo headphones. -
Page 12: Chapter 1 Playing The Keyboard
Chapter 1 Playing the Keyboard Listening to Internal Songs Now, try listening to internal songs The FP-3 comes with fifty four internal songs. fig.01-01 Press the [Song] button, getting its indicator to light. The following appears in the display. fig.01-02 Press the [-] or [+] button to select the song. -
Page 13: Listening To Each Part Separately
When the following appears in the display If there is any performance data stored in the FP-3’s memory, the following appears in the display. fig.01-03 Until you erase the performance data, you cannot play back an internal song. To erase the performance data and play back the internal song, press the [Rec] button. -
Page 14: Performing With A Variety Of Sounds
Chapter 1 Playing the Keyboard Performing with a Variety of Sounds The FP-3 features 40 different internal sounds, allowing you to enjoy performing with sounds suitable for many different types of music. These onboard sounds are called “Tones.” The Tones are divided into six different groups, each of which is assigned to a different Tone button. -
Page 15: Performing With Two Layered Tones (Dual Play)
Although when you press the pedal while in Dual Play, the effect is applied to both tones, you can set the FP-3 so that the effect is not applied to the Lower Tone. Refer to “Changing How the Pedal Effects Are... -
Page 16: Performing With Different Tones In The Left And Right Sides Of The Keyboard (Split Play)
Chapter 1 Playing the Keyboard Performing With Different Tones in the Left and Right Sides of the Keyboard (Split Play) Performing with the keyboard divided at a certain key into a left side and a right side is called “Split Play,” and the point at which the keyboard is divided is called the “split point.”... -
Page 17: Changing Tones
Changing Tones fig.01-13 Hold down the [Split] button and press the Tone button for the tone you want to change, whether the Upper or Lower Tone. The indicators for the [-] and [+] buttons light in the same color as the indicator of the selected tone button. -
Page 18: Changing The Volume Balance For Dual Play And Split Play
Chapter 1 Playing the Keyboard Changing the Volume Balance for Dual Play and Split Play You can change the volume balance of the Upper and Lower Tones in Dual Play (p. 15) and Split Play (p. 16). When the instrument is turned on, this is set to “5–5” (“Lower Tone volume”–“Upper Tone volume”). -
Page 19: Changing The Keyboard's Touch
Changing the Keyboard’s Touch You can change the touch sensitivity, or response of the keys. When the instrument is turned on, this is set to “Normal.” fig.01-17 Hold down the [Song] button and press the [Reverb] button. The indicators for the [Song] and [Reverb] buttons flash in red. fig.01-18 Press the [-] or [+] buttons to select the touch. -
Page 20: Adding Breadth To The Sound (Chorus Effect)
Chapter 1 Playing the Keyboard Adding Breadth to the Sound (Chorus Effect) You can apply a chorus effect to the notes you play on the keyboard. By adding the chorus effect, you can give the sound greater dimension, with more fatness and breadth. The settings of the chorus effect are memorized independently for each sound, and remain in effect until you turn off the power. -
Page 21: Adding Reverberation To Sounds (The Reverb Effect)
fig.01-20 Press the [-] or [+] button to change the depth of effect. Press the [Chorus] button once more. The button’s indicator returns to its previous state. The next time you choose the same tone, the chorus effect with the depth you’ve selected here is applied. -
Page 22: Transposing The Key Of The Keyboard (Key Transpose)
Chapter 1 Playing the Keyboard Transposing the Key of the Keyboard (Key Transpose) You can transpose the key of a performance without having to shift the position of your fingers on the keyboard. This feature is called “Key Transpose.” This lets you take a song in a difficult key with lots of sharps ( ) and flats ( ) and play it in a key with fingering that’s easier for you. -
Page 23: Using The Metronome
Using the Metronome Here’s how you can make use of the metronome. fig.02-01 Press the [ (Metronome)] button to have the metronome sound. The [Tempo/Rhythm] button’s indicator flashes in red and green in time with the beat selected at that time. The indicator lights in red on the downbeats, and in green on weak beats. -
Page 24: Changing The Beat Of Metronome
Chapter 1 Playing the Keyboard Changing the Beat of Metronome While holding down the [Tempo/Rhythm] button, press the [-] or [+] button. The [Tempo/Rhythm] button’s indicator flashes in red. The currently selected beat is displayed. fig.02-03 Press the [-] or [+] button to select the beat. You can select from the following beats. -
Page 25: Chapter 2 Playing Along With Rhythms25
We encourage you to enjoy the variety of performance options open to you by using the “Session Partner” feature. What are the FP-3’s “Rhythms?” The FP-3 features internal “Rhythms” complementing Jazz, Rock, and other various musical genres. “Rhythms,” which combine rhythmic patterns, bass patterns, and other elements found in different musical styles, form the foundation of performance accompaniment in the “Session Partner”... -
Page 26: Performing Along With Rhythms
Chapter 2 Playing Along with Rhythms Performing Along With Rhythms fig.02-05 Performing Along With Drum Sounds Now, try performing as the sound of the Rhythm’s Drum Part plays. Since a wide variety of musical genres is provided, be sure to use a Rhythm that best suits the song you are performing. -
Page 27: Indicators
Chord Parts play. You can also change the settings while the Rhythm is being played. This setting is effective for all Rhythms until the FP-3’s power is turned off. Hold down the [Song] button and press the [Chord] button. -
Page 28: Selecting A Rhythm
Chapter 2 Playing Along with Rhythms Selecting a Rhythm Now, try changing the Rhythm being performed. fig.02-09 Press the [Tempo/Rhythm] button so that the Rhythm number appears in the display. Rhythm numbers are indicated by an “r” before the number. When a Rhythm is displayed, the [-] and [+] buttons light in green. -
Page 29: Changing A Rhythm's Tempo
Changing a Rhythm’s Tempo You can change the tempo of the selected Rhythm. Furthermore, you can change the tempo as the Rhythm is being played. fig.02-08 Press the [Tempo/Rhythm] button to have the tempo displayed. Pressing the [Tempo/Rhythm] button alternately displays the tempo and the currently selected Rhythm number (indicated by an initial “r”). -
Page 30: Selecting A Rhythm's Chord Progression
Chapter 2 Playing Along with Rhythms Selecting a Rhythm’s Chord Progression When playing the Chord Part while performing, the chord progression is automatic. You can change the chord progression pattern if you want. These settings cannot be memorized independently for each Rhythm. Hold down the [Chord] button and press the [-] or [+] button. -
Page 31: Performing With The Chord Progression Specified In The Left Hand (Rhythm Split Play)
Press the [Split] button, getting its indicator to light. Press the [Chord] button, getting its indicator to light. The indicators for the [Chord] and [Drums] buttons flash, and the FP-3 is put into standby mode. When the [Split] button is pressed while a performance is in progress, the Rhythm stops. -
Page 32: Changing The Volume Balance Between The Keyboard And The Rhythm
Chapter 2 Playing Along with Rhythms Changing the Volume Balance Between the Keyboard and the Rhythm When using Rhythms in a performance, you can change the balance between the Rhythm volume and the volume of the performance played on the keyboard. When the power is turned on, the volume balance is set to “5–5”... -
Page 33: Chapter 3 Recording A Performance
While listening the metronome, select the tempo and beat of the song (p. 23). Press the [Rec] button. The [Rec] button’s indicator lights, the [Play] button’s indicator begins flashing, and the FP-3 is put into recording standby. Press the [Play] button or play a key on the keyboard to begin recording. -
Page 34: Recording A Performance Using Rhythms
Also set the Rhythm tempo to one that is easier to play (p. 29). Press the [Rec] button. The [Rec] button’s indicator lights up, the [Play] button’s indicator flashes, and the FP-3 is put into recording standby. Press the [Chord] button or the [Drums] button to begin recording. -
Page 35: Recording A Performance Using Rhythms (In Split Play)
Press the [Split] button, getting its indicator to light. The keyboard is set to Split Play. Press the [Chord] button. The indicators for the [Chord] and [Drums] buttons flash, and the FP-3 is put into standby mode. Specify a chord by playing it on the left-hand keyboard section. -
Page 36: Recording Selected Track Buttons
The [Rec] button’s indicator lights up, the [Play] button’s indicator flashes, and the FP-3 is put into recording standby. With the FP-3 in standby, go on to record the performance according to the procedures as described in “Recording a Performance” (p. 33), “Recording a Performance Using Rhythms”... -
Page 37: Erasing Recorded Performances
Erasing Recorded Performances You can erase recorded performances. fig.03-04 Hold down the [Song] button and press the [Rec] button. A confirmation message appears in the display. fig.03-05 Press the [Rec] button. The recorded performance is erased. If you do not want to erase the performance, press the [Play] or [Song] button. -
Page 38: Chapter 4 Other Functions
The damper pedal on the FP-3 recreates this resonance (Sympathetic Resonance) when depressed. You can select from ten levels of depth for the resonant sound (resonance level). -
Page 39: Changing How The Pedal Effects Are Applied
Changing How the Pedal Effects Are Applied When the pedal is pressed in Dual Play (p. 15) or Split Play (p. 16), the pedal’s effect is applied to both the Upper Tone and the Lower Tone, but you can change the settings for the tone to which the effect is applied. -
Page 40: Tuning To Other Instruments' Pitches (Master Tuning)
Chapter 4 Other Functions Tuning to Other Instruments’ Pitches (Master Tuning) When playing ensemble with other instruments and in other such instances, you can match the standard pitch to another instrument. The standard pitch generally refers to the pitch of the note that’s played when you finger the middle A key. -
Page 41: Changing The Beat Pattern
The indicators buttons return to their original state. * When performing in ensemble with other instruments, be aware that depending on the key, there may be some shifting of the pitch. Tune the FP-3 to the fundamental pitch of the other instruments. Changing the Beat Pattern... -
Page 42: Connecting Midi Devices
Turn the volume all the way down on the FP-3 and on the device you’re about to connect. Turn off the power to the FP-3 and to the device being connected. Connect a MIDI cable (sold separately) between the MIDI connectors on each device. -
Page 43: Midi Send Channel Settings
No sound will be produced by the keyboard when it is played. fig.04-14.e * When connecting a unit in the Roland MT series, you don’t Flashes in red need to switch off Local Control. MT units transmit Local Off messages when their power is switched on. -
Page 44: Setting The Midi Out Mode
FP-3. When recording something on a sequencer, this mode should assure that when you play back the performance on the FP-3, you will hear the same tones used when the performance was recorded. • Program Change •... -
Page 45: Appendices
Cause/What to do No Power Is the power cord properly connected? (p. 8) Is the volume level of the FP-3 (p. 11) or con- No Sound nected device turned all the way down? Is the power to all devices turned on? (p. 10) - Page 46 Be sure to switch off the power to the unit before attempting to disconnect or connect a pedal cord (p. 10). As the FP-3 piano sounds faithfully repro- Reverb Remains duce the depth and reverberation of actual Even After Reverb...
-
Page 47: Error Messages/Other Messages
Too much MIDI data was sent from the external MIDI instrument at one E.40 time, and the unit could not process the data. Reduce the amount of MIDI data being sent to the FP-3. A problem such as a loose MIDI cable or computer cable occurred. Make sure E.41 the MIDI cables and computer cables are correctly hooked up. -
Page 48: Tone List
Tone List “Performing with a Variety of Sounds” (p. 14) Piano Grand Piano 1* Grand Piano 2* Rock Piano Honky-tonk Upright Piano* Harpsichord * indicates a tone with sympathetic resonance (p. 38). E.Piano Stage Rhodes Dyno Rhodes E.Piano Suitcase Wurly Clavi Vibraphone Vibra Bell... -
Page 49: Rhythm List
Rhythm List “Selecting a Rhythm” (p. 28) Genre Name Recommended Cutting Guitar 1 Cutting Guitar 2 EP Pop 1 EP Pop 2 Acoustic Pop 1 Acoustic Pop 2 Piano Pop 1 Piano Pop 2 Latin Bossa Nova 1 Latin Bossa Nova 2 Ballad Ballad 1 Ballad... -
Page 50: Chord Progression Pattern List
Chord Progression Pattern List “Selecting a Rhythm’s Chord Progression” (p. 30) Recommended Rhythm Genre: All Pattern 1 Recommended Rhythm Genre: All Pattern 2 Recommended Rhythm Genre: Jazz Pattern 3 Recommended Rhythm Genre: Pop, Ballad Pattern 4 Recommended Rhythm Genre: Pop Pattern 5 Recommended Rhythm Genre: Ballad, Jazz Pattern 6... - Page 51 Recommended Rhythm Genre: Blues, Rock, Pop Pattern 7 Recommended Rhythm Genre: Jazz Pattern 8 Recommended Rhythm Genre: Latin, Pop Pattern 9 Cdim I M7 I dim IIm9 I M7 Cdim I M7 I dim IIm9 I M7 VIm7 G7sus4 IIm7 V7sus4 Chord Progression Pattern List IIm9...
-
Page 52: Chord Fingering List
Chord Fingering List symbol: indicates the constituent notes of chords. symbol: Chords shown with an “ ” can be played by pressing just the key marked with the “ ”. “Performing With the Chord Progression Specified in the Left Hand (Rhythm Split Play)” (p. 31) C#M7 C#m7 Cdim... - Page 53 F#M7 F#m7 F#dim Gdim F#m7 ( 5 ) Gm7 ( 5 ) F#aug Gaug F#sus4 Gsus4 F#7sus4 G7sus4 F#m6 A M7 A m7 A dim Adim A m7 ( 5 ) Am7 ( 5 ) A aug Aaug A sus4 Asus4 A 7sus4 A7sus4...
-
Page 54: Internal Song List
Composer Copyright J. Maul © 2000 John Maul S. Wilkie © 2000 Scott Wilkie (ASCAP) J. Maul © 1992 Roland Corporation J. Maul © 1992 Roland Corporation C. Debussy © 1994 Roland Corporation E. Satie © 1997 Roland Corporation C. Debussy ©... - Page 55 His writing credits include commercial music for BBC radio and televi- sion, as well as scoring jazz and classical works. Having been a product specialist for Roland U.K., John is now actively involved in music software composing/programming for both Roland Japan and various music publishers.
-
Page 56: Easy Operation List
Easy Operation List You want to Hold down the [Song] button and press the [ ] button. Volume balance between the Lower and Upper Tone Octave Shift Pedal works How the pedal effects are applied MIDI send channel settings MIDI OutMode Master Tuning Local Control Volume balance between the keyboard and... -
Page 57: Midi Implementation
DIGITAL PIANO Model FP-3 Function... Basic Default Channel Changed Default Mode Messages Altered Note True Voice Number : Note ON Velocity Note OFF After Key’s Touch Ch’s Pitch Bend 0, 32 Control Change Prog : True Number Change System Exclusive... -
Page 58: Main Specifications
Main Specifications <Keyboard> 88 keys (Progressive Hammer Action Keyboard) Touch Sensitivity Light/Normal/Heavy/Fixed Keyboard Mode Whole Dual Split (adjustable split point) <Sound Source> Max.Polyphony 64 voices Tones 6 groups 40 variations (including 2 drum sets) Effects Reverb (10 levels) Chorus (10 levels) Sympathetic Resonance (10 levels, for some Pianos only) Rotary (for some Organs only) Transpose... -
Page 59: Index
Index AC adaptor ... 9 All Song Play ... 12 Beat ... 24 Brilliance ... 11 Chord ... 52 Chord Fingering List ... 52 Chord Part ... 25, 26 Bass ... 27 Chord progression Automatic ... 26 Selecting pattern ... 30 Specifying the chords ... - Page 60 Index Sequencer ... 42 Session Partner ... 25 Soft ... 10 Soft Pedal ... 8, 10, 38 Sostenuto pedal ... 38 Split Play ... 16 Rhythm ... 31 Split Point ... 17 Standard pitch ... 40 Sympathetic Resonance ... 10, 38 Temperament ...
- Page 61 MEMO...
- Page 62 Information When you need repair service, call your nearest Roland Service Center or authorized Roland distributor in your country as shown below. SINGAPORE AFRICA AFRICA Swee Lee Company 150 Sims Drive, EGYPT SINGAPORE 387381 TEL: 846-3676 Al Fanny Trading Office...
- Page 63 This product complies with the requirements of European Directive 89/336/EEC. FEDERAL COMMUNICATIONS COMMISSION RADIO FREQUENCY INTERFERENCE STATEMENT This equipment has been tested and found to comply with the limits for a Class B digital device, pursuant to Part 15 of the FCC Rules.
- Page 64 This owner’s manual is printed on recycled paper. 02349012 ’02-7-AE2-61N...