Table of Contents
Advertisement
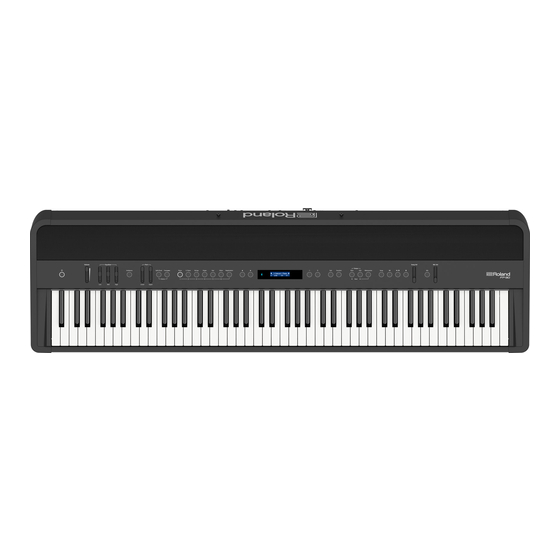
Owner's Manual
° Live Performance Features
˙
Adjust the tone color (Equalizer)
You can adjust the character of the sound as appropriate for the location where you're playing the
instrument.
˙
Recall performance settings (Registration)
You can save the settings related to your performance and recall them up anytime, easily.
˙
Add vocals to your performance
You can connect a microphone (sold separately) to the FP-90 and add your voice to your performance.
You can even add effects to your vocals.
Provision of Bluetooth functionality
Please be aware that depending on the country in which you purchased the unit, Bluetooth functionality might not be included.
If Bluetooth functionality is included
The Bluetooth logo appears
when you turn on the power.
Before using this unit, carefully read "USING THE UNIT SAFELY" and "IMPORTANT NOTES" (leaflet "USING THE UNIT SAFELY" and Owner's Manual (p. 28)). After
reading, keep the document(s) including those sections where it will be available for immediate reference.
© 2016 Roland Corporation
° Play the Piano
˙
Play various sounds
This unit contains a wide variety of tones (sounds).
You can freely select and perform using these tones.
˙
Play two layered tones (Dual Play)
You can layer two tones on a single key.
˙
Play different tones with your left and right hands (Split Play)
You can divide the keyboard into left and right zones, and select a different tone for each zone.
° Convenient Functions
˙
Record your performances
You can record your performance. You can record your performance along with a song.
˙
Bluetooth function
You can use the Bluetooth-compatible app "Piano Partner 2, " or play back audio from your smartphone.
˙
Personalize your piano (Piano Designer)
You can customize the individual sound characteristics of the piano sound to create the perfect tone for
your performances.
6
page
15
page
14
page
6
page
7
page
7
page
10
page
21
page
13
page
Advertisement
Table of Contents

Related Manuals for Roland FP-90


Summary of Contents for Roland FP-90
-
Page 1: Play The Piano
You can save the settings related to your performance and recall them up anytime, easily. ˙ Add vocals to your performance page You can connect a microphone (sold separately) to the FP-90 and add your voice to your performance. You can even add effects to your vocals. ° Convenient Functions ˙... -
Page 2: Placing The Fp-90 On A Stand
Placing the FP-90 on a Stand Be careful not to pinch your fingers when setting up the stand. Please use one of the following Roland stands to support your FP-90: KSC-90, KS-G8B, KS-18Z, or KS-12. Refer to the following when using a stand. -
Page 3: Table Of Contents
1,340 (W) x 418 (D) x 932 (H) mm, 52-13/16” (W) x 16-1/2” (D) x 36-3/4” (H) 23.6 kg, 52 lbs 1 oz (FP-90 with music rest) Weight 37.8 kg, 83 lbs 6 oz (FP-90 with KSC-90, KPD-90, and music rest) -
Page 4: Panel Descriptions
Move the [Volume] slider all the way down to minimize the volume Minimize the volume. Loosen the attachment screws Hold down the [L] button until the display shows “Roland Digital Fit the cut-outs of the music rest onto the attachment screws Piano ” Firmly tighten the attachment screws The power turns on, and the tone buttons and other buttons illuminate. -
Page 5: Rear Panel
Sold separately: KPD-90, RPU-3, EV-5 USB Computer port Mic Input jack You can use commercially available USB cable to connect the FP-90 Connect the microphone (sold separately) here. to your computer. You can then use MIDI-related software to record Mic [Gain] knob and play back FP-90 performances. -
Page 6: Operation Guide
Basic operations ° Operation Guide Select a setting item Press the [K] [J] buttons. Edit a value Press the [-] [+] buttons. Restore the default value Press the [–] [+] buttons simultaneously. Cancel an operation Press the [Exit] button. Selecting a Tone (Single) In addition to piano sounds, the unit lets you enjoy performing with many other sounds. -
Page 7: Operation Guide
Operation Guide Playing Different Tones with the Right and Left Hands (Split) Layering two tones (Dual) You can play different tones in the areas at the left and right of a specified key. For You can play two tones simultaneously from a single key. This example, you can use your left hand to play a bass tone and use your right hand to play a function is called “Dual Play. -
Page 8: Operation Guide
Operation Guide Display The display shows information such as the tone name, song name, tempo, and time signature. Single Split Dual Tone name Song transposition Right-Hand Tone Tone 1 Time signature Keyboard transposition Left-Hand Tone Tone 2 Tempo Measure Bluetooth connection status Various Settings (Function Mode) Sounding the Metronome You can make detailed settings for the unit. -
Page 9: Operation Guide
Playing Back or Recording Using a Mic (Mic) Here’s how to play back or record a song. You can connect a mic to the FP-90 and mix the sound of its performance with the sound from the mic. Return to the beginning of Press the [u] button. -
Page 10: Advanced Operation
° Advanced Operation ˙ Recording Your Performance It’s easy to record your own performances. You can play back a Listening to the recorded performance recorded performance to check your playing, or play along with a After you record, the newly recorded song is selected. recorded performance. -
Page 11: Renaming A Song (Rename Song)
Advanced Operation Renaming a Song (Rename Song) Converting an SMF-recorded song to audio Here’s how to rename a previously-saved song. A song recorded as SMF can be re-recorded as audio so that you can play it back on your computer. Press the [Function] button, and then use the [K] [J] Select the song that you want to convert to audio (p 9) buttons to select “Rename Song.”... -
Page 12: Copying A Saved Song (Copy Song)
Advanced Operation Copying a Saved Song (Copy Song) Deleting a Saved Song (Delete Song) Songs that have been saved in internal memory can be copied to Here’s how to delete a song that you saved on an internal memory or USB flash drive. -
Page 13: Personalizing Your Piano Sound (Piano Designer)
Advanced Operation ˙ Personalizing Your Piano Sound (Piano Designer) Parameter Value Explanation What is Piano Designer? String Adjusts the sympathetic vibrations of an acoustic Hammer Noise Resonance piano’s Duplex Scale. This unit allows you to personalize Duplex Scale Off, 1–10 Higher settings will make the sympathetic vibration your piano sound by adjusting various louder. -
Page 14: Using The Microphone
Advanced Operation ˙ Using the Microphone You can connect a microphone (sold separately) to the Mic Input jack Applying an Effect to the Mic (Mic Effects) and sing while playing. Here’s how to apply an effect to the sound of the mic. Connecting a Microphone Here’s how to connect a microphone to the Mic Input jack. -
Page 15: Saving Performance Settings (Registrations)
Play can be saved as a “registration” and recalled whenever you like. NOTE The FP-90 has six registration buttons ([1]–[6]), and you can save five When you save a registration into a location, it will overwrite any different registrations under each button. This means that you can registration already stored at that location. -
Page 16: Saving A Registration Set (Registration Set Export)
Saving a Registration Set (Registration Set Export) Loading a Saved Registration Set (Registration Set Import) Here’s how the registration set that’s saved in the FP-90 can be saved to a USB flash drive. Here’s how a registration set saved on a USB flash drive can be * If you’re saving to a USB flash drive, connect your USB flash drive... -
Page 17: Convenient Functions
Temperament settings, equalizer settings, and other settings are Use the [J] button to select “Yes,” and then press the reset to their default values when the FP-90 is turned on. [Function] (Enter) button. You can automatically restore the desired settings if you save them in internal memory. -
Page 18: Various Settings (Function Mode)
Press the [Exit] button to finish. * The FP-90 settings return to their factory defaults when you turn off the power. But if you backup the current settings into internal memory, they will be restored the next time the power comes on. -
Page 19: Editing The Equalizer Settings
Allows control of the volume. You may find it convenient to connect an expression pedal (EV-5: sold separately). Does not Expression *3 change the recorded performance play. Master Expression Controls the overall volume of the FP-90. Center Pedal Bend Up *3 Pitch rises when pedal is depressed. -
Page 20: Changing The Function Of The Left Pedal (Left Pedal)
If you don’t want the power to turn off automatically, change the “Auto Off” setting to “Off. ” Off, 10, 30, 240 (min) The FP-90 settings return to their factory defaults when you turn off the power. But if you backup the current settings into internal memory, they will Memory Backup be restored the next time the power comes on. -
Page 21: Using The Bluetooth® Functionality
“mobile device”) and this unit, allowing you to do the This unit is paired with the mobile device. When pairing succeeds, “FP-90 following. Audio” is added to the list of “Paired Devices” on your mobile device. -
Page 22: Transferring Midi Data
This unit will be wirelessly connected to the mobile device. NOTE MEMO Do not tap the “FP-90” that is shown in the Bluetooth settings of 5 If the above steps do not succeed in establishing a the mobile device. connection, tap the model name (“FP-90”) that is shown in the Bluetooth device screen of the mobile device. -
Page 23: Changing The Operating Keys Of The Page Turning Function
In some cases, the connection with the mobile device might become unavailable when you switch the Bluetooth Turn/MIDI function. Can’t connect to Bluetooth After unpairing the “FP-90” that is registered on the mobile device, turn the mobile device’s Bluetooth function off and then on again, and MIDI reconnect it. -
Page 24: Troubleshooting
Are you using If you don’t hear it through headphones: Objects near the from/write to (optional) Roland Use a USB flash drive sold by Roland. – Low notes unit are resonating because of the high volume of sound USB flash drive... -
Page 25: Error Messages
A MIDI transmission error has occurred. Check the MIDI cable and connected MIDI device. There may be a problem with the system. Repeat the procedure from the beginning. If it is not solved after you have tried several times, contact the Roland Error 51 service center. -
Page 26: Saved Settings
° Saved Settings Settings Stored Settings Saved in Items Stored by Immediately When Registrations Memory Backup Edited Selected tone (including Split or Dual tones) Dual Play On/Off Split Play On/Off Part Volume Split Point Split Point Left Shift Octave shift of the left-hand tone Tone 2 Shift Octave shift of tone 2 Transpose... -
Page 28: Using The Unit Safely
Keep small items out of the reach of children Precautions regarding placement of this unit on a by Roland. If used in combination with other To prevent accidental ingestion of the parts stands, you risk sustaining injuries as the result...