Table of Contents
Advertisement
Advertisement
Table of Contents
Troubleshooting

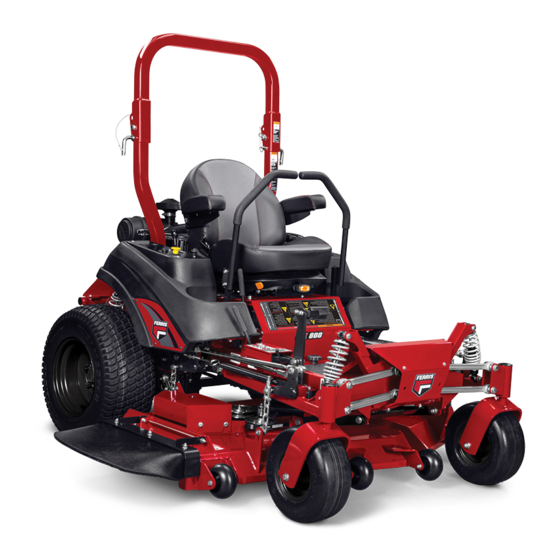
Related Manuals for Ferris ISX800 Series


Summary of Contents for Ferris ISX800 Series
-
Page 2: Table Of Contents
Table of Contents: Check / Fill Transmission Oil Level........ 31 Transmission Oil Filter Change........31 General Information.............. 3 Purging the Air from the Hydraulic System....32 Identifying Your Unit ............3 Lubrication..............32 Operator Safety..............3 Lubricating the ForeFront Suspension Control Arms..33 Safety Alert Symbol and Signal Words...... -
Page 3: General Information
Record your product model number, product serial number, engine model number, and engine serial number in the space Ferris is a registered trademark of Briggs & Stratton. provided for easy access. Identifying Your Unit When contacting your authorized service dealer for... -
Page 4: California Proposition 65
injury. In addition, a hazard symbol may be used to represent Use common sense, and think through what you are doing. the type of hazard. If you are not sure that the task you are about to perform can be safely done with the equipment you have chosen, ask a professional: contact your local authorized dealer. ... - Page 5 Slope Operation Moving Parts This equipment has many moving parts that can injure you or someone else. However, if you stay in the operator zone (stay seated in the seat), and follow the safety rules in this operator’s manual, the unit is safe to operate. Operation on slopes can be dangerous.
-
Page 6: Slope Identification Guide
Retaining walls and drop-offs around steps and water are Only operate this unit outdoors and away from unventilated a common hazard. Do NOT operate down slope towards or areas such as inside garages or enclosed trailers. The near water, retaining walls, or drop-offs. engine emits poisonous carbon monoxide gas and prolonged exposure in an enclosed area can result in serious injury or Give yourself a minimum of two mower widths of clearance... -
Page 7: Safety Rules And Information
Note: A paper gauge slope identification guide is included • Be sure of your footing while using pedestrian controlled in your product literature packet and is also available to equipment, especially when backing up. Walk, don’t run. download from the manufacturer's website. Reduced footing could cause slipping. ... - Page 8 • Avoid starting, stopping, or turning on a slope. Do NOT WARNING make sudden changes in speed or direction, which could It is a violation of California Public Resource Code, Section cause the mower to rollover. 4442, to use or operate the engine on any forest-covered, •...
- Page 9 Service and Maintenance wire. Wait for all movement to stop before adjusting, cleaning or repairing. To avoid personal injury or property damage, use extreme • Clean grass and debris from cutting units, drives, care in handling gasoline. Gasoline is extremely flammable mufflers, and engine to prevent fires.
- Page 10 Inspection of the Roll Bar Protective Structure WARNING Units with hydraulic pumps, hoses, or motors: Hydraulic WARNING fluid escaping under pressure may have sufficient force to Failure to properly inspect and maintain the ROLL BAR penetrate skin and cause serious injury. If foreign fluid is protective structure can cause serious injury or death.
-
Page 11: Safety Decals And Icons (North American Models)
Inspection and Maintenance of the Roll Bar Seat Belt WARNING Failure to properly inspect and maintain the seat belt can cause serious injury or death. • The seat belt like the ROLL BAR, needs to be periodically inspected to verify that the integrity has not been compromised through normal machine use, misuse, age degradation, modifications, or a roll over. - Page 12 WARNING DANGER Avoid serious injury or death. Loss of control and roll-over hazard. • Read operator's manual before using this product. • Do NOT operate this machine unless you are trained. Operating on slopes can be hazardous and cause loss •...
- Page 13 Decal, Warning, Folding Roll Bar Part Number: 5104082YP WARNING Amputation and Pinch Point Hazard. To avoid injury from rotating parts, stay WARNING clear of parts and keep all shields and Avoid serious guards in place. injury or death from roll over. Decal, Danger, Cut Hand/Foot Part Number: 84007896 •...
-
Page 14: Safety Decals And Icons (Export Models)
Decal, Warning, Roll Bar Removed H. Part Number: 5100685 - Decal, Safety, Overhead Obstacles Part Number: 84008199 Part Number: 5100537 - Decal, Warning, Roll Bar 5106565 - Decal, Main Safety WARNING Avoid serious injury or death from rollover. • Do not operate without the roll bar installed and operational. - Page 15 5102456 - Decal, Fire Danger - Thrown objects hazard: Keep bystanders and children a safe distance away. Remove objects that can be thrown by the blade. Do not mow without discharge chute in place. *This limit was determined per International Standard ISO 5395-3:2013, Section 4.6 and is based on the ISO 5395-3 Stability Test procedure Danger: Fire Hazard: Keep unit free of described in Annex A.
-
Page 16: Safety Icons For Optional Jack Kit Accessory
Roll Bar Decals Part Number: 5105632 - Decal, Warnings, Svc Jack 5100536 - Decal, Safety, 5100537 - Decal, Safety, 1.) Warning - Read the Operator's Manual. Roll Bar Overhead Obstacles 2.) Crushing Hazard, Mower: (1.) Park machine on flat level ground and engage the parking brake; (2.) Stop the engine and remove the ignition key;... -
Page 17: Zero-Turn Rider Controls
Zero-Turn Rider Controls Cutting Height Storage Hole for Deck Lift Lock Adjustment Cutting Height Lever Adjustment Pin Ground Speed Control Levers: These levers control the A. Deck Lift Pedal ground speed and direction of the zero-turn riding mower. The left lever controls the left rear drive wheel and the right B. -
Page 18: Suspension Seat
Moving a lever forward (A) from the NEUTRAL position (B) increases the FORWARD speed of the associated wheel, and pulling back (C) on a lever increases the REVERSE speed. Moving the levers outwards (D) from the NEUTRAL position locks the levers in the NEUTRAL LOCKOUT position. Note: The further a lever is moved away from the neutral position the faster the drive wheel will turn. -
Page 19: Instrument Control Panel
Instrument Control Panel Models with Carbureted Engines: A. Choke B. PTO (Power Take Off) Switch To raise the seat plate, release the latch by moving the seat latch towards the front of the unit and then raise the seat C. Ignition Switch plate. -
Page 20: Operation
choking. Pull the knob UP to close the choke. Push the knob "B" - Mode Icon - The mode icon will display an "E" when DOWN to open the choke. displaying engine hours, and a "P" when displaying PTO hours. "C"... -
Page 21: Checks Before Starting
Starting the Engine - Carbureted Models WARNING • Never operate on slopes greater than 15°. WARNING • Select slow ground speed before driving onto a slope. • If you do not understand how a specific control Use extra caution when operating on slopes with a rear- functions, or have not yet thoroughly read the mounted grass catcher. ... -
Page 22: Stopping The Zero-Turn Riding Mower
Warm up the engine by running it for one minute before engaging the PTO switch or driving the unit. 4. After warming the engine always operate the unit at the FAST position when mowing. In the event of an emergency the engine can be stopped by simply turning the ignition switch to OFF. - Page 23 Reverse Travel Practice To turn in place, “zero-turn,” gradually move one ground speed control lever forward from neutral and the other lever LOOK DOWN AND BEHIND, then gradually move both back from neutral simultaneously. Repeat several times. ground speed control levers evenly BACK from neutral. Slow Note: Changing the amount each ground speed control lever down and repeat.
-
Page 24: Mowing
Mowing 1. Engage the parking brake. Make sure that the PTO switch is disengaged, the ground speed control levers are locked in the NEUTRAL position and the operator is in the seat. 2. Start the engine. See Starting the Engine. 3. - Page 25 • Avoid mowing after rain or even heavy dew, and never The remainder of the mowing should be done in the opposite mulch when the grass is wet (moist grass does not mulch direction so that the clippings are dispersed OUT onto the well, and clumps beneath the mower deck).
-
Page 26: Pushing The Unit By Hand
The best mulching action typically results from cutting only 4. Disengage the parking brake. The unit can now be the top 1/2 inch to 3/4 inch of grass blade. This provides pushed by hand. short clippings which decompose properly (much more 5. -
Page 27: Attaching A Trailer
2. Rotate the retainer pins so that the handle of the pin is and never operate on slopes greater than 10°. See SLOPE pointing up (C). OPERATION and TOWED EQUIPMENT in the safety section of this manual for additional safety information. 3. -
Page 28: Maintenance Schedule
6. Cover the air cleaner and exhaust outlet tightly with UNIT MAINTENANCE plastic or other waterproof material to keep out moisture, Before Each Use dirt, and insects. Check safety interlock system. 7. Completely grease and oil unit as outlined in the Lubrication section. -
Page 29: Service And Maintenance Safety
Service and Maintenance Safety Note: Do not overfill. Refer to your engine operator's manual for specific fuel recommendations. 3. Install and hand tighten the fuel cap. WARNING 4. If your unit is equipped with two fuel tanks, repeat this Amputation and crushing hazard process to fill the other fuel tank. -
Page 30: Clean The Engine Compartment Area With Pressurized Air And Water
Clean the Engine Compartment Area with Pressurized Air and Water Pressurized air and/or water can cause debris and/or hot water to be blown out. This action could result in personal injury. When pressurized air and/or pressurized water is used for cleaning wear protective clothing, protective shoes, and eye protection. -
Page 31: Fuse Location And Identification
Transmission Oil Filter Change WARNING Change Interval: Every 400 Hours or Yearly (Initial hydraulic Replacement parts must be the same and installed in the oil and filter change after first 100 hours of operation) same position as the original parts or fire could result. Replacement Filter Number: 5101026X1 ... -
Page 32: Purging The Air From The Hydraulic System
4. Apply a film of new oil to the gasket of the new forward and reverse directions (5 to 6 times), as air is replacement filter. After the oil has drained, thread the purged from the unit, the oil level will drop. new filter onto the filter base until the gasket makes 3. -
Page 33: Lubricating The Forefront Suspension Control Arms
Lubricate the ends of the four (4) ForeFront™ suspension control arms with a petroleum based chain lube at the areas identified as "A" in Figure 34. Lubricating the Front Casters Interval: Front caster wheel axles (A, Figure 35) - Every 25 hours. - Page 34 1. Use a block of wood to prevent the mower blade from • More than .5" (12,7 mm) of the mower blade metal turning as shown in Figure 36. has been removed from previous sharpening or wear (A). • The air lifts are excessively eroded (B) and the notch (C) is .25"...
-
Page 35: Seat Adjustment (Suspension Seat)
7. The mower blade should have a maximum of 1/64" (0,40 mm) cutting edge (B) or less. CAUTION Thrown objects hazard. An unbalanced mower blade can create excessive vibration and damage the unit, or cause mower blade failure resulting in thrown debris. Be sure blade is balanced before installing. -
Page 36: Ground Speed Control Lever Adjustment
To Adjust the Control Lever Height Remove the mounting hardware and position the control lever either up or down from its original position. You will need to adjust the control lever alignment as described above. Speed Balancing Adjustment If the unit drifts to the right or left when the ground speed control levers are in the maximum forward position, the top speed of each of these control levers can be balanced by turning the adjustment bolt(s) (A, Figure 43). -
Page 37: Foot Pedal Adjustment
between 1-1/2" (3,8 cm) and 5” (12,7 cm) in 1/4” (0,6 cm) 2. Place the cutting height adjustment pin in any open increments. cutting height hole. The lift lock lever holds the mower deck at 5" (12,7 cm) while cutting. Note: Make sure that the pin is inserted into the holes in both upper and lower plates of the pin box (B). -
Page 38: Neutral Adjustment
2. There are two nuts (B) on the linkage rod. Loosen the nuts from the ball joints (C) and turn the linkage rod to adjust. • If the unit creeps forward, turn the rod clockwise (while standing at the rear of the unit, facing forward); •... -
Page 39: Neutral Lockout Adjustment
This may damage the brake mechanism. 6. Engage the parking brake and re-measure the spring. If this does not correct the braking problem, see your authorized Ferris servicing dealer. Deck Lift Rod Timing Adjustment 5. Engage the parking brake. The neutral lockout bolts will enter the notches of the neutral lockout plates (C). -
Page 40: Deck Leveling Adjustment
2. To check the inner lift rod (A, Figure 51) timing, measure 2. To ensure that the deck is in the lowest position, push the and record the distance between the inner lift pivots (B) pedal by hand towards the rear of the unit and install the and the inner rod pivots (C). - Page 41 Determining if the Deck Leveling Needs to be 4. Position the hardware (A, Figure 55) that secures the front hanger chain (B) to the front mounting plate (C). Adjusted • If the measurement between the front tip of the 1. Park the unit on a flat, level surface. Disengage the PTO, blade and the ground was 4-1/4"...
-
Page 42: Deck Lift Assist Springs
• If the measurements are greater than 4" (10,2 cm) loosen the jam nut (D, Figure 55) and turn the fine WARNING adjustment nut (E) counter-clockwise to lower the Use extreme caution when rotating the idler arm with the deck. breaker bar, due to the increased tension in the spring •... -
Page 43: Short Right Hand Deck Belt Replacement
loosen the jam nut (C) on the eye bolt (D) and then turn the adjustment nut (E) until the measurement is achieved. Tighten the jam nut. 5. Remove the spring anchor hardware (D) that anchors the idler arm spring (E) to the mower deck. 11. -
Page 44: Transmission Drive Belt Replacement
Transmission Drive Belt Replacement Figure 61 depicts the transmission drive belt setup as seen from the top side of the unit and the arrow (A, Figure 61) indicates the front of the unit. 7. Remove the two (2) 5/16" bolts (D), 5/16" flat washers (E), and 5/16"... - Page 45 • The highest numbered shock mounting position should always be used when a rear mounted grass collection system is installed on the unit. To Adjust the Spring Pre-load: This procedure details the process for adjusting the spring's pre-load for the rear shocks. To adjust the spring's pre-load for the front shocks only steps #1 and #5 are required.
-
Page 46: Battery Maintenance
Note: If necessary, a replacement spanner wrench can be DANGER ordered through your authorized Ferris servicing dealer. Be careful when handling the battery. 6. Re-install the rear drive tires. Torque the lug bolts to Battery acid can cause severe burns. Avoid contact with 85-95 ft.lbs. -
Page 47: Troubleshooting
If there is any doubt about the cause of the problem, see Ground speed control levers not in Move ground speed control levers to your authorized Ferris servicing dealer. If you need to replace "NEUTRAL" position. the "NEUTRAL" position. the battery, follow the steps under Cleaning the Battery and Out of fuel. -
Page 48: Troubleshooting Common Cutting Problems
Problem: Engine will not turnover or start. Problem: Unit steers or handles poorly. Fuel Injected Models: Malfunction See authorized service dealer. Cause Remedy in fuel injection system. Steering linkage is loose. Check and tighten any loose connections. Problem: Engine starts hard or runs poorly. Improper tire inflation See Checking Tire Pressures. - Page 49 Problem: Streaking Problem: Uneven Cutting Cause Remedy Cause Remedy Blades are not sharp. Sharpen your blades. Deck is not leveled correctly. Level the deck correctly. Blades are worn down too far. Replace your blades. Blades are dull or worn. Sharpen or replace the blades. Engine speed is too slow.
-
Page 50: Specifications
Specifications Briggs & Stratton 49X977 Make Briggs & Stratton Specifications are correct at time of printing and are subject to change without notice. Model 49X977-0005-J1 Electrical System 12 volt, 20 amp alternator; Battery: ENGINE 340 cca For complete engine specifications see the engine Fits models: 5902001, 5902022 &... -
Page 51: Warranty
Unless required under Australian Consumer Law, Ferris shall not be liable under this Warranty to the Customer or any other person in connection with this Warranty, for consequential, direct or indirect damages, loss or costs incurred or suffered by the Customer or any other person;... - Page 52 ABOUT YOUR WARRANTY Warranty service is available only through Ferris Authorized Service Dealers. This warranty only covers defects in materials or workmanship. It does not cover damage caused by improper use or abuse, improper maintenance or repair, normal wear and tear, or stale or unapproved fuel.
- Page 53 Notes...
- Page 54 Notes...
- Page 55 Notes...