Table of Contents
Advertisement
Quick Links
Advertisement
Table of Contents

Related Manuals for Pioneer SUPER-TUNERIII D DEH-4090MP


Summary of Contents for Pioneer SUPER-TUNERIII D DEH-4090MP
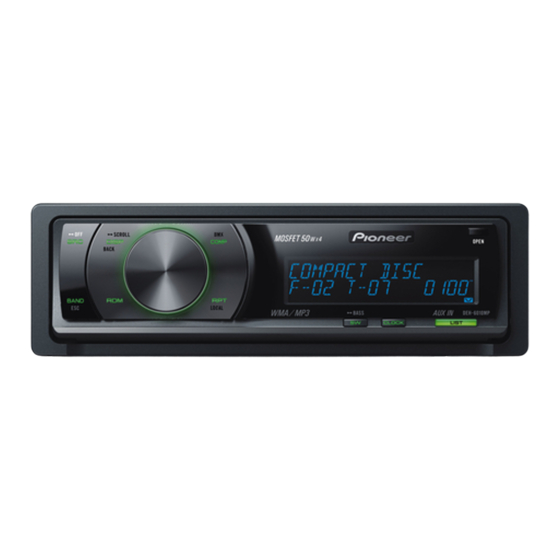
- Page 1 Owner’s Manual CD RECEIVER DEH-4090MP English...
-
Page 2: Table Of Contents
Contents Thank you for buying this Pioneer product. Please read through these operating instructions so you will know how to operate your model properly. After you have finished reading the instructions, keep this man- ual in a safe place for future reference. - Page 3 Contents Connections Important 23 When not connecting a rear speaker lead to a subwoofer 24 When using a subwoofer without using the optional amplifier 26 Installation DIN front/rear mount 28 DIN Front-mount 28 – Installation with the rubber bush 28 –...
-
Page 4: Before You Start
Protecting your unit from reprogrammed. ! If this unit does not operate properly, contact theft your dealer or nearest authorized Pioneer Ser- The front panel can be detached to deter theft. vice Station. ! If the front panel is not detached from the... -
Page 5: Attaching The Front Panel
Section Before You Start Use and care of the remote control Installing the battery Slide the tray on the back of the remote con- trol out and insert the battery with the plus (+) Put the front panel into the provided and minus (–) poles aligned properly. - Page 6 Section Before You Start Important ! Do not store the remote control in high tem- peratures or direct sunlight. ! Do not let the remote control fall onto the floor, where it may become jammed under the brake or accelerator pedal.
-
Page 7: Operating This Unit
Section Operating this unit 6 LIST button What’s What Press to display the track title list, folder list, file list or preset channel list depending on Head unit the source. 1 SRC/OFF button 7 CLOCK button This unit is turned on by selecting a source. Press to change to the clock display. -
Page 8: Display Indication
Section Operating this unit Band and frequency are displayed. ! Built-in CD Player Elapsed playback time and literal infor- mation are displayed. 2 c indicator Appears when an upper tier of folder or menu exists. (folder) indicator Appears when operating list function. c VOLUME buttons 4 d indicator Press to increase or decrease the volume. -
Page 9: Basic Operations
Section Operating this unit Basic Operations Tuner Power ON/OFF Basic Operations % Select a band Turning the unit on Press BAND/ESC. % Press SRC to turn the unit on. # Band can be selected from among FM1, FM2, FM3 or AM. Turning the unit off % Manual tuning (step by step) % Press OFF and hold until the unit turns... -
Page 10: Introduction Of Advanced Operations
Section Operating this unit % Press LOCAL repeatedly to select the Introduction of advanced desired setting. operations FM: OFF—LEVEL 1—LEVEL 2—LEVEL 3— Press MULTI-CONTROL to display the LEVEL 4 main menu. AM: OFF—LEVEL 1—LEVEL 2 The LEVEL 4 setting allows reception of only Use MULTI-CONTROL to select the strongest stations, while lower settings let FUNCTION. -
Page 11: Built-In Cd Player
Section Operating this unit # This operation is available only when playing Built-in CD Player CD-EXTRA or MIXED-MODE CDs. Basic Operations # If you have switched between compressed audio and CD-DA, playback starts at the first % Open the front panel track on the disc. -
Page 12: Selecting Tracks From The Track Title List
Section Operating this unit Press LIST to switch to the track title list For WMA/MP3 discs Play time—folder name and file name—artist mode. name and track title—artist name and album Use MULTI-CONTROL to select the de- title—album title and track title—track title sired track title. -
Page 13: Introduction Of Advanced Operations
Section Operating this unit # If you do not operate the list within about 30 # If you select another folder during repeat play, seconds, the display automatically returns to the the repeat play range changes to disc repeat. # Performing track search or fast forward/re- ordinary display. -
Page 14: Pausing Playback
Section Operating this unit Pausing playback Turn MULTI-CONTROL to select a letter of the alphabet. % Press e (pause) on the remote control # You can also perform the same operations by to turn pause on. pushing MULTI-CONTROL up or down. Playback of the current track pauses. -
Page 15: Audio Adjustments
Section Audio Adjustments ! You can select the SW SETTING 2 only when Introduction of audio subwoofer output is turned on in adjustments SW SETTING 1. ! When selecting FM as the source, you cannot Press MULTI-CONTROL to display the switch to SRC LV ADJUST. -
Page 16: Using The Equalizer
Section Audio Adjustments Using the equalizer Use MULTI-CONTROL to select EQ SETTING 1. The equalizer lets you adjust the equalization to match the car’s interior acoustic character- Press MULTI-CONTROL to display the istics as desired. setting mode. Press MULTI-CONTROL to select the seg- Recalling equalizer curves ment you wish to set. -
Page 17: Adjusting Loudness
Section Audio Adjustments Press MULTI-CONTROL to select the seg- Using subwoofer output ment you wish to set. This unit is equipped with a subwoofer output Press MULTI-CONTROL repeatedly to switch which can be turned on or off. the segment in the following order: Also, phase can be selected between normal Band—Frequency—Q factor and reverse. -
Page 18: Using The High Pass Filter
Section Audio Adjustments Press MULTI-CONTROL to select the seg- Press and hold BASS to display ment you wish to set. BASS BOOST setting mode. Press MULTI-CONTROL repeatedly to switch Turn MULTI-CONTROL to adjust the the segment in the following order: level. -
Page 19: Initial Settings
Section Initial Settings Adjusting initial settings Setting the FM tuning step The FM tuning step employed by seek tuning Press SRC and hold until the unit turns can be switched between 100 kHz, the preset off. step, and 50 kHz. Press MULTI-CONTROL and hold until ! If seek tuning is performed in 50 kHz steps, CLOCK SET appears in the display. -
Page 20: Switching The Warning Tone
Section Initial Settings Turn MULTI-CONTROL to select the AM Press MULTI-CONTROL to turn dimmer tuning step. # To turn dimmer off, press MULTI-CONTROL Turning MULTI-CONTROL will switch the AM tuning step between 9 kHz and 10 kHz. The se- again. lected AM tuning step will appear in the dis- play. -
Page 21: Switching The Feature Demo
Section Initial Settings REAR SP :SUB W (subwoofer)— Switching the Ever Scroll REAR SP :FULL (full-range speaker) When Ever Scroll is set to ON, CD text infor- When PREOUT (RCA output setting) is se- mation scrolls continuously in the display. Set lected. -
Page 22: Other Functions
Section Other Functions Using the AUX source You can connect an auxiliary equipment to this unit using a stereo mini plug cable. % Insert the stereo mini plug into the input jack on this unit. For more details, refer to Connections on the next page. -
Page 23: Connections
Section Connections — Never band together multiple speaker’s ne- Important gative cables. ! Control signal is output through blue/white Important cable when this unit is powered on. Connect it ! When this unit is installed in a vehicle without to an external power amp’s system remote ACC (accessory) position on the ignition control or the vehicle’s auto-antenna relay switch, red cable must be wired to the term-... -
Page 24: When Not Connecting A Rear Speaker Lead To A Subwoofer
Section Connections When not connecting a rear speaker lead to a subwoofer This product Rear output or subwoofer output Antenna jack Front output Use a stereo mini plug Fuse (10 A) cable to connect with auxiliary device. Yellow Connect to the constant 12 V supply terminal. Connect to terminal controlled by ignition switch (12 V DC). - Page 25 Section Connections Power amp (sold separately) Power amp (sold separately) Connect with RCA cables (sold separately) System remote control Blue/white Connect to system control terminal of the power amp or auto-antenna relay control terminal (max. 300 mA 12 V DC). White Gray Front speaker...
-
Page 26: When Using A Subwoofer Without Using The Optional Amplifier
Section Connections When using a subwoofer without using the optional amplifier This product Subwoofer output Antenna jack Front output Fuse (10 A) Yellow Connect to the constant 12 V supply terminal. Connect to terminal controlled by ignition switch (12 V DC). Orange/white Connect to lighting switch terminal. - Page 27 Section Connections Use a stereo mini plug cable to connect with auxiliary device. Blue/white Connect to system control terminal of the power amp or auto-antenna relay control terminal (max. 300 mA 12 V DC). White Gray Front speaker Front speaker White/black Gray/black Left...
-
Page 28: Installation
Section Installation DIN Front-mount Important ! Check all connections and systems before Installation with the rubber bush final installation. % Install the unit into the dashboard. ! Do not use unauthorized parts. Use of un- After inserting the holder into the dashboard, authorized parts may cause malfunctions. -
Page 29: Din Rear-Mount
Section Installation Insert the supplied extraction keys into both sides of the unit until they click into place. Screw Dashboard or Console Factory radio mounting bracket DIN Rear-mount Installation using the screw holes on the side of the unit Remove the trim ring. Extend top and bottom of the trim ring out- wards to remove the trim ring. -
Page 30: Additional Information
! Use only conventional, fully circular discs. Error messages Do not use shaped discs. When you contact your dealer or your nearest Pioneer Service Center, be sure to have the error message recorded. Built-in CD Player ! Use 12-cm or 8-cm CD. Do not use an... -
Page 31: Compressed Audio Files On The Disc
Appendix Additional Information ! Since the CD side of Dual Discs is not phy- Example of a hierarchy sically compatible with the general CD : Folder standard, it may not be possible to play the : Compressed audio file CD side with this unit. ! Frequent loading and ejecting of a Dual Disc may result in scratches on the disc. - Page 32 Appendix Additional Information ! Compatible format: Linear PCM (LPCM), MS ADPCM ! Quantization bits: 8 and 16 (LPCM), 4 (MS ADPCM) ! Sampling frequency: 16 kHz to 48 kHz (LPCM), 22.05 kHz to 44.1 kHz (MS AD- PCM)
-
Page 33: Specifications
Appendix Additional Information Specifications HPF: Frequency ......50/63/80/100/125 Hz Slope ........–12 dB/oct General Subwoofer (mono): Rated power source ....14.4 V DC Frequency ......50/63/80/100/125 Hz (allowable voltage range: Slope ........–18 dB/oct 12.0 V to 14.4 V DC) Gain ........ - Page 34 TEL: (03) 9586-6300 PIONEER ELECTRONICS OF CANADA, INC. 300 Allstate Parkway, Markham, Ontario L3R 0P2, Canada TEL: 1-877-283-5901 TEL: 905-479-4411 PIONEER ELECTRONICS DE MEXICO, S.A. de C.V. Blvd.Manuel Avila Camacho 138 10 piso Col.Lomas de Chapultepec, Mexico, D.F. 11000 TEL: 55-9178-4270 先鋒股份有限公司...