Table of Contents
Advertisement
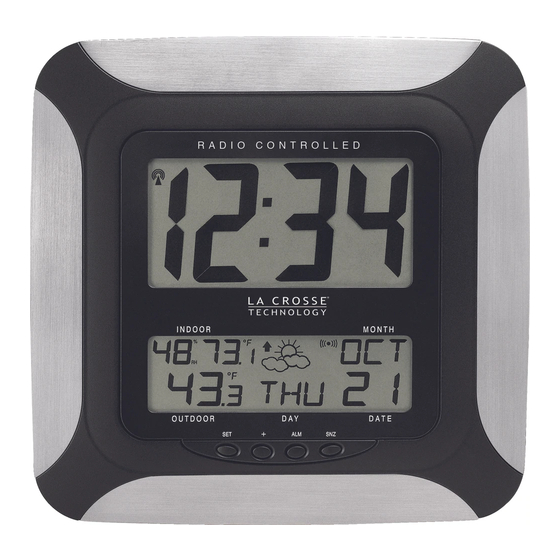
ATOMIC CLOCK WITH TEMPERATURE, HUMIDITY AND
FEATURES:
ATOMIC CLOCK:
LCD1
display
LCD2
display
Function keys
• WWVB Radio controlled time with manual time setting
• Time display: hour, minute, second
• Alarm setting with snooze function
• Complete calendar display
• Weekday display (3 languages to choose from: English, French and Spanish)
• Time zone setting
• Daylight savings time ON/OFF option (DST)
• Indoor temperature and humidity display
• Outdoor temperature display via 433MHz transmission
• Wall mount or freestanding
• Weather forecast with weather tendency indicator
WS-8256U
WEATHER FORECAST
Instruction Manual
1
Hanging holes
Battery cover
Foldable stands
Advertisement
Table of Contents

Related Manuals for La Crosse Technology WS-8256-AL


Summary of Contents for La Crosse Technology WS-8256-AL
- Page 1 ATOMIC CLOCK WITH TEMPERATURE, HUMIDITY AND WEATHER FORECAST FEATURES: ATOMIC CLOCK: LCD1 display LCD2 display Function keys • WWVB Radio controlled time with manual time setting • Time display: hour, minute, second • Alarm setting with snooze function • Complete calendar display •...
-
Page 2: To Install And Replace Batteries In The Temperature Transmitter
OUTDOOR TEMPERATURE TRANSMITTER: • Remote transmission of outdoor temperature to the atomic clock by 433 MHz signals • Wall mounting case TO INSTALL AND REPLACE BATTERIES IN THE TEMPERATURE TRANSMITTER The transmitter uses 2 x AA,1.5V batteries. To install and replace the batteries, please follow the steps below: Remove the cover. -
Page 3: Setting Up
SETTING UP: Alkaline batteries are recommended for use in both units. Avoid using rechargable batteries. NOTE: Do not set the clock until the outdoor temperature is displayed. Place batteries in the outdoor transmitter first, then into the atomic clock. DO NOT PRESS ANY BUTTONS FOR 15 MINUTES. -
Page 4: Atomic Clock Lcd Screen Descriptions
ALM key ALM key : To enter into the alarm set mode : To enter into the alarm set mode To set the alarm ON/OFF To set the alarm ON/OFF To display the alarm time in normal mode display To display the alarm time in normal mode display To exit the setting modes To exit the setting modes SNZE key... -
Page 5: Manual/Lcd Contrast Settings
MANUAL SETTINGS Note: If the atomic clock has already successfully received the WWVB time signal and displays the correct time and date, then the Manual settings can be skipped. After completion of the above described procedures in “Setting up” the manual setting modes can be entered by pressing and holding the SET key for 5 seconds. -
Page 6: Time Zone/Dst Setting
Press and release the SET ket to confirm the LCD contrast and continue to the Time Zone setting. TIME ZONE SETTING The time zone can be set between the –1 to –12 hour or Greenwich Mean Time (GMT) range. The time zone will start flashing (Default setting "-5h“) in the lower LCD display. Press and release the + key to select the desired time zone. -
Page 7: Language Setting
Press and release the SET key to confirm the DST setting and continue to the Radio- controlled time setting. Note: The DST default is “ON”, meaning that the WWVB will automatically change the time according to Daylight Saving Time in the spring and fall. For areas that do not recognize DST changes (Arizona and parts of Indiana) turn the DST “OFF”. -
Page 8: Manual Time/Year Setting
Press and release the + key to select the desired language. Press and release the SET key to confirm the language setting and enter the Manual Time setting mode. MANUAL TIME SETTING In case the atomic clock is not able to detect the WWVB-signal (disturbances, transmitting distance, etc.), the time can be manually set. -
Page 9: Month Setting
The year digits will start flashing in the lower LCD. Press and release the + key to select the desired year. Press and release the SET key to confirm the Year setting and continue to the Month setting. MONTH SETTING The month digits on LCD2 will start flashing. -
Page 10: To Deactivate The Alarm
TO DEACTIVATE THE ALARM: Alarm icon (((•))) (ON) The alarm will be automatically switched ON when the alarm time is set. To deactivate the alarm (OFF), press and release once the ALM key in normal mode display. The alarm icon will disappear, the alarm is now off. -
Page 11: Changing The Display Mode
3. Using other electrical products such as headphones or speakers operating on the same signal frequency (433MHz) may prevent correct signal transmission and reception. 4. Neighbors using electrical devices operating on the 433MHz signal frequency can also cause interference. Note: When the 433 MHz signal is received correctly, do not re-open the battery cover of either the outdoor temperature transmitter or atomic clock, as the batteries may spring free from the contacts and force a false reset. -
Page 12: Wwvb Radio Controlled Time
3. Press and release the + key a third time. The display will now show the indoor humidity, indoor temperature and seconds. 4. Press and release the + key a fourth time. The display will now return to the normal display mode, indoor humidity, indoor temperature and outdoor temperature. -
Page 13: Weather Forecast
detected a radio signal and is trying to receive it. When the time code is received, the WWVB tower becomes permanently lit and the time will be displayed. If the tower icon flashes, but does not set the time or the WWVB tower does not appear at all, then please take note of the following: •... -
Page 14: Positioning The Atomic Clock
Clouds with Rain—indicates that the weather is expected to get worse (not that the weather will be rainy). The weather icons change when the unit detects a change in air pressure. The icons change in order, from “sunny” to “partly sunny” to “cloudy” or the reverse. It will not change from “sunny” directly to “rainy”, although it is possible for the change to occur quickly. -
Page 15: Positioning Outdoor Temperature Transmitter
• wall mounting FOLDOUT TABLE STAND The foldout table stand legs are located on the backside, at the lower corners, just below the battery cover. The hinges are towards the edges of the atomic clock, and the ends (with no hinge) need to be folded out towards the edge. Once the foldout table stands are extended, place the atomic clock in an appropriate location. -
Page 16: Troubleshooting
Where marked, start the screw holes into mounting surface. Screw mounting bracket onto the mounting surface. Ensure that the screws are flush with the bracket. MOUNTING WITH ADHESIVE TAPE 1) With a nonabrasive solution, clean and dry the back of the mounting bracket and the mounting surface to ensure a secure hold. -
Page 17: Care And Maintenance
again. Make sure the batteries are new and fresh. 2) Move the atomic clock closer to the transmitter or place the transmitter closer to the atomic clock. Make sure the clock is at a receivable range from the transmitter. 3) Move the units to another location. Interferences from other electrical devices operating on the same signal frequency (433MHz) may prevent correct signal transmission and reception. -
Page 18: Liability Disclaimer
Temperature checking interval Indoor: every 10 seconds Outdoor: every 5 minutes Humidity measuring range Indoor: 1-99% Transmission distance: maximum 330 feet (100 meters) in open field Power source (Alkaline batteries recommended) Atomic clock : 3 x AA, 1.5V batteries Transmitter: 2 x AA, 1.5V batteries Battery life: about 12 months Dimensions (H x W x D) Atomic clock: 9.46“... -
Page 19: Warranty Information
WARRANTY INFORMATION La Crosse Technology, Ltd provides a 1-year limited warranty on this product against manufacturing defects in materials and workmanship. This limited warranty begins on the original date of purchase, is valid only on products purchased and used in North America and only to the original purchaser of this product. To receive warranty service, the purchaser must contact La Crosse Technology, Ltd for problem determination and service procedures. - Page 20 from a fixed installation, normal set-up or adjustments, claims based on misrepresentation by the seller or performance variations resulting from installation-related circumstances. LA CROSSE TECHNOLOGY, LTD WILL NOT ASSUME LIABILITY FOR INCIDENTAL, CONSEQUENTIAL, PUNITIVE, OR OTHER SIMILAR DAMAGES ASSOCIATED WITH THE OPERATION OR MALFUNCTION OF THIS PRODUCT.
- Page 21 FCC ID: OMO-01RX (receiver) OMO-01TX (transmitter) THIS DEVICE COMPLIES WITH PART 15 OF THE FCC RULES. OPERATION IS SUBJECT TO THE FOLLOWING TWO CONDITIONS: 1. THIS DEVICE MAY NOT CAUSE HARMFUL INTERFERENCE, AND 2. THIS DEVICE MUST ACCEPT INTERFERENCE RECEIVED, INCLUDING INTERFERENCE THAT MAY CAUSE UNDESIRED OPERATION.
- Page 22 WS-8256U ATOMIC CLOCK WITH INDOOR TEMP/HUMIDITY AND OUTDOOR TEMPERATURE Instruction Manual...