
Related Manuals for Konica Minolta DiMAGE Transfer


Summary of Contents for Konica Minolta DiMAGE Transfer
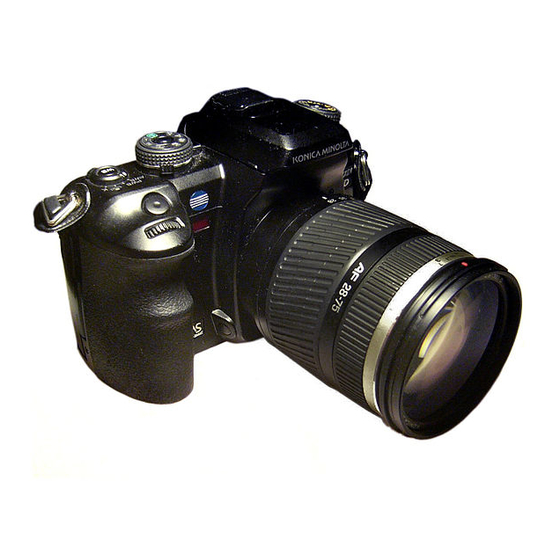
- Page 1 DiMAGE T ransfer for DiMAGE T ransfer for MAXXUM 7D / DYNAX 7D MAXXUM 7D / DYNAX 7D...
-
Page 2: Table Of Contents
Windows operating systems; refer to the manuals supplied with the computer. Every precaution has been taken to ensure the accuracy of this material. Contact Konica Minolta if you have any questions. Konica Minolta is not responsible for any loss or damage caused by the use of this software. -
Page 3: System Requirements
MAGE V BOUT DiMAGE Viewer or DiMAGE Master can be launched from DiMAGE Transfer. DiMAGE Viewer is installed from the DiMAGE Viewer CD-ROM supplied with the camera. Many editing and image- processing functions are available. DiMAGE Master is an optional software that has improved editing and processing tools compared with DiMAGE Viewer. -
Page 4: Camera Firmware Update
CAMERA FIRMWARE UPDATE AMERAS REQUIRING UPDATING If RemoteStorage in the transfer-mode option of the setup menu (A) is not displayed, the camera must be updated. To check the Maxxum/Dynax 7D firmware version, press the menu button, and then press the display button. -
Page 5: Software Update License Agreement
GRANT OF LICENSE Konica Minolta Photo Imaging U.S.A., Inc. ("Konica Minolta") grants you a license to use one or more copies of the Software specifi- cally for the purpose of copying the Firmware into a Camera in order to update the Camera, subject to the license restrictions set forth below. -
Page 6: Preparing The Compactflash Card
REPARING THE The required files downloaded from the web site must be copied to a CompactFlash (CF) card in the camera. Before updating the camera firmware, read the data-transfer section of the camera instruction manual to connect the camera to a computer. •... -
Page 7: Updating The Camera Firmware
• If any other software version number is displayed or the camera does not work properly, repeat the installation procedure. • This software update can only be used for versions ending with the letter "u" or "e.” The update will not work with software ending in any other letter. -
Page 8: Installation
INSTALLATION RAM-stationed programs such as anti-virus or installation-monitoring software may cause the installer to fail. Remove or disable these programs before installing DiMAGE Transfer. Reinstall or enable the software when the installation is complete. In the example below, the hard disk is drive C. The letters designating the drives vary between computers. - Page 9 5. To install the software in the default location (C:\Program Files\DiMAGE Transfer for Maxxum 7D, Dynax 7D), click “Next >.” To install the software in a different location, click the Browse button to display the folder selection window. Specify the directory in which to install the software.
- Page 10 8. The message shown at left is displayed. Click “OK” to continue. 9. The welcome window opens. Click “Next >” to continue. 10. The license agreement appears. If you accept the agreement, click “Yes.” Installation of the USB driver begins. Read the entire license agreement carefully before continuing.
-
Page 11: Uninstalling Dimage Transfer
NINSTALLING Windows ® 1. Quit the software. 2. Select Start > Control Panel > Add or Remove Programs. 3. Select DiMAGE Transfer for Maxxum 7D, Dynax 7D. 4. Click Change/Remove. Windows 2000 Professional: ® 1. Quit the software. 2. Select Start > Settings > Control Panel > Add/Remove Applications. -
Page 12: Starting Up The Software
STARTING UP THE SOFTWARE LCDbrightness Transfer mode Data storage Video output Audio signals RemoteStorage Language Date/Time set (B-1) (B-2) 1. Start up the computer. The computer must be on before connecting the camera. 2. Turn the camera on and select “RemoteStorage”... - Page 13 5. Open DiMAGE Transfer. Windows ® Choose Start > All Programs > DiMAGE Transfer for Maxxum 7D, Dynax 7D > DiMAGE Transfer for Maxxum 7D, Dynax 7D Windows 2000 Professional: ® Choose Start > Programs > DiMAGE Transfer for Maxxum 7D, Dynax 7D > DiMAGE Transfer for Maxxum 7D, Dynax 7D The main window opens.
-
Page 14: Quit
• Fast user switching may prevent DiMAGE Transfer from operating properly. • System standby will not work until DiMAGE Transfer is closed. • If the low-battery warning appears on the camera, DiMAGE Transfer cannot be used. The computer and the camera are disconnect automatically after transferring the data. - Page 15 Preview window 2. Press the shutter-release button on the camera to take the picture. The image taken is displayed in the preview window and saved in the My Picture folder at the same time. • Pictures are saved in the My Picture folder with the default setting. This folder can be changed. See page 22.
- Page 16 DiMAGE Transfer can not control the camera settings. • While connecting the camera to the computer with the DiMAGE Transfer, the playback button on the camera is disabled. During the instant playback period, image can not be deleted or enlarged.
-
Page 17: Preview Window
PREVIEW WINDOW Full-screen display button Fit-to-window button Magnifying tool button Full-screen display button Fit-to-window button Magnifying tool button Grab tool button Rotate 90 degrees to left button Rotate 90 degrees to right button Display horizontally Show first image Show previous image Show next image Show last image 1. - Page 18 Full-screen display button Fit-to-window button Magnifying tool button Histogram button Close button Grab tool button Show first image Rotate buttons Display horizontally To show the histogram of the image displayed in the preview window. To close the preview window. Click histogram button to show the histogram of the image displayed in the preview window.
-
Page 19: Updating The File List
PDATING THE FILE LIST When image data is saved with DiMAGE Viewer, DiMAGE Master, or Windows Explorer when using DiMAGE Transfer, press the F5 key on the keyboard to update the file list so images are displayed correctly in the preview window. -
Page 20: Viewing Images With Dimage Software
VIEWING IMAGES WITH DIMAGE SOFTWARE The DiMAGE Viewer or DiMAGE Master can be launched from DiMAGE Transfer. DiMAGE Viewer is supplied with every Konica Minolta camera. Many editing and image-processing functions are available. DiMAGE Master is an optional software that has improved editing and processing tools compared with DiMAGE Viewer. - Page 21 2. Press the shutter-release button on the camera to take pictures. Images taken are added automatically to the DiMAGE Viewer or DiMAGE Master thumbnail display. Images taken are added automatically to the thumbnail display. - 21 -...
-
Page 22: Preferences
PREFERENCES REFERENCES WINDOW ESTINATION 1. Turn the camera off. The main window changes as shown. Confirm that the remaining frames counter displays a dash and the preferences button is active. 2. Click the preferences button in the main window. The preferences window opens. Images are saved in the My Picture folder. -
Page 23: File Name
Click “Version” to display the splash screen showing the version number of this software. 2. Select the folder to save the images. Click “OK” to complete the operation. The folder name can be changed using the keyboard’s F2 key. A new folder can also be created in this window. - Page 24 © 2004 Konica Minolta Photo Imaging, Inc. under the Berne Convention and the Universal Copyright Convention. X- B502 9224-7306-11...