Table of Contents
Advertisement
Advertisement
Table of Contents
Troubleshooting

Related Manuals for Kohler CV11-16


Summary of Contents for Kohler CV11-16
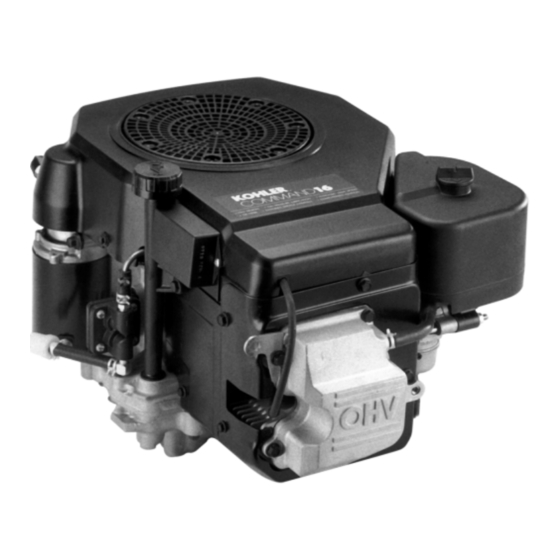
- Page 1 ERVICE ANUAL COMMAND CV11-16, CV460-465, CV490-495 ERTICAL RANKSHAFT...
-
Page 2: Table Of Contents
Section 1. Safety and General Information ... Section 2. Special Tools ... Section 3. Troubleshooting ... Section 4. Air Cleaner and Air Intake System ... Section 5. Fuel System and Governor ... Section 6. Lubrication System ... Section 7. Retractable Starter ... Section 8. -
Page 3: Section 1. Safety And General Information
Keep hands, feet, hair, and clothing away from all moving parts to prevent injury. Never operate the engine with covers, shrouds, or guards removed. CV11-16 Section 1 CV460-465, CV490-495 WARNING Hot Parts can cause severe burns. Do not touch engine while operating or just after stopping. - Page 4 Section 1 Safety and General Information WARNING Explosive Fuel can cause fires and severe burns. Stop engine before filling fuel tank. Explosive Fuel! Gasoline is extremely flammable and its vapors can explode if ignited. Store gasoline only in approved containers, in well ventilated, unoccupied buildings, away from sparks or flames.
- Page 5 Basic Engine SERIAL NO. REFER TO OWNER'S MANUAL FOR SAFETY, MAINTENANCE SPECS AND ADJUSTMENTS. FOR SALES AND SERVICE IN US/CANADA CALL: 1-800-544-2444. KOHLER CO. KOHLER, WI USA 2105810334 Factory Code Section 1 Identification Decal Version Code S = Electric Start...
- Page 6 Gasoline/Alcohol blends Gasohol (up to 10% ethyl alcohol, 90% unleaded gasoline by volume) is approved as a fuel for Kohler engines. Other gasoline/alcohol blends are not approved. Gasoline/Ether blends Methyl Tertiary Butyl Ether (MTBE) and unleaded gasoline blends (up to maximum of 15% MTBE by volume) are approved as a fuel for Kohler engines.
- Page 7 500 Hours Perform these maintenance procedures more frequently under extremely dusty, dirty conditions. Have a Kohler Engine Service Dealer perform this service. Not necessary on Delco Starters. Storage If the engine will be out of service for two months or more, use the following storage procedure.
- Page 8 25.4 Valve Cover End (1.00) 6.34 Keyway Width (.250) 26.5 (1.04) Throttle Cable Oil Level Dipstick & Fill 135.0 (5.31) (4.25) 328* (12.91) 463* (18.23) *CV11-16 10 mm shorter Dimensions in () are inch equivalents. Cylinder (80.16) 176.6 (6.95) Cylinder...
- Page 9 Bore CV11-14, CV460-465 ... 87 mm (3.43 in.) CV15, CV16, CV490-495 ... 90 mm (3.60 in.) Stroke CV11-16 ... 67 mm (2.64 in.) CV460-465, CV490-495 ... 77 mm (3.03 in.) Displacement CV11-14 ... 398 cc (24.3 cu. in. CV15, CV16 ... 426 cc (26.0 cu. in.
- Page 10 Section 1 Safety and General Information Balance Shaft End Play ... 0.0575/0.3625 mm (0.0027/0.0137 in.) Running Clearance ... 0.0250/0.1520 mm (0.0009/0.0059 in.) Bore I.D. New ... 20.000/20.025 mm (0.7874/0.7884 in.) Max. Wear Limit ... 20.038 mm (0.7889 in.) Balance Shaft Bearing Surface O.D. New ...
- Page 11 Crankshaft End Play (free) ... 0.0575/0.4925 mm (0.0022/0.0193 in.) End Play (thrust bearing with shims) ... 0.050/0.530 mm (0.0020/0.0209 in.) Crankshaft Bore in Crankcase I.D. New ... 44.965/44.990 mm (1.7702/1.7712 in.) Max. Wear Limit ... 44.9758/45.0012 mm (1.7707/1.7717 in.) Crankshaft Bore in Crankcase Running Clearance New ...
- Page 12 Section 1 Safety and General Information Cylinder Head Cylinder Head Fastener Torque (torque in 2 increments) ... 20, 40.7 N·m (15, 30 ft. lb.) Max. Out-of-Flatness ... 0.076 mm (0.003 in.) Rocker Pedestal Fastener Torque ... 11.3 N·m (100 in. lb.) Electric Starter Starter Thru Bolt Torque UTE/Johnson Electric, Eaton (Inertia Drive) ...
- Page 13 Ignition (Cont'd) Spark Plug Torque ... 24.4-29.8 N·m (18-22 ft. lb.) Ignition Module Air Gap ... 0.200/0.300 mm (0.0078/0.0118 in.) Ignition Module Fastener Torque ... 6.2 N·m (55 in. lb.) Into new as-cast hole Muffler Muffler Retaining Nuts ... 24.4 N·m (216 in. lb.) Oil Filter/Oil Pan Oil Filter Torque ...
- Page 14 Section 1 Safety and General Information Piston, Piston Rings, and Piston Pin (Cont'd.) Center Compression Ring End Gap New Bore CV11-14, CV460-465 ... 0.250/0.510 mm (0.0010/0.020 in.) CV15, CV16, CV490-495 ... 0.22/0.48 mm (0.008/0.018 in.) Used Bore (max.) ... 0.76 mm (0.030 in.) Oil Control Ring End Gap CV11-14, CV460-465 ...
- Page 15 Valves and Valve Lifters Hydraulic Valve Lifter to Crankcase Running Clearance ... 0.0124/0.0501 mm (0.0005/0.0020 in.) Intake Valve Stem-to-Valve Guide Running Clearance ... 0.038/0.076 mm (0.0015/0.0030 in.) Exhaust Valve Stem-to-Valve Guide Running Clearance ... 0.050/0.088 mm (0.0020/0.0035 in.) Intake Valve Guide I.D. New ...
- Page 16 Section 1 Safety and General Information General Torque Values Metric Fastener Torque Recommendations for Standard Applications Tightening Torque: N·m (in. lb.) + or - 10% Size 1.2 (11) 1.7 (15) 2.5 (22) 3.2 (28) 4.3 (38) 5.7 (50) 10.5 (93) 13.6 (120) Tightening Torque: N·m (ft.
-
Page 17: Section 2. Special Tools
Tool Corp.) to handle our special service tools. The intent of this program is to provide you with a single source for all Kohler special tools, and to make it easy and convenient to obtain those tools, at reasonable cost. Tool orders can be placed with SPX by any of three methods. -
Page 18: Section 2 Special Tools
Used like the water manometer but easier to operate, transport, and maintain Spanner Wrench Used for installing push rods or rotating crankshaft Engine Analysis Kit Used for testing running conditions of Kohler engines in applications SPX Part No. KO1044 KO1046... - Page 19 Obtain a flat washer with the correct I.D. to slip on the capscrew and an O.D. of approximately 1". Kohler Part No. 12 468 05-S can be used if you don’t have the right size on hand.
- Page 20 Section 2 Special Tools...
-
Page 21: Section 3. Troubleshooting
2. Excessive engine load. 3. Low crankcase oil level. 4. High crankcase oil level. 5. Faulty carburetor. Engine Knocks 1. Excessive engine load. 2. Low crankcase oil level. 3. Old/improper fuel. 4. Internal wear or damage. Section 3 CV11-16 CV460-465, CV490-495 Troubleshooting... - Page 22 Section 3 Troubleshooting Engine Loses Power 1. Low crankcase oil level. 2. High crankcase oil level. 3. Dirty air cleaner element. 4. Dirt or water in the fuel system. 5. Excessive engine load. 6. Engine overheated. 7. Faulty spark plug. 8.
- Page 23 Basic Engine Tests Crankcase Vacuum Test A partial vacuum should be present in the crankcase when the engine is operating at normal temperatures. Pressure in the crankcase (normally caused by a clogged or improperly-assembled breather) can cause oil to be forced out at oil seals, gaskets, or other available spots.
- Page 24 Section 3 Troubleshooting Compression Test These engines are equipped with an automatic compression release (ACR) mechanism. Because of the ACR mechanism, it is difficult to obtain an accurate compression reading. As an alternate, use the leakdown test described below. Cylinder Leakdown Test A cylinder leakdown test can be a valuable alternative to a compression test.
-
Page 25: Section 4. Air Cleaner And Air Intake System
(Extra Capacity Shown) Rubber Seal Stud (Sleeve) Stud Gasket Open Base Figure 4-2. Later Style Air Cleaner Assemblies - Exploded View. CV11-16 Section 4 CV460-465, CV490-495 Air Duct Knob (Part of Cover) Air Cleaner Cover Wing Nut Inner Air Cleaner Seal... -
Page 26: Section 4 Air Cleaner And Air Intake System
Do not wash the paper element or use pressurized air, as this will damage the element. Replace a dirty, bent, or damaged element with a genuine Kohler element. Handle new elements carefully; do not use if the sealing surfaces are bent or damaged. - Page 27 If time will not permit air drying, keep a spare filter on hand (Kohler Part No. 12 050 02-S). When reinstalling, make sure the foam filter seals against the blower housing around its base and is securely attached to the velstuds.
- Page 28 Section 4 Air Cleaner and Air Intake System...
-
Page 29: Section 5. Fuel System And Governor
Gasoline/Alcohol blends Gasohol (up to 10% ethyl alcohol, 90% unleaded gasoline by volume) is approved as a fuel for Kohler engines. Other gasoline/alcohol blends are not approved. Gasoline/Ether blends Methyl Tertiary Butyl Ether (MTBE) and unleaded gasoline blends (up to a maximum of 15% MTBE by volume) are approved as a fuel for Kohler engines. - Page 30 Fuel Filter Some engines are equipped with an in-line fuel filter. Visually inspect the filter periodically, and replace when dirty with a genuine Kohler filter. Fuel Pump Some engines are equipped with an optional mechanical fuel pump. The fuel pump body is constructed of nylon. The nylon body insulates the fuel from the engine crankcase.
- Page 31 Repair Nylon-bodied fuel pumps are not serviceable and must be replaced when faulty. Replacement pumps are available in kits that include the pump and mounting gasket. Removal 1. Disconnect the fuel lines from the inlet and outlet fittings of the pump. 2.
- Page 32 Section 5 Fuel System and Governor Troubleshooting - Gasoline Systems If engine troubles are experienced that appear to be fuel system related, check the following areas before adjusting or disassembling the carburetor. • Make sure the fuel tank is filled with clean, fresh gasoline.
- Page 33 Adjustment NOTE: Carburetor adjustments should be made only after the engine has warmed up. The carburetor is designed to deliver the correct fuel- to-air mixture to the engine under all operating conditions. The main fuel jet is calibrated at the factory and is not adjustable*.
- Page 34 Section 5 Fuel System and Governor Disassembly Throttle Plate Screw(s) Throttle Plate Low Idle Speed Adjusting Screw and Spring Low Idle Fuel Adjusting Needle and Spring (may not be present or may have limiter cap on certified engines) Fuel Shut-off Solenoid Figure 5-6.
- Page 35 Tool No. KO1018 Do Not Allow Tip to Strike Carburetor Body Pierce Plug with Tip Welch Plug Figure 5-7. Removing Welch Plug. Main Fuel Jet Removal The main jet on Walbro carburetors is pressed into the side of the tower portion of the body. Removal is not recommended, unless a high-altitude kit is being installed, in which case the removal instructions will be included in the kit.
- Page 36 Section 5 Fuel System and Governor Dust Cap Choke Lever Spring Brass Bushing Stop Pin Choke Valve Screws Figure 5-10. Cutaway View Showing Self-Relieving Choke Carburetor. Removing Old Parts 1. Remove the black dust cover. This cover snaps on and off. 2.
- Page 37 Repair Always use new gaskets when servicing or reinstalling carburetors. Repair kits are available which include new gaskets and other components. Always refer to the Parts Manual for the engine being serviced to ensure the correct repair kits are ordered. Reassembly Choke Shaft Installation (Non-Self-Relieving) 1.
- Page 38 Section 5 Fuel System and Governor Welch Plug Installation–Walbro Carburetors Use Tool No. KO1017 and install new plugs as follows: 1. Position the carburetor body with the welch plug cavities to the top. 2. Place a new welch plug into the cavity with the raised surface up.
- Page 39 LPG Systems Components of a typical LPG (liquefied propane gas) system are shown in Figure 5-15. This subsection covers standard systems as shown in Figure 5-15 and engines equipped with the Kohler Emission Sentry System. Fuel Recommendations (LPG) WARNING: Pressurized LPG! Fuel tanks are filled under pressure and should be handled with care.
- Page 40 Muffler (Not Shown) LPG Carburetor Shown with Self-Relieving Choke Figure 5-17. Main Components of Kohler Emission Sentry™ System. 5.12 Adjust Carburetor 1. With the engine stopped, reset the main fuel setting by closing the adjusting screw until it bottoms then turn it 2 1/4 to 2 1/2 turns open (see Figure 5-16).*...
- Page 41 ™ Kohler Emission Sentry System Some Kohler Command engines are equipped with the ™ Emission Sentry System. Emission Sentry feature which assures the operator that the exhaust emission levels of the engine are well within safe exposure limits. The system does not require any additional daily maintenance beyond the schedule normally specified for Command engines.
- Page 42 Section 5 Fuel System and Governor 2. The stepper motor, electronic control unit (ECU) and oxygen sensor can all be checked with the Kohler Emission Sentry ™ No. 12 761 07-S). a. Separate the plug connector between the electronic control unit (ECU) and the stepper motor.
- Page 43 When the engine is at rest, and the throttle is in the ‘‘fast’’ position, the tension of the governor spring holds the throttle plate open. When the engine is operating (the governor gear assembly is rotating), the force applied by the regulating pin against the cross shaft tends to close the throttle plate.
- Page 44 Section 5 Fuel System and Governor Warm Engine Cold Engine Figure 5-20. Typical Throttle/Choke Controls. 3. Align the hole in the throttle lever with the hole in the speed control bracket by inserting a pencil or 6.35 mm (1/4 in.) drill bit. See Figure 5-21. Choke Adjusting Screw Speed Control...
- Page 45 Choke Adjustment This procedure must follow the "High Idle Speed Adjustment" just described. If not already completed, perform that operation first. 1. Turn the choke adjusting screw out (counterclockwise), until it no longer contacts the choke lever. Then turn it back in (clockwise), until it just makes contact.
- Page 46 Section 5 Fuel System and Governor 2. Position the application throttle control in the full (fast) throttle position. Then move the throttle lever back 3/16" or 4.75 mm. Insert the cable boden wire into the throttle control lever on the control plate.
- Page 47 Starting an Engine Equipped with Separate Control Cables 1. Place the throttle control midway between the "slow" and "fast" positions. Place the choke control into the "on" position. 2. Start the engine. 3. For a Cold Engine – Gradually return the choke control to the "off"...
- Page 48 Section 5 Fuel System and Governor Governed Idle Adjusting Screw Figure 5-26. Location of Governed Idle Adjusting Screw. 5.20...
-
Page 49: Section 6. Lubrication System
3. Unthread and remove the oil fill cap/dipstick; wipe oil off. Reinsert the dipstick into the tube and rest the oil fill cap on the tube. Do not thread the cap onto the tube. See Figure 6-3. Section 6 CV11-16 CV460-465, CV490-495 Lubrication System... - Page 50 Section 6 Lubrication System Oil Fill Cap/Dipstick Oil Fill Tube Figure 6-3. Checking Oil Level. 4. Remove the dipstick and check the oil level. The oil level should be up to, but not over the ‘‘F’’ mark on the dipstick. See Figure 6-4. Operating Range Figure 6-4.
-
Page 51: Lubrication System
Change Oil Filter Replace the oil filter every other oil change (every 200 hours of operation). Always use a genuine Kohler oil filter. Replace the oil filter as follows: 1. Drain the oil from the engine crankcase. 2. Remove the oil filter drain plug (where applicable) located at the base of the oil filter adapter. - Page 52 Section 6 Lubrication System Figure 6-7. Oil Pickup. Oil Pressure Relief Valve Figure 6-8. Oil Pressure Relief Valve Styles. Oil Filter These engines are equipped with a full-flow oil filter. See Figure 6-9. The oil filter helps remove sludge and other combustion by-products from the oil.
- Page 53 Installation The pressure switch is installed in the oil filter adapter, in one of the main oil galleries of the oil pan. See Figure 6-10. On engines not equipped with Oil Sentry ™ , the installation hole is sealed with a 1/8-27 N.P.T.F.
- Page 54 Section 6 Lubrication System...
-
Page 55: Section 7. Retractable Starter
2. Pull the starter handle out until the pawls engage the drive cup. Hold the handle in this position and tighten the screws securely. See Figure 7-2. Figure 7-2. Installing Retractable Starter. CV11-16 Section 7 CV460-465, CV490-495 Retractable Starter... - Page 56 Section 7 Retractable Starter Rope Replacement The rope can be replaced without complete starter disassembly. 1. Remove the starter from the engine blower housing. 2. Pull the rope out approximately 12" and tie a temporary (slip) knot in it to keep it from retracting into the starter.
- Page 57 Disassembly CAUTION: Spring Under Tension! Do not remove the center screw from the starter until the spring tension is released. Removing the center screw before releasing spring tension, or improper starter disassembly, can cause the sudden and potentially dangerous release of the spring. Follow these instructions carefully to ensure personal safety and proper starter disassembly.
- Page 58 2. Replace all worn or damaged components. Use only genuine Kohler replacement parts as specified in the Parts Manual. All components shown in Figure 7-1 are available as service parts. Do not use nonstandard parts.
-
Page 59: Section 8. Electrical System And Components
RC12YC (Kohler Part No. 12 132 02-S). A high-performance spark plug, Champion Premium Gold 2071 (used on Pro Series engines, Kohler Part No. 12 132 06-S) is also available. Equivalent alternate brand plugs can also be used. Gap: CV11-15,CV460-465,490-495 1.02 mm (0.040 in.) CV11-14 LP,CV16 0.76 mm (0.030 in.) - Page 60 Section 8 Electrical System and Components 4. Reinstall the spark plug into the cylinder head. Torque the spark plug to 24.4-29.8 N·m (18-22 ft. lb.). Inspection Inspect the spark plug as soon as it is removed from the cylinder head. The deposits on the tip are an indication of the general condition of the piston rings, valves, and carburetor.
- Page 61 Electronic Magneto Ignition System, CV11-15, CV460-465, CV490-495 Engines Air Gap 0.2-0.3 mm (0.008-0.012 in.) Flywheel Kill Switch or Off Position of Key Switch Figure 8-2. Electronic Magneto Ignition System, CV11-15, CV460-465, CV490-495 Engines. CV11-15, CV460-465, CV490-495 engines are equipped with a dependable electronic magneto ignition system.
-
Page 62: Section 9. Disassembly
Section 8 Electrical System and Components Magneto Ignition System Troubleshooting Guide The following guide will help locate and correct ignition system problems. Problem 1. Make sure the spark plug lead is connected to the spark plug. 2. Check the condition of spark plug. Make sure gap is set correctly. - Page 63 Electronic Ignition System with Spark Advance (Smart Spark Kill Switch or Off Position of Key Switch Figure 8-5. Capacitive Discharge Ignition System with Spark Advance. The CV16 engines are equipped with an electronic capacitive discharge ignition system with electronic spark advance. A typical application (Figures 8-5 and 8-6) consists of the following components.
- Page 64 Section 8 Electrical System and Components Operation As the flywheel rotates, the magnet grouping passes the input coil (L1) of the ignition module, inducing energy in the coil. The resultant pulse is rectified by diode (D1) and charges capacitor (C1). Current from the same pulse also travels through the brown lead to the spark advance module (SAM), and enters the input of the conditioning circuit.
- Page 65 Troubleshooting CD Ignition Systems The CD ignition system is designed to be trouble-free for the life of the engine. Other than periodically checking/replacing the spark plug, no maintenance or timing adjustment is necessary or possible. Mechanical systems do occasionally fail or break down, however, so the following troubleshooting information is provided to help you get to the root of a reported problem.
- Page 66 Section 8 Electrical System and Components 4. Remove the blower housing from the engine. a. Trace the black ground lead from the SAM and check that the ground tab and terminal connections are all tight. Recheck voltage at engine connector. If voltage is still low, check battery, key switch, and wiring on unit.
- Page 67 Battery Test Test the battery voltage by connecting DC voltmeter across the battery terminals - crank the engine. If the battery drops below 9 volts while cranking, the battery is discharged or faulty. Refer to Figure 8-8. Voltmeter Figure 8-8. Checking Battery Voltage. Electrical Systems Wiring Diagrams and Battery Charging Systems Most engines are equipped with 15 amp regulated...
- Page 68 Section 8 Electrical System and Components Ground-To-Kill Lead (White) Light Key Switch Optional Oil Sentry Switch (Indicator Optional Light) Sentry Switch 12 V. Battery (Shutdown) Figure 8-10. CV11-15, CV460-465, CV490-495 3 amp Unregulated Battery Charging System. Spark Advance Module White Yellow Green (Optional) To Solenoid...
- Page 69 Troubleshooting Guide 3 amp Battery Charging System with 70 Watt Lighting Stator NOTE: Zero ohmmeters on each scale to ensure accurate readings. Voltage tests should be made with engine running at 3000 RPM - no load. Battery must be fully charged. Problem 1.
- Page 70 Section 8 Electrical System and Components Troubleshooting Guide 3 amp/70 Watt Braking Stator NOTE: Zero ohmmeteres on each scale to ensure accurate readings. Voltage tests should be made with engine running at 3400 RPM - no load. Battery must be fully charged. Problem 1.
- Page 71 Problem 1. Make sure lights are not burned out. 2. Disconnect the braking lead (green) from the wiring harness. With engine running at 3400 RPM, Lights measure voltage from braking lead to ground using an AC voltmeter. Battery Charging 3. With the engine stopped, measure the (Braking resistance from braking lead to ground System...
- Page 72 Section 8 Electrical System and Components CV11-15, CV460-465, CV490-495 Electric Start Engines 15 amp Battery Charging System Ground-to-Kill Lead (White) Optional Oil Sentry™ Optional Oil Switch Sentry™ (Indicator Switch Light) (Shutdown) Battery Figure 8-12. CV11-15, CV460-465, CV490-495 Electric Start Engines/15 amp Regulated Battery Charging System.
- Page 73 Section 8 Electrical System and Components Rectifier-Regulator AC Leads 15 Amp Stator Figure 8-14. 15 amp Stator and Rectifier-Regulator. DC Volt Meter Rectifier-Regulator Flywheel Stator Ammeter Battery Figure 8-15. Proper Connection to Test 15 amp Charging System. 8.15...
- Page 74 Section 8 Electrical System and Components Troubleshooting Guide 15 amp Regulated Battery Charging System. NOTE: Zero ohmmeters on each scale to ensure accurate readings. Voltage tests should be made with engine running at 3600 RPM - no load. The battery must be fully charged. Problem 1.
- Page 75 Electric Starters Some engines in this series use inertia drive starting motors while others use solenoid shift type. The inertia drive types are covered first and the solenoid shift type is covered starting on page 8.23. Starting Motor Precautions NOTE: Do not crank the engine continuously for more than 10 seconds at a time.
- Page 76 4. Clean the splines on drive shaft thoroughly with solvent. Dry the splines thoroughly. 5. Apply a small amount of Kohler electric starter drive lubricant, Part No. 52 357 01-S, to the splines. The use of other lubricants may cause the drive pinion to stick or bend.
- Page 77 If the splines are dirty, clean them with solvent. 7. The splines should have a light film of lubricant. Relubricate as necessary with Kohler bendix starter lubricant (Part No. 52 357 01-S). Reinstall or replace the drive components, assembling them in the same sequence as they were removed.
- Page 78 Section 8 Electrical System and Components Retaining Ring Installation 1. Position the retaining ring in the groove in one of the inner halves. Assemble the other half over the top and slide on the outer collar. 2. Be certain the drive components are installed in correct sequence onto the armature shaft.
- Page 79 NOTE: Use a brush holder tool to keep the brushes in the pockets. A brush holder tool can easily be made from thin sheet metal See Figure 8-22. Stud Terminal with Positive (+) Brushes Negative (-) Brush Self-Tapping Screw Negative (-) Brush Figure 8-21.
- Page 80 Figure 8-25. 110 Volt UL Approved Electric Starter. 8.22 6. Install the thru bolts and tighten securely. 7. Lubricate the drive shaft with Kohler bendix starter drive lubricant (Part No. 52 357 01-S). Install the drive components following the instructions for servicing the drive.
- Page 81 Solenoid Shift Electric Starters The following subsection covers the solenoid shift electric starters. Much of the information in the preceding subsection relates to these starters, therefore it is not repeated here. Refer to Figure 8-26 for disassembly and assembly procedure of the UTE solenoid shift starter. The Nippendenso solenoid shift starter is covered starting on page 8.24.
- Page 82 Replacing brushes in the solenoid shift starters is exactly the same procedure as explained for the UTE starter in the previous subsection. UTE Starter Service Clean drive lever and armature shaft. Apply Kohler electric starter drive lubricant (52 357 02-S) to lever and shaft. UTE Starter Reassembly 1.
- Page 83 Reinstall the springs. Snap the insulator into the brush holder to keep the springs from popping out. Starter Service Clean drive lever and armature shaft. Apply Kohler electric starter drive lubricant (52 357 02-S) to lever and shaft. Section 8...
- Page 84 Section 8 Electrical System and Components Starter Reassembly 1. Install the drive pinion onto the armature shaft. 2. Slide the stop collar onto the armature shaft below the retaining ring groove. Make sure the recessed side of the stop collar is ‘‘up’’. 3.
- Page 85 8. Position the insulator over the brushes and springs. Hold it firmly in place so the springs do not come out. See Figure 8-31. Figure 8-31. Holding Insulator in Place. 9. Stand the armature/drive end cap assembly on end so the commutator end is ‘‘up’’. Place brush/ armature installation tool over the end of the armature shaft until it rests against the commutator.
- Page 86 Section 8 Electrical System and Components Figure 8-35. Installing Thru Bolts. 14. Connect the braided (brush) lead to lower main solenoid terminal and secure with the hex. flange nut. See Figure 8-36. Figure 8-36. Connecting Brush Lead. Delco-Remy Starters Figure 8-37. 8.28 Starter Disassembly 1.
- Page 87 3. Lift and unhook the plunger assembly from the drive lever. Remove the gasket from the recess in the housing. See Figure 8-40. Figure 8-40. Removing Plunger. 4. Remove the two thru (larger) bolts. See Figure 8-41. Figure 8-41. Removing Thru Bolts. 5.
- Page 88 Section 8 Electrical System and Components 8. Take out the drive lever and pull the armature out from the drive end cap. See Figure 8-45. 9. Remove the thrust washer from the armature shaft. See Figure 8-45. Figure 8-45. Armature and Lever Removed. 10.
- Page 89 Armature Washer Figure 8-48. Delco-Remy Solenoid Shift Starter. Inspection Drive Pinion Check and inspect the following areas: a. The pinion teeth for abnormal wear or damage. b. The O.D. surface between the pinion and the clutch mechanism for nicks or burrs which could cause seal damage.
- Page 90 8.32 Brush Replacement The brushes and springs are serviced as a set (4). Use Brush and Spring Kit, Kohler Part No. 25 221 01-S, if replacement is necessary. 1. Perform steps 1-5 in “Starter Disassembly.” 2. Remove the two screws securing the brush holder assembly to the end cap (plate).
- Page 91 Starter Service Clean the drive lever and armature shaft. Apply Kohler electric starter drive lubricant, Part No. 52 357 02-S (Versilube G322L or Mobil Temp SHC 32), to the lever and shaft. Clean and check the other starter parts for wear or damage as required.
- Page 92 Section 8 Electrical System and Components 7. Install the backup washer, followed by the rubber grommet, into the matching recess of the drive end cap. The molded recesses in the grommet should be “out”, matching and aligned with those in the end cap. See Figure 8-57. Figure 8-57.
- Page 93 Figure 8-61. Removing Retaining Caps. b. Position each of the brushes back in their slots so they are flush with the I.D. of the brush holder assembly. Insert Brush Installation Tool No. KO3226-1 (w/extension), or use the tube described above from a prior brush installation, through the brush holder assembly, so the holes in the metal mounting clips are “up/out.”...
- Page 94 Section 8 Electrical System and Components Figure 8-65. Torquing Brush Holder Screws. 13. Hook the plunger behind the upper end of the drive lever, and install the spring into the solenoid. Insert the three mounting screws through the holes in the drive end cap. Use these to hold the solenoid gasket in position, then mount the solenoid.
- Page 95 4. Remove and discard the oil filter. Remove Oil Sentry (on models so equipped) 1. Disconnect the leads from the pressure switch. 2. Unthread and remove the pressure switch from the oil filter adapter. See Figure 9-1. CV11-16 Section 9 CV460-465, CV490-495 Disassembly ™ Pressure Switch...
- Page 96 Section 9 Disassembly Spark Plug Lead Oil Drain Optional Oil Sentry Oil Filter Drain Plug Figure 9-1. Removing Spark Plug Lead, Oil Drains, Oil Filter, and Oil Sentry ™ Switch (oil filter drain plug not on all models). Remove Muffler 1.
- Page 97 Hex. Flange Screws Electric Starter Stud Terminal Figure 9-5. Removing Bendix Drive Starter. Remove Air Cleaner 1. Loosen the knob and remove the air cleaner cover. See Figure 9-6. 2. Remove the wing nut, air cleaner element, and precleaner (if so equipped). 3.
- Page 98 Section 9 Disassembly 3. Remove the two hex. flange screws and speed control bracket. See Figure 9-9. Speed Control Choke Linkage Bracket Choke Control Lever Hex. Flange Nut Governor Lever Figure 9-9. Removing Speed Control Bracket. 4. Disconnect the choke linkage from the choke control lever of speed control bracket.
- Page 99 Remove Rectifier-Regulator (If Required) 1. Remove the connector from the rectifier-regulator. See Figure 9-13. 2. Remove the two screws securing the rectifier- regulator and individual ground lead (if used). Hex. Flange Screws Rectifier- Regulator Ground Lead Connector Figure 9-13. Removing Rectifier-Regulator (not on all models).
- Page 100 Section 9 Disassembly 3. Remove the hex. flange nut on stud securing the carburetor side baffle,* if not removed previously during carburetor removal. Remove the screws attaching the cylinder head baffle. See Figure 9-18. * If so equipped. Cylinder Hex. Flange Head Baffle Nut or Screw Figure 9-18.
- Page 101 Fuel Line Hex. Flange Screw and Clip Figure 9-22. Removing Fuel Line (not on all models). Remove Valve Cover and Cylinder Head 1. Remove the remaining hex. flange mounting screws and any loose spacers (stamped steel covers) from the valve cover. Note their placement/ orientation.
- Page 102 Section 9 Disassembly Rocker Shaft Hex. Flange Screw Breather Reed Retainer and Breather Reed Figure 9-26. Removing Spark Plug, Breather, and Rocker Arms (Rocker Bridge Head). 2. Remove the hex. flange screw, breather reed retainer, and breather reed. 3. Rocker Bridge Heads - Figure 9-26 a.
- Page 103 Figure 9-28. Removing Valves with Valve Spring Compressor. Figure 9-29. Removing Valves. (Bridge Type Head.) Remove Drive Cup, Grass Screen, Flywheel and Fan NOTE: Always use a flywheel strap wrench or flywheel holding tool (see Section 2) to hold the flywheel when loosening or tightening the flywheel retaining screw.
- Page 104 Section 9 Disassembly 1. Check if the extra retaining clips are present. If so, cut the clips, so they can be removed and discard. Mark the tops of the knobs where they were located. Order 3 new clips, Part No. 24 018 03-S, for installation during reassembly.
- Page 105 Oil Pan Figure 9-36. Removing Oil Pan. 3. Locate the splitting tabs on the oil pan and crankcase. Insert the drive end of a 3/8" breaker bar between the splitting tabs and rotate the handle to break the RTV seal between the crankcases and oil pan.
- Page 106 Section 9 Disassembly Figure 9-41. Later Style - Oil Pressure Relief Valve. NOTE: Later one-piece relief valves (Figure 9-41) are staked in place and do not require removal, unless replacement is necessary. 4. Remove the three hex. flange screws, oil pump cover, O-Ring, and oil pump rotors.
- Page 107 Remove Balance Shaft 1. Remove the balance shaft from the crankcase. See Figure 9-45. On CV460-495 engines rotate the crankshaft clockwise so the timing marks are one to two teeth past being aligned. See Figure 9-46. This will permit the counterweights of the two shafts to clear.
- Page 108 Section 9 Disassembly Remove Piston Rings 1. Remove the top and center compression rings using a ring expander tool. See Figure 9-49. Piston Ring Expander Figure 9-49. Removing Piston Rings. 2. Remove the oil control ring rails, then remove the spacer.
- Page 109 Section 9 Disassembly Regulating Pin Governor Gear Figure 9-53. Removing Governor Gear. 9.15...
- Page 110 Section 9 Disassembly 9.16...
-
Page 111: Section 10. Inspection And Reconditioning
3. ACR eliminates the need for a spark retard/ advance mechanism. A spark retard/advance mechanism would be required on engines without ACR to prevent the ‘‘kickback’’ that would occur during starting. ACR eliminates this ‘‘kickback’’ making manual starting safer. CV11-16 Section 10 CV460-465, CV490-495 10.1... - Page 112 The connecting rod journal can be ground one size under. When grinding a crankshaft on a CV11-16, CV460- 465, CV490-495 engine, grinding stone deposits can get caught in the oil passages, which could cause severe engine damage.
- Page 113 Self-Tapping Screw Flat Washer 1 2 3 4 5 6 7 8 1 2 3 4 5 6 7 8 1 2 3 4 5 6 7 8 1 2 3 4 5 6 7 8 Crankshaft Figure 10-2. Removing Plug. Crankcase Inspection and Service Check all gasket surfaces to make sure they are free...
- Page 114 Replace the flywheel, the crankshaft, and the key if flywheel key is sheared or the keyway is damaged. Inspect the ring gear for cracks or damage. Kohler does not offer replacement ring gears. Replace the flywheel if the ring gear is damaged.
- Page 115 Cylinder Head and Valves Inspection and Service Carefully inspect the valve mechanism parts. Inspect the valve springs and related hardware for excessive wear or distortion. Check the valves and valve seat area or inserts for evidence of deep pitting, cracks, or distortion.
- Page 116 Section 10 Inspection and Reconditioning Normal: Even after long hours of operation a valve can be reconditioned and reused if the face and margin are in good shape. If a valve is worn to where the margin is less than 1/32" do not reuse it. The valve shown was in operation for almost 1000 hours under controlled test conditions.
- Page 117 Excessive Combustion Temperatures: The white deposits seen here indicate very high combustion temperatures, usually due to a lean fuel mixture. Gum: Gum deposits usually result from using stale gasoline. This condition is often noted in applications where fuel is not treated with stabilizer or drained out of tank during the off season.
- Page 118 Section 10 Inspection and Reconditioning Valve Guides If a valve guide is worn beyond specifications, it will not guide the valve in a straight line. This may result in burnt valve faces or seats, loss of compression, and excessive oil consumption. To check valve guide-to-valve stem clearance, thoroughly clean the valve guide and, using a split-ball gauge, measure the inside diameter.
- Page 119 Ring failure is usually indicated by excessive oil consumption and blue exhaust smoke. When rings fail, oil is allowed to enter the combustion chamber where it is burned along with the fuel. High oil consumption can also occur when the piston ring end gap is incorrect, because the ring cannot properly conform to the cylinder wall.
- Page 120 Section 10 Inspection and Reconditioning Some important points to remember when servicing piston rings: 1. If the cylinder bore does not need reboring and if the old piston is within wear limits and free of score or scuff marks, the old piston may be reused.
- Page 121 1. Oil Control Ring (Bottom Groove): Install the expander and then the rails. Make sure the ends of the expander are not overlapped. 2. Compression Ring (Center Groove): Install the center ring using a piston ring installation tool. Make sure the ‘‘pip’’ mark is up and the PINK dykem stripe (if present) is to the left of the end gap.
- Page 122 Section 10 Inspection and Reconditioning Procedure to Install Governor Shaft: 1. Install new pin by pressing or lightly tapping into crankcase. It must be installed so that it protrudes 1.289 plus or minus .004 in. above the crankcase boss. See Figure 10-13. 1.289 ±...
-
Page 123: Section 11. Reassembly
1. Install the thrust washer to governor gear shaft. 2. Position the regulating pin to governor gear/ flyweights as shown in Figure 11-1. Slide the governor gear/regulating pin over the governor gear shaft. Figure 11-1. Installing Governor Gear. Section 11 CV11-16 Reassembly CV460-465, CV490-495 Regulating Governor Gear Thrust Washer 11.1... -
Page 124: Install Piston To Connecting Rod
Section 11 Reassembly 3. Using the KO1030 oil seal installer, install a new governor cross shaft oil seal into the crankcase. See Figure 11-2. Cross Shaft Oil Seal Figure 11-2. Cross Shaft Oil Seal. 4. Install smaller plain washer to the cross shaft and insert the cross shaft (from inside) through the crankcase and oil seal. -
Page 125: Install Piston And Connecting Rod
On CV460-495 models the offset of the connecting rod and cap must be oriented to the left, with the part number up. The arrow on the piston must point away from the part number. See Figure 11-6 and 11-7. Figure 11-6. Connecting Rod Configuration to Piston with the Part Number "up". -
Page 126: Install Balance Shaft
Section 11 Reassembly 4. Lubricate the crankshaft journal and connecting rod bearing surfaces with engine oil. Install the rod cap to connecting rod. 5. Three different types of connecting rod bolts have been used in production and each has a different torque value. - Page 127 Installing Camshaft 1. Lubricate the camshaft lobes and bearing surfaces with engine oil. 2. Align the timing marks on the camshaft gear and the smaller crankshaft gear. Lower the camshaft into the bearing surface in crankcase. Make sure the camshaft gear and smaller gear on crankshaft mesh and the timing marks are aligned.
- Page 128 Section 11 Reassembly 3. Push bracket down until it seats against top of relief valve body. Secure with hex. flange screw. See Figure 11-16. Hex. Flange Screw Figure 11-16. Installing Oil Pressure Relief Valve Bracket. Later (One-Piece) Style Oil Pressure Relief Valve 1.
-
Page 129: Install Oil Pan To Crankcase
Figure 11-20. Installing Oil Pickup Components. Install Oil Pan to Crankcase RTV silicone sealant is used as a gasket between the oil pan and crankcase. Refer to page 2.1 for the approved sealant. NOTE: Always use fresh sealant. Using outdated sealant can result in leakage. -
Page 130: Install Oil Pump
Section 11 Reassembly Install Oil Pump 1. Lubricate the oil pump cavity and oil pump rotors with engine oil. Install the outer and inner oil pump rotors. See Figure 11-23. Figure 11-23. Installing Oil Pump Gears and O-Ring. 2. Install the O-Ring in the groove in the oil pan. 3. -
Page 131: Install Fuel Line
Oil Seal KO1036 Handle and KO1027 Driver Figure 11-25. Installing Oil Seals. Install Stator and Wiring Harness 1. Push the stator leads through the hole to the outside of the crankcase. See Figure 11-26. Stator Kill Lead Figure 11-26. Installing Stator. 2. - Page 132 Section 11 Reassembly 2. Reattach the fan to the flywheel, using the spacers and hex. flange screws, or shoulder screws. See Figure 11-28. Torque the hex. flange screws to 9.9 N·m (88 in. lb.). On electric start models, with the domed fan, proceed through step 4 before reattaching the fan.
- Page 133 Figure 11-32. Torquing Flywheel Fastener (Electric Start Models). 5. Install the grass screen onto the fan assembly (electric start models). See Figure 11-33. If the engine originally had extra retainers on three of the snap knobs, you were instructed to mark those knobs during the disassembly procedure.
- Page 134 Section 11 Reassembly Reassemble Cylinder Head Refer to Figure 11-37 for cylinder head differences. Assemble the components accordingly, based on head configuration involved. Rocker Bridge Rocker Shaft Rocker Bridge Bridge Screw Rocker Non-Adjustable Valve Lash Round Pivot Cylindrical Pivot Figure 11-37. Cylinder Head Valve Train Differences. 1.
- Page 135 Hex. Cap Screws Exhaust Valve Intake Valve Rotator Spring Seat Figure 11-38. Installing Rocker Bridge and Valves. Keepers Valve Spring Cap Figure 11-39. Installing Valve Keepers. 4. Rocker Bridge Heads–Figure 11-40 a. Position the rocker arms over the valve stems and rocker arm bridge.
-
Page 136: Install Cylinder Head
Section 11 Reassembly b. Start the set screw into the nut, but only a few turns or it may hamper lash adjustment. Start the adjustment nut with the set screw on the end of each stud. Figure 11-42. Installing Adjustment Nut. 5. - Page 137 Heads with Separate Pivots/Rocker Arms– Figure 11-37 • Non-Adjustable Valve Lash Configuration a. Seat the push rods into sockets under the end of the rocker arm and align the rocker arms over the valve stems. Hold the rocker arm in the position and torque the screws to 11.3 N·m (100 in.
-
Page 138: Install Ignition Module
Section 11 Reassembly Install Ignition Module 1. Rotate the flywheel so the magnet is away from the ignition module bosses. Install the ignition module to the bosses on crankcase, using the hex. flange screws. The directional arrow (on some modules) denoting proper flywheel rotation must be up. -
Page 139: Install Valve Cover And Muffler Bracket
Intake Studs Gasket Heat Deflector Silver Screw for Ground Lead Figure 11-51. Installing Heat Deflector and Carburetor Side Baffle (not on all models). 4. Install the cylinder head baffle and secure with the two hex. flange screws. Later production models use one screw and one hex. -
Page 140: Install Extended Oil Fill Tube
Section 11 Reassembly 2. Apply a 1/16" bead of RTV sealant to the cylinder head as shown in Figure 11-55. NOTE: To ensure proper adhesion of the sealant to both sealing surfaces, perform Step 3 immediately (5 minutes maximum) after application of RTV sealant. - Page 141 Mounting Screws and Washers Ground Lead Figure 11-59. Installing Rectifier-Regulator (not on all models). Install Fuel Pump (If So Equipped) 1. Install the rubber line and two hose clamps to the fuel pump end of the metal fuel line. Secure the rubber fuel line to the steel fuel line with one of the clamps.
- Page 142 Section 11 Reassembly 4. Attach the ground lead from carburetor fuel solenoid (if applicable) to the silver screw and lock washer on the cylinder baffle. See Figure 11-63. Grounding Lock Washer Ground Lead Figure 11-63. Attaching the Ground Lead. 5. Install the governor lever onto the cross shaft, but DO NOT tighten at this time.
- Page 143 b. Grasp the cross shaft with a pliers and turn the shaft couterclockwise as far as it will go, then tighten the hex. nut securely. See Figure 11-66. Governor Shaft Figure 11-66. Adjusting the Governor. Original Design Figure 11-67. Air Cleaner Details. 5.
-
Page 144: Install Electric Starter
Section 11 Reassembly 6. Install the air cleaner cover and tighten the knob securely. See Figure 11-68. Knob Air Cleaner Cover Figure 11-68. Installing Air Cleaner Cover. Install Electric Starter Electric Starter (Bendix Drive or Solenoid Shift) 1. Install the starter and secure with the two hex. flange screws. - Page 145 Hex. Flange Screws Muffler Muffler Bracket Figure 11-72. Installing Muffler. Prepare the Engine for Operation The engine is now completely reassembled. Before starting or operating the engine, be sure to do the following: 1. Make sure all hardware is tightened securely. 2.
- Page 146 ERVICE ANUAL COMMAND CV11-16, CV460-465, CV490-495 ERTICAL RANKSHAFT...
- Page 147 ENGINE DIVISION, KOHLER CO., KOHLER, WISCONSIN 53044 FOR SALES AND SERVICE INFORMATION IN U.S. AND CANADA, CALL 1-800-544-2444 FORM NO.: TP-2339-D ISSUED: 3/89 REVISED: 7/02 MAILED: 8/02 LITHO IN U.S.A.