Table of Contents
Advertisement
Quick Links
Advertisement
Table of Contents

Related Manuals for Canon EOS 90D


Summary of Contents for Canon EOS 90D
- Page 213 Advanced User Guide...
-
Page 214: Introduction
After shooting, play images back and check whether they have been properly recorded. If the camera or memory card is faulty and the images cannot be recorded or downloaded to a computer, Canon cannot be held liable for any loss or inconvenience caused. -
Page 215: Item Check List
If you purchased a Lens Kit, check that the lenses are included. Be careful not to lose any of the above items. When you need Lens Instruction Manuals, download them from the Canon website ( = 4). The Lens Instruction Manuals (PDF fi les) are for lenses sold individually. Note that when purchasing the Lens Kit, some of the accessories included with the lens may not match those listed in the Lens Instruction Manual. -
Page 216: Instruction Manuals
Canon website to a computer or other device. Downloading the Advanced User Guide/Instruction Manuals The Advanced User Guide and Instruction Manuals for lenses and software (PDF fi les) can be downloaded from the Canon website to a computer or other device. Download site ... - Page 217 The Advanced User Guide and Instruction Manuals for lenses and software (PDF fi les) can be downloaded to a smartphone or tablet using the QR code. www.canon.com/icpd A software app is required to read the QR code. Select your country or region of residence, then download the Advanced User Guide/Instruction Manuals.
-
Page 218: Quick Start Guide
Quick Start Guide Insert the battery ( = 47). Upon purchase, charge the battery to start using ( = 44). Insert the card ( = 48). With the card’s label facing toward the back of the camera, insert it into the card slot. - Page 219 Quick Start Guide Flip out the screen ( = 51). When the date/time/zone setting screen is displayed, see = 516. Focus on the subject ( = 57). Look through the viewfi nder and center the subject on the screen. Press the shutter button halfway, ...
-
Page 220: About This Manual
About This Manual Icons in this Manual < 6 > : Indicates the Main dial. < 5 > : Indicates the Quick control dial. < j > < 9 > : Indicates Multi-controller 1 and 2. < W / X / Y / Z > : Indicates the direction to press the Multi-controller. - Page 221 About This Manual Basic Assumptions for Operational Instructions, Sample Photos Before following any instructions, make sure the power switch is set to < 1 > and the Multi-function lock feature is off ( = 52, = 60). It is assumed that all the menu settings and Custom Functions are set to ...
-
Page 222: Compatible Cards
Compatible Cards The following cards can be used with the camera regardless of capacity. If the card is new or was previously formatted (initialized) by another camera or computer, format the card with this camera ( = 511). SD/SDHC/SDXC memory cards ... -
Page 223: Chapters
Chapters Introduction Preparation and Basic Operations Basic Zone Creative Zone AF, Drive, and Exposure Settings Flash Photography Shooting Playback Wireless Features Set-up Custom Functions / My Menu Reference... -
Page 224: Contents
Contents Introduction Item Check List ..................3 Instruction Manuals ................4 Quick Start Guide ...................6 About This Manual .................8 Compatible Cards ................10 Chapters....................11 Contents ....................12 Index to Features .................21 Safety Instructions ................25 Handling Precautions ................28 Part Names ..................31 Preparation and Basic Operations Charging the Battery ................44 Inserting/Removing the Battery ............47 Inserting and Removing the Card ............48... - Page 225 Contents Basic Zone Fully Automatic Shooting (Scene Intelligent Auto) .......76 Special Scene Mode ................84 Shooting Portraits ................86 Shooting Group Photos ................87 Shooting Landscapes ................88 Shooting Moving Subjects ..............89 Photographing Children ...............90 Panning ....................91 Shooting Close-ups ................93 Shooting Food ..................94 Shooting Candlelight Portraits .............95 Shooting Night Portraits (With a Tripod) ..........96 Handheld Shooting of Night Scenes ............97 Shooting Backlit Scenes ..............98...
- Page 226 Contents AF, Drive, and Exposure Settings Selecting the AF Operation ..............124 Selecting the AF Area and AF Point (Viewfi nder Shooting)....128 Selecting the AF Method (Live View Shooting) ........135 Manual Focus..................147 Selecting the Drive Mode ..............150 Using the Self-Timer ................153 Remote Control Shooting ..............155 Eyepiece Cover ..................157 Selecting the Metering Mode .............158...
- Page 227 Contents Image Review Time................204 Card Reminder ...................205 Correction of Lens Aberrations due to Optical Characteristics ..206 Auto Exposure Bracketing (AEB) ............211 ISO Speed Settings for Still Photos ...........213 Auto Correction of Brightness and Contrast (Auto Lighting Optimizer) ..............218 Highlight Tone Priority Settings ............219 Metering Timer (Live View Shooting) ..........220 Exposure Simulation (Live View Shooting) ........221 White Balance Settings ..............222...
- Page 228 Contents Continuous AF (Live View Shooting) ..........265 Lens Electronic MF Settings ..............266 AF-Assist Beam Settings ..............267 General Still Photo Shooting Cautions ..........269 Movie Recording Tab Menus: Movie Recording ............274 Movie Recording ................277 HDR Movie Recording ...............284 Movie Recording With Filter Eff ects Applied ........285 Movie Recording Quality Settings ............288 Setting the Sound Recording .............295 Movie Digital IS ..................298...
- Page 229 Contents Editing a Movie’s First and Last Scenes ..........340 Frame Extraction from 4K Movies or 4K Time-Lapse Movies ....342 Playback on a TV Set .................344 Protecting images ................346 Image Rotation ...................349 Erasing Images ..................350 Digital Print Order Format (DPOF) .............354 Specifying Images for a Photobook ...........358 Creative Filter Eff...
- Page 230 Contents Wireless Features Tab Menus: Wireless Tab ..............396 Selection of Wi-Fi/Bluetooth Connection ...........397 Connecting to a Smartphone .............399 Connecting to a Computer via Wi-Fi ..........426 Connecting to a Printer via Wi-Fi ............434 Sending Images to a Web Service .............444 Wi-Fi Connection via Access Points ..........458 Connecting to a Wireless Remote Control .........464 Reconnecting via Wi-Fi ..............467 Registering Multiple Connection Settings ..........469...
- Page 231 Contents Set-up Tab Menus: Set-up ................502 Creating and Selecting a Folder ............505 File Numbering Methods ..............507 The Auto Rotation of Vertical Images ..........510 Formatting Memory Cards ..............511 Auto Power Off ...................513 Adjusting the Screen Brightness ............514 Turning the Screen Off /On ..............515 Setting the Date, Time, and Time Zone ..........516 Interface Language ................519 Video System ..................520...
- Page 232 Contents Multi-Function Lock ................545 Registering Custom Shooting Modes ..........546 Restoring Camera Defaults ..............547 Copyright Information .................548 Other Information ................550 Custom Functions / My Menu Tab Menus: Customization ..............552 Setting Custom Functions ..............553 Custom Functions ................554 Custom Function Setting Items ............556 Fine Adjustment of AF Position (AF Microadjustment) .......575 Clearing Custom Function Settings ...........581 Tab Menus: My Menu .................582...
-
Page 233: Index To Features
Index to Features Power Screen Charging the battery ( = 44) Vari-angle ( = 51) Battery level ( = 53) Touch control ( = 70) Power saving ( = 513) Brightness ( = 514) Checking battery information Help ( = 534) ... - Page 234 Index to Features Multiple exposures ( = 245) Image Quality HDR mode ( = 251) Image quality ( = 199) Focus bracketing ( = 255) Still image aspect ratio ( = 202) Interval timer ( = 258) ...
- Page 235 Index to Features Movie Recording Playback Autoexposure recording ( = 277) Image review time ( = 204) Manual exposure recording Single-image display ( = 332) ( = 279) Touch playback ( = 335) HDR movie ( = 284) ...
- Page 236 Index to Features Image Editing Wireless Features Creative fi lters ( = 361) Connect to smartphones ( = 399) RAW image processing ( = 364) Auto send images to smartphones ( = 412) Red-eye correction ( = 373) ...
-
Page 237: Safety Instructions
Safety Instructions Be sure to read these instructions in order to operate the product safely. Follow these instructions to prevent injury or harm to the operator of the product or others. WARNING: Denotes the risk of serious injury or death. Keep the product out of the reach of young children. - Page 238 Safety Instructions If a battery/battery pack leaks and the material contacts your skin or clothing, fl ush the exposed area thoroughly with running water. In case of eye contact, fl ush thoroughly with copious amounts of clean running water and seek immediate medical assistance.
- Page 239 Safety Instructions CAUTION: Denotes the risk of injury. Do not fi re the fl ash near the eyes. It may hurt the eyes. Do not look at the screen or through the viewfi nder for prolonged periods of time. This may induce symptoms similar to motion sickness. In such a case, stop using the product immediately and rest for a while before resuming use.
-
Page 240: Handling Precautions
If you accidentally drop the camera into water or are concerned that moisture (water), dirt, dust, or salt may have gotten inside it, promptly consult the nearest Canon Service Center. Never leave the camera near anything having a strong magnetic fi eld ... - Page 241 Do not use cleaners that contain organic solvents to clean the camera body or lens. For stubborn dirt, take the camera to the nearest Canon Service Center. Do not touch the camera’s electrical contacts with your fi ngers. This is ...
- Page 242 Handling Precautions Screen and LCD Panel Although the screen is manufactured with very high precision technology with over 99.99% eff ective pixels, 0.01% or fewer of the pixels may be dead, and there may also be spots of black, red, or other colors. This is not a malfunction.
-
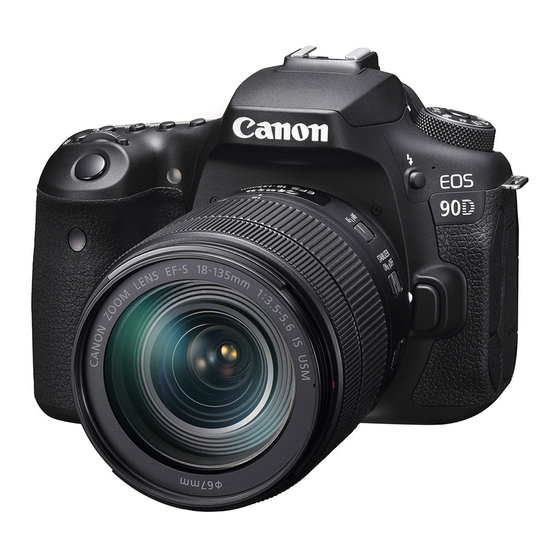
Page 243: Part Names
Part Names (17) (18) (19) (20) (21) (22) (23) (24) (25) (26) (27) (28) (29) (10) (11) (12) (30) (13) (14) (15) (16) LCD panel (16) Lens lock pin < i > ISO speed setting button (17) < R > Drive mode selection button <... - Page 244 Part Names (10) (12) (13) (14) (15) (16) (11) Eyecup Viewfi nder eyepiece Speaker (10) < Q > Quick Control button < B > Info button (11) < M > Menu button Power switch (12) < Y > External microphone IN terminal Terminal cover (13) <...
- Page 245 Part Names (10) (11) (12) (13) (14) (15) (16) (17) (18) (19) (20) Accessory positioning hole (11) Access lamp Screen (12) Strap mount Serial number (13) < j > Multi-controller 1 Tripod socket (14) Card slot cover < 0 > Setting button (15) Card slot <...
- Page 246 Part Names Viewfi nder Information Display (10) (11) (12) (13) (14) (15) (16) (17) Zone AF (Manual selection of (10) Large Zone AF (Manual selection zone) of zone) 1-point AF (Manual selection) (11) Automatic selection AF Spot AF (Manual selection) (12) <...
- Page 247 Part Names (18) (26) (19) (27) (20) (21) (28) (22) (29) (23) (30) (24) (31) (25) (32) (18) Aperture value (25) < d > FE lock FEB in-progress (19) AF point selection < e > High-speed sync AF, SEL [ ], SEL AF) (26) <...
- Page 248 Part Names LCD Panel (10) (11) Drive mode AF point selection AF, SEL [ ], SEL AF) < H > Bulb timer/Interval timer < A > Highlight tone priority AF operation < i > ISO speed Shutter speed ISO speed Bulb (buLb) Metering mode FE lock (FEL)
- Page 249 Part Names (14) (15) (12) (16) (13) (17) (18) (12) < O > Exposure compensation (13) Exposure level indicator Exposure compensation amount AEB range Red-eye reduction lamp on indicator (14) < a > Time-lapse movies (15) < l > Wi-Fi function (16) Battery level (17) <...
- Page 250 Part Names Mode Dial Turn the Mode dial while holding down the lock-release button in the center. (1) Basic Zone All you do is press the shutter button. The camera sets everything to suit the subject or scene for shooting. : Scene Intelligent Auto ( = 76) 8 : Special scene ( = 84) 2 Portrait ( = 86)
- Page 251 Part Names (2) Creative Zone These modes give you more control for shooting various subjects as desired. Program AE ( = 110) s Shutter-priority AE ( = 112) f Aperture-priority AE ( = 114) a Manual exposure ( = 117) Bulb ( = 119) (3) Custom shooting modes You can assign <...
- Page 252 Part Names Battery Charger LC-E6 Charger for Battery Pack LP-E6N/LP-E6 ( = 44). Battery pack slot Charge lamp Power plug Battery Charger LC-E6E Charger for Battery Pack LP-E6N/LP-E6 ( = 44). Charge lamp Battery pack slot Power cord Power cord socket...
- Page 253 Part Names Attaching the Strap Pass the end of the strap through the camera’s strap mount eyelet from the bottom. Then pass it through the strap’s buckle as shown in the illustration. Pull the strap to take up any slack and make sure the strap will not loosen from the buckle.
-
Page 255: Preparation And Basic Operations
Preparation and Basic Operations This chapter describes preparatory steps before you start shooting and the basic camera operations. -
Page 256: Charging The Battery
Charging the Battery Detach the protective cover provided with the battery. Insert the battery in the charger. Do the opposite to remove the battery. LC-E6 Recharge the battery. For LC-E6 As shown by the arrow, fl ip out the ... - Page 257 Charging the Battery Charge Lamp Charge Level Color Display 0–49% Blinks once per second 50–74% Blinks twice per second Orange Blinks three times per 75% or higher second Fully charged Green Turned on It takes approx. 2 hr. and 30 min. to fully recharge a completely ...
- Page 258 Charging the Battery Upon purchase, the battery is not fully charged. Charge the battery before use. Recharge the battery on the day before or on the day it is to be used. Even during storage, a charged battery will gradually drain and lose its capacity.
-
Page 259: Inserting/Removing The Battery
Inserting/Removing the Battery Insert a fully-charged Battery Pack LP-E6N (or LP-E6) into the camera. Insertion Slide the battery compartment cover lock and open the cover. Insert the battery. Insert the end with the electrical contacts. Insert the battery until it locks in place. ... -
Page 260: Inserting And Removing The Card
Inserting and Removing the Card The captured images are recorded onto the card. Make sure the card’s write-protect switch (1) is set upward to enable writing and erasing. Insertion Slide the cover to open it. Insert the card. As shown by the illustration, face the ... - Page 261 Inserting and Removing the Card Removal Open the cover. Set the power switch to < 2 >. Check that the access lamp (1) is off , then open the cover. If [Saving...] is displayed on the screen, close the cover.
- Page 262 Inserting and Removing the Card When the access lamp is lit or blinking, it indicates that images are being written to, read from, or erased from the card, or data is being transferred. Do not open the card slot cover during this time. Also, never do any of the following while the access lamp is lit or blinking.
-
Page 263: Using The Screen
Using the Screen You can change the direction and angle of the screen. Flip out the screen. Rotate the screen. 180° When the screen is swung out, you can rotate it up, down, or over 180° to face 90° the subject. -
Page 264: Turning On The Power
Turning on the Power < 1 > The camera turns on. < 2 > The camera is turned off and does not function. Set the power switch to this position when not using the camera. Setting the Date, Time, and Time Zone If you turn on the power switch and the date/time/zone setting screen appears, see = 516 to set the date/time/zone. - Page 265 Turning on the Power z Battery Level Indicator When the power switch is set to < 1 >, the battery level will be indicated. Display 100–70 69–50 49–20 Level (%) Display 19–10 9–1 Level (%) Doing any of the following will exhaust the battery faster: •...
-
Page 266: Attaching And Detaching A Lens
Attaching and Detaching a Lens All EF and EF-S lenses can be used. The camera cannot be used with RF or EF-M lenses. Attaching a Lens Remove the caps. Remove the rear lens cap and the body cap by turning them as shown by the arrows. - Page 267 Attaching and Detaching a Lens Detaching the Lens While pressing the lens release button, turn the lens as shown by the arrow. Turn the lens until it stops, then detach Attach the rear lens cap to the detached lens.
-
Page 268: Basic Operations
Basic Operations Adjusting the Viewfi nder Turn the dioptric adjustment knob left or right so that the AF points in the viewfi nder look sharp. If the knob is diffi cult to turn, remove the eyecup ( = 157). If the camera’s dioptric adjustment still cannot provide a sharp viewfi... - Page 269 Basic Operations Shutter Button The shutter button has two steps. You can press the shutter button halfway. Then you can further press the shutter button completely. Pressing Halfway This activates autofocusing and the automatic exposure system that sets the shutter speed and aperture. The exposure setting (shutter speed and aperture) is displayed in the viewfi...
- Page 270 Basic Operations Mode Dial Turn the dial while holding down the lock-release button at the center of the dial. Use it to set the shooting mode. 6 Main Dial (1) After pressing a button, turn the < 6 > dial. When you press a button such as <AF>, <...
- Page 271 Basic Operations 5 Quick Control Dial (1) After pressing a button, turn the < 5 > dial. When you press a button such as <AF>, < i >, or < q >, the respective function remains selectable for approx. 6 sec. ( 9 ). During this time, you can turn the <...
- Page 272 Basic Operations j Multi-Controller 1/ 9 Multi-Controller 2 < j > is an eight-direction key with center button. To use it, press lightly with the tip of your thumb. < 9 > is an eight-direction key. Used for operations such as AF point ...
- Page 273 Basic Operations U LCD Panel Illumination You can illuminate the LCD panel by pressing the < U > button. Turn on ( 9 ) or off the LCD panel illumination by pressing the < U > button. During a bulb exposure, pressing the shutter button completely will turn off the LCD panel illumination.
- Page 274 Basic Operations B button Each press of the < B > button changes the information shown. The following sample screens are for still photos. When the Quick Control screen is displayed, you can press the < Q > button and confi gure shooting functions directly ( = 67).
-
Page 275: Menu Operations And Settings
Menu Operations and Settings < M > button < 9 > Multi-controller 2 < B > button < 0 > button Screen < 5 > Quick control dial < j > Multi-controller 1 < 6 > Main dial Basic Zone Modes Menu Screen * In Basic Zone modes, some tabs and menu items do not appear. - Page 276 Menu Operations and Settings Creative Zone Modes Menu Screen (10) Main tabs k : Wireless features Secondary tabs 5 : Set-up Menu items 8 : Custom Functions z : Shooting 9 : My Menu 3 : Playback (10) Menu settings Menu Setting Procedure Display the menu screen.
- Page 277 Menu Operations and Settings Select an item. Turn the < 5 > dial to select an item, then press < 0 >. Select an option. Turn the < 5 > dial to select an option. The current setting is indicated in blue. ...
- Page 278 Menu Operations and Settings Dimmed Menu Items Example: Highlight tone priority Dimmed menu items cannot be set. The menu item is dimmed if another function setting is overriding it. You can see the overriding function by selecting the dimmed menu item and pressing <...
-
Page 279: Quick Control
Quick Control You can directly select and set the settings displayed on the screen. In Viewfi nder Shooting Press the <Q> button (7). Select a setting item. Press the < W > < X > < Y > < Z > keys for ... - Page 280 Quick Control Select an option. Turn the < 6 > or < 5 > dial, or press the < Y > < Z > keys to change the setting. Some items are set by pressing a button after this. Press <...
- Page 281 Quick Control During Playback Press the <Q> button (7). Select a setting item. Press the < W > < X > keys for selection. Select an option. Turn the < 6 > or < 5 > dial, or press ...
-
Page 282: Touch-Screen Operation
Touch-Screen Operation Sample screen (Quick Control) Use your fi nger to tap on (touch briefl y and then remove your fi nger from) the screen. For example, when you tap on [ Q ], the Quick Control screen appears. By tapping on [ Q ], you can return to the preceding screen. -
Page 283: Viewing The Screen As You Shoot (Live View Shooting)
Viewing the Screen as You Shoot (Live View Shooting) Set the Live View shooting/Movie shooting switch to <A>. Display the Live View image. Press the < 0 > button. The Live View image will be displayed in the brightness level closely matching that of the actual image to be captured. - Page 284 Viewing the Screen as You Shoot (Live View Shooting) Shooting with the Touch Shutter Just by tapping on the screen, you can focus and take the picture automatically. Enable the Touch Shutter. Tap [ y ] on the screen’s bottom left. ...
- Page 285 Viewing the Screen as You Shoot (Live View Shooting) The camera shoots in single shooting mode regardless of the drive mode setting. Tapping the screen focuses with [One-Shot AF] regardless of the AF operation setting. Tapping on the screen in magnifi ed view will not focus or take the picture. Regardless of where you tap to shoot with the Fish-eye eff...
-
Page 287: Basic Zone
Basic Zone This chapter describes how to use the Basic Zone modes on the Mode dial for best results. With Basic Zone modes, all you do is point and shoot, and the camera sets everything automatically. -
Page 288: Fully Automatic Shooting (Scene Intelligent Auto)
Fully Automatic Shooting (Scene Intelligent Auto) < A > is a fully automatic mode. The camera analyzes the scene and sets the optimum settings automatically. It can also adjust focus automatically on either the still or moving subject by detecting the motion of the subject ( = 80). - Page 289 Fully Automatic Shooting (Scene Intelligent Auto) Focus on the subject. Press the shutter button halfway to focus. If < D > blinks, press the < D > button to raise the built-in fl ash. With viewfi nder shooting When achieving focus, the AF point that ...
- Page 290 Fully Automatic Shooting (Scene Intelligent Auto) Subject movement (whether subjects are still or moving) may not be detected correctly for some subject or shooting conditions. The < A > mode makes the colors look more impressive in nature, outdoor, and sunset scenes. If you do not obtain the desired color tones, change the mode to a Creative Zone mode ( = 39) and select a Picture Style other than <...
- Page 291 Fully Automatic Shooting (Scene Intelligent Auto) Pictures are too dark. Raise the built-in fl ash to enable automatic fl ash fi ring, in case subjects in daytime shots are backlit, or when shooting under low light. The built-in fl ash fi red repeatedly when raised while ...
- Page 292 Fully Automatic Shooting (Scene Intelligent Auto) Recomposing the Shot Depending on the scene, positioning the subject toward the left or right to include a balanced background will result in a picture with better perspective. Pressing the shutter button halfway to focus on a still subject will lock the focus on that subject.
- Page 293 Fully Automatic Shooting (Scene Intelligent Auto) Scene Icons The camera detects the scene type and sets everything automatically to suit the scene. In Live View shooting, an icon representing the type of scene detected appears in the upper left of the screen ( = 627).
- Page 294 Fully Automatic Shooting (Scene Intelligent Auto) Shooting with Eff ects Applied (Creative Assist) Press the <Q> button. In viewfi nder shooting, use the < Y > < Z > keys to select [Creative Assist], then press < 0 >. In Live View shooting, read the message ...
- Page 295 Fully Automatic Shooting (Scene Intelligent Auto) ] Background blur Adjust background blur. Choose higher values to make backgrounds sharper, or lower values to make them blurrier. [Auto] adjusts background blurring to match the brightness. Depending on lens brightness (f/ number), some positions may not be available.
-
Page 296: Special Scene Mode
Special Scene Mode The camera will automatically choose the appropriate settings when you select a shooting mode for your subject or scene. * < 8 > stands for Special Scene. Set the Mode dial to <8>. Press <0>. Select a shooting mode. Press the <... - Page 297 Special Scene Mode Available Shooting Modes in the 8 Mode Shooting Mode Page Shooting Mode Page 2 Portrait = 86 Close-up = 93 q Group Photo = 87 Food = 94 3 Landscape = 88 Candlelight = 95 5 Sports = 89 Night Portrait = 96...
-
Page 298: Shooting Portraits
Shooting Portraits The < 2 > (Portrait) mode blurs the background to make the human subject stand out. It also makes skin tones and hair look softer. Shooting Tips Select the location where the distance between the subject and the background is the farthest. The further the distance between the subject and background, the more blurred the background will look. -
Page 299: Shooting Group Photos
Shooting Group Photos Use the < q > (Group Photo) mode to shoot group photos. You can take a picture in which both the people in the front and people in the back are all in focus. Shooting Tips Use a wide-angle lens. ... -
Page 300: Shooting Landscapes
Shooting Landscapes Use the < 3 > (Landscape) mode for expansive scenery or to have everything in focus from near to far. For vivid blues and greens, and sharp and crisp images. Shooting Tips With a zoom lens, use the wide-angle end. ... -
Page 301: Shooting Moving Subjects
Shooting Moving Subjects Use the < 5 > (Sports) mode to shoot a moving subject, such as a running person or a moving vehicle. Shooting Tips Use a telephoto lens. Use of a telephoto lens is recommended to enable shooting from a distance. -
Page 302: Photographing Children
Photographing Children To photograph the children running around, use the < C > (Kids) mode. Skin tones will look healthy. Shooting Tips Track the subject with the Area AF frame. In viewfi nder shooting, aim the Area AF frame (1) over the subject and press the shutter button halfway to start focusing. -
Page 303: Panning
Panning If you want to take a picture with the feel of speed and a blurred motion eff ect on the subject’s background, use the < r > (Panning) mode. If you use a lens supporting the < r > mode, subject blur is detected, corrected, and reduced. - Page 304 To see which lenses support the < r > mode, refer to the Canon website. With lenses that support < r > mode, the camera automatically corrects subject blur and (based on the [Eff...
-
Page 305: Shooting Close-Ups
Shooting Close-ups When you want to shoot fl owers or small things up close, use the < 4 > (Close-up) mode. To make small things appear much larger, use a macro lens (sold separately). Shooting Tips Use a simple background. ... -
Page 306: Shooting Food
Shooting Food When you want to take pictures of food, use the < P > (Food) mode. The photo will look bright and appetizing. Also, depending on the light source, the reddish tinge will be suppressed in the pictures taken under tungsten lights, etc. -
Page 307: Shooting Candlelight Portraits
Shooting Candlelight Portraits When you want to photograph a person in candlelight, use the < y > (Candlelight) mode. The atmosphere of candlelight is refl ected in the color tones of the picture. Shooting Tips Use the center AF point to focus. ... -
Page 308: Shooting Night Portraits (With A Tripod)
Shooting Night Portraits (With a Tripod) When you want to photograph people at night and obtain a natural-looking night scene in the background, use the < 6 > (Night Portrait) mode. Note that shooting in this mode requires the built-in fl ash or an external Speedlite. -
Page 309: Handheld Shooting Of Night Scenes
Handheld Shooting of Night Scenes The < F > (Handheld Night Scene) mode enables you to shoot night scenes even while handholding the camera. In this shooting mode, four shots are taken consecutively for each picture, and the resulting one image with reduced camera shake is recorded. -
Page 310: Shooting Backlit Scenes
Shooting Backlit Scenes When shooting a scene having both the bright and dark areas, use the < G > (HDR Backlight Control) mode. When you take one picture in this mode, three consecutive shots are taken at diff erent exposures. This results in one image, with a wide tonal range, that has minimized the clipped shadows caused by backlighting. -
Page 311: Cautions For The
Cautions for the <SCN> Modes q : Group Photo The angle of view changes slightly, due to distortion correction. Depending on the shooting conditions, focus may not be attained for everyone from the front to the back of the image. 3 : Landscape The built-in fl...Modes - Page 312 Cautions for the <SCN> Modes r : Panning (continued) With a lens supporting the < r > mode, subject blur may not be corrected properly when shooting the following subjects or under the following shooting conditions. • Subjects with very low contrast. •...
- Page 313 Cautions for the <SCN> Modes 6 : Night Portrait Tell subjects to remain still for a moment after the fl ash fi res. During Live View shooting, achieving focus may be diffi cult when the face of the subject looks dark. In this case, set the lens’s focus mode switch to <MF> and focus manually.
- Page 314 Cautions for the <SCN> Modes F : Handheld Night Scene (continued) If you shoot a moving subject, the subject’s movement may leave afterimages or the surrounding area of the subject may become dark. The image alignment may not function properly with repetitive patterns (lattice, stripes, etc.), fl...
-
Page 315: Shooting With Filter Effects Applied
Shooting with Filter Effects Applied You can shoot with fi lter eff ects applied. In Live View shooting, you can preview fi lter eff ects before shooting. Set the Mode dial to <U>. Display the Live View image. Set the Live View shooting/Movie ... - Page 316 Shooting with Filter Eff ects Applied Adjust the eff ect and shoot. Press the < Q > button and select an icon below [Creative fi lters] (except c , A , B , C , or D ). Use the < Y > < Z > keys to adjust the ...
- Page 317 Shooting with Filter Eff ects Applied Creative Filter Characteristics I Grainy B/W Makes the image grainy and black and white. By adjusting the contrast, you can change the black-and-white eff ect. W Soft focus Gives the image a soft look. By adjusting the blur, you can change the degree of softness.
- Page 318 Shooting with Filter Eff ects Applied c Miniature eff ect Creates a diorama eff ect. Shooting under the default setting will keep the center looking sharp. In Live View shooting, you can move the area that looks sharp (the scene frame) as described in “Miniature Eff...
- Page 319 Shooting with Filter Eff ects Applied < A >, < B >, < C >, and < D > Notes Compared to other shooting modes, the image area will be smaller. Live View previews of the fi lter eff ects will not look exactly the same as your shots.
- Page 320 Shooting with Filter Eff ects Applied Miniature Eff ect Operations Move the AF point. Move the AF point to the position to focus on. Move the scene frame and shoot. Move the scene frame if the AF point is outside of it, so that the AF point is aligned with it.
-
Page 321: Creative Zone
Creative Zone Creative Zone modes give you the freedom to shoot in a variety of ways by setting your preferred shutter speed, aperture value, exposure, and more. To clear the shooting mode description displayed when you turn the Mode dial, press < 0 > ( = 532). Make sure the Multi-function lock feature is off... -
Page 322: Program Ae
Program AE The camera automatically sets the shutter speed and aperture to suit the subject’s brightness. * < d > stands for Program. * AE stands for Auto Exposure. Set the Mode dial to <d>. Focus on the subject. Aim the AF point over the subject and ... - Page 323 Program AE Diff erences Between < d > and < A > Modes In < A > mode, many functions, such as the AF method and metering mode, are set automatically to prevent spoiled shots. The functions you can set are limited.
-
Page 324: Setting The Shutter Speed Before Shooting (Shutter-Priority Ae)
Setting the Shutter Speed Before Shooting ( Shutter-Priority AE) In this mode, you set the shutter speed and the camera automatically sets the aperture to obtain the standard exposure matching the brightness of the subject. A faster shutter speed can freeze the action of a moving subject. A slower shutter speed can create a blurred eff... - Page 325 Setting the Shutter Speed Before Shooting (Shutter-Priority AE) If the lowest f/number blinks, it indicates underexposure. Use the < 6 > dial to decrease the shutter speed until the aperture value stops blinking, or set a higher ISO speed. If the highest f/number blinks, it indicates overexposure. Use the <...
-
Page 326: Setting The Aperture Value Before Shooting (Aperture-Priority Ae)
Setting the Aperture Value Before Shooting ( Aperture-Priority AE) In this mode, you set the desired aperture and the camera sets the shutter speed automatically to obtain the standard exposure matching the subject brightness. A higher f/number (smaller aperture hole) will make more of the foreground and background fall within acceptable focus. - Page 327 Setting the Aperture Value Before Shooting (Aperture-Priority AE) If the “30"” shutter speed blinks, it indicates underexposure. Use the < 6 > dial to decrease the f/number (open the aperture) until the shutter speed stops blinking, or set a higher ISO speed. If the “8000”...
- Page 328 Setting the Aperture Value Before Shooting (Aperture-Priority AE) Checking the Area in Focus M Press the depth-of-fi eld preview button to stop down the lens to the current aperture setting and check the area in focus ( depth of fi eld). The larger the aperture value, the wider the area (from the foreground to the background) in focus, but the darker the viewfi...
-
Page 329: Setting The Exposure Before Shooting (Manual Exposure)
Setting the Exposure Before Shooting ( Manual Exposure) In this mode, you set both the shutter speed and aperture as desired. To determine the exposure, refer to the exposure level indicator or use a commercially available exposure meter. * < a > stands for Manual. Set the Mode dial to <a>. - Page 330 Setting the Exposure Before Shooting (Manual Exposure) Exposure Compensation with ISO Auto If the ISO speed is set to [A] (AUTO) for manual exposure shooting, you can set exposure compensation ( = 160) as follows: [ z : Expo.comp./AEB] )] in [ 8 C.Fn III-3: Custom : Expo comp (hold btn, turn ...
-
Page 331: Long (Bulb) Exposures
Long (Bulb) Exposures In this mode, the shutter stays open as long as you hold down the shutter button completely, and closes when you let go of the shutter button. Use bulb exposures for night scenes, fi reworks, the heavens, and other subjects requiring long exposures. - Page 332 Long (Bulb) Exposures With [ z : Long exp. noise reduction], you can reduce the noise generated during long exposures ( = 238). For bulb exposures, using a tripod and bulb timer is recommended. You can also use mirror lockup ( = 263) in combination. You can shoot bulb exposures by using Remote Switch RS-60E3 (sold separately, = 156).
- Page 333 Long (Bulb) Exposures Select [OK]. When you exit the menu, < H > is displayed on the LCD panel. Take the picture. Press the shutter button completely, and after shooting begins, release it. To stop shooting in progress, press the ...
-
Page 335: Af, Drive, And Exposure Settings
AF, Drive, and Exposure Settings This chapter describes how to confi gure AF, drive mode, metering mode, and related settings. A M icon to the right of a page title indicates that the function is available only in Creative Zone. In Basic Zone, the AF operation is set automatically. -
Page 336: Selecting The Af Operation
Selecting the AF Operation Set the lens’s focus mode switch to <AF>. Turn the Mode dial to a Creative Zone. Press the <AF> button (9). Select the AF operation. Turn the < 6 > or < 5 > dial. X : One-Shot AF 9 : AI Focus AF Z : AI Servo AF... - Page 337 Selecting the AF Operation One-Shot AF for Still Subjects This AF operation is suited for still subjects. When you press the shutter button halfway, the camera will focus only once. In viewfi nder shooting, once the subject is in focus, that AF point is ...
- Page 338 Selecting the AF Operation AI Focus AF (Viewfi nder Shooting) for Automatic Switching of AF Operation AI Focus AF switches the AF operation from One-Shot AF to AI Servo AF automatically if a still subject starts moving. After the camera uses One-Shot AF to focus on a subject, if it detects ...
- Page 339 Selecting the AF Operation AF Points Lighting Up in Red (Viewfi nder Shooting) The AF points light up in red when focus is achieved in low-light conditions or on a dark subject. You can disable lighting up in Creative Zone modes ( = 569).
-
Page 340: Selecting The Af Area And Af Point (Viewfinder Shooting)
Selecting the AF Area and AF Point (Viewfinder Shooting) Depending on the lens used, the number of usable AF points, AF point patterns, Area AF frame shape, etc. vary. For details, see “Supplemental Information”. AF Area Selection Mode N: Spot AF (Manual selection) The camera focuses in a narrower area ... - Page 341 Selecting the AF Area and AF Point (Viewfi nder Shooting) G: Large Zone AF (Manual selection of zone) The AF area is divided into three focusing zones (left, center, and right) for focusing. Subjects are easier to acquire than with ...
- Page 342 Selecting the AF Area and AF Point (Viewfi nder Shooting) AF points may not track subjects under some shooting conditions when AI Servo AF is used with Zone AF, Large Zone AF, or Automatic selection AF. Focusing may be diffi cult when using a peripheral AF point or a wide-angle or telephoto lens.
- Page 343 Selecting the AF Area and AF Point (Viewfi nder Shooting) Selecting the AF Area Selection Mode Press the <S> or <G> button (9). Press the <G> button. Each time you press the < G > button, the AF area selection mode changes. With [ 8 C.Fn II-7: Select AF area selec.
- Page 344 Selecting the AF Area and AF Point (Viewfi nder Shooting) Selecting the AF Point or Zone Manually Press the <S> or <G> button (9). Select an AF point or zone. Use < j > < 9 > or the < 6 > or < 5 > ...
- Page 345 Selecting the AF Area and AF Point (Viewfi nder Shooting) Meaning of Lit or Blinking AF Points Pressing the < S > or < G > button lights up the AF points that are cross- type AF points for high-precision autofocusing. The blinking AF points are horizontal-line or vertical-line sensitive.
- Page 346 Selecting the AF Area and AF Point (Viewfi nder Shooting) Shooting Conditions that Make Focusing Diffi cult Subjects with very low contrast (Example: Blue skies, solid-color fl at surfaces, etc.) Subjects in very low light Strongly backlit or refl ective subjects ...
-
Page 347: Selecting The Af Method (Live View Shooting)
Selecting the AF Method (Live View Shooting) AF Method : Face+Tracking The camera detects and focuses on people’s faces. < p > (an AF point) appears over any face detected, which is then tracked. If no face is detected, the entire AF area is used for auto selection AF. With Servo AF, you can set the initial position for AF ( = 143). - Page 348 Selecting the AF Method (Live View Shooting) : Zone AF Uses auto selection AF in Zone AF frames to cover a large area, which makes focusing easier than with 1-point AF. Prioritizes focusing on the nearest subject. Faces of any people in the Zone AF frame are also given priority in focusing.
- Page 349 Selecting the AF Method (Live View Shooting) Selecting the AF Method Press the <G> button. Select the AF method. Each time you press the < G > button, the AF method changes. You can also make your selection from ...
- Page 350 Selecting the AF Method (Live View Shooting) u (face)+Tracking: c The camera detects and focuses on human faces. If a face moves, the AF point < p > also moves to track the face. You can set [Eye Detection AF] to [Enable] to shoot with the subject’s eyes in focus ( = 142).
- Page 351 Selecting the AF Method (Live View Shooting) Tapping a Face for Focus Tapping a face or subject to focus on changes the AF point to < > and focuses where you tap. Even if the face or subject moves on the screen, the AF point < > moves to track it.
- Page 352 Selecting the AF Method (Live View Shooting) Spot AF / 1-point AF / Zone AF You can manually set the AF point or Zone AF frame. Here, 1-point AF screens are used as an example. Check the AF point. The AF point (1) will appear.
- Page 353 Selecting the AF Method (Live View Shooting) Focus and take the picture. Aim the AF point over the subject and press the shutter button halfway. When focus is achieved, the AF point will turn green and the beeper will sound.
- Page 354 Selecting the AF Method (Live View Shooting) Eye Detection AF With the AF method set to [ u +Tracking], you can shoot with the subject’s eyes in focus. Select [z: Eye Detection AF]. Select [Enable]. Aim the camera at the subject. An AF point is displayed around their ...
- Page 355 Selecting the AF Method (Live View Shooting) Subject eyes may not be detected correctly, depending on the subject and shooting conditions. To disable Eye Detection AF without using menu operations, press these buttons, one after another: < G >, and < B >. To resume Eye Detection AF, press the <...
- Page 356 Selecting the AF Method (Live View Shooting) Magnifi ed View To check the focus when the AF method is other than [ u +Tracking], magnify display by approx. 5× or 10× by pressing the < v > button (or tapping < u >). Magnifi...
- Page 357 Selecting the AF Method (Live View Shooting) AF Shooting Tips Even when focus is achieved, pressing the shutter button halfway will focus again. Image brightness may change during autofocusing. Depending on the subject and shooting conditions, it may take longer to ...
- Page 358 Selecting the AF Method (Live View Shooting) Shooting Conditions that Make Focusing Diffi cult Subject with low-contrast such as the blue sky, solid-color fl at surfaces or when highlight or shadow details are clipped. Subjects in low light. Stripes and other patterns where there is contrast only in the horizontal ...
-
Page 359: Manual Focus
Manual Focus If focus cannot be achieved with autofocus, follow the procedure below to focus manually. In Viewfi nder Shooting Set the lens’s focus mode switch to <MF>. Focus on the subject. Turn the lens focusing ring (1) until the ... - Page 360 Manual Focus Magnify the image. Press the < v > button to activate magnifi ed display. Determine an area to magnify. Use < j > < 9 > to move the magnifi ed area into position for focusing. To center the magnifi...
- Page 361 Manual Focus Setting MF Peaking (Outline Emphasis) In Live View shooting, edges of subjects in focus can be displayed in color to make focusing easier. You can set the outline color and adjust the sensitivity (level) of edge detection (except in < A > mode). Select [z: MF peaking settings].
-
Page 362: Selecting The Drive Mode
Selecting the Drive Mode Press the <R> button (9). Select the drive mode. Turn the < 6 > dial. u : Single shooting When you press the shutter button completely, only one shot will be taken. o : High-speed continuous shooting ... - Page 363 Selecting the Drive Mode i : Low-speed continuous shooting/Continuous shooting When you hold down the shutter button completely, you can shoot continuously at max. approx. 3.0 shots/sec. while you keep holding it down. (In < r > mode, at max. approx. 5.7 shots/sec. in viewfi nder shooting, and at max.
- Page 364 Selecting the Drive Mode Approx. 10 shots/sec. is the maximum < o > high-speed continuous shooting speed ( = 150) under these conditions: shooting with a fully charged Battery Pack LP-E6N at a 1/1000 sec. or faster shutter speed and maximum aperture (depending on the lens), Image Stabilizer off...
-
Page 365: Using The Self-Timer
Using the Self-Timer Press the <R> button (9). Select the self-timer. Turn the < 6 > dial. Q: Shoot in 10 sec. Remote control shooting is also possible ( = 155). k: Shoot in 2 sec. Remote control shooting is also possible ( = 155). - Page 366 Using the Self-Timer With < q >, the shooting interval may become longer under some shooting conditions, depending on image quality, use of fl ash, and other factors. If you will not look through the viewfi nder when pressing the shutter button, attach the eyepiece cover ( = 157).
-
Page 367: Remote Control Shooting
Remote Control Shooting For remote control shooting, you can use Remote Controller RC-6, Wireless Remote Control BR-E1, or Remote Switch RS-60E3 (infrared, Bluetooth, and wired connections, respectively; sold separately). Remote Controller RC-6 You can shoot remotely up to approx. 5 meters/16.4 feet away from the front of the camera. - Page 368 Remote Control Shooting Infrared remote controllers such as the RC-6 cannot be used for remote control shooting when the camera is paired via Bluetooth with a smartphone or wireless remote control. Fluorescent or LED lighting may cause camera misoperation by triggering the shutter inadvertently.
-
Page 369: Eyepiece Cover
Eyepiece Cover Shots taken without looking through the viewfi nder (as when using the self- timer or a remote control) may be underexposed. To prevent this, use the eyepiece cover ( = 41) attached to the camera strap. Note that attaching the eyepiece cover is not necessary in Live View shooting or movie recording. -
Page 370: Selecting The Metering Mode
Selecting the Metering Mode You can select how the camera determines subject brightness. In Basic Zone, evaluative metering is set automatically. (In the < 8 : y > or < U : X > mode, center-weighted average metering is set automatically.) Press the <q>... - Page 371 Selecting the Metering Mode By default, the camera will set the exposure as follows. With < q >, holding down the shutter button halfway will lock the exposure setting (AE lock) after focus is achieved with One-Shot AF. In the < w >, < r >, and <...
-
Page 372: Exposure Compensation
Exposure Compensation Exposure compensation can brighten (increased exposure) or darken (decreased exposure) the standard exposure set by the camera. Exposure compensation can be set in the < d >, < s >, < f >, and < a > shooting modes. For details on exposure compensation when <... -
Page 373: Locking The Exposure (Ae Lock)
Locking the Exposure ( AE Lock) You can lock the exposure when you want to set the focus and exposure separately or when you are to take multiple shots at the same exposure setting. Press the < A > button to lock the exposure, then recompose and take the picture. -
Page 375: Flash Photography
Flash Photography This chapter describes how to shoot with the built-in fl ash or an external fl ash (EL/EX Speedlites). Flash cannot be used while you are recording movies. AEB is not available in fl ash photography. -
Page 376: Shooting With The Built-In Flash
Shooting With the Built-in Flash Using the built-in fl ash is recommended when the < I > icon appears in the viewfi nder or on the screen, when subjects in daytime shots are backlit, or when shooting under low light. Press the <I>... - Page 377 Shooting With the Built-in Flash Shutter Speed and Aperture Value in Flash Photography Shooting Mode Shutter Speed Aperture Value Auto (1/250–1/30 sec.)* Automatically set Manual (1/250–30 sec.) Automatically set Auto (1/250–30 sec.)* Manually set Manual (1/250–30 sec.) Manually set Exposure continues as long as you hold down the shutter button, or until the bulb timer Manually set elapses.
- Page 378 Shooting With the Built-in Flash Flash Exposure Compensation M Just as exposure compensation is adjustable, you can also adjust fl ash output of the built-in fl ash. Press the <Q> button. Select [y]. Set the compensation amount. To make fl ash exposure brighter, set the ...
- Page 379 Shooting With the Built-in Flash A Shooting With FE Lock M Viewfi nder shooting with FE (fl ash exposure) Lock provides suitable fl ash exposure over your specifi ed area of the subject. Press the <I> button. Press the shutter button halfway. Press the shutter button halfway and ...
-
Page 380: Flash Function Settings
Flash Function Settings Functions of the built-in fl ash or external EL/EX series Speedlites can be set from menu screens on the camera. Before setting functions of external Speedlites, attach the Speedlite and turn it on. For details on external Speedlite functions, refer to the Speedlite’s instruction manual. - Page 381 Flash Function Settings Flash Firing Set to [ a ] (in Basic Zone or < d > modes) to have the fl ash fi re automatically, based on shooting conditions. Set to [ D ] to have the fl ash always fi re when you shoot.
- Page 382 Flash Function Settings Slow Synchro M You can set the fl ash-sync speed for fl ash photography in < f > aperture-priority AE mode or < d > Program AE mode. ] 1/250-30sec. auto The fl ash sync speed is set automatically within a range of 1/250 sec. to 30 sec.
- Page 383 Flash Function Settings Built-in Flash Function Settings M Flash mode Set to [E-TTL II] to shoot in E-TTL II/E-TTL fully automatic fl ash mode. Set to [ Manual fl ash] to specify your preferred fl ash output manually. Shutter synchronization ...
- Page 384 fl ash output of the built-in fl ash ( = 166). Wireless functions You can use another Canon Speedlite compatible with optical wireless fl ash photography to shoot with wireless multiple- fl ash lighting ( = 180).
- Page 385 Flash Function Settings External Flash Function Settings M The information displayed, position of display, and available options vary depending on the Speedlite model, its Custom Function settings, the fl ash mode, and other factors. Refer to the instruction manual of your fl ash unit for details on its functions.
- Page 386 Flash Function Settings Flash mode You can select the fl ash mode to suit your desired fl ash photography. [E-TTL II] is the standard mode of EL/ EX series Speedlites for automatic fl ash photography. [Manual fl ash] is for setting the Speedlite’s [Flash output] yourself.
- Page 387 Flash Function Settings Wireless functions You can use radio or optical wireless transmission to shoot with wireless multiple- fl ash lighting. For details on wireless fl ash, refer to the Instruction Manual of a Speedlite compatible with wireless fl ash photography. Firing ratio control ...
- Page 388 Flash Function Settings Shutter synchronization Normally, set this to [First-curtain synchronization] so that the fl ash fi res immediately after the exposure starts. Set to [ Second-curtain synchronization] and use low shutter speeds for natural-looking shots of subject motion trails, such as car headlights. Set to [High-speed synchronization] for fl...
- Page 389 Flash Function Settings Flash exposure bracketing External Speedlites equipped with fl ash exposure bracketing (FEB) can change the external fl ash output automatically as three shots are taken at once. External Flash Custom Function Settings For details on the external Speedlite’s Custom Functions, refer to the Speedlite’s Instruction Manual.
- Page 390 Flash Function Settings Clearing Flash Function Settings/Flash C.Fn Settings M Select [Clear settings]. Select the settings to be cleared. Select [Clear built-in fl ash set.], [Clear external fl ash set.], or [Clear ext. fl ash C.Fn set.]. On the confi rmation dialog, select [OK]. ...
-
Page 391: Shooting With External Speedlites
Non-Canon Flash Units Sync Speed The camera can synchronize with non-Canon compact fl ash units at up to 1/250 sec. With large studio fl ash units, the fl ash duration is longer than that of a compact fl ash unit and varies depending on the model. Be sure to check before shooting if fl... -
Page 392: Wireless Flash Photography Using Optical Transmission
Wireless Flash Photography Using Optical Transmission You can use the built-in fl ash as the sender for external Canon Speedlites compatible with optical wireless fl ash photography to shoot with wireless multiple-fl ash lighting. Receiver Setup and Positioning Referring to the instruction manual of the external Speedlite (receiver), confi... - Page 393 Wireless Flash Photography Using Optical Transmission Methods of Wireless Flash Photography Using Optical Transmission External Speedlite Settings Built-in Page No. of Wireless Flash Firing Firing Group Units Functions Ratio ― ― = 182 1 All ― = 184 0 : 3 ―...
- Page 394 Wireless Flash Photography Using Optical Transmission Fully Automatic Shooting With One Receiver Fully automatic wireless fl ash photography using one receiver and one sender. Steps 1–4 and 6 apply to all wireless fl ash photography. Press the <I> button. Select [Flash control]. Select [ z : Flash control].
- Page 395 Wireless Flash Photography Using Optical Transmission Set to [Flash mode: E-TTL II]. Set [Wireless func.] to [0]. Confi gure [Channel]. Set the same optical channel (1–4) as the receiver. Set [Firing group] to [1All]. Take the picture. Just as in normal fl ash photography, ...
- Page 396 Wireless Flash Photography Using Optical Transmission Autofl ash With One Receiver You can adjust how shadows form on subjects by changing the ratio of fl ash output from a receiver and a sender. Set [Wireless func.] to [0:3]. Set [Wireless func.] to [ 0 : 3 ] as ...
- Page 397 Wireless Flash Photography Using Optical Transmission Autofl ash With Multiple Receivers Multiple receivers can be treated as a single fl ash unit or, if you prefer to adjust the fl ash ratio, as separate groups. Basic settings are as follows. Set these basic settings.
- Page 398 Wireless Flash Photography Using Optical Transmission [ 1 (A:B)] Autofl ash with two receiver groups Receivers can be assigned as fl ash groups A and B, and you can adjust the relative output of each. Exposure is automatically controlled, so that the groups’...
- Page 399 Wireless Flash Photography Using Optical Transmission Autofl ash With Multiple Receivers and a Sender You can include a sender in the wireless fl ash photography arrangements described from = 185 to = 186. Set these basic settings. Flash mode : E-TTL II : 0 + 3 Wireless functions : (same as receiver)
- Page 400 Wireless Flash Photography Using Optical Transmission Advanced Wireless Flash Photography Flash exposure compensation Available when [Flash mode] is set to [E-TTL II]. Note that the setting items available for fl ash exposure compensation (see below) vary depending on [Wireless func.] and [Firing group] setting details. Flash exposure compensation The same amount of fl...
- Page 401 Wireless Flash Photography Using Optical Transmission Wireless Multiple-Flash Photography with Specifi ed Output Available when [Flash mode] is set to [Manual fl ash]. Available fl ash output options (such as [ 1 fl ash output] and [Group A output]) vary depending on [Wireless func.] setting details (see below).
-
Page 403: Shooting
Shooting This chapter describes shooting and introduces menu settings on the shooting ([ z ]) tab. -
Page 404: Still Photo Shooting
Still Photo Shooting A M icon to the right of a page title indicates that the function is available only in Creative Zone. -
Page 405: Tab Menus: Still Photo Shooting (Viewfinder Shooting)
Tab Menus: Still Photo Shooting (Viewfinder Shooting) Shooting 1 = 199 = 202 = 204 = 205 = 206 = 168 Shooting 2 = 211 = 213 = 218 = 219 Shooting 3 = 224 = 225 = 227 = 229 = 230, 233, 236... - Page 406 Tab Menus: Still Photo Shooting (Viewfi nder Shooting) Shooting 4 = 238 = 239 = 241 = 71 = 245 = 251 Shooting 5 = 258 = 119 = 261 = 263 Shooting 6 = 266 = 267...
- Page 407 Tab Menus: Still Photo Shooting (Viewfi nder Shooting) In Basic Zone modes, the following screens are displayed. Note that available setting items vary by shooting mode. Shooting 1 = 199 = 204 = 205 = 168 Shooting 2 = 82 = 71 = 258...
-
Page 408: Tab Menus: Still Photo Shooting (Live View Shooting)
Tab Menus: Still Photo Shooting (Live View Shooting) Shooting 1 = 199 = 202 = 204 = 205 = 206 = 168 Shooting 2 = 211 = 213 = 218 = 219 = 220 = 221 Shooting 3 ... - Page 409 Tab Menus: Still Photo Shooting (Live View Shooting) Shooting 4 = 238 = 239 = 241 = 72 = 243 = 245 = 251 Shooting 5 = 255 = 119 Shooting 6 = 135 = 91 = 265 = 266 = 267 = 149...
- Page 410 Tab Menus: Still Photo Shooting (Live View Shooting) In Basic Zone modes, the following screens are displayed. Note that available setting items vary by shooting mode. Shooting 1 = 199 = 204 = 205 = 168 Shooting 2 = 82 = 72 Shooting 3...
-
Page 411: Image Quality Settings
Image Quality Settings Select [z: Image quality]. Set the image quality. To select the RAW quality, turn the < 6 > dial, and to select the JPEG quality, press the < Y > < Z > keys. Press < 0 > to set it. ... - Page 412 RAW images captured by this camera. If a previous version of DPP (Ver.4.x) is installed on your computer, obtain and install the latest version of DPP from the Canon website to update it ( = 590). (The previous version will be overwritten.) Similarly, DPP Ver.3.x or earlier does not support display, processing, editing, or other operations with RAW images captured by this camera.
- Page 413 Image Quality Settings Maximum Burst for Continuous Shooting The approximate maximum burst is shown on the shooting screen and in the lower right of the viewfi nder. If the maximum burst is displayed as “99”, it indicates that you can shoot 99 or more shots continuously.
-
Page 414: Still Image Aspect Ratio
Still Image Aspect Ratio You can change the image’s aspect ratio. Select [z: Still img aspect ratio]. Set the aspect ratio. Select an aspect ratio, then press < 0 >. JPEG images The images will be recorded with the set aspect ratio. RAW images ... - Page 415 Still Image Aspect Ratio Aspect Ratio 16:9 With viewfi nder shooting With Live View shooting The picture will be taken at the [3:2] aspect ratio setting for the multiple- exposures. When you play back RAW images shot in the [4:3], [16:9], or [1:1] aspect ratio, they will be displayed with lines indicating the respective aspect ratio.
-
Page 416: Image Review Time
Image Review Time To keep the captured image displayed, set [Hold]. To not have the captured image displayed, set [Off ]. Select [z: Image review]. Set a time option. When [Hold] is set, images are displayed until the time set in [ 5 : Auto power off... -
Page 417: Card Reminder
Card Reminder You can set the camera not to shoot unless there is a card in the camera. The default setting is [Enable]. Select [z: Release shutter without card]. Select [Disable]. -
Page 418: Correction Of Lens Aberrations Due To Optical Characteristics
Correction of Lens Aberrations due to Optical Characteristics Vignetting, image distortion, and other issues may be caused by lens optical characteristics. The camera can compensate for these phenomena by using [Lens aberration correction]. Select [z: Lens aberration correction]. Select an item. Select [Enable]. - Page 419 Correction of Lens Aberrations due to Optical Characteristics Peripheral Illumination Correction Vignetting (dark image corners) can be corrected. Depending on shooting conditions, noise may appear on the image periphery. The higher the ISO speed, the lower the correction amount will be. The correction amount applied will be lower than the maximum correction amount that applied with Digital Photo Professional (EOS software).
- Page 420 Correction of Lens Aberrations due to Optical Characteristics Digital Lens Optimizer Various aberrations from lens optical characteristics can be corrected, along with diff raction and low-pass fi lter-induced loss of clarity. If [Correction data not available] or [ ] is displayed by [Digital Lens Optimizer], you can use EOS Utility to add the lens correction data to the camera.
- Page 421 Correction of Lens Aberrations due to Optical Characteristics Chromatic Aberration Correction Chromatic aberration (color fringing around subjects) can be corrected. [Chromatic aberr corr] is not displayed when [Digital Lens Optimizer] is enabled. Diff raction Correction Diff raction (loss of sharpness caused by the aperture) can be corrected. Depending on shooting conditions, noise may be intensifi...
- Page 422 JPEG images already taken. When using a non-Canon lens, setting the corrections to [Disable] is recommended even if [Correction data available] is displayed. Magnifying the periphery of the image may display parts of the image that will not be recorded.
-
Page 423: Auto Exposure Bracketing (Aeb)
Auto Exposure Bracketing (AEB) You can capture three images at diff erent shutter speeds, aperture values, and ISO speeds, as adjusted by the camera. This is called AEB. * AEB stands for Auto Exposure Bracketing. Select [z: Expo.comp./AEB]. Set the AEB range. Turn the <... - Page 424 Auto Exposure Bracketing (AEB) If [ z : Auto Lighting Optimizer] ( = 218) is set to any setting other than [Disable], the eff ect of AEB may be reduced. If the drive mode is set to < u >, press the shutter button three times for each shot.
-
Page 425: Iso Speed Settings For Still Photos
ISO Speed Settings for Still Photos Set the ISO speed (image sensor’s sensitivity to light) to suit the ambient light level. In Basic Zone modes, ISO speed is set automatically. Regarding the ISO speed during movie recording, see = 620. Press the <i>... - Page 426 ISO Speed Settings for Still Photos Image noise (such as dots of light or banding) may increase and apparent resolution may decrease at H (equivalent to ISO 51200), because this is an expanded ISO speed. ISO 100/125/160 or an expanded ISO speed cannot be selected when [ z : Highlight tone priority] is set to [Enable] or [Enhanced] ( = 219).
- Page 427 ISO Speed Settings for Still Photos ISO Speed Range When Set Manually Select [z: zISO speed settings]. Select [ISO speed range]. Set the minimum limit. Select the minimum limit box, then press < 0 >. Select the ISO speed, then press < 0 >. ...
- Page 428 ISO Speed Settings for Still Photos ISO Speed Range Used With ISO Auto Select [Auto range]. Set the minimum limit. Select the minimum limit box, then press < 0 >. Select the ISO speed, then press < 0 >. ...
- Page 429 ISO Speed Settings for Still Photos Minimum Shutter Speed for ISO Auto This can help reduce camera shake and subject blur in < d > or < f > mode when shooting moving subjects with a wide-angle lens, or when using a telephoto lens.
-
Page 430: Auto Correction Of Brightness And Contrast (Auto Lighting Optimizer)
Auto Correction of Brightness and Contrast ( Auto Lighting Optimizer) Brightness and contrast can be corrected automatically if shots look dark or contrast is too low or high. Select [z: Auto Lighting Optimizer]. Set a correction option. Noise may increase and clarity may change, under some shooting conditions. If the eff... -
Page 431: Highlight Tone Priority Settings
Highlight Tone Priority Settings You can reduce overexposed, clipped highlights. Select [z: Highlight tone priority]. Set an option. [Enable]: Improves gradation in highlights. The gradation between the grays and highlights becomes smoother. [Enhanced]: Reduces overexposed highlights even more than [Enable], under some shooting conditions. -
Page 432: Metering Timer (Live View Shooting)
Metering Timer (Live View Shooting) You can set how long the metering timer runs (which determines the duration of exposure display/AE lock) after it is triggered by an action such as pressing the shutter button halfway. Select [z: Metering timer]. Set a time option. -
Page 433: Exposure Simulation (Live View Shooting)
Exposure Simulation (Live View Shooting) Exposure simulation simulates and displays how the brightness (exposure) of the actual image will look. Select [z: Expo. simulation]. Set an option. Enable ( g ) The displayed image brightness will be close to the actual brightness (exposure) of the resulting image. -
Page 434: White Balance Settings
White Balance Settings White balance (WB) is for making the white areas look white. Normally, the Auto [ Q ] (Ambience priority) or [ Q w] (White priority) setting will obtain the correct white balance. If natural-looking colors cannot be obtained with Auto, you can select the white balance to match the light source or set it manually by shooting a white object. - Page 435 White Balance Settings White Balance To the human eye, a white object looks white regardless of the type of lighting. With a digital camera, the white for color correction basis is decided depending on the color temperature of the illumination, and then the color is adjusted with software to make the white areas look white.
- Page 436 White Balance Settings [ Q ] Auto White Balance With [ Q ], you can slightly increase the intensity of the image’s warm color cast when shooting a tungsten-light scene. If you select [ Q w], you can reduce the intensity of the image’s warm color cast. Select [z: White balance].
- Page 437 White Balance Settings [ O ] Custom White Balance With custom white balance, you can manually set the white balance for the specifi c light source of the shooting location. Make sure to perform this procedure under the light source at the actual location of the shoot. Shoot a white object.
- Page 438 White Balance Settings If the exposure obtained in step 1 diff ers greatly from the standard exposure, a correct white balance may not be obtained. These images cannot be selected: Images captured with Picture Style set to [Monochrome], images with a Creative fi lter applied before or after shooting, multiple-exposure images, cropped images, or images shot with another camera.
-
Page 439: White Balance Correction
White Balance Correction White balance correction has the same eff ect as using a commercially available color temperature conversion fi lter or color compensating fi lter. White Balance Correction Select [z: WB Shift/Bkt.]. Set the white balance correction. Use < j > < 9 > to move the “ ”... - Page 440 White Balance Correction White Balance Auto Bracketing White balance bracketing ( WB Bkt.) enables you to capture three images at once with diff erent color tones. B/A bias ±3 levels Set the white balance bracketing amount. In step 2 for “White Balance Correction”, ...
-
Page 441: Color Space Settings
Color Space Settings The range of reproducible colors is called “color space”. For normal shooting, sRGB is recommended. Select [z: Color space]. Set a color space option. Adobe RGB This color space is mainly used for commercial printing and other industrial uses. -
Page 442: Picture Style Selection
Picture Style Selection Just by selecting a preset Picture Style, you can obtain image characteristics eff ectively matching your photographic expression or the subject. Select [z: Picture Style]. Select a Picture Style. Picture Style Characteristics [ D ] Auto The color tone will be adjusted automatically to suit the scene. - Page 443 Picture Style Selection [ R ] Landscape For vivid blues and greens, and very sharp and crisp images. Eff ective for impressive landscapes. [ u ] Fine Detail Suited for detailed outline and fi ne texture description of the subject. The colors will be slightly vivid.
- Page 444 Picture Style Selection Symbols The Picture Style selection screen has icons for [Strength], [Fineness], or [Threshold] for [Sharpness] as well as [Contrast] and other settings. The numbers indicate the values for these settings specifi ed for the respective Picture Style. Sharpness Strength Fineness...
-
Page 445: Picture Style Customization
Picture Style Customization You can customize any Picture Style by changing it from the default settings. To customize [Monochrome], see = 235. Select [z: Picture Style]. Select a Picture Style. Select the Picture Style to adjust, then press the < B > button. Select an item. - Page 446 Picture Style Customization Set the eff ect level. Press the < M > button to save the adjusted setting and return to the Picture Style selection screen. Any settings you change from default values are displayed in blue. Settings and Eff...
- Page 447 Picture Style Customization [ V ] Monochrome Adjustment [ k ] Filter eff ect With a fi lter eff ect applied to a monochrome image, you can make white clouds or green trees stand out more. Filter Sample Eff ects N: None Normal black-and-white image with no fi...
-
Page 448: Picture Style Registration
Picture Style Registration You can select a base Picture Style such as [Portrait] or [Landscape], adjust it as desired, and register it under [User Def. 1], [User Def. 2], or [User Def. 3]. Useful when creating several Picture Styles with diff erent settings. - Page 449 Picture Style Registration Select an item. Set the eff ect level. For details, see “Picture Style Customization” ( = 233). Press the < M > button to save the adjusted setting and return to the Picture Style selection screen. The base Picture Style will be indicated on the right of [User Def.
-
Page 450: Noise Reduction Settings
Noise Reduction Settings Long Exposure Noise Reduction For images exposed for 1 sec. or longer, noise (dots of light and banding) typical of long exposures can be reduced. Select [z: Long exp. noise reduction]. Set a reduction option. [AUTO] Auto For exposures of 1 sec. - Page 451 Noise Reduction Settings High ISO Speed Noise Reduction This function reduces the noise generated in the image. This function is especially eff ective when shooting at high ISO speeds. When shooting at low ISO speeds, the noise in the darker parts of the image (shadow areas) can further be reduced.
- Page 452 Noise Reduction Settings Cautions for Setting Multi Shot Noise Reduction If there is signifi cant misalignment in the image due to camera shake, the noise reduction eff ect may become smaller. If you are handholding the camera, keep it steady to prevent camera shake. Using a tripod is recommended.
-
Page 453: Appending Dust Delete Data
Appending Dust Delete Data Dust Delete Data used to erase dust spots can be appended to images in case sensor cleaning leaves dust on the sensor. The Dust Delete Data is used by Digital Photo Professional (EOS software) to erase the dust spots automatically. - Page 454 Appending Dust Delete Data Shoot a plain white object. Shoot with a plain white object (such as a new sheet of white paper) fi lling the screen, at a distance of 20–30 cm (0.7–1.0 ft.). Since the image will not be saved, the ...
-
Page 455: Shutter Release Method (Live View Shooting)
Shutter Release Method (Live View Shooting) You can choose how the shutter is released in Live View shooting. Select [z: Shutter mode]. Select an item. Mechanical Shooting activates the mechanical shutter. Be sure to set it to [Mechanical] if you use a TS-E lens (except TS-E17mm f/4L or TS-E24mm f/3.5L II) for shifting or tilting the lens or if you use an extension tube. - Page 456 Shutter Release Method (Live View Shooting) [Electronic] is not available in viewfi nder shooting with the drive mode set to < o >, < i >, or < B >. Defocused image areas may be incomplete when shooting near maximum aperture at high shutter speeds, depending on shooting conditions.
-
Page 457: Multiple Exposures
Multiple Exposures You can shoot multiple exposures to merge into a single image. With Live View shooting, you can see in real time how the exposures are merged when you shoot multiple-exposure images. Select [z: Multiple exposure]. Set a [Multiple exposure] option. Select [Enable]. - Page 458 Multiple Exposures Set the [No. of exposures]. Select the number of exposures, then press < 0 >. Set a [Continue Mult-exp] option. With [1 shot only], multiple-exposure shooting will be canceled automatically after the shooting ends. With [Continuously], multiple-exposure ...
- Page 459 Multiple Exposures During continuous shooting, the continuous shooting speed will decrease greatly. Only the merged multiple-exposure image will be saved. The images taken in steps 6 and 7 for the multiple-exposure image will not be saved. The image quality, ISO speed, Picture Style, high ISO speed noise reduction, color space, etc.
- Page 460 Multiple Exposures Merging Multiple Exposures with a RAW Image Recorded on the Card You can select a RAW image recorded on the card as the fi rst single exposure. The selected RAW image will remain intact. Select [Select image for multi. expo.].
- Page 461 Multiple Exposures Checking and Deleting Multiple Exposures During Shooting Before you fi nish shooting your specifi ed number of exposures, you can press the < x > button to view the multiple-exposure image so far, check exposure, and see how the images will be merged.
- Page 462 Multiple Exposures Are there any restrictions on the image quality? All single exposures and the multiple-exposure image are captured at your specifi ed image quality. Can I merge images recorded on the card? With [Select image for multi. expo.], you can select the fi rst single exposure from the images recorded on the card ( = 248).
-
Page 463: Hdr (High Dynamic Range) Shooting
HDR (High Dynamic Range) Shooting You can shoot still photos with clipped highlights and shadows reduced for a high dynamic range of tones even in high-contrast scenes. HDR shooting is eff ective for landscape and still-life shots. With HDR shooting, three images of diff erent exposures (standard exposure, underexposure, and overexposure) are captured consecutively for each shot and then merged together automatically. - Page 464 HDR (High Dynamic Range) Shooting Eff ects [ P ] Natural For images preserving a wide tonal range where the highlight and shadow details would otherwise be lost. Clipped highlights and shadows will be reduced. [ A ] Art standard While the clipped highlights and shadows will be reduced more than with [Natural], the contrast will be lower, and the gradation fl...
- Page 465 HDR (High Dynamic Range) Shooting Set a [Continuous HDR] option. With [1 shot only], HDR shooting will be canceled automatically after the shooting ends. With [Every shot], HDR shooting continues until the setting in step 2 is set to [Disable HDR].
- Page 466 HDR (High Dynamic Range) Shooting When shooting HDR images with [Auto Image Align] set to [Enable], AF point display information ( = 392) and Dust Delete Data ( = 241) will not be appended to the image. If you perform handheld HDR shooting with [Auto Image Align] set to [Enable], image periphery will be slightly trimmed and resolution will be slightly lowered.
-
Page 467: Focus Bracketing (Live View Shooting)
Focus Bracketing (Live View Shooting) Focus bracketing* enables continuous shooting with the focal distance changed automatically after a single shot. From these images, you can create a single image in focus over a wide area by using an application that supports depth compositing, such as Digital Photo Professional (EOS software). - Page 468 Focus Bracketing (Live View Shooting) Set [Focus increment]. Specify how much to shift the focus. This amount is automatically adjusted to suit the aperture value at the time of shooting. Because larger aperture values increase the focus shift, focus bracketing covers a wider range under the same [Focus increment] and [Number of shots] settings in that case.
- Page 469 Focus Bracketing (Live View Shooting) Focus bracketing is intended for still photo shooting on a tripod. Shooting with a wider angle of view is recommended. After depth compositing, you can crop the image if necessary. The following lenses can be used (as of April 2019). •...
-
Page 470: Interval Timer Shooting
Interval Timer Shooting With the interval timer in viewfi nder shooting, you can set the shooting interval and number of shots to have the camera repeatedly shoot once at the specifi ed interval. Select [z: Interval timer]. Select [Enable]. Select [Enable], then press the < B > ... - Page 471 Interval Timer Shooting Select [OK]. The interval timer settings will be displayed on the menu screen. (1) Interval (2) Number of shots Take the picture. First shot is taken and shooting continues according to the interval timer settings. During interval timer shooting, <...
- Page 472 Interval Timer Shooting Do not point the camera toward an intense light source, such as the sun or an intense artifi cial light source. Doing so may damage the image sensor or the camera’s internal components. Setting the lens focus mode switch to <AF> prevents the camera from shooting unless subjects are in focus.
-
Page 473: Flicker Effect Reduction
Flicker Effect Reduction If you shoot an image with a fast shutter speed under a light source such as fl uorescent light, the blinking of the light source causes fl icker and the image may be vertically unevenly exposed. If continuous shooting is used under these conditions, uneven exposures or colors across the images may result. - Page 474 Flicker Eff ect Reduction In the < d > or < f > mode, if the shutter speed changes during continuous shooting or if you shoot multiple shots of the same scene at diff erent shutter speeds, the color tone may become inconsistent. To avoid inconsistent color tones, use the <...
-
Page 475: Mirror Lockup
Mirror Lockup Mirror lockup keeps the mirror up in viewfi nder shooting to reduce blur from mirror movement. Useful when shooting close-ups (macro photography), using a super telephoto lens, shooting at slow shutter speeds, etc. Select [z: Mirror lockup]. Select [Enable]. Focus on the subject, then press the shutter button completely. - Page 476 Mirror Lockup Do not point the camera toward an intense light source, such as the sun or an intense artifi cial light source. Doing so may damage the image sensor or the camera’s internal components. In very bright light, such as at the beach or a ski slope on a sunny day, take the picture promptly after mirror lockup is stabilized.
-
Page 477: Continuous Af (Live View Shooting)
Continuous AF (Live View Shooting) This function keeps subjects generally in focus in Live View shooting. The camera is ready to focus immediately when you press the shutter button halfway. Select [z: Continuous AF]. Select [Enable]. Enabling this function reduces the number of shots available, because the lens is driven continuously and battery power is consumed. -
Page 478: Lens Electronic Mf Settings
Lens Electronic MF Settings For EF, or EF-S lenses equipped with electronic manual focusing, you can specify how manual focus adjustment is used with One-Shot AF. Select [z: Lens electronic MF]. Select an item. Disable after One-Shot AF Manual focus adjustment after the AF operation is disabled. Enable after One-Shot AF ... -
Page 479: Af-Assist Beam Settings
AF-Assist Beam Settings You can specify to use the AF-assist beam of the built-in fl ash or a Speedlite in viewfi nder shooting. Select [z: AF-assist beam fi ring]. Select an item. [ON] Enable Enables fi ring of the AF-assist beam, when needed. Press the <... - Page 480 AF-Assist Beam Settings If an external Speedlite’s [AF-assist beam fi ring] Custom Function is set to [Disable], the AF-assist beam will not be emitted. The AF-assist beam of an attached EX series Speedlite equipped with an LED light will fi re as needed from the Speedlite’s LED light in Live View shooting when you specify [Enable] or [Enable external fl...
-
Page 481: General Still Photo Shooting Cautions
General Still Photo Shooting Cautions Applies to Both Viewfi nder and Live View Shooting Image Quality When you shoot at high ISO speeds, noise (such as dots of light and banding) may become noticeable. Shooting in high temperatures may cause noise and irregular colors in the image. - Page 482 General Still Photo Shooting Cautions Images and Display Under low- or bright-light conditions, the displayed image may not refl ect the brightness of the captured image. Under low light, noise may be noticeable in image display even at low ISO speeds, but there will be less noise in your shots, because image quality varies between display and captured images.
- Page 483 General Still Photo Shooting Cautions With the HDMI Cable HTC-100 (sold separately), you can display the image on a television ( = 344). Note that no sound will be output. Information Display in Live View Shooting For details on the icons displayed for still photo shooting, see = 623. When [ g ] is displayed in white, it indicates that the image is displayed at the brightness level closely matching that of the actual image to be captured.
-
Page 485: Movie Recording
Movie Recording For movie recording, set the Live View shooting/ Movie shooting switch to < k >. A M icon to the right of a page title indicates that the function is available only in Creative Zone. When switching from still photo shooting to movie recording, check the camera settings again before recording movies. -
Page 486: Tab Menus: Movie Recording
Tab Menus: Movie Recording Shooting 1 = 288 = 295 = 298 = 322 = 300 = 322 = 312 Shooting 2 = 211 = 322 = 218 = 323 = 324 = 220 Shooting 3 = 224 = 225 = 227 = 230... - Page 487 Tab Menus: Movie Recording Shooting 4 = 135 = 317 = 142 = 266 = 319 = 320 = 149...
- Page 488 Tab Menus: Movie Recording In Basic Zone modes, the following screens are displayed. Note that available setting items vary by shooting mode. Shooting 1 = 288 = 295 = 298 = 300 = 322 = 312 Shooting 2 = 135 = 317 = 142...
-
Page 489: Movie Recording
Movie Recording y / k Autoexposure Recording Autoexposure control will take eff ect to suit the scene’s current brightness. Set the Mode dial to a mode other than <8>, <U>, or <a>. Set the Live View shooting/Movie shooting switch to <k>. Focus on the subject. - Page 490 Movie Recording ISO Speed in Basic Zone Modes The ISO speed will be set automatically within ISO 100–12800. ISO Speed in the < d >, < s >, < f >, and < F > Modes Will be set according to the details of [ z : k ISO speed settings] ...
- Page 491 Movie Recording M Manual Exposure Recording You can manually set the shutter speed, aperture, and ISO speed for movie recording. Set the Live View shooting/Movie shooting switch to <k>. Set the Mode dial to <a>. Set the ISO speed. Press the < i > button. ...
- Page 492 Movie Recording During movie recording, avoid changing the shutter speed, aperture, or ISO speed. Doing so may record the changes in the exposure or create more noise at high ISO speeds. When recording a movie of a moving subject, a shutter speed of approx. 1/25 sec.
- Page 493 Movie Recording Available Shutter Speeds Shutter speed in < a > mode can be set in a range of 1/4000–1/8 sec. The available shutter speeds will diff er for time-lapse movie recording ( = 300). Still Photo Shooting Still photos cannot be taken during movie recording. To take still photos, stop the movie recording and perform viewfi...
- Page 494 Movie Recording Cautions for Movie Recording Do not point the camera toward an intense light source, such as the sun or an intense artifi cial light source. Doing so may damage the image sensor or the camera’s internal components. If you shoot something that has fi ne detail, moire or false colors may result. If [ Q ] or [ Q w] is set and the ISO speed or aperture changes during movie recording, the white balance may also change.
- Page 495 Movie Recording Notes for Movie Recording Each time you record a movie, a new movie fi le is created on the card. The movie’s fi eld of view coverage for recording 4K, Full HD, and HD movies is approx. 100%. To enable starting or stopping movie recording by pressing the shutter button completely, set [Fully-press] for [ 5 : Shutter btn function for movies] to [Start/stop mov rec].
-
Page 496: Hdr Movie Recording
HDR Movie Recording You can shoot high dynamic range movies that retain detail in highlights of high-contrast scenes. Set the Mode dial to <8>. Record an HDR movie. Record the movie in the same way as normal movie recording. Since multiple frames are merged to create an HDR movie, certain parts of the movie may look distorted. -
Page 497: Movie Recording With Filter Effects Applied
Movie Recording With Filter Effects Applied In < U > (creative fi lters) mode, you can record movies with fi lter eff ects applied. Set the Mode dial to <U>. Press the <Q> button (7). The Quick Control screen will appear. ... - Page 498 Movie Recording With Filter Eff ects Applied Adjust the fi lter eff ect level. Press the < Q > button to select the icon below [Shooting mode]. Use the < Y > < Z > keys to adjust the ...
- Page 499 Movie Recording With Filter Eff ects Applied n Dramatic B&W Creates an atmosphere of dramatic realism with high-contrast black and white. You can adjust the graininess and black-and-white eff ect. o Miniature eff ect movie You can record movies with a miniature (diorama) eff ect. Select the playback speed and shoot.
-
Page 500: Movie Recording Quality Settings
Movie Recording Quality Settings Under the [ z : Movie rec quality] tab, set the image size, frame rate, and compression method. The movie will be recorded as an MP4 fi le. The frame rate displayed on the [Movie rec. size] screen switches automatically depending on the [ 5 : Video system] setting ( = 520). - Page 501 Movie Recording Quality Settings If you change the [ 5 : Video system] setting, also set [ z : Movie rec. size] again. Normal playback of 4K and L8 / 7 movies may not be possible on other devices, because playback is processing-intensive. Clarity and noise vary depending on movie recording quality and cropped shooting settings.
- Page 502 Movie Recording Quality Settings Frame Rate (fps: frame per second) [ 8 ] 59.94fps / [ 6 ] 29.97fps For areas where the TV system is NTSC (North America, Japan, South Korea, Mexico, etc.). [ 7 ] 50.00fps / [ 5 ] 25.00fps ...
- Page 503 Movie Recording Quality Settings Cards that Can Record Movies For details on cards you can use for various movie recording sizes, see = 617. When recording movies, use a high-capacity card with a writing/reading speed (as specifi ed in card performance requirements) shown in the table on = 617 or higher than the standard specifi...
- Page 504 Movie Recording Quality Settings High Frame Rate You can record Full HD movies at a high frame rate of 119.88 fps or 100.0 fps. This is ideal for recording movies that will be played back in slow motion. The maximum recording time per movie is 7 min. 29 sec. Movies are recorded as L2X or L3X .
- Page 505 Movie Recording Quality Settings Movie Files Exceeding 4 GB Even if you record a movie exceeding 4 GB, you can keep recording without interruption. Using SD/SDHC cards formatted with the camera If you use the camera to format an SD/SDHC card, the camera will format it in FAT32.
- Page 506 Movie Recording Quality Settings Total Movie Recording Time and File Size Per Minute For details on fi le sizes and the recording time available at each movie recording size, see = 618. Movie Recording Time Limit When recording non-High Frame Rate movies The maximum recording time per movie is 29 min.
-
Page 507: Setting The Sound Recording
Setting the Sound Recording You can record movies while recording sound with the built-in stereo microphone or an external stereo microphone. You can also freely adjust the sound-recording level. Use [ z : Sound recording] to set sound recording functions. Sound Recording/Sound-Recording Level Auto ... - Page 508 Setting the Sound Recording Attenuator Automatically suppresses sound distortion caused by loud noises. Set [Sound rec.] to [Enable] if distortion occurs when set to [Auto] or [Manual]. External Microphone If an external microphone equipped with a miniature stereo plug (3.5 mm diameter) is connected to the camera’s external microphone IN terminal, the external microphone will be given the priority.
- Page 509 Setting the Sound Recording Sounds from Wi-Fi operations may be captured with built-in or external microphones. During sound recording, using the wireless communication function is not recommended. When connecting an external microphone or headphones to the camera, make sure the plug is fully inserted. The camera’s built-in microphone will also record the operation sound and mechanical sound of the camera during shooting.
-
Page 510: Movie Digital Is
Movie Digital IS The camera’s Movie digital IS feature reduces camera shake as movies are recorded. Movie digital IS can provide eff ective stabilization even when your lens is not equipped with Image Stabilizer. When using a lens equipped with Image Stabilizer, set the lens’s Image Stabilizer switch to <... - Page 511 The wider the angle of view, the more eff ective the image stabilization will be. The narrower the angle of view, the less eff ective the image stabilization will When using a TS-E lens, fi sh-eye lens, or non-Canon lens, setting Movie digital IS to [Disable] is recommended.
-
Page 512: Recording Time-Lapse Movies
Recording Time-lapse Movies Still photos shot at a set interval can be stitched together automatically to create a 4K or Full HD time-lapse movie. A time-lapse movie shows how a subject changes in a much shorter period of time than the actual time it took. - Page 513 Recording Time-lapse Movies Select a scene. Select a scene to suit the shooting situation. For greater freedom when setting the shooting interval and number of shots manually, select [Custom]. Set the shooting interval. Select [Interval/shots]. Select [Interval] (sec.). Use the < Y > ...
- Page 514 Recording Time-lapse Movies Set the number of shots. Select [No. of shots]. Use the < Y > < Z > keys to set a value, then press < 0 >. Refer to the [ k : Time required] and ...
- Page 515 Recording Time-lapse Movies Select the desired movie recording size. H (3840×2160) The movie is recorded in 4K quality. The aspect ratio is 16:9. The frame rate is 29.97 fps ( 6 ) for NTSC and 25.00 fps ( 5 ) for PAL, and movies are recorded in MP4 ( C ) format with ALL-I ( W ) compression.
- Page 516 Recording Time-lapse Movies Confi gure [Auto exposure]. Fixed 1st frame When taking the fi rst shot, metering is performed to set the exposure automatically to match the brightness. The exposure setting for the fi rst shot will be applied to subsequent shots. Other shooting-related settings for the fi...
- Page 517 Recording Time-lapse Movies Set the beeper. Select [Beep as img taken]. If [Disable] is set, the beeper will not sound for shooting. Check the settings. (1) Time required Indicates the time required to shoot the set number of shots with the set interval.
- Page 518 Recording Time-lapse Movies Read the message. Read the message and select [OK]. Take test shots. As with still photo shooting, set the exposure and shooting functions, then press the shutter button halfway to focus. Press the shutter button completely to ...
- Page 519 Recording Time-lapse Movies Press the <0> button. The camera will be ready to start recording a time-lapse movie. To return to step 15, press the movie shooting button again. Record the time-lapse movie. Press the < B > button and check ...
- Page 520 Recording Time-lapse Movies If the card does not have enough free space to record the set number of shots, [Playback time] will be displayed in red. Although the camera can continue shooting, the shooting will stop when the card becomes full. If the movie fi...
- Page 521 Recording Time-lapse Movies If the shutter speed exceeds the shooting interval (such as for long exposures), or if a slow shutter speed is set automatically, the camera may not be able to shoot at the set interval. Shooting may also be prevented by shooting intervals nearly the same as the shutter speed.
- Page 522 Recording Time-lapse Movies If you start time-lapse movie recording while the white [ s ] icon ( = 326) is displayed, the image quality of the time-lapse movie may deteriorate. It is recommended that you start time-lapse movie recording after the white [ s ] icon disappears (camera’s internal temperature decreases).
- Page 523 Recording Time-lapse Movies You can use Remote Controller RC-6 (sold separately) or Wireless Remote Control BR-E1 (sold separately) to start and stop the time-lapse movie recording. Set [ z : Remote control] to [Enable] beforehand. With Remote Controller RC-6 Camera Status/Remote <...
-
Page 524: Recording Video Snapshots
Recording Video Snapshots Record a series of short video snapshots, each a few seconds long, and the camera will combine them to create a video snapshot album that shows these highlights of your trip or event. Video snapshots are available when the movie recording size is set to L6X (NTSC) / L5X (PAL). - Page 525 Recording Video Snapshots Specify [Playback time]. Specify playback time per video snapshot. Specify [Playback eff ect]. This setting determines how fast albums are played back. Specify [Show confi rm msg]. Select [Enable]. Check the required recording time. The time required to record each video ...
- Page 526 Recording Video Snapshots Close the menu. Press the < M > button to close the menu. A blue bar is displayed to indicate the recording time (2). Creating a Video Snapshot Album Record the fi rst video snapshot. Press the movie shooting button to start ...
- Page 527 Recording Video Snapshots Stop recording video snapshots. Set [Video snapshot] to [Disable]. To return to normal movie recording, be sure to specify [Disable]. Press the < M > button to close the menu and return to normal movie recording.
- Page 528 Recording Video Snapshots Adding to an Existing Album Select [Add to existing album]. Follow step 3 on = 312 to select [Add to existing album]. Select an existing album. Turn the < 5 > dial to select an existing ...
-
Page 529: Movie Servo Af
Movie Servo AF With this function enabled, the camera focuses on the subject continuously during movie recording. Select [z: Movie Servo AF]. Select [Enable]. When [Enable] is set: The camera focuses on the subject continuously even when you are ... - Page 530 Movie Servo AF Cautions When [Movie Servo AF] is Set to [Enable] Shooting Conditions that Make Focusing Diffi cult • A fast-moving subject approaching or moving away from the camera. • A subject moving at a close distance to the camera. •...
-
Page 531: Movie Servo Af Track Sensitivity
Movie Servo AF Track Sensitivity You can adjust the tracking sensitivity (to one of seven levels), which aff ects responsiveness if the subject strays from the AF point during Movie Servo AF, as when interfering objects move across AF points or when you pan. Select [z: Movie Servo AF track sens.]. -
Page 532: Movie Servo Af Speed
(one of two levels) to obtain the desired eff ect for the movie creation. * Lenses supporting slow focus transition during movie recording USM and STM lenses released in and after 2009 are compatible. For details, refer to the Canon website. - Page 533 Movie Servo AF Speed With certain lenses, even if you adjust the AF speed, the speed may not change. Available when [ z : Movie Servo AF] is set to [Enable] and [ z : AF method] is set to [1-point AF]. Operation when [ z : AF method] is set to an option other than [1-point AF] is equivalent to setting [AF speed] to [Standard (0)].
-
Page 534: Other Menu Functions
Other Menu Functions [ z 1] Lens aberration correction M Peripheral illumination and chromatic aberration can be corrected as you record movies. For details on lens aberration correction, see = 206. Remote control shooting When [Enable] is set, you can start or stop movie recording using Remote Controller RC-6 or Wireless Remote Control BR-E1 (sold separately). - Page 535 Other Menu Functions a Max for Auto You can set the maximum limit for ISO Auto in 4K time-lapse/Full HD time-lapse movie recording in [ k ] mode or in [ M ] mode with ISO Auto. ISO 25600 is an expanded ISO speed (indicated by [H]). ISO 25600 is not available when recording 4K movies, 4K time-lapse movies, or Full HD time-lapse movies.
- Page 536 Other Menu Functions k Auto slow shutter M You can choose whether to record movies that are brighter and less aff ected by image noise than when set to [Disable] by automatically slowing the shutter speed under low light. Available in [ k ] shooting mode.
- Page 537 Other Menu Functions [ z 3] HDMI info disp M You can confi gure information display for image output via an HDMI cable. With info The image, shooting information, AF points, and other information is shown on the other device via HDMI. Note that the camera screen goes off...
-
Page 538: General Movie Recording Cautions
General Movie Recording Cautions Red [ E ] Internal Temperature Warning Icon If the camera’s internal temperature increases due to prolonged movie recording or under a high ambient temperature, a red [ E ] icon will appear. The red [ E ] icon indicates that movie recording will soon be terminated automatically. - Page 539 General Movie Recording Cautions Recording and Image Quality If you use a card with a slow writing speed, an indicator may appear on the right of the screen during movie recording. It indicates how much data has not yet been written to the card (remaining capacity of the internal buff...
-
Page 541: Playback
Playback This chapter covers topics related to playback—playing back captured still photos and movies—and introduces menu settings on the Playback ([ x ]) tab. Normal display or selection on this camera may not be possible for images captured on other cameras, or images from this camera that have been edited or renamed on a computer. -
Page 542: Tab Menus: Playback
Tab Menus: Playback Playback 1 = 346 = 349 = 350 = 354 = 358 = 361 Playback 2 = 364 = 370 = 372 = 373 = 374 Playback 3 = 377 = 379 = 380 = 383 = 385 = 387... - Page 543 Tab Menus: Playback Playback 4 = 389 = 391 = 392 = 393 = 394...
-
Page 544: Image Playback
Image Playback Single-Image Display Play back the image. Press the < x > button. The last image captured or played back will appear. Select an image. To play back images starting with the most recent, turn the < 5 > dial counterclockwise. - Page 545 Image Playback Exit the image playback. Press the < x > button to exit the image playback and return to shooting-ready state. When RAW images shot with [ z : Still img aspect ratio] set to an option other than [3:2] ( = 202) are played back, frame lines indicating the image area will be displayed.
-
Page 546: Index Display (Multiple-Image Display)
Index Display (Multiple-Image Display) Switch to the index display. During image playback, press the < r > button. The 4-image index display will appear. The selected image is highlighted with an orange frame. Pressing the < r > button again switches display from 9 images to 36, and then to 100. - Page 547 Index Display (Multiple-Image Display) Touch Playback The camera features a touch-screen panel that you can touch to control playback. Supported touch operations are like those used with smartphones and similar devices. First, press the < x > button to prepare for touch playback.
-
Page 548: Magnified Image Display
Magnified Image Display Magnify the image. During image playback, press the < v > button. The magnifi ed view will appear. The magnifi ed area position (1) will be displayed on the lower right of the screen. Each press of the < v > button enlarges ... -
Page 549: Movie Playback
Movie Playback Play back the image. Press the < x > button. Select a movie. Use the < 5 > dial to select the movie to play back. In the single-image display, the < s1 > icon displayed on the upper left indicates a movie. - Page 550 Movie Playback Movie Playback Panel Item Playback Operations Pressing < 0 > toggles between playback and stop. 7 Play Adjusts the slow motion speed with the < 5 > dial. The slow 8 Slow motion motion speed is indicated on the upper right of the screen. Skips backward 4 sec.
- Page 551 Movie Playback Movie Playback Panel (Video Snapshot Albums) Item Playback Operations Pressing < 0 > toggles between playback and stop. 7 Play Adjusts the slow motion speed with the < 5 > dial. The slow 8 Slow motion motion speed is indicated on the upper right of the screen. Displays the fi...
-
Page 552: Editing A Movie's First And Last Scenes
Editing a Movie’s First and Last Scenes In the single-image display, press <0>. The movie playback panel will appear. On the movie playback panel, select [X]. Specify the part to be edited out. Select either [ U ] (Cut beginning) or ... - Page 553 Editing a Movie’s First and Last Scenes Save the image. Select [ W ] (1). The save screen will appear. To save it as a new movie, select [New fi le]. To save it and overwrite the original movie fi...
-
Page 554: Frame Extraction From 4K Movies Or 4K Time-Lapse Movies
Frame Extraction from 4K Movies or 4K Time-Lapse Movies From 4K movies or 4K time-lapse movies, you can select individual frames to save as approx. 8.3 megapixel (3840×2160) JPEG still images. This function is called “Frame Grab (4K frame capture)”. Play back the image. - Page 555 Frame Extraction from 4K Movies or 4K Time-Lapse Movies Save the image. Select [OK] to save the current frame as a JPEG still image. Select the image to display. Check the destination folder and image fi le number. Select [View original movie] or [View ...
-
Page 556: Playback On A Tv Set
Playback on a TV Set By connecting the camera to a television with an HDMI cable, you can play back the captured still photos and movies on the television. Using the HDMI Cable HTC-100 (sold separately) is recommended. If the image does not appear on the TV screen, check if the [ 5 : Video system] is correctly set to [For NTSC] or [For PAL] (depending on the video system of your television). - Page 557 Playback on a TV Set Adjust movie sound volume with the TV set. The sound volume cannot be adjusted with the camera. Before connecting or disconnecting the cable between the camera and television, turn off the camera and television. Depending on the television, part of the image displayed may be cut off . Do not connect any other device’s output to the camera’s <...
-
Page 558: Protecting Images
Protecting images You can protect important images from being accidentally erased. Protecting a Single Image Select [3: Protect images]. Select [Select images]. Select an image. Turn the < 5 > dial to select the image to be protected. Protect the image. Press <... - Page 559 Protecting images Specifying the Range of Images to be Protected While looking at the images in the index display, you can specify the fi rst and last images for a range to protect all the specifi ed images at once. Select [Select range].
- Page 560 Protecting images Protecting All Images in a Folder or on a Card You can protect all the images in a folder or on a card at once. When you select [All images in folder] or [All images on card] in [ 3 : Protect images], all the images in the folder or on the card will be protected.
-
Page 561: Image Rotation
Image Rotation You can use this feature to rotate the displayed image to the desired orientation. Select [3: Rotate image]. Select an image. Select with < 5 >. Rotate the image. Each time you press < 0 >, the image ... -
Page 562: Erasing Images
Erasing Images You can either select and erase unnecessary images one by one or erase them in one batch. Protected images ( = 346) will not be erased. Once an image is erased, it cannot be recovered. Make sure you no longer need the image before erasing it. - Page 563 Erasing Images Checkmarking [ X ] Images to Be Erased in a Batch By adding checkmarks to the images to be erased, you can erase all those images at once. Select [3: Erase images]. Select [Select and erase images]. Select an image. Turn the <...
- Page 564 Erasing Images Specifying the Range of Images to Be Erased While looking at the images in the index display, you can specify the fi rst and last images for a range to erase all the specifi ed images at once. Select [Select range].
- Page 565 Erasing Images Erasing All Images in a Folder or on a Card When [ 3 : Erase images] is set to [All images in folder] or [All images on card], all the images in the folder or on the card will be erased.
-
Page 566: Digital Print Order Format (Dpof)
Digital Print Order Format (DPOF) DPOF (Digital Print Order Format) enables you to print images recorded on the card according to your printing instructions such as the image selection, quantity to print, etc. You can print multiple images in one batch or create a print order for a photofi... - Page 567 Digital Print Order Format (DPOF) Exit the setting. Press the < M > button. Next, select [Sel.Image] or [Multiple] to specify the images to be printed. If you print an image with a large image size using the [Index] or [Both] setting ( = 354), the index print may not be printed with certain printers.
- Page 568 Digital Print Order Format (DPOF) Selection of Images for Printing Selecting Images Select and specify the images one by one. Press the < M > button to save the print order to the card. Standard/Both Press < 0 > to print a copy of the displayed image.
- Page 569 Digital Print Order Format (DPOF) All Images in a Folder Select [Mark all in folder] and select the folder. A print order for one copy of all the images in the folder will be specifi ed. If you select [Clear all in folder] and select the folder, the print order for all the images in the folder will be canceled.
-
Page 570: Specifying Images For A Photobook
Specifying Images for a Photobook You can specify up to 998 images for printing in a photobook. When you use EOS Utility (EOS software) to import images to a computer, the specifi ed images for a photobook will be copied to a dedicated folder. This function is useful for ordering photobooks online. - Page 571 Specifying Images for a Photobook Specifying the Image Range for a Photobook While looking at the images in the index display, you can specify the range (start point to end point) of images to be specifi ed for a photobook at once. Select [Multiple].
- Page 572 Specifying Images for a Photobook Specifying All Images in a Folder or on a Card You can specify all the images in a folder or on a card at once for a photobook. Under [ x : Photobook Set-up], you can set [Multiple] to [All images in folder] or [All images on card] to specify all the images in the folder or on the card for a...
-
Page 573: Creative Filter Effects
Creative Filter Effects You can apply the following fi lter processing to an image and save it as a separate image: Grainy B/W, Soft focus, Fish-eye eff ect, Art bold eff ect, Water painting eff ect, Toy camera eff ect, and Miniature eff ect. Select [3: Creative fi... - Page 574 Creative Filter Eff ects Save the image. Select [OK]. Check the destination folder and image fi le number displayed, then select [OK]. To apply fi lter processing to other images, repeat steps 2–5. For images captured in RAW+JPEG shooting, fi lter processing is applied to the RAW image, and the results are saved as a JPEG.
- Page 575 Creative Filter Eff ects X Fish-eye eff ect Gives the eff ect of a fi sh-eye lens. The image will have barrel distortion. Depending on the level of this fi lter eff ect, the area trimmed along the periphery of the image changes. Also, because this fi lter eff ect magnifi es the center of the image, the apparent resolution at the center may degrade depending on the number of recorded pixels, so set the fi...
-
Page 576: Raw Image Processing
RAW Image Processing You can process 1 or F images with the camera to create JPEG images. RAW images are not aff ected, so diff erent conditions can be applied to create JPEGs. You can also use Digital Photo Professional (EOS software) to process RAW images. - Page 577 RAW Image Processing Set the desired processing conditions. Use shot settings Images are processed using image settings at the time of capture. Customize RAW processing Select an item with < j > < 9 >. Turn the < 6 > or < 5 > dial to switch ...
- Page 578 RAW Image Processing Select the image to display. Select [Original image] or [Processed img.]. Magnifi ed View You can magnify images displayed for [Customize RAW processing] by pressing the < v > button. Magnifi cation varies depending on the [Image quality] setting.
- Page 579 RAW Image Processing RAW Image Processing Options ] Brightness adjustment You can adjust the image brightness up to ±1 stop in 1/3-stop increments. ] White balance ( = 222) You can select the white balance. If you select [ Q ], you can select [Auto: Ambience priority] or [Auto: White priority].
- Page 580 RAW Image Processing ] Color space ( = 229) You can select either sRGB or Adobe RGB. Since the camera screen is not compatible with Adobe RGB, the diff erence in the image will hardly be perceptible when either color space is set. ...
- Page 581 RAW Image Processing ] Chromatic aberration correction ( = 209) Chromatic aberrations (color fringing along the subject’s outline) due to the lens characteristics can be corrected. If [Enable] is set, the corrected image will be displayed. If the eff ect is diffi cult to discern, magnify the image ( = 336).
-
Page 582: Processing With Your Preferred Effects Applied (Creative Assist)
Processing With Your Preferred Effects Applied (Creative Assist) You can process RAW images by applying your preferred eff ects and saving as JPEGs. Select [3: Creative Assist]. Select an image. Turn the < 5 > dial to select images to ... - Page 583 Processing With Your Preferred Eff ects Applied (Creative Assist) You can select eff ects such as [Brightness] or [Contrast] by pressing < 0 > and then using the < Y > < Z > keys. Press < 0 > when adjustment is ...
-
Page 584: Selecting The Type Of Raw Image Processing
Selecting the Type of RAW Image Processing You can select the type of RAW image processing performed from the Quick Control screen. Select [3: Quick Control RAW processing]. Select an item. Creative Assist RAW processing that applies your preferred eff ect ( = 370). RAW image processing ... -
Page 585: Red-Eye Correction
Red-Eye Correction Automatically corrects relevant portions of images aff ected by red-eye. The image can be saved as a separate fi le. Select [3: Red-eye correction]. Select an image with <5>. After image selection, either touch [ E ] or press <... -
Page 586: Editing Video Snapshot Albums
Editing Video Snapshot Albums Select [3: Create album]. Select an album to edit. Press < 0 > to add a checkmark [ X ]. After selection, press the < Q > button. Select an editing option. - Page 587 Editing Video Snapshot Albums Option Description T Rearrange video Turn the < 5 > dial to select a video snapshot to move, then snapshots press < 0 >. Turn the < 5 > dial to move it, then press < 0 >. Turn the <...
- Page 588 Editing Video Snapshot Albums Selection of Background Music Albums and slideshows can be played with background music once you copy the music to the card, using EOS Utility (EOS software). Select [Background music]. Set [Background music] to [On]. Select the background music. Turn the <...
-
Page 589: Cropping Jpeg Images
Cropping JPEG Images You can crop a captured JPEG image and save it as another image. Cropping an image is possible only with JPEG images. Images shot in RAW cannot be cropped. Select [x: Cropping]. Select an image. Turn the < 5 > dial to select the image ... - Page 590 Cropping JPEG Images Moving the Cropping Frame Use < j > < 9 > to move the frame vertically or horizontally. Move the cropping frame until it covers the desired image area. Correcting the Tilt You can correct image tilt by ±10°. Turn the < 5 > dial to select < c >, then press <...
-
Page 591: Resizing Jpeg Images
Resizing JPEG Images You can resize a JPEG image to make the pixel count lower and save it as a new image. Resizing an image is possible only with JPEG 3 , 4 , and a images. JPEG b and RAW images cannot be resized. Select [3: Resize]. -
Page 592: Image Ratings
Image Ratings You can rate images on a scale of 1–5 ( l / m / n / o / p ). This function is called rating. * Rating images can help you organize them. Rating a Single Image Select [3: Rating]. Select [Select images]. - Page 593 Image Ratings Rating by Specifying the Range While looking at the images in the index display, you can specify the fi rst and last images for a range to rate all the specifi ed images at once. Select [Select range]. Select [Select range] in [ 3 : Rating].
- Page 594 Image Ratings Rating All Images in a Folder or on a Card You can rate all the images in a folder or on a card at once. Under [ 3 : Rating], when you select [All images in folder] or [All images on card], all the images in the folder or on the card will be rated.
-
Page 595: Image Slide Shows (Auto Playback)
Image Slide Shows (Auto Playback) You can play back the images on the card as an automatic slide show. Specify the images to be played back. To play back all the images on the card, go to step 2. If you want to specify the images to be ... - Page 596 Image Slide Shows (Auto Playback) Display time Repeat Transition eff ect Background music Start the slide show. Select [Start]. After [Loading image...] is displayed, the slide show will start. Exit the slide show. To exit the slide show and return to ...
-
Page 597: Filtering Images For Playback
Filtering Images for Playback You can fi lter image display according to your search conditions. After setting the image search conditions, you can play back and display only the found images. You can also protect, rate, erase, play a slide show, and apply other operations to fi... - Page 598 Filtering Images for Playback Apply the search conditions. Press < 0 > and read the message displayed. Select [OK]. The search condition is specifi ed. Display the found images. Press the < 3 > button. Only the images that match the set conditions (fi...
-
Page 599: Jump Display (Jumping Through Images)
Jump Display (Jumping Through Images) In the single-image display, you can turn the < 6 > dial to jump through the images forward or backward according to the jump method set. Select [x: Image jump w/6]. Select the jump method. With [Jump images by the specifi... - Page 600 Jump Display (Jumping Through Images) Browse by jumping. Press the < x > button. In the single-image display, turn the < 6 > dial. You can browse by the set method. (1) Jump method (2) Playback position To search images by shooting date, select [ g : Date]. To search images by folder, select [ h : Folder].
-
Page 601: Customizing Playback Information Display
Customizing Playback Information Display You can specify screens and accompanying information displayed during image playback. Select [3: Playback information display]. Add a checkmark [X] next to the number of screens to display. Select numbers with < 5 >. Press < 0 > to add a checkmark [ X ]. ... - Page 602 Customizing Playback Information Display [Brightness] display This histogram is a graph showing the distribution Sample of the image’s brightness level. The horizontal Histograms axis indicates the brightness level (darker on the left and brighter on the right) while the vertical axis indicates how many pixels exist for each brightness level.
-
Page 603: Displaying The Highlight Alert
Displaying the Highlight Alert You can specify blinking display of overexposed highlights on the playback screen. To obtain more detailed gradation in the blinking areas where you want the gradation to be faithfully reproduced, set the exposure compensation to a negative amount and shoot again for a better result. Select [3: Highlight alert]. -
Page 604: Af Point Display
AF Point Display You can display the AF points that were used to focus, which will be outlined in red on the playback screen. If automatic AF point selection is set, multiple AF points may be displayed. Select [3: AF point disp.]. Select [Enable]. -
Page 605: Grid Display
Grid Display You can display a grid over still photos shown in single-image display on the playback screen. This function is convenient for checking the image’s vertical or horizontal tilt as well as composition. Select [3: Playback grid]. Select an item. -
Page 606: Specifying Initial Image Display When Playback Begins
Specifying Initial Image Display When Playback Begins Select [3: View from last seen]. Select an item. [Enable]: Playback resumes from the last image displayed (except when you have just fi nished shooting). [Disable]: Playback resumes from your most recent shot whenever the camera is restarted. -
Page 607: Wireless Features
Important Note that Canon cannot be held liable for any loss or damage from erroneous wireless communication settings when using the camera. In addition, Canon cannot be held liable for any other loss or damage caused by use of the camera. -
Page 608: Tab Menus: Wireless Tab
Tab Menus: Wireless Tab Wireless 1 = 397 = 470 = 471 = 472 = 473 = 480 Wireless communication is not available while the camera is connected via an interface cable to a computer or other device. Other devices, such as computers, cannot be used with the camera by connecting them with an interface cable while the camera is connected to devices via Wi-Fi. -
Page 609: Selection Of Wi-Fi/Bluetooth Connection
Selection of Wi-Fi/Bluetooth Connection Select [k: Wi-Fi/Bluetooth connection]. Select an item for the camera to connect to. q Connect to smartphone ( = 399) Control the camera remotely and browse images on the camera over a Wi-Fi connection by using the dedicated Camera Connect app on smartphones or tablets (collectively referred to as “smartphones”... - Page 610 Selection of Wi-Fi/Bluetooth Connection R Upload to Web service ( = 444) Share images with friends or family on social media or the CANON iMAGE GATEWAY online photo service for Canon customers after you complete member registration (free of charge).
-
Page 611: Connecting To A Smartphone
Connecting to a Smartphone You can do the following after pairing the camera with a smartphone compatible with Bluetooth low energy technology (hereafter, “Bluetooth”). Establish a Wi-Fi connection using only the smartphone ( = 400). Establish a Wi-Fi connection with the camera even when it is off ( = 405). ... - Page 612 Connecting to a Smartphone Connecting to a Bluetooth-compatible Smartphone via Wi-Fi Steps on the Camera (1) Select [k: Wi-Fi/Bluetooth connection]. Select [qConnect to smartphone]. Select [Add a device to connect to]. Select an item. If Camera Connect is already installed, ...
- Page 613 Connecting to a Smartphone Select [Pair via Bluetooth]. Pairing now begins. To pair with a diff erent smartphone after pairing with one initially, select [OK] on the screen at left. Steps on the Smartphone (1) Start Camera Connect. Tap the camera for pairing.
- Page 614 Connecting to a Smartphone Steps on the Camera (2) Select [OK]. Press <0>. Pairing is now complete, and the camera is connected to the smartphone via Bluetooth. A Bluetooth icon appears on the main Camera Connect screen. The camera cannot be connected to two or more devices at the same time via Bluetooth.
- Page 615 Connecting to a Smartphone Steps on the Smartphone (2) Tap on a Camera Connect function. In iOS, tap [Join] when a message is displayed to confi rm camera connection. For the Camera Connect functions, see = 404. When a Wi-Fi connection is established, ...
- Page 616 Connecting to a Smartphone Camera Connect Functions Images on camera Images can be browsed, deleted, or rated. Images can be saved on a smartphone. Remote live view shooting Enables remote shooting as you view a live image on the smartphone. ...
- Page 617 Connecting to a Smartphone Maintaining a Wi-Fi Connection When the Camera Is Off Even when the camera power switch is set to < 2 >, as long as it is paired to a smartphone via Bluetooth, you can use the smartphone to connect via Wi-Fi.
- Page 618 Connecting to a Smartphone Canceling the Pairing Cancel pairing with a smartphone as follows. Select [k: Wi-Fi/Bluetooth connection]. Select [qConnect to smartphone]. If the history ( = 467) is displayed, switch the screen with the < Y > < Z > keys.
- Page 619 Connecting to a Smartphone Select [Delete connection information]. Select [OK]. Clear the camera information on the smartphone. In the smartphone’s Bluetooth setting menu, clear the camera information registered on the smartphone.
- Page 620 Connecting to a Smartphone Wi-Fi Connection Without Using Bluetooth Steps on the Camera (1) Select [k: Wi-Fi/Bluetooth connection]. Select [qConnect to smartphone]. If the history ( = 467) is displayed, switch the screen with the < Y > < Z > keys.
- Page 621 Connecting to a Smartphone Select [Connect via Wi-Fi]. Check the SSID (network name) and password. Check the SSID (1) and password (2) displayed on the camera screen. In [Wi-Fi settings], if you set [Password] to [None], the password will not be displayed or required ( = 470).
- Page 622 Connecting to a Smartphone Steps on the Smartphone Operate the smartphone to Smartphone’s screen establish a Wi-Fi connection. (sample) Activate the smartphone’s Wi-Fi function, then tap the SSID (network name) checked in step 6. For the password, enter the password ...
- Page 623 Connecting to a Smartphone The main window of Camera Connect will be displayed on the smartphone. The Wi-Fi connection to a smartphone is now complete. Operate the camera using Camera Connect ( = 404). For how to terminate the Wi-Fi connection, see “Terminating Wi-Fi ...
- Page 624 Connecting to a Smartphone Automatic Image Transfer as You Shoot Your shots can be automatically sent to a smartphone. Before following these steps, make sure the camera and smartphone are connected via Wi-Fi. Select [k: Wi-Fi settings]. Select [Send to smartphone after shot].
- Page 625 Connecting to a Smartphone Sending Images to a Smartphone from the Camera You can use the camera to send images to a smartphone paired via Bluetooth (Android devices only) or connected via Wi-Fi. Play back the image. Press the <Q> button. Select [qSend images to smartphone].
- Page 626 Connecting to a Smartphone (1) Sending Images Individually Select an image to send. Press the < Y > < Z > keys or turn the < 5 > dial to select an image to send, then press < 0 >. You can press the <...
- Page 627 Connecting to a Smartphone Select images to send. Press the < Y > < Z > keys or turn the < 5 > dial to select images to send, then press < 0 >. You can press the < r > button to ...
- Page 628 Connecting to a Smartphone (3) Sending a Specifi ed Range of Images Press <0>. Select [Send range]. Specify the range of images. Select the fi rst image (start point). Select the last image (end point). To cancel the selection, repeat this step. ...
- Page 629 Connecting to a Smartphone Select [Size to send]. On the displayed screen, select an image size. When sending movies, select the image quality in [Quality to send]. Select [Send].
- Page 630 Connecting to a Smartphone (4) Sending All Images on the Card Press <0>. Select [Send all card]. Select [Size to send]. On the displayed screen, select an image size. When sending movies, select the image quality in [Quality to send]. Select [Send].
- Page 631 Connecting to a Smartphone (5) Sending Images that Match the Search Conditions Send all the images that match the search conditions set in [Set image search conditions] at once. For [Set image search conditions], refer to “Filtering Images for Playback” ( = 385).
- Page 632 Connecting to a Smartphone Ending Image Transfer Sending Images from the Camera When Paired via Bluetooth (Android) Press the < M > button on the image transfer screen. Select [OK] on the screen on the left to end image transfer and the Wi-Fi connection.
- Page 633 Connecting to a Smartphone During the image transfer operation, a picture cannot be taken even if the camera’s shutter button is pressed. You can cancel the image transfer by selecting [Cancel] during the transfer. You can select up to 999 fi les at a time. With a Wi-Fi connection established, disabling the smartphone’s power saving function is recommended.
- Page 634 Connecting to a Smartphone Settings to Make Images Viewable from Smartphones Images can be specifi ed after the Wi-Fi connection is terminated. Select [k: Wi-Fi/Bluetooth connection]. Select [qConnect to smartphone]. If the history ( = 467) is displayed, switch the screen with the < Y > < Z > keys.
- Page 635 Connecting to a Smartphone Select [Viewable imgs]. Select an item. Select [OK] to access the setting screen. [All images] All images stored on the card become viewable. [Images from past days] Specify viewable images on the shooting- date basis. Images shot up to nine days ago can be specifi...
- Page 636 Connecting to a Smartphone [Select by rating] Specify viewable images depending on whether a rating is appended (or not appended) or by the type of rating. Once you select the type of rating, the viewable images are set. [File number range] (Select range) Select the fi...
- Page 637 Connecting to a Smartphone If the Wi-Fi connection is terminated while recording a movie with remote shooting, the following will occur. • If the Live View shooting/Movie shooting switch is set to < k >, movie recording will continue. • If the Live View shooting/Movie shooting switch is set to < A >, movie recording will stop.
-
Page 638: Connecting To A Computer Via Wi-Fi
Connecting to a Computer via Wi-Fi This section describes how to connect the camera to a computer via Wi-Fi and perform camera operations using EOS software or other dedicated software. Install the latest version of software on the computer before setting up a Wi-Fi connection. For computer operating instructions, refer to the computer user manual. - Page 639 Connecting to a Computer via Wi-Fi Check the SSID (network name) and password. Check the SSID (1) and password (2) displayed on the camera screen. In [Wi-Fi settings], if you set [Password] to [None], the password will not be displayed or required. For details, see = 470.
- Page 640 Connecting to a Computer via Wi-Fi Steps on the Camera (2) Select [OK]. The following message is displayed. “******” represents the last six digits of the MAC address of the camera to be connected. Steps on the Computer (2) Start EOS Utility.
- Page 641 Connecting to a Computer via Wi-Fi Steps on the Camera (2) Establish a Wi-Fi connection. Select [OK]. [ D Wi-Fi on] Screen Disconnect,exit Terminates the Wi-Fi connection. Confi rm set. You can check the settings. Error details When a Wi-Fi connection error occurs, ...
- Page 642 Connecting to a Computer via Wi-Fi If the Wi-Fi connection is terminated while recording a movie with remote shooting, the following will occur. • If the Live View shooting/Movie shooting switch is set to < k >, movie recording will continue. •...
- Page 643 Connecting to a Computer via Wi-Fi Sending Images on the Camera Automatically With the dedicated software Image Transfer Utility 2, you can send images on the camera to a computer automatically. Steps on the Computer (1) Connect the computer and access point and start Image Transfer Utility 2.
- Page 644 Connecting to a Computer via Wi-Fi Connect to an access point via Wi-Fi. Establish a Wi-Fi connection between the camera and the access point connected to the computer. For connection instructions, see “Wi-Fi Connection via Access Points” ( = 458). Select the computer to pair the camera with.
- Page 645 Connecting to a Computer via Wi-Fi Steps on the Camera (2) Select [Auto send images to computer]. Select [ k : Wi-Fi settings]. Select [Auto send images to computer]. Select [Image sending options]. Select what to send. If you select [Selected imgs] in [Range ...
-
Page 646: Connecting To A Printer Via Wi-Fi
Connecting to a Printer via Wi-Fi This section describes how to print images by directly connecting the camera to a printer supporting PictBridge (Wireless LAN) via Wi-Fi. For printer operating instructions, refer to the printer user manual. Select [k: Wi-Fi/Bluetooth connection]. - Page 647 Connecting to a Printer via Wi-Fi Set up the printer. On the Wi-Fi settings menu of the printer to be used, select the SSID you have checked. For the password, enter the password checked in step 4. Select the printer. In the list of detected printers, select the ...
- Page 648 Connecting to a Printer via Wi-Fi Image Printing Printing Images Individually Select the image to be printed. Press the < Y > < Z > keys or turn the < 5 > dial to select an image to print, then press <...
- Page 649 Connecting to a Printer via Wi-Fi Printing According to Specifi ed Image Options Press <0>. Select [Print order]. Set the printing options. For the setting procedures, refer to “Digital Print Order Format (DPOF)” ( = 354). If the print order is complete before ...
- Page 650 Connecting to a Printer via Wi-Fi Print the image. When [OK] is selected, printing starts. Shooting is not possible while connected to a printer via Wi-Fi. Movies cannot be printed. Before printing, be sure to set the paper size. Certain printers may not be able to imprint the fi...
- Page 651 Connecting to a Printer via Wi-Fi Print Settings The screen display and setting options vary depending on the printer. Also, certain settings may not be available. For details, refer to the printer’s instruction manual. Print setting screen (1) Sets date or fi le number printing ( = 441). (2) Sets the printing eff...
- Page 652 Connecting to a Printer via Wi-Fi [ Q ] Setting the Paper Size Select the size of the paper in the printer. [ Y ] Setting the Paper Type Select the type of the paper in the printer. [ U ] Setting the Page Layout Select the page layout.
- Page 653 Connecting to a Printer via Wi-Fi [ I ] Setting the Date/File Number Imprinting Select [ I ]. Select what to print. [ E ] Setting the Printing Eff ects (Image Optimization) Select [ E ]. Select printing eff ects. ...
- Page 654 Connecting to a Printer via Wi-Fi Cropping the Image Set cropping immediately before printing. Changing other print settings after you crop images may require you to crop the images again. On the print setting screen, select [Cropping]. Set the cropping frame size, position, and aspect ratio. The image area within the cropping frame will be printed.
- Page 655 Connecting to a Printer via Wi-Fi Depending on the printer, the cropped image area may not be printed as you specifi ed. The smaller the cropping frame, the lower the resolution at which images are printed. Handling Printer Errors If printing does not resume after you resolve a printer error (no ink, no paper, etc.) and select [Continue], operate the buttons on the printer.
-
Page 656: Sending Images To A Web Service
For CANON iMAGE GATEWAY instructions and setting details, refer to the help information for CANON iMAGE GATEWAY. If you also intend to use Web services other than CANON iMAGE GATEWAY, you must have an account with the services you intend to use. - Page 657 Sending Images to a Web Service Registering CANON iMAGE GATEWAY Link the camera and CANON iMAGE GATEWAY by adding CANON iMAGE GATEWAY as a destination Web service on the camera. You will need to enter an email address used on your computer or smartphone.
- Page 658 Sending Images to a Web Service Enter your email address. Enter your email address, then select [OK]. Enter a four-digit number. Enter a four-digit number of your choice, then select [OK]. Select [OK]. The [ R ] icon changes to [ ...
- Page 659 Access the page in the notifi cation message. Follow the instructions to complete the settings on the camera web link settings page. Steps on the Camera (2) Add CANON iMAGE GATEWAY as a destination. Select [ CANON iMAGE GATEWAY is now added.
- Page 660 Sending Images to a Web Service Registering Other Web Services Steps on the Computer or Smartphone Confi gure the Web service you want to use. Visit the CANON iMAGE GATEWAY website and access the camera web link settings page. Follow the on-screen instructions to ...
- Page 661 Sending Images to a Web Service Sending Images You can share images with your family and friends by sending images from the camera to a Web service registered on the camera or by sending Web links of the online albums. Connecting to Web Services via Wi-Fi Select [k: Wi-Fi/Bluetooth connection].
- Page 662 Sending Images to a Web Service Sending Images Individually Select an image to send. Press the < Y > < Z > keys or turn the < 5 > dial to select an image to send, then press < 0 >. You can press the <...
- Page 663 Sending Images to a Web Service Sending Multiple Selected Images Press <0>. Select [Send selected]. Select images to send. Press the < Y > < Z > keys or turn the < 5 > dial to select images to send, then press <...
- Page 664 Sending Images to a Web Service Select [Size to send]. When YouTube is selected as the destination, [Size to send] is not displayed. On the displayed screen, select an image size. Select [Send]. On the screen after images are sent, ...
- Page 665 Sending Images to a Web Service Sending a Specifi ed Range of Images Specify the range of images to send all the images in the range at once. Press <0>. Select [Send range]. Specify the range of images. Select the fi rst image (start point). ...
- Page 666 Sending Images to a Web Service Select [Size to send]. On the displayed screen, select an image size. Select [Send]. On the screen after images are sent, select [OK] to end the Wi-Fi connection. When the [Terms of use] screen is ...
- Page 667 Sending Images to a Web Service Select [Size to send]. On the displayed screen, select an image size. Select [Send]. On the screen after images are sent, select [OK] to end the Wi-Fi connection. When the [Terms of use] screen is ...
- Page 668 Sending Images to a Web Service Sending Images that Match the Search Conditions Send all the images that match the search conditions set in [Set image search conditions] at once. For [Set image search conditions], refer to “Filtering Images for Playback” ( = 385).
- Page 669 With a Wi-Fi connection to a Web service established, a picture cannot be taken even if the camera’s shutter button is pressed. When sending an image to a Web service other than CANON iMAGE GATEWAY, a send error message may not be displayed even if the image has not been sent to the Web service successfully.
-
Page 670: Wi-Fi Connection Via Access Points
Wi-Fi Connection via Access Points This section describes how to join a Wi-Fi network via an access point compatible with WPS (PCB mode). First, check the position of the WPS button and how long to press it. It may take approx. one minute to establish a Wi-Fi connection. Select [k: Wi-Fi/Bluetooth connection]. - Page 671 Wi-Fi Connection via Access Points Select [Switch network]. Displayed when [ q ], [ D ], or [ l ] is selected. Select [Connect with WPS]. For [Camera access point mode] displayed in step 5, see = 462.
- Page 672 Wi-Fi Connection via Access Points Select [WPS (PBC mode)]. Select [OK]. Connect to the access point via Wi-Fi. Press the access point’s WPS button. Select [OK]. Select [Auto setting]. Select [OK] to access the setting screen for the Wi-Fi function.
- Page 673 Go to step 8 on = 410. [DRemote control (EOS Utility)] Go to step 7 or 8 on = 428. [lPrint from Wi-Fi printer] Go to step 6 on = 435. Registering CANON iMAGE GATEWAY Go to step 5 on = 446.
- Page 674 Wi-Fi Connection via Access Points Send To Screen A screen to select a destination may be displayed depending on the Web service. To register destinations or to specify the settings, you must use a computer. For more information, refer to the EOS Utility Instruction Manual. The [Send to] screen may be displayed.
- Page 675 Wi-Fi Connection via Access Points Select an item. Select an item to access the screen for numerical input. To use a gateway, select [Enable], then select [Address]. Enter the desired values. Turn the < 6 > dial to move the input ...
-
Page 676: Connecting To A Wireless Remote Control
Connecting to a Wireless Remote Control This camera can also be connected to Wireless Remote Control BR-E1 (sold separately) via Bluetooth for remote control shooting ( = 156). Select [k: Wi-Fi/Bluetooth connection]. Select [KConnect to Wireless Remote]. Select [Add a device to connect to]. Press <0>. - Page 677 Connecting to a Wireless Remote Control Set up the camera for remote shooting. When shooting still photos, select [ Q ] or [ k ] as the drive mode ( = 153). When recording movies, set [ z : ...
- Page 678 Connecting to a Wireless Remote Control Canceling the Pairing Before pairing with a diff erent BR-E1, clear the information about the connected remote control. Select [k: Wi-Fi/Bluetooth connection]. Select [KConnect to Wireless Remote]. Select [Delete connection information]. Select [OK].
-
Page 679: Reconnecting Via Wi-Fi
Reconnecting via Wi-Fi Follow these steps to reconnect to devices or Web services with registered connection settings. Select [k: Wi-Fi/Bluetooth connection]. Select an item. Select the item to connect to via Wi-Fi from the displayed history. If the item is not displayed, use the <... - Page 680 Reconnecting via Wi-Fi [D] Computer On the computer, start the EOS software. If the computer’s connection destination has been changed, restore the setting to connect via Wi-Fi to the camera or the same access point as the camera. When directly connecting the camera to a computer via Wi-Fi, “_Canon0A”...
-
Page 681: Registering Multiple Connection Settings
Registering Multiple Connection Settings You can register up to 10 connection settings for the wireless communication functions. Select [k: Wi-Fi/Bluetooth connection]. Select an item. If the history ( = 467) is displayed, switch the screen with the < Y > < Z > keys. -
Page 682: Wi-Fi Settings
Wi-Fi Settings Select [k: Wi-Fi settings]. Select an item. Wi-Fi When the use of electronic devices and wireless devices is prohibited, such as on board airplanes or in hospitals, set it to [Disable]. Password Set to [None] to allow a Wi-Fi connection to be established without a password (except when connecting to an access point via Wi-Fi). -
Page 683: Bluetooth Settings
Bluetooth Settings Select [k: Bluetooth settings]. Select an item. Bluetooth If you will not use the Bluetooth function, select [Disable]. Check connection information You can check the name and communication status of the paired device. Bluetooth address You can check the camera’s Bluetooth address. -
Page 684: Changing The Nickname
Changing the Nickname You can change the camera nickname (displayed on smartphones and other cameras) as needed. Select [k: Nickname]. Enter text using the virtual keyboard (=482). When you fi nish entering characters, press the < M > button. -
Page 685: Geotagging Images With Gps Information From Other Devices
Geotagging Images with GPS Information from Other Devices You can geotag images with GPS Receiver GP-E2 (sold separately) or a Bluetooth enabled smartphone. GP-E2 Attach GP-E2 to the camera. Attach GP-E2 to the camera’s hot shoe and turn it on. For details, refer to the GP-E2 Instruction Manual. - Page 686 Make sure the GP-E2 fi rmware is updated to Ver. 2.0.0 or later. Firmware updating requires an interface cable. For updating instructions, visit the Canon website. The cable cannot be used to connect the camera to the GP-E2.
- Page 687 Geotagging Images with GPS Information from Other Devices Smartphone Complete these settings after installing the dedicated Camera Connect app ( = 399) on the smartphone. On the smartphone, activate location services. Establish a Bluetooth connection. Connect the camera to a smartphone ...
- Page 688 Geotagging Images with GPS Information from Other Devices GPS Connection Display You can check the status of smartphone location information acquisition in the GPS connection icon on the screens for still photo or movie shooting ( = 623 and = 625, respectively). Gray: Location services are off...
- Page 689 Geotagging Images with GPS Information from Other Devices The smartphone can acquire location information only while it is paired with the camera via Bluetooth. Direction information is not acquired. Acquired location information may not be accurate, depending on traveling conditions or smartphone status. It may take some time to acquire location information from the smartphone after you turn the camera on.
-
Page 690: Changing Or Deleting Connection Settings
Changing or Deleting Connection Settings To change or delete the connection settings, terminate the Wi-Fi connection fi rst. Select [k: Wi-Fi/Bluetooth connection]. Select an item. If the history ( = 467) is displayed, switch the screen with the < Y > < Z > keys. - Page 691 Delete connection information When deleting connection information for a paired smartphone, also delete the camera information registered on the smartphone ( = 406). For Web services, visit the CANON iMAGE GATEWAY website to delete the connection settings.
-
Page 692: Clearing Wireless Communication Settings To Default
Clearing Wireless Communication Settings to Default All wireless communication settings can be deleted. By deleting the wireless communication settings, you can prevent their information from being exposed when you lend or give your camera to other people. Select [k: Clear wireless settings]. Select [OK]. -
Page 693: View Info Screen
View Info Screen You can check error details and the camera’s MAC address. Select [k: Wi-Fi/Bluetooth connection]. Press the <B> button. The [View info] screen will appear. When an error has occurred, press < 0 > to display the error content. ... -
Page 694: Virtual Keyboard Operations
Virtual Keyboard Operations (7) (8) Input area, for entering text Space Cursor keys, for moving in the Delete a character in the input input area area Current no. of characters/no. Change the type of keyboard available Finish the text entry Keyboard Switch input modes Use <... -
Page 695: Responding To Error Messages
Responding to Error Messages When an error occurs, display the details of the error by following one of the procedures below. Then, eliminate the cause of the error by referring to the examples shown in this chapter. On the [View info] screen, press < 0 > ( = 481). ... - Page 696 Responding to Error Messages 11: Connection target not found In the case of [ q ], is Camera Connect running? Establish a connection using Camera Connect ( = 410). In the case of [ D ], is the EOS software running? ...
- Page 697 Responding to Error Messages 21: No address assigned by DHCP server What to check on the camera On the camera, IP address is set to [Auto setting]. Is this the correct setting? If no DHCP server is used, specify the settings after setting the IP address to [Manual setting] on the camera ( = 462).
- Page 698 Responding to Error Messages 22: No response from DNS server What to check on the camera On the camera, does the DNS server’s IP address setting match the server’s actual address? Set the IP address to [Manual setting]. Then, on the camera, set the IP address that matches the address of the DNS server used ( = 497, = 462).
- Page 699 Responding to Error Messages 23: Device with same IP address exists on selected network What to check on the camera Do the camera and another device connected via Wi-Fi to the same network have the same IP address? Change the camera’s IP address to avoid using the same address as another device on the network.
- Page 700 Responding to Error Messages 61: Selected SSID wireless LAN network not found Are any obstacles blocking the line of sight between the camera and the antenna of the access point? Move the antenna of the access point to a position clearly visible from the point of view of the camera ( = 494).
- Page 701 Responding to Error Messages 63: Wireless LAN authentication failed Are the camera and the access point set to use the same authentication method? The camera supports the following authentication methods: [Open system], [Shared key], and [WPA/WPA2-PSK]. Are the camera and the access point set to use the same password for ...
- Page 702 Responding to Error Messages 65: Wireless LAN connection lost Are any obstacles blocking the line of sight between the camera and the antenna of the access point? Move the antenna of the access point to a position clearly visible from the point of view of the camera ( = 494).
- Page 703 Responding to Error Messages 68: Cannot connect to wireless LAN terminal. Retry from the beginning. Did you hold down the access point’s WPS (Wi-Fi Protected Setup) button for the specifi ed period of time? Hold down the WPS button for the period of time specifi ed in the access point’s instruction manual.
- Page 704 Is the network connected? Check the connection status of the network. 126: Could not connect to server CANON iMAGE GATEWAY is under maintenance or load is concentrated temporarily. Try connecting to the Web service again later. 127: An error has occurred A problem other than error code number 121 to 126 occurred while the ...
- Page 705 Responding to Error Messages 151: Transmission canceled Automatic image transfer to the computer was somehow interrupted. To resume automatic image transfer, set the camera’s power switch to < 2 >, and then set it to < 1 >. 152: Card’s write protect switch is set to lock Is the card’s write protect switch set to the locked position? ...
-
Page 706: Wireless Communication Function Notes
Wireless Communication Function Notes If the transmission rate drops, the connection is lost, or other problems occur when using the wireless communication functions, try the following corrective actions. Distance Between the Camera and the Smartphone If the camera is too far from the smartphone, a Wi-Fi connection may not be established even when Bluetooth connection is possible. - Page 707 Wireless Communication Function Notes Using the Wireless Remote Control BR-E1 BR-E1 cannot be used while the camera and smartphone are paired via Bluetooth. Change the camera connection to the wireless remote control in [Connect to Wireless Remote] under [ k : Wi-Fi/Bluetooth connection].
-
Page 708: Security
Security If security settings have not been properly set, the following problems may occur. Transmission monitoring Third parties with malicious intent may monitor the Wi-Fi transmissions and attempt to acquire the data you are sending. Unauthorized network access Third parties with malicious intent may gain unauthorized access to the network you are using to steal, modify, or destroy information. -
Page 709: Checking Network Settings
Checking Network Settings Windows Open the Windows [Command Prompt], then type ipconfi g/all and press the <Enter> key. In addition to the IP address assigned to the computer, the subnet mask, gateway, and DNS server information are also displayed. Mac OS ... -
Page 710: Wireless Communication Status
Wireless Communication Status Wireless communication status can be checked on the screen and LCD panel. Screen Quick Control screen Information display screen during playback LCD Panel Wi-Fi function Bluetooth function Wireless signal strength... - Page 711 Wireless Communication Status Screen LCD Panel Wireless Communication Status Wi-Fi Function Signal Wi-Fi Function Strength Wi-Fi: Disable Off connected Wi-Fi: Enable (Blinking) (Blinking) Connecting Connected Sending data () Connection error (Blinking) (Blinking) Bluetooth Function Indicator Bluetooth Connection Status Screen LCD Panel Function Bluetooth connected...
-
Page 713: Set-Up
Set-up This chapter describes menu settings on the set-up ([ 5 ]) tab. A M icon to the right of a page title indicates that the function is available only in Creative Zone. -
Page 714: Tab Menus: Set-Up
Tab Menus: Set-up Set-up 1 = 505 = 507 = 510 = 511 Set-up 2 = 513 = 514 = 515 = 516 = 519 Set-up 3 = 520 = 521 = 522 = 523 = 524 = 528... - Page 715 Tab Menus: Set-up Set-up 4 = 532 = 533 = 535 = 536 = 538 = 543 = 544 Set-up 5 = 545 = 546 = 547 = 548 = 550 = 550 = 550 In Live View shooting, the following screen is displayed for [ 5 4].
- Page 716 Tab Menus: Set-up When you are recording movies, the following screen is displayed for [ 5 4]. = 532 = 533 = 535 = 539 = 542 = 543 = 544 In Basic Zone and [HDR Movie] modes, the following screen is displayed for [ 5 5].
-
Page 717: Creating And Selecting A Folder
Creating and Selecting a Folder You can freely create and select the folder where the captured images are to be saved. Creating a Folder Select [5: Select folder]. Select [Create folder]. Select [OK]. - Page 718 Creating and Selecting a Folder Selecting a Folder Select a folder on the folder selection screen. Captured images are stored in your selected folder. (1) Number of images in folder (2) Lowest fi le number (3) Folder name (4) Highest fi...
-
Page 719: File Numbering Methods
File Numbering Methods The captured images saved in a folder are assigned a fi le number from 0001 to 9999. (Example) IMG_0001.JPG You can change how the image fi les are File number numbered. Select [5: File numbering]. Set the item. Select [Numbering]. - Page 720 File Numbering Methods Continuous When you wish to continue the fi le numbering sequence even after the card is replaced or a new folder is created. Even after you replace the card or create a new folder, the fi le numbering continues in sequence up to 9999.
- Page 721 File Numbering Methods Auto Reset When you wish to restart the fi le numbering from 0001 each time the card is replaced or a new folder is created. When you replace the card or create a folder, the fi le numbering restarts from 0001 for the new images saved.
-
Page 722: The Auto Rotation Of Vertical Images
The Auto Rotation of Vertical Images You can change the auto rotation setting that straightens images shot in vertical orientation when they are displayed. Select [5: Auto rotate]. Select an item. On zD Automatically rotates images for display on both the camera and computers. -
Page 723: Formatting Memory Cards
Formatting Memory Cards If the card is new or was previously formatted (initialized) by another camera or computer, format the card with this camera. When the card is formatted, all images and data on the card will be erased. Even protected images will be erased, so make sure there is nothing you need to keep. - Page 724 Formatting Memory Cards Conditions Requiring Card Formatting The card is new. The card was formatted by a diff erent camera or a computer. The card is full of images or data. A card-related error is displayed ( = 613). ...
-
Page 725: Auto Power Off
Auto Power Off You can change the camera’s auto power off time. Select [5: Auto power off ]. Select an item. The screen turns off in approx. 30 min. even when set to [OFF]. Note that the camera remains on. -
Page 726: Adjusting The Screen Brightness
Adjusting the Screen Brightness Select [5: Disp. brightness]. Make the adjustment. Referring to the gray chart, use the < Y > < Z > keys to adjust the brightness, then press < 0 >. To check the image’s exposure, referring to the histogram is recommended ( = 389). -
Page 727: Turning The Screen Off/On
Turning the Screen Off/On You can set the camera so that the screen turns off and on as you press the shutter button halfway in viewfi nder shooting. Select [5: Screen off /on btn]. Select an item. Remains on The screen does not turn off... -
Page 728: Setting The Date, Time, And Time Zone
Setting the Date, Time, and Time Zone When you turn on the power for the fi rst time or if the date/time/zone have been reset, follow the steps below to set the time zone fi rst. By setting the time zone fi rst, you can simply adjust this setting as needed in the future and the date/time will be updated to match it. - Page 729 Setting the Date, Time, and Time Zone Use the < Y > < Z > keys to select a [Time diff erence] item (+/–/hour/ minute), then press < 0 >. Use the < W > < X > keys to set it, then ...
- Page 730 Setting the Date, Time, and Time Zone The date, time, and time zone settings may be reset when the camera is stored without the battery, when its battery becomes exhausted, or when it is exposed to below freezing temperatures for a prolonged period. If this happens, set them once again.
-
Page 731: Interface Language
Interface Language Select [5: LanguageK]. Set the desired language. -
Page 732: Video System
Video System Set the video system of any television used for display. This setting determines the frame rates available when you record movies. Select [5: Video system]. Select an item. For NTSC For areas where the TV system is NTSC (North America, Japan, South Korea, Mexico, etc.). -
Page 733: Touch Sensitivity Settings
Touch Sensitivity Settings Select [5: Touch control]. Select an item. [Sensitive] provides a more reactive touch-screen panel response than [Standard]. To disable touch operations, select [Disable]. Cautions for Touch Control Operations Do not use sharp objects such as fi ngernails or ballpoint pens for touch operations. -
Page 734: Beeping For Camera Operations
Beeping for Camera Operations Select [5: Beep]. Select an item. Touch Disables beeping for touch operations. Disable Disables beeping for focus confi rmation, self-timer shooting, and touch operations. -
Page 735: Headphone Volume
Headphone Volume Select [5: Headphone volume]. Make the adjustment. Use the < Y > < Z > keys to adjust it, then press < 0 >. You can check sound from the built-in microphone or an external microphone on headphones when [ z : Sound recording] is set to an option other than [Disable]. -
Page 736: Checking The Battery Information
(Red) : Purchasing a new battery is recommended. Using a genuine Canon Battery Pack LP-E6N/LP-E6 is recommended. If you use batteries that are not genuine Canon products, the camera’s full performance may not be attained or malfunction may result. - Page 737 Checking the Battery Information The shutter count is the number of still photos taken. (Movie recording is not counted.) Battery information is also displayed when you are using Battery Grip BG-E14 (sold separately) with LP-E6N/LP-E6 battery packs. With AA/R6 batteries, only the battery level is displayed.
- Page 738 Checking the Battery Information Labeling Batteries with Serial Numbers It is convenient to label registered LP-E6N/LP-E6 battery packs with their serial numbers, using commercially available labels. On a label approx. 25×15 mm, write the serial number (1). Apply the label. Set the power switch to <...
- Page 739 Checking the Battery Information Checking the Remaining Capacity of a Registered Battery You can check the remaining capacity of batteries not currently in use, as well as their last date of use. Look for the serial number. Refer to the battery’s serial number label ...
-
Page 740: Sensor Cleaning
Sensor Cleaning Activating Immediate Cleaning Select [5: Sensor cleaning]. Select [Clean nowf]. Select [OK] on the confi rmation dialog. ... - Page 741 Sensor Cleaning Setting Auto Cleaning Select [Auto cleaningf]. Select an item. Use the < Y > < Z > keys to select an item, then press < 0 >. For best results, clean with the camera in a stable position on a desk or other fl...
- Page 742 Always use a fully charged battery. The image sensor is extremely delicate. If the sensor needs to be cleaned directly, having it done by a Canon Service Center is recommended. Select [5: Sensor cleaning]. Select [Clean manually].
- Page 743 If the battery level becomes low while cleaning the sensor, the beeper will sound as a warning. Stop cleaning the sensor. If a smudge that cannot be removed with a blower remains, having the sensor cleaned by a Canon Service Center is recommended.
-
Page 744: Displaying The Shooting Mode Guide
Displaying the Shooting Mode Guide A brief description of the shooting mode can be displayed when you switch shooting modes. Select [5: Mode guide]. Select [Enable]. Turn the Mode dial. A brief description of the selected shooting mode is displayed. To display more details, press the <... -
Page 745: Feature Guide Display
Feature Guide Display A brief description of functions and items can be displayed when you use Quick Control setting. Select [5: Feature guide]. Select [Enable]. To clear a description, either tap it or continue performing operations. -
Page 746: Help Features
Help Features When [ z Help] is displayed , you can display a description about the feature by pressing the < B > button. Press it again to exit Help display. To scroll the screen when a scrollbar (1) appears on the right, turn the < 5 > dial. - Page 747 Help Features Text Size Adjustment Select [5: Help text size]. Select an item.
-
Page 748: Customization Of Information In The Viewfinder
Customization of Information in the Viewfinder Select [5: Viewfi nder display]. Select an item. Select with the < W > < X > keys, then press < 0 >. Electronic Level Display The electronic level (1) appears when you press the shutter button halfway. This level also works with vertical shooting. - Page 749 Customization of Information in the Viewfi nder Only horizontal tilt can be checked. (Forward/backward tilt is not displayed.) There may be a margin of error of approx. ±1°. An asterisk next to [ 5 : Viewfi nder display] indicates that the default viewfi...
-
Page 750: B > Button Display Options
< B > Button Display Options You can select the information displayed on the screen in response to pressing the < B > button when the camera is ready to shoot. Select [5: B button display options]. Select an item. Select the desired display option, then ... -
Page 751: Customization Of On-Screen Information
Customization of On-Screen Information You can customize on-screen display in Live View shooting or movie recording. Select [5: Shooting info. disp.]. Customizing Information on the Screen Select [Screen info. settings]. Select screens. Use the < W > < X > keys to select ... - Page 752 Customization of On-Screen Information Grid Display Select [Grid display]. Select an item. Setting the Histogram Select [Histogram disp]. Select an item. Select the content ([Brightness] or [RGB]) and display size ([Large] or [Small]). Press < M > button to confi rm the ...
- Page 753 Customization of On-Screen Information Clearing Settings Select [Reset]. Select [OK].
-
Page 754: Shutter Button Customization For Movie Recording
Shutter Button Customization for Movie Recording You can set the functions performed by pressing the shutter button halfway or completely during movie recording. Select [5: Shutter btn function for movies]. Select an item. Half-press Specify the function performed by pressing the shutter button halfway. -
Page 755: Hdmi Output Resolution
HDMI Output Resolution Set the image output resolution used when the camera is connected to a television or external recording device with an HDMI cable. Select [5: HDMI resolution]. Select an item. Auto The images will automatically be displayed at the optimum resolution matching the connected television. -
Page 756: Raw Image Display On Hdr Tvs
RAW Image Display on HDR TVs You can view RAW images in HDR by connecting the camera to an HDR Select [5: HDMI HDR output]. Select [On]. Image operations such as RAW processing are not available during HDR display. JPEG images are used for HDR display in the case of multiple-exposure RAW images. -
Page 757: Multi-Function Lock
Multi-Function Lock Specify camera controls to lock when the Multi-function lock is enabled. This can help prevent accidentally changing settings. Select [5: Multi function lock]. Select camera controls to lock. Press < 0 > to add a checkmark [ X ]. ... -
Page 758: Registering Custom Shooting Modes
Registering Custom Shooting Modes Current camera settings such as shooting, menu, and Custom Function settings can be registered as Custom shooting modes. Select [5: Custom shooting mode (C1, C2)]. Select [Register settings]. Register the desired items. On the [Register settings] screen, ... -
Page 759: Restoring Camera Defaults
Restoring Camera Defaults The camera’s settings for shooting functions and menu functions can be restored to their defaults. Select [5: Clear all camera settings]. Select [OK]. For details on clearing all Custom Function and customized control settings, see = 581. -
Page 760: Copyright Information
Copyright Information When you set the copyright information, it will be recorded to the image as Exif information. Select [5: Copyright information]. Select an item. Enter text. Use < j > < 9 > or the < 5 > dial to ... - Page 761 Copyright Information Checking the Copyright Information When you select [Display copyright info.] in step 2, you can check the [Author] and [Copyright] information that you entered. Deleting the Copyright Information When you select [Delete copyright information] in step 2, you can delete the [Author] and [Copyright] information.
-
Page 762: Other Information
Other Information Downloading instruction manuals or software To download instruction manuals, select [ 5 : Manual/software URL] and scan the displayed QR code with a smartphone. You can also use a computer to access the website at the URL displayed and download software. -
Page 763: Custom Functions / My Menu
Custom Functions / My Menu You can fi ne-tune camera functions and change the functionality of buttons and dials to suit your shooting preferences. You can also add menu items and Custom Functions that you adjust frequently to My Menu tabs. -
Page 764: Tab Menus: Customization
Tab Menus: Customization = 556 = 559 = 570 = 581... -
Page 765: Setting Custom Functions
Setting Custom Functions Select [C.Fn I:Exposure], [C.Fn II:Autofocus], or [C.Fn III:Operation/Others]. Select a Custom Function number. Use the < Y > < Z > keys to select the Custom Function number (1) to set up. Change the setting as desired. Use the <... -
Page 766: Custom Functions
Custom Functions Custom Functions indicated by have no eff ect (the setting is disabled) in Live View (LV) shooting and movie recording. C.Fn I: Exposure A LV k Movie Shooting Recording Exposure level increments = 556 ISO speed setting increments a mode = 556 Bracketing auto cancel... - Page 767 Custom Functions C.Fn III: Operation/Others A LV k Movie Shooting Recording Warnings z in viewfi nder = 570 Dial direction during Tv/Av = 570 Custom Controls Varies by settings = 571 Retract lens on power off = 574 Audio compression = 574...
-
Page 768: Custom Function Setting Items
Custom Function Setting Items You can customize camera features on the [ 8 ] tab to suit your shooting preferences. C.Fn I:Exposure C.Fn I-1: Exposure level increments Sets 1/2-stop increments for the shutter speed, aperture, exposure compensation, AEB, fl ash exposure compensation, etc. 0: 1/3-stop ... - Page 769 Custom Function Setting Items C.Fn I-4: Bracketing sequence The AEB shooting sequence and white balance bracketing sequence can be changed. 0: 0, –, + 1: –, 0, + 2: +, 0, – White Balance Bracketing B/A Direction M/G Direction 0 : Standard exposure 0 : Standard white balance...
- Page 770 Custom Function Setting Items C.Fn I-6: Safety shift If the subject brightness changes and the standard exposure cannot be obtained within the autoexposure range, the camera will automatically change the manually selected setting to obtain the standard exposure. When set to [Shutter speed/Aperture], this setting applies to < s > and <...
- Page 771 Custom Function Setting Items C.Fn II: Autofocus C.Fn II-1: Tracking sensitivity You can set the subject-tracking sensitivity, which aff ects responsiveness to interfering objects that move across AF points or subjects that stray from AF points during AI Servo AF/Servo AF. ...
- Page 772 Custom Function Setting Items C.Fn II-2: Acceleration/deceleration tracking Sets the AI Servo AF/Servo AF tracking sensitivity for subjects that change speed suddenly, as by suddenly moving or stopping. Suited for subjects that move at a steady speed (minor changes in moving speed).
- Page 773 Custom Function Setting Items C.Fn II-3: AF point auto switching This sets the switching sensitivity of the AF points as they track the subject moving dramatically up, down, left, or right. Applies in [Auto selection AF], [Zone AF], or [Large Zone AF] AF area selection modes, or with [ u +Tracking] or [Zone AF] AF methods.
- Page 774 Custom Function Setting Items C.Fn II-5: AI Servo 2nd image priority With AI Servo AF for continuous shooting, you can preset the AF operation characteristics and shutter-release timing for the subsequent shots after the fi rst shot in continuous shooting. Equal priority ...
- Page 775 Custom Function Setting Items C.Fn II-6: Lens drive when AF impossible You can specify lens operation in cases when the camera cannot autofocus on a subject. 0: Continue focus search If focus cannot be achieved with autofocus, the lens is driven to search for the precise focus.
- Page 776 Custom Function Setting Items C.Fn II-8: Limit AF methods You can limit the AF methods available to those that you will use. For details on AF methods, see = 135– = 137. Add a checkmark [ X ] to the AF methods to make available. Select [OK] to register the setting.
- Page 777 Custom Function Setting Items C.Fn II-10: Orientation linked AF point 0: Same for both vertic./horiz. The same AF area selection mode or manually selected AF points (or AF points or Zone AF frames in the same position) are used for both vertical shooting and horizontal shooting.
- Page 778 Custom Function Setting Items C.Fn II-11: Initial Servo AF point, You can set the initial AF point for AI Servo AF or Servo AF when the AF area selection mode is set to [Auto selection AF], or when the AF method is set to [ u +Tracking].
- Page 779 Custom Function Setting Items C.Fn II-12: Auto AF point selection: EOS iTR AF Use this function to autofocus in viewfi nder shooting by recognizing people. This function works when the AF area selection mode is set to Zone AF (manual selection of zone), Large Zone AF (manual selection of zone), or Automatic selection AF.
- Page 780 Custom Function Setting Items C.Fn II-13: AF point selection movement (Viewfi nder shooting) 0: Stops at AF area edges Useful if you often use the AF point at the outer edge. 1: Continuous Instead of stopping at the outer edge, the selection of AF point continues to the opposite side.
- Page 781 Custom Function Setting Items C.Fn II-15: Viewfi nder display illumination 0: Auto The AF points achieving focus in low light or with a dark subject will automatically light up in red. 1: Enable The AF points light up in red regardless of the ambient light level. 2: Disable ...
- Page 782 Custom Function Setting Items C.Fn III: Operation/Others C.Fn III-1: Warnings z in viewfi nder When any of the following functions are set, the < z > icon can be displayed in the viewfi nder and on the LCD panel ( = 34). Select the function for which you want the warning icon to appear, then press <...
- Page 783 Custom Function Setting Items C.Fn III-3: Custom Controls You can assign frequently used functions to camera buttons or dials according to your preferences for easy operations. Select a part of the bar. Select a function to assign. Press < 0 > to set it. ...
- Page 784 Custom Function Setting Items Functions Available for Camera Controls Function Metering and AF start AF stop ONE SHOT z AI SERVO/SERVO Direct AF point selection Pause Movie Servo AF Metering start AE lock/FE lock AE lock (hold) AE lock AE lock (while button pressed) FE lock Set ISO speed (hold button, turn Exposure compensation (hold button, turn...
- Page 785 Custom Function Setting Items < > stands for “AF stop button” provided on super telephoto lenses equipped with Image Stabilizer.
- Page 786 Custom Function Setting Items C.Fn III-4: Retract lens on power off You can set whether to retract gear-type STM lenses (such as EF40mm f/2.8 STM) automatically when the camera’s power switch is set to < 2 >. 0: Enable 1: Disable ...
-
Page 787: Fine Adjustment Of Af Position (Af Microadjustment)
Fine Adjustment of AF Position ( AF Microadjustment) Fine adjustment of the point of focus is possible when autofocusing in viewfi nder shooting. Normally, AF microadjustment is not required. Perform this adjustment only if necessary. Make sure to note that performing this adjustment may prevent accurate focusing from being achieved. - Page 788 Fine Adjustment of AF Position (AF Microadjustment) Make the adjustment. Setting it toward “–: ” will shift the point of focus in front of the standard point of focus. Setting it toward “+: ” will shift the point of focus to behind the standard point of focus.
- Page 789 Fine Adjustment of AF Position (AF Microadjustment) 2: Adjust by Lens You can make the adjustment for each lens and register the adjustment in the camera. You can register the adjustment for up to 40 lenses. When you autofocus with a lens whose adjustment is registered, the point of focus will always be shifted by the adjustment amount.
- Page 790 Fine Adjustment of AF Position (AF Microadjustment) Entering the Serial Number Select the digit to be entered, then press < 0 > so < r > is displayed. Enter the number, then press < 0 >. After entering all the digits, select [OK]. ...
- Page 791 Fine Adjustment of AF Position (AF Microadjustment) Make the adjustment. Single focal length lens For a zoom lens, select the wide-angle (W) or telephoto (T) end. Pressing < 0 > will turn off the orange frame and make the adjustment possible. Set the adjustment amount, then press ...
- Page 792 Fine Adjustment of AF Position (AF Microadjustment) When shooting with the intermediate range (focal length) of a zoom lens, the AF’s point of focus is corrected automatically relative to the adjustments made for the wide-angle and telephoto ends. Even if only the wide-angle or telephoto end is adjusted, a correction will be made automatically for the intermediate range.
-
Page 793: Clearing Custom Function Settings
Clearing Custom Function Settings Selecting [ 8 : Clear all Custom Func. (C.Fn)] clears all Custom Function settings. Note that [Custom Controls] settings are not cleared. -
Page 794: Tab Menus: My Menu
Tab Menus: My Menu = 583 = 586 = 586 = 587... -
Page 795: Registering My Menu
Registering My Menu Under My Menu tab, you can register menu items and Custom Functions whose settings you change frequently. Creating and Adding My Menu Tab Select [Add My Menu tab]. Select [OK]. You can create up to fi ve My Menu tabs ... - Page 796 Registering My Menu Select [Select items to register]. Register the desired items. Select the item to be set, then press < 0 >. Select [OK] on the confi rmation dialog. You can register up to six items. To return to the screen in step 2, press ...
- Page 797 Registering My Menu Delete tab You can delete the current My Menu tab. Select [Delete tab] to delete the [MY MENU*] tab. Rename tab You can rename the My Menu tab from [MY MENU*]. Select [Rename tab]. Enter text. Select [ ] or press the <...
- Page 798 Registering My Menu Deleting all My Menu tabs/Deleting all items You can delete all the created My Menu tabs or My Menu items registered under them. Delete all My Menu tabs You can delete all My Menu tabs you created. When you select [Delete all My Menu tabs], all the tabs from [MY MENU1] to [MY MENU5] will be deleted and the [ 9 ] tab will revert to its default.
- Page 799 Registering My Menu Menu Display Settings You can select [Menu display] to set the menu screen that is to appear fi rst when you press the < M > button. Normal display Displays the last displayed menu screen. Display from My Menu tab ...
-
Page 801: Reference
Reference This chapter provides reference information on camera features. -
Page 802: Software
RAW images from this camera is not possible. Download the software. Connect to the Internet from a computer and access the following Canon website. www.canon.com/icpd Enter the serial number on the bottom of the camera, then download ... - Page 803 The installer starts. Follow the on-screen instructions to install the software. Downloading the Software Instruction Manuals Software Instruction Manuals (PDF fi les) can be downloaded from the Canon website to your computer. Software Instruction Manual Download Site www.canon.com/icpd To view the Instruction Manuals (PDF fi les), an Adobe PDF viewing software such as Adobe Acrobat Reader DC (most recent version recommended) is required.
-
Page 804: Importing Images To A Computer
Importing Images to a Computer You can use EOS software to import images from the camera to a computer. There are three ways to do this. Connecting to a Computer via an Interface Cable (sold separately) Install the software (=590). Connect the camera to the computer with Interface Cable IFC-600PCU (computer end: USB... - Page 805 Importing Images to a Computer Card Reader You can use a card reader to import images to a computer. Install the software (=590). Insert the card into the card reader. Use Digital Photo Professional to import the images. Refer to the Digital Photo Professional ...
-
Page 806: Battery Grip Bg-E14
Battery Grip BG-E14 BG-E14 is a battery grip you can use with two LP-E6N/LP-E6 battery packs, or with AA/R6 batteries. It provides controls to use in vertical shooting, such as a shutter button and Main dial. For instructions on attachment and use, refer to the BG-E14 Instruction Manual. -
Page 807: Troubleshooting Guide
If the battery’s remaining capacity ( = 524) is 94% or higher, the battery will not be recharged. Do not use any battery other than genuine Canon Battery Pack LP-E6N/ LP-E6. The charger’s lamp blinks at high speed. - Page 808 [Does this battery/do these batteries display the Canon logo?] is displayed. Do not use any battery other than genuine Canon Battery Pack LP-E6N/ LP-E6. Remove and install the battery again ( = 47).
- Page 809 Troubleshooting Guide Shooting-Related Problems The lens cannot be attached. The camera cannot be used with RF or EF-M lenses ( = 54). The viewfi nder is dark. Install a recharged battery in the camera ( = 44). No images can be shot or recorded. Make sure the card is properly inserted ( = 48).
- Page 810 Troubleshooting Guide The card cannot be used. If a card error message is displayed, see = 50 or = 613. An error message is displayed when the card is inserted in another camera. Since SDXC cards are formatted in exFAT, if you format a card with this ...
- Page 811 Troubleshooting Guide The AF point is blinking or two AF points are displayed. Regarding the AF points lighting up or blinking when you press the < S > or < G > button, see = 133. The AF points do not light up in red. The AF points light up in red when you shoot under low light or when ...
- Page 812 even if you switch to a high-speed card. The maximum burst shown in the table on = 615 is based on Canon’s testing card. (The faster the card’s writing speed, the higher the actual maximum burst will be.) For this reason, the maximum burst displayed may diff...
- Page 813 The external Speedlite does not fi re. Make sure the external Speedlite is securely attached to the camera. When using non-Canon fl ash units in Live View shooting, set [ z : Shutter mode] to an option other than [Electronic] ( = 243).
- Page 814 Troubleshooting Guide Enabling Live View Shooting Set [ z : Live View shoot.] to [Enable]. The shutter makes two release sounds during Live View shooting. If you use fl ash with Live View shooting, the shutter will make two release ...
- Page 815 Troubleshooting Guide Movie recording stops by itself. If the card’s writing speed is slow, movie recording may stop automatically. For cards that can record movies, see = 617. To fi nd out the card’s writing speed, refer to the card manufacturer’s website, etc. If you shoot a movie for 29 min.
- Page 816 Troubleshooting Guide The image fl ickers or horizontal stripes appear during movie recording. Flickering, horizontal stripes (noise), or irregular exposures can be caused by fl uorescent lighting, LED lighting, or other light sources during movie recording. Also, changes in the exposure (brightness) or color tone may be recorded.
- Page 817 Troubleshooting Guide Problems with Wireless Features Cannot pair with a smartphone. Use a smartphone compliant with Bluetooth Specifi cation Version 4.1 or later. Turn on Bluetooth from the smartphone settings screen. Pairing with the camera is not possible from the smartphone’s Bluetooth ...
- Page 818 Troubleshooting Guide Cannot reconnect to a smartphone. Even with a combination of the same camera and smartphone, if you have changed the settings or selected a diff erent setting, reconnection may not be established even after selecting the same SSID. In this case, delete the camera connection settings from the Wi-Fi settings on the smartphone and set up a connection again.
- Page 819 Troubleshooting Guide Operation Problems I cannot change the setting with < 6 >, < 5 >, < j >, < 9 >, or < d >. Set the < R > switch downward (lock release) ( = 60). Check the [ 5 : Multi function lock] setting ( = 545). ...
- Page 820 Troubleshooting Guide The fi le name starts with “MVI_”. It is a movie fi le ( = 507). The fi le numbering does not start from 0001. If the card already contains recorded images, the image number may not ...
- Page 821 Troubleshooting Guide Playback Problems Part of the image blinks in black. [ 3 : Highlight alert] is set to [Enable] ( = 391). A red box is displayed on the image. [ 3 : AF point disp.] is set to [Enable] ( = 392). ...
- Page 822 Troubleshooting Guide Operation sound and mechanical sound can be heard during movie playback. If you operate the camera’s dials or lens during movie recording, the operation sound will also be recorded. Using the Directional Stereo Microphone DM-E1 (sold separately) is recommended ( = 296). The movie appears to freeze momentarily.
- Page 823 Troubleshooting Guide My card reader does not recognize the card. Depending on the card reader used and the computer’s operating system, SDXC cards may not be correctly recognized. In this case, either connect the camera to a computer with an interface cable (sold separately) and use EOS Utility (EOS software, = 590) or connect the camera to a computer via Wi-Fi ( = 426) to import the images on the camera.
- Page 824 Sensor Cleaning Problems The shutter makes a sound during sensor cleaning. Under [ 5 : Sensor cleaning], when you select [Clean now f ], the shutter will make a mechanical sound during the cleaning, but no picture will be recorded to the card ( = 528). Automatic sensor cleaning does not work.
-
Page 825: Error Codes
Error Codes If there is a problem with the camera, an error message will appear. Follow the on-screen instructions. If the problem persists, write down the error code (Errxx) and contact a Customer Support Help Desk. (1) Error number (2) Cause and countermeasures... -
Page 826: Performance Data
Performance Data Still Photo Shooting Number of Possible Shots (Approx. number of shots) Room Temperature Low Temperature Temperature (23°C / 73°F) (0°C / 32°F) 1860 1850 In viewfi nder shooting No fl ash In Live View shooting 1300 1200 In viewfi... - Page 827 11.1 20.4 11.1 • The number of possible shots is based on Canon’s testing standards and an 32 GB card. • Maximum burst measured under conditions and with an SD card conforming to Canon testing standards (32 GB standard/UHS-II card, < o > High-speed continuous shooting, 3:2 aspect ratio, ISO 100, Standard Picture Style).
- Page 828 Performance Data Pixel Count at Specifi c Aspect Ratios (Approx. pixels) Image Quality 1 / F 6960 × 4640 (32.3 megapixels) 6960 × 4640 (32.3 megapixels) 6960 × 4640 (32.3 megapixels) 6160 × 4640 (28.6 megapixels)* 4800 × 3200 (15.4 megapixels) 4256 ×...
- Page 829 Performance Data Movie Recording Cards that Can Record Movies Movie Recording Size SD Card UHS-I, UHS Speed Class 3 or higher SD Speed Class 10 or higher HDR movie SD Speed Class 4 or higher 4K time-lapse movie Reading speed of 40 Mbps or faster Full HD time-lapse movie Reading speed of 20 Mbps or faster •...
- Page 830 Performance Data Total Movie Recording Time and File Size Per Minute (Approx.) Total Possible Recording Time on Card Movie Recording Size File Size 8 GB 32 GB 128 GB 8 min. 35 min. 2 hr. 21 min. 860 MB/min. 8 min.
- Page 831 Performance Data Total Possible Time for Time-lapse Movie Recording (Approx.) Time-lapse Movie Recording Room Temperature Low Temperature (23°C / 73°F) (0°C / 32°F) Interval Screen Auto Off 5 hr. 10 min. 5 hr. 10 min. Disable 2 sec. 7 hr. 30 min. 7 hr.
- Page 832 Performance Data ISO Speed in Movie Recording In [ k ] Mode The ISO speed will be set automatically within ISO 100–12800. Under [ z : k ISO speed settings], setting [Max for Auto] to [H (25600)] ( = 322) expands the maximum limit of the automatic ISO speed setting range to H (equivalent to ISO 25600).
- Page 833 Performance Data Image Playback Resize Options by Original Image Quality Available Resize Settings Original Image Quality Size for Resized Images (Approx. pixels) Image Quality 15.4 megapixels (4800 × 3200) ― 8.1 megapixels (3472 × 2320) ― 3.8 megapixels (2400 × 1600) 3.4 megapixels (2112 ×...
-
Page 834: Information Display
Information Display Quick Control Screen (in Viewfi nder Shooting) Each time you press the < B > button, the information display will change. The display will show only the settings currently applied. (16) (17) (18) (19) (20) (21) (22) (23) (24) (10) - Page 835 Information Display Live View Shooting Screen Each time you press the < B > button, the information display will change. The display will show only the settings currently applied. (11) (12) (13) (14) (15) (16) (17) (18) (19) (20) (21) (10) Maximum burst...
- Page 836 Information Display (31) (22) (23) (32) (24) (33) (34) (25) (26) (35) (27) (36) (28) (37) (38) (29) (30) (39) (22) Warning to use fl ash (blinking)/ (31) GPS acquisition status Flash ready (on)/FE Lock/High- (32) Wi-Fi function speed sync (33) Magnify button (23) Electronic (34) ISO speed...
- Page 837 Information Display Movie Recording Screen Each time you press the < B > button, the information display will change. The display will show only the settings currently applied. (11) (12) (13) (14) (15) (16) (17) (18) (19) (20) (21) (10) Temperature warning (11) AF point (1-point AF)
- Page 838 Information Display (27) (28) (22) (29) (23) (30) (24) (31) (25) (32) (26) (33) (22) Sound-recording level indicator (27) Exposure level indicator (manual) (28) GPS acquisition status (23) AE lock (29) Bluetooth function (24) Shutter speed (30) ISO speed (25) Aperture value (31) Highlight tone priority (26) Exposure compensation (32) Wi-Fi signal strength...
- Page 839 Information Display Scene Icons In < A > mode, in Live View shooting or when recording movies, the camera detects the type of scene and sets all settings automatically to suit the scene. The detected scene type is indicated on the upper left of the screen.
- Page 840 Information Display *4: Displayed when all the following conditions apply: The shooting scene is dark, it is a night scene, and the camera is mounted on a tripod. *5: Displayed with any of the lenses below: • EF-S18-55mm f/3.5-5.6 IS II •...
- Page 841 Information Display Playback Screen Basic information display for still photos (10) (11) (12) (13) (14) (15) Wi-Fi function Bluetooth function Wi-Fi signal strength Already sent to a computer/ smartphone Battery level (10) Rating Playback No./Total images/ Number of found images (11) Image protection Shutter speed (12) Folder number-File number...
- Page 842 Information Display Detailed information display for still photos (10) (11) (12) (13) (14) (15) (16) (17) Aperture value (11) ISO speed Shutter speed (12) Highlight tone priority Shooting mode/Multiple exposure (13) Scroll bar White balance (14) Flash exposure compensation/ Bounce/HDR shooting/Multi Shot Auto Lighting Optimizer Noise Reduction...
- Page 843 Information Display Detailed information display for movies Movie playback Compression method Movie recording mode/Time-lapse Movie digital IS movie/Video snapshot Recording time Image size Movie recording format Frame rate * < G > will be displayed for still photos taken as test shots for time-lapse movies. During movie playback, “*, *”...
- Page 844 Protected Setup. The Bluetooth® word mark and logos are registered trademarks owned by Bluetooth SIG, Inc. and any use of such marks by Canon Inc. is under license. Other trademarks and trade names are those of their respective owners. All other trademarks are the property of their respective owners.
- Page 845 About MPEG-4 Licensing “This product is licensed under AT&T patents for the MPEG-4 standard and may be used for encoding MPEG-4 compliant video and/or decoding MPEG-4 compliant video that was encoded only (1) for a personal and non-commercial purpose or (2) by a video provider licensed under the AT&T patents to provide MPEG-4 compliant video.
- Page 846 Canon accessories. Therefore, using this product with genuine accessories is highly recommended. Canon shall not be liable for any damage to this product and/or accidents such as malfunction, fi re, etc. caused by the failure of non-genuine Canon accessories (e.g., a leakage and/or explosion of a battery). Please note that...
-
Page 847: Index
Index AI FOCUS (AI Focus AF) : 126 Numbers AI SERVO (AI Servo AF) : 125 1-point AF : 128, 135, 140 Tracking sensitivity : 559, 561 4K frame capture : 342 Album (video snapshot) : 312, 374 4K (movie) : 288 Ambience priority (AWB) : 224 Anti-fl... - Page 848 Index Bracketing Color tone : 234 AEB (Auto Exposure Bracketing) : 211 Continuous (fi le numbering) : 508 FEB (Flash Exposure Bracketing) : Continuous shooting : 150 Contrast : 218, 234 Focus bracketing : 255 Copyright information : 548 White balance bracketing : 228 Creative Assist : 82, 370 Built-in fl...
- Page 849 Index DPOF (Digital Print Order Format) : 354 Filter eff ect (Monochrome) : 235 Dragging : 70 Fine (Image quality) : 199 Drive mode : 150 Firmware : 550 Dust Delete Data : 241 First-curtain synchronization : 176 Fish-eye eff ect : 105, 363 Flash exposure compensation : 166, 172 Electronic level : 539 Flash mode : 171, 174...
- Page 850 Index Frame rate : 290, 520 High-speed continuous shooting : 150 Full High-Defi nition (Full HD) : 288 Histogram : 389, 540 Full High-Defi nition (Full HD) (movie) : Hot shoe : 31, 179 Household power : 594 Fully-press : 542 ICC profi...
- Page 851 Index Image search : 385 Distortion correction : 207, 368 Importing images to a computer : 592 Focus mode switch : 54 Index display : 334 Lock release : 55 INFO button : 62, 332, 538, 622, 623, Optical aberration correction : 206, Interval timer : 258 Peripheral illumination correction : IPB : 290...
- Page 852 Index Monochrome : 83, 231, 235 Movies : 273 Macro photography : 93 AE lock : 278 Magnifying images : 144, 147 AF method : 135 Main dial : 58 Attenuator : 296 Malfunction : 595 Autoexposure recording : 277 Manual exposure : 117 Auto slow shutter : 324 Manual focus : 147...
- Page 853 High ISO speed : 239 Photobook set-up : 358 Long exposures : 238 Print order (DPOF) : 354 Non-Canon fl ash units : 179 Program AE : 110 Normal (Image quality) : 199 Program shift : 111 NTSC : 290, 520...
- Page 854 Index Reduced display : 334 Shooting mode Release shutter without card : 205 <A+> (Scene Intelligent Auto) : 76 Remote controller : 155 Av (Aperture-priority AE) : 114 Remote control terminal : 156 B (Bulb) : 119 Remote switch : 156 [C1]/[C2] (Custom shooting) : 546 Resizing : 379 Creative fi...
- Page 855 Android : 399 TV display : 344 Camera access point mode : 462 Tv (Shutter-priority AE) : 112 Camera Connect : 399, 404 CANON iMAGE GATEWAY : 444 Clearing wireless communication UHS-II/UHS-I : 10 settings : 480 USB (digital) terminal : 592...
- Page 856 Index Printer : 434 Printing : 436 Print order : 439 Reconnecting : 467 Remote operation : 404 Resize image : 412, 417, 452 Sending all images on the card : 418, Sending images that match search conditions : 419, 456 Send selected : 414, 451 SSID : 409, 427, 434 Switch network : 459...
- Page 858 The descriptions in this Instruction Manual are current as of June 2019. For information on the compatibility with any products introduced after this date, contact any Canon Service Center. For the latest version Instruction Manual, refer to the Canon Web site.
- Page 859 Supplemental Information CT2-D042-A © CANON INC. 2019...
- Page 860 AF Sensor 45 AF points are available in viewfi nder shooting. Diagram Cross-type focusing: f/5.6 vertical + f/5.6 horizontal (some also supporting f/8) Dual cross-type focusing: f/2.8 right diagonal + f/2.8 left diagonal f/5.6 vertical + f/5.6 horizontal (also supporting f/8) This focusing sensor is geared to obtain higher-precision focusing for lenses with a maximum aperture value as low as f/2.8.
- Page 861 Lenses and Usable AF Points The number of available AF points and the focusing patterns used vary by lens group (A–H). Fewer AF points are available for lenses in groups E–H. AF points in [ ] blink when the < S > or < G > button is pressed (while ...
- Page 862 Lenses and Usable AF Points Group C Autofocusing with 45 points is possible. All the AF area selection modes are selectable. : Cross-type AF point. Subject tracking performance is superior and high-precision focusing is achieved. : AF points sensitive to horizontal lines. Group D Autofocusing with 45 points is possible.
- Page 863 Lenses and Usable AF Points Group F Autofocusing with 35 points is possible. (Not possible with all 45 AF points.) All the AF area selection modes are selectable. During automatic AF point selection, the outer frame marking the AF area (Area AF frame) will be diff...
- Page 864 AF when shooting low-contrast or low-light subjects. If the maximum aperture value is slower than f/8 (greater than f/8), AF is not possible during viewfi nder shooting. For updates on “Group Classifi cation of Lenses,” visit the Canon website or others.
- Page 865 Lenses and Usable AF Points Group Classifi cation of Lenses EF-S24mm f/2.8 STM EF35mm f/2 EF-S35mm f/2.8 Macro IS STM EF35mm f/2 IS USM EF-S60mm f/2.8 Macro USM EF40mm f/2.8 STM EF-S10-18mm f/4.5-5.6 IS STM EF50mm f/1.0L USM EF-S10-22mm f/3.5-4.5 USM EF50mm f/1.2L USM EF-S15-85mm f/3.5-5.6 IS USM EF50mm f/1.4 USM...
- Page 866 Lenses and Usable AF Points EF200mm f/2.8L USM EF400mm f/2.8L II USM + Extender EF2x I/II/III EF200mm f/2.8L USM + Extender EF1.4x I/II/III EF400mm f/2.8L IS USM EF200mm f/2.8L USM EF400mm f/2.8L IS USM + Extender EF2x I/II/III + Extender EF1.4x I/II/III EF200mm f/2.8L II USM EF400mm f/2.8L IS USM + Extender EF2x I/II/III...
- Page 867 Lenses and Usable AF Points EF600mm f/4L USM EF24-105mm f/3.5-5.6 IS STM EF600mm f/4L USM EF24-105mm f/4L IS USM + Extender EF1.4x I/II/III EF24-105mm f/4L IS II USM EF600mm f/4L USM H (f/8)* EF28-70mm f/2.8L USM + Extender EF2x I/II/III EF28-70mm f/3.5-4.5 EF600mm f/4L IS USM EF28-70mm f/3.5-4.5 II...
- Page 868 Lenses and Usable AF Points EF35-135mm f/4-5.6 USM EF70-210mm f/3.5-4.5 USM EF35-350mm f/3.5-5.6L USM EF70-210mm f/4 EF38-76mm f/4.5-5.6 EF70-300mm f/4-5.6 IS USM EF50-200mm f/3.5-4.5 EF70-300mm f/4-5.6 IS II USM EF50-200mm f/3.5-4.5L EF70-300mm f/4-5.6L IS USM EF55-200mm f/4.5-5.6 USM EF70-300mm f/4.5-5.6 DO IS EF55-200mm f/4.5-5.6 II USM EF75-300mm f/4-5.6 EF70-200mm f/2.8L USM...
- Page 869 Lenses and Usable AF Points EF200-400mm f/4L IS USM H (f/8) Extender 1.4x: With built-in Ext. 1.4x + Extender EF1.4x I/II/III EF200-400mm f/4L IS USM H (f/8) Extender 1.4x + Extender EF2x I/II EF200-400mm f/4L IS USM G (f/8) Extender 1.4x + Extender EF2x III TS-E17mm f/4L TS-E24mm f/3.5L TS-E24mm f/3.5L II...
- Page 870 System Map 470EX-AI ST-E2 ST-E3-RT EL-100 270EX II 430EX III-RT/ 600EX II-RT Macro Ring Lite Macro Twin Lite 430EX III MR-14EX II MT-26EX-RT Bundled Accessories Magnifier MG-Eb Eyecup Eb Eyepiece Extender EP-EX15 Strap Rubber Frame Eb E-series Dioptric Adjustment Lenses Battery Pack Battery Charger LP-E6N...
- Page 871 System Map Headphones Wireless Remote Remote Timer Receiver Remote Controller Switch Remote GP-E2 Control RC-6 RS-60E3 Controller BR-E1 TC-80N3 EF lenses EF-S lenses Remote Controller Adapter RA-E3 Directional Stereo Microphone DM-E1 HDMI Cable HTC-100 (Approx. 2.9 m/9.5 ft.) TV/Video Interface Cable IFC-600PCU (Approx.
- Page 872 * UHS-II and UHS-I cards supported. Image sensor size: Approx. 22.3×14.8 mm Compatible lenses: Canon EF lenses (including EF-S lenses) * Not including EF-M lenses (Eff ective angle of view is approx. 1.6 times the indicated focal length.) Lens mount: Canon EF mount ■...
- Page 873 Specifi cations ■ Image Processing During Shooting Picture Style: Auto, Standard, Portrait, Landscape, Fine Detail, Neutral, Faithful, Monochrome, User Defi ned 1–3 White balance: Auto (Ambience priority), Auto (White priority), Preset (Daylight, Shade, Cloudy, Tungsten light, White fl uorescent light, Flash), Custom, Color temperature setting (approx.
- Page 874 Specifi cations ■ Autofocus [Viewfi nder shooting] Type: TTL secondary image-registration, phase-diff erence detection with the dedicated AF sensor AF points: Cross-type AF point: Max. 45 points * Number of available AF points, Dual cross-type AF points, and Cross-type AF points vary depending on the lens used.
- Page 875 Specifi cations AF operation: One-Shot AF, Servo AF Auto AF operation In Scene Intelligent Auto mode switching: Eye Detection AF: Available Continuous AF: Available AF area: Horizontal: Approx. 88%, Vertical: Approx. 100% Horizontal: Approx. 80%, Vertical: Approx. 80% * Varies depending on factors such as the lens and aspect ratio used Focusing brightness range: EV –5 to 18 (f/1.2, center AF point, at room temperature, ISO 100,...
- Page 876 Specifi cations ■ Exposure Control Metering mode: Viewfi nder shooting: TTL open-aperture metering with an approx. 220,000-pixel RGB+IR metering sensor 216-zone (18×12) metering Live View shooting/movie recording: Real-time metering with image sensor 384-zone (24×16) metering Metering mode: Still photo shooting: Evaluative metering (linked to all AF points), Partial metering (approx.
- Page 877 Specifi cations ■ Shooting Mode Basic Zone: Scene Intelligent Auto Special Scene (Portrait, Group Photo, Landscape, Sports, Kids, Panning, Close-up, Food, Candlelight, Night Portrait, Handheld Night Scene, HDR Backlight Control), Creative fi lters (Grainy B/W, Soft focus, Fish-eye eff ect, Water painting eff...
- Page 878 Specifi cations ■ Shutter Type: Electronically-controlled, focal-plane shutter Shutter speed: Viewfi nder shooting: 1/8000 sec. to 30 sec. (full shutter speed range; available range varies by shooting mode), Bulb, X-sync at 1/250 sec. Live View shooting: 1/16000 sec. to 30 sec. (full shutter speed range;...
- Page 879 RAW+JPEG Large/Fine: Approx. 23 shots (Approx. 24 shots) C-RAW+JPEG Large/Fine: Approx. 37 shots (Approx. 36 shots) * Measured with an SD card conforming to Canon testing standards (standard: 32 GB UHS-I card / high-speed: 32 GB UHS-II card) and under conditions following the standards (high-speed continuous shooting at ISO 100 using the Standard Picture Style).
- Page 880 Specifi cations ■ Movie Recording Recording format: Video: MPEG-4 AVC/H264, variable (average) bit rate Audio: AAC (when [C.Fn III-5: Audio compression] is set to [0: Enable]) Linear PCM (when [C.Fn III-5: Audio compression] is set to [1: Disable]) Movie recording quality: 4K (3840×2160), Full HD (1920×1080), HD (1280×720) HDR movies: Full HD Time-lapse movies: 4K/Full HD...
- Page 881 Specifi cations Headphone: Headphone terminal provided, volume adjustable 4K movie cropping: Available Movie digital IS: Available (Enable/Enhanced) HDR movies: Available (in Special scene mode) Video snapshot: Available Time-lapse movies: 4K or Full HD HDMI output: Image output without information display available * 4K output supported;...
- Page 882 Specifi cations ■ Playback Image display format: Single-image display (without shooting information), Single- image display (with basic information), Single-image display (Shooting information displayed: Detailed information, Lens/ histogram, White balance, Picture Style 1, Picture Style 2, Color space/noise reduction, Lens aberration correction 1, Lens aberration correction 2, GPS information), Index display (4/9/36/100 images) * Customizable shooting information display...
- Page 883 Specifi cations ■ Customization Features Custom Functions: 29 types Custom shooting modes: Registered to C1/C2 on the Mode dial My Menu: Up to 5 screens Copyright information: Text entry and appending possible ■ Interface Digital terminal: Hi-Speed USB equivalent; terminal shape: USB Micro-B Computer communication HDMI mini OUT terminal: Type C (auto switching of resolution)
- Page 884 Working humidity: 85% or less All the data above is based on Canon’s testing standards and CIPA (Camera & Imaging Products Association) testing standards and guidelines. Dimensions and weight listed above are based on CIPA Guidelines (except weight for camera body only).