Table of Contents
Advertisement
Available languages
Available languages
BOMBA DE CALOR
INVERTER PARA PISCINA
INVERTER SWIMMING
POOL HEAT PUMP
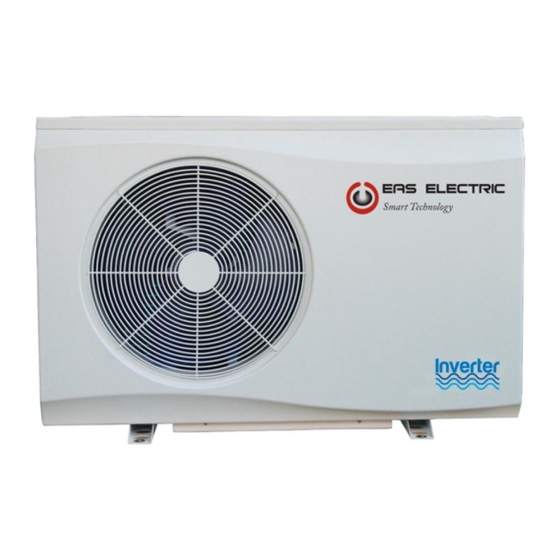
EBP08WZRN
EBP12WZRN
EBP15WZRN
EBP23WZRN
EBP29WZRN
EBP34YZRN
MANUAL DE
INSTRUCCIONES
INSTRUCTION MANUAL
Escanee para ver este manual en otros idiomas y actualizaciones
Scan for manual in other languages and further updates
Manuel dans d'autres langues et mis à jour
Manual em outras línguas e actualizações
V.1
Advertisement
Chapters
Table of Contents

Related Manuals for EAS Electric EBP08WZRN


Summary of Contents for EAS Electric EBP08WZRN
- Page 1 BOMBA DE CALOR INVERTER PARA PISCINA INVERTER SWIMMING POOL HEAT PUMP EBP08WZRN EBP12WZRN EBP15WZRN EBP23WZRN EBP29WZRN EBP34YZRN MANUAL DE INSTRUCCIONES INSTRUCTION MANUAL Escanee para ver este manual en otros idiomas y actualizaciones Scan for manual in other languages and further updates Manuel dans d'autres langues et mis à...
- Page 2 Estimado usuario, ¡Gracias por elegir nuestros productos, apreciamos mucho su confianza en nosotros! Con las Bombas de Calor EBP para Piscinas Inverter podrá calentar o enfriar su piscina y así extender su temporada de baño. Esta es una bomba de calor especial para piscinas más cercana de los usuarios, porque se trata de una bomba de calor inteligente que sabe cómo calentar su piscina de la manera más eficiente y puede mantener la temperatura de la piscina, gracias a la tecnología Super DC Inverter.
-
Page 3: Table Of Contents
INTRODUCCIÓN Este manual La unidad Contenido MEDIDAS DE SEGURIDAD ACCESORIOS INCLUIDOS VISTA DE LA UNIDAD INSTALACIÓN Sobre la instalación Lugar de instalación Perfeccionar la instalación Conexión hidráulica Conexión eléctrica Prueba de funcionamiento FUNCIONAMIENTO DE LA UNIDAD Instrucciones del controlador Instrucciones sobre la pantalla Instrucciones para las funciones Función de diagnóstico COMPROBACIÓN Y AJUSTE DE PARÁMETROS... -
Page 4: Introducción
1. INTRODUCCIÓN 1.1 Este manual Este manual incluye toda la información necesaria sobre la unidad. Le rogamos que lo lea detenidamente antes de usar este producto. 1.2 La unidad La bomba de calor para piscinas es uno de los sistemas más económicos para calentar la piscina de manera eficiente. -
Page 5: Medidas De Seguridad
6. Auto diagnóstico Cuando hay un fallo de funcionamiento, la bomba de calor para piscinas realizará un autodiagnóstico y mostrará el código de error correspondiente en el panel de control. El problema se puede descubrir de un solo vistazo. 2.MEDIDAS DE SEGURIDAD Para evitar lesiones al usuario y otras personas además de daños a objetos, se deben cumplir las siguientes medidas de seguridad. - Page 6 Realice el trabajo eléctrico de acuerdo con el manual de instalación y asegúrese de consultar la sección correspondiente. Si la capacidad del circuito de potencia es insuficiente o hay un circuito eléctrico incompleto, podría provocar un incendio o una descarga eléctrica. La unidad siempre debe tener una conexión a tierra.
- Page 7 3. ACCESORIOS EN LA CAJA Antes de comenzar la instalación, asegúrese de que todas las piezas se encuentren dentro de la caja. Caja de la unidad Cantidad Imagen Item Bomba de calor para piscinas Manual de usuario e instalación Conectores de agua (55mm) Funda para...
-
Page 8: Vista De La Unidad
4. VISTA DE LA UNIDAD Dimensiones de la unidad EBP12WZRN/ EBP29WZRN MODELO EBP23WZRN EBP08WZRN EBP15WZRN / EBP34YZRN 1076 1176... - Page 9 Vista de despiece Nombre Nombre Tapa superior Panel base Tapa caja eléctrica Compresor inverter Estructura Conector de media presión Componentes electrónicos de control Conector de baja presión Batería intercambiador de calor Tapa de alimentación Aspa del ventilador Display de control Panel separador Panel derecho Motor ventilador AC...
-
Page 10: Instalación
5. INSTALACIÓN 5.1 Información sobre la instalación Los siguientes datos no son instrucciones, simplemente tienen como objetivo brindar al usuario una mejor comprensión de la instalación. 5.2 Lugar de instalación Instale la bomba de calor para piscinas sobre una superficie plana, horizontal y estable. -
Page 11: Conexión Hidráulica
Durante los primeros meses de uso, su bomba de calor puede mostrar condensación. Esto dará como resultado flujos de agua, más o menos importantes según el contenido de humedad, que disminuirá gradualmente. Para canalizar los flujos de condensación, le recomendamos que instale un kit de drenaje de condensado. - Page 12 El filtro debe limpiarse regularmente para garantizar que el agua del sistema esté limpia y para evitar cualquier problema relacionado con la suciedad o la obstrucción del filtro.
-
Page 13: Conexión Eléctrica
Los cables de conexión deben tener una longitud acorde a la potencia del dispositivo y a los requisitos de instalación. Consulte la siguiente tabla: Modelo Tamaño del cable EBP08WZRN 3 x 1,5 mm /AWG 16 EBP12WZRN 3 x 2,5 mm... -
Page 14: Prueba De Funcionamiento
5.7 Prueba de funcionamiento Después de conectar el agua al sistema de la piscina, un ingeniero cualificado debe completar la instalación realizando un by-pass adecuado y las cone- xiones eléctricas. Asegúrese de que: 1) El dispositivo está instalado horizontalmente y sobre una base firme. 2) El circuito de agua está... -
Page 15: Instrucciones Del Controlador
6.1 Instrucciones del controlador 6.1.1 General Voltaje de entrada: DC12V Comunicación RS485 Pulsación corta de 1 ~ 5 seg., pulsación larga de 5 seg. Si no pulsa ningún botón durante más de 30 seg., la superficie del controlador volverá a la normalidad. El usuario puede operar el controlador solo cuando la pantalla esté... -
Page 16: Instrucciones Sobre La Pantalla
6.1.3 Pantalla y funcionamiento 6.2 Instrucciones de la pantalla 6.2.1 Instrucciones para los botones ON / OFF: Presione brevemente para activar / desactivar el equipo. También se puede presionar este botón para salir cuando termina de configurar o verificar. Modo funcionamiento: Presione brevemente para cambiar el modo de funcionamiento. -
Page 17: Instrucciones Para Las Funciones
6.2.2 Instrucciones para los símbolos de la pantalla Modo de calentamiento de la piscina Modo de enfriamiento de la piscina Modo de funcionamiento automático Modo "Boost" para el calentamiento rápido Modo "Smart" para el funcionamiento inteligente Modo "Silent" para el funcionamiento silencioso y de bajo consumo Capacidad de salida de la bomba de calor en tiempo real Función wifi Temperatura de entrada de agua... - Page 18 6.3.2 Ajuste de temperatura Cuando la bomba de calor está encendida, presione brevemente para ajustar la temperatura del agua, el símbolo se visualiza normalmente. El ajuste del valor de temperatura del agua parpadea, presione para seleccionar el valor, presione para confirmar y salir de la configuración actual.
-
Page 19: Función De Diagnóstico
6.4 Función de diagnóstico Cuando la bomba de calor está apagada, el micro-interruptor 4 cambia a 1, la bomba de calor entra en la función de Diagnóstico automáticamente. Luego la pantalla mostrará cada símbolo y cambiará cada segundo. 7. COMPROBACIÓN Y AJUSTE DE PARÁMETROS 7.1 Lista de parámetros Algunos parámetros pueden ser verificados y ajustados mediante el controlador. - Page 20 7.2 Fallos de funcionamiento de la unidad y mantenimiento Cuando se produce un error o la unidad activa una protección automáticamente, la placa de circuitos y el controlador mostrarán el mensaje de error. Error Significado Análisis Diagnóstico Solución 1. Compruebe si la válvula 1.
- Page 21 1. Verifique si existe aire 1.Si la válvula de Protección contra 1. Menor flujo de en el sistema de agua; drenaje tiene un la congelación del agua; 2. Limpiar el problema, cámbiela agua de salida 2. Intercambiador intercambiador de calor por una nueva;...
- Page 22 Reservado Reservado Reservado Reservado Voltaje DC extra bajo Voltaje DC extra alto Protección de corriente alterna (lado de entrada) Error del módulo IPM Error PFC Fallo de arranque del compresor Falta fase del compresor Reinicio módulo IPM Sobrecorriente del compresor Temp.
-
Page 23: Mantenimiento De La Unidad
8. MANTENIMIENTO DE LA UNIDAD Para proteger la pintura, evite apoyar o colocar objetos encima del equipo. Las partes externas de la bomba de calor se pueden limpiar con un paño húmedo y un limpiador doméstico. (Atención: Nunca use productos de limpieza que contengan arena, soda, ácido o cloruro, ya que pueden dañar las superficies. -
Page 24: Solución De Problemas
9. SOLUCIÓN DE PROBLEMAS Esta sección ofrece información útil para el diagnóstico y la corrección de algunos fallos que pueden ocurrir en la unidad. Antes de comenzar el procedimiento de localización de averías, lleve a cabo una inspección visual de la unidad y busque defectos como conexiones flojas o cables dañados. -
Page 25: Esquema Eléctrico
10. ESQUEMA ELÉCTRICO Consulte el diagrama de cableado en la caja eléctrica. Modelo: EBP08WZRN/ EBP12WZRN/ EBP015WZRN... - Page 26 Modelo: EBP23WZRN...
- Page 27 EBP29WZRN...
- Page 28 Modelo: EBP34YZRN...
-
Page 29: Características Técnicas
Características técnicas EBP08WZRN EBP12WZRN EBP15WZRN Modelo 1.6~7.7 2.7~11.6 3.4~14.8 Capacidad(kW) 0.13~1.24 0.18~1.81 0.23~2.36 Potencia entrada (kW) 6.02~12.6 6.27~14.8 6.15~14.62 Calefacción* Capacidad(kW) Boost 7.70 11.60 14.80 Aire 26℃ COP Boost 6.26 6.27 6.15 /Agua 26℃ Capacidad(kW)Smart 5.92 8.94 11.44 Humedad 80% COP Smart 7.65... - Page 30 EBP23WZRN EBP29WZRN EBP34YZRN Modelo Capacidad(kW) 4.8~21.6 6.6~28.3 7.7~33.2 0.33~3.42 0.46~4.49 0.54~5.27 Potencia entrada (kW) 6.36~14.55 6.1~14.54 6.11~14.6 21.60 28.30 33.2 Capacidad (kW)Boost Calefacción* 6.36 6.10 6.11 Aire26℃/ COP Boost Agua 26℃ 17.17 21.95 25.68 Capacidad (kW)Smart Humedad 80% 3.00 7.63 7.64 COP Smart 10.60...
-
Page 31: Protección Del Medio Ambiente
12. PROTECCIÓN DEL MEDIO AMBIENTE Este producto contiene gases fluorados de efecto invernadero contemplado en el Protocolo de Kyoto. Solo debe ser reparado o desmantelado por personal capacitado profesionalmente. 13. REQUISITOS DE ELIMINACIÓN El desmontaje de la unidad, el tratamiento del refrigerante, del aceite y de otras partes se debe realizar de acuerdo con la legislación local y nacional pertinente. - Page 32 CONDICIONES DE LA GARANTÍA EAS ELECTRIC ofrece una garantía de reparación contra todo defecto de funcionamiento prove- niente de la fabricación, incluyendo mano de obra y piezas de recambio, en los plazos y términos indicados a continuación: 3 años: Gama Doméstica, Gama Comercial, VRV de uso doméstico, M-Thermal Monoblock y Biblock, Fan Coils de uso doméstico, Acumuladores aerotérmicos de ACS, Bombas de Piscina,...
- Page 33 BOMBA DE CALOR INVERTER PARA PISCINA Serie EBP APLICACIÓN WI-FI MANUAL DE INSTRUCCIONES...
- Page 34 Contenido 1. Conexión del kit Wi-Fi ..........3 2. Instalación de la app ............5 3. Registro .................. 6 4. Configuración de la app ..........7 5. Funcionamiento de la app ......... 10...
-
Page 35: Conexión Del Kit Wi-Fi
1. Conexión del kit Wi-Fi 1.1 Requisitos de la conexión del kit Wi-Fi Items Forma Cantidad Notas Módulo Wi-Fi -------- Incluidos como Cable I accesorios en el (Longitud: embalaje de la 50cm) bomba de Cable II piscina. (Longitud: 15m) 1.2 Dimensiones del módulo Wi-Fi 1.3 Descripción del módulo Wi-Fi... - Page 36 Funcionamiento Este indicador se ilumina al encender la unidad. 1. Durante la configuración del Wi-Fi, el indicador parpadeará. Indicador Wi-Fi 2. Tras conectar el Wi-Fi, quedará encendido. 3. El indicador se apagará si no hay conexión a internet. Si la comunicación es normal entre el mó- Indicador de dulo Wi-Fi, el controlador y la unidad, estará...
-
Page 37: Instalación De La App
Desconecte los cables del controlador y de la PCB con los conectores. El cable II se conecta con el cable de la PCB, que a su vez se conecta con el controlador I. Introduzca el cable II y los conectores entre el cable II y el cable I en la unidad. 2. -
Page 38: Registro
3. Registro Abra la App y conceda los permisos necesarios. Tras pulsar "Allow" (‘Permitir’), acceda a la siguiente interfaz y pulse "Register" (Registrar). Pulse ‘Agree’ (Aceptar) para aceptar la política de privacidad. Escoja su país y escriba su número de teléfono o dirección de correo electrónico para recibir el mensaje con el código de verificación. -
Page 39: Configuración De La App
4. Configuración de la app Tras configurar la contraseña para iniciar sesión en la app, pulse "Add device" y añada el dispositivo. Pulse ‘Large Home Applications’ (Gran- des sistemas domésticos) y ‘Water Heater’ para pasar a la siguiente página. - Page 40 Conecte el módulo Wi-Fi con la bomba de calor. Al mismo tiempo, asegúrese de que el módulo y los dispositivos móviles reciben señal de la misma red Wi-Fi. Encienda la bomba de piscina y los indicadores de funcio- namiento y de comunicación del módulo Wi-Fi se iluminarán. Pulse el botón de configuración durante 3 segundos.
- Page 41 Pulse ‘go to connect’ (Ir a Ajustes/Conexión) para configurar el Wi- Fi del móvil. Si el móvil ya está conectado al Wi-Fi del router, introduzca la contraseña y pulse ‘Confirm’ en la siguiente pantalla. Tras pulsar ‘Confirm’, comenzará el proceso de conexión del módulo Wi-Fi, del dispositivo móvil y del router Wi-Fi.
-
Page 42: Funcionamiento De La App
5. Funcionamiento de la app 1. Botón "Editar", para realizar modificaciones. Púlselo para acceder a la interfaz de edición. - Page 43 2. B arra de ajuste de temperatura. Deslice la bola hacia derecha o izquierda con el dedo para ajustar la temperatura de consigna. 3. Valor de ajuste de temperatura. Este valor puede cambiarse según la ubicación de la bola en la barra deslizable de ajuste de temperatura.
- Page 44 7. Botón temporizador. Pulse este botón para acceder a la interfaz del temporizador. Pulse ‘Add’ (Añadir) para configurar una programación. En esta pantalla puede configurar la hora y día de programación de encendido y apagado.
- Page 45 Tras configurar, pulse ‘Save’ (Guardar) para confirmar y guardar. La programación configurada se mostrará en la siguiente pantalla. En esta interfaz, pulse ‘Add Schedule’ (Añadir progra- mación) para añadir otro temporizador de encendido/apagado. Deslice un ajuste de programación de derecha a izquierda para borrarla.
- Page 46 English THANK YOU Dear User, Thank you for choosing our products and greatly we appreciate your confidence in us! These are the EBP-Inverter Swimming Pool Heat Pumps for heating or cooling your pool and extending your swimming season. This is a special Pool heat pumps which is most close to users and why? It is a smart heat pump who knows how to heat your pool most efficiently and maintain pool temperature, thanks to the full inverter technology.
- Page 47 INTRODUCTION This manual The unit SAFETY INSTRUCTIONS Contents ITEMS INSIDE PRODUCT BOX OVERVIEW OF THE UNIT INSTALLATION Installation information Installation place To perfect your installation Water connection Electrical connection Trial running OPERATING THE UNIT Controller instruction Display instruction Instruction for function Function diagnosis PARAMETER CHECKING AND ADJUSTMENT Parameter list...
-
Page 48: Introduction
1. INTRODUCTION 1.1 This manual This manual includes the necessary information about the unit. Please read this manual carefully before you use and maintain the unit. 1.2 The unit The swimming pool heat pump is one of the most economical systems to heat the swimming pool efficiently. -
Page 49: Safety Instructions
2. SAFETY INSTRUCTIONS To prevent injury to the user, other people, or property damage, the following instructions must be followed. Incorrect operation due to ignoring of instructions may cause harm or damage. Install the unit only when it complies with local regulations, by-laws and standards. Check the main voltage and frequency. - Page 50 If there is no suitable, earthed wall socket available, have one installed by a recognized electrician. Do not move/repair the unit yourself. Before proceeding with any maintenance, service or repair work, the product must be isolated from the mains electrical supply. Only qualified personnel should carry out these tasks.
-
Page 51: Items Inside Product Box
3. ITEMS INSIDE PRODUCT BOX Before starting the installation, please make sure that all parts are found inside the box. The Unit Box Item Image Quantity Wave-Inverter Swimming pool heat pump Installation and Operation Manual Water Connectors (55mm) Winter Cover Rubber foots for anti- vibration... -
Page 52: Overview Of The Unit
OVERVIEW OF THE UNIT Unit Dimension EBP12WZRN/ EBP29WZRN MODEL EBP08WZRN EBP23WZRN EBP15WZRN EBP34YZRN 1076 1176... - Page 53 Exploded View Name Name Top Cover Bottom Panel component Electric box cover Inverter compressor Support frame Middle-pressure switch Electronic control components Low-pressure switch Fin heat exchanger Power waterproof cover Fan blade Controller Middle panel Right panel AC fan motor Needle valve Four-way valve Front Panel High-pressure valve...
-
Page 54: Installation
5. INSTALLATION 5.1 Installation information The following information given here is not an instruction, but simply meant to give the user a better understanding of the installation. 5.2 Installation place Install the swimming pool heat pump on a flat, horizontal, and stable surface. Maintain 1 M of open space in front of the discharge grids and 3 M on the outlet side of the ventilator. - Page 55 To channel condensation flows, we recommend that you install our conden- sate drain kit. For this purpose the heat pump must be raised by at least 10 How to install the condensate drain kit? 1. Install your heat pump by raising it by at least 10 cm using solid, moisture- resistant studs.
-
Page 56: Electrical Connection
Electrical supply must correspond to that indicated on the appliance. Connection cables have to be sized according to appliance power and installation requirements. Please refer to below table: Model Cable size EBP08WZRN 3 x 1,5 mm /AWG 16 EBP12WZRN 3 x 2,5 mm... -
Page 57: Trial Running
These data are only indication, you must ask an electrician to determine the exact data for your pool installation. Use the cable glands and grommets provided inside the heat pump to route cables. If the length of your cable is more than 10 meters, we advise you to seek advice from a professional. -
Page 58: Controller Instruction
6.1 Controller Instruction 6.1.1 General Input Voltage: DC12V RS485 Communication Short-Press for 1~5seconds, Long-Press for 5 seconds. No B utton press for more than 30s, controller surface will exit to original normal. User can operate the controller only when the creen is light on. Back light of Screen is orange, characters and symbols are black. -
Page 59: Instruction For Function
Silent Running mode: Short-press to enter in 6.2.2 Intructions for Display Symbols Heating Pool mode Cooling Pool mode Auto run mode Boost run mode Smart run mode Silent run mode : Heat Pump output capacity in actual time Wi-Fi function Water IN temperature Water OUT temperature Error warning... -
Page 60: Function Diagnosis
6.3.2 Set Temperature When heat pump is on, short-press into water temperature setting surface. Water in area temperature value twinkles, press to select value, press to confirm and exit current setting. No any set up after 30 seconds, the controller will save the last setting and go back to original surface. -
Page 61: Parameter Checking And Adjustment
7. PARAMETER CHECKING AND ADJUSTMENT 7.1 Parameter list Some parameters can be checked and adjusted by the controller. B elow is the parameter list. Name Instruction Compressor running frequency Current hz EEV Open degree Current Value/5 Current ºC Ambient Temperature Current ºC Outlet Water Temp. - Page 62 of larger water flow; protection 2. High-pressure or water pump flow is not enough; 2. Change a new switch is high-pressure switch 2. Check if high- damaged; 3. Change a new filter pressure switch is off 3. Refrigerant 4. Change a new EEV 3.
- Page 63 High- Check if high pressure High pressure Change high pressure switch 2 cuts under pressure 2 switch 2 cuts switch 2 protection unit OFF condition Controller Communica Check Change connection communi- tion cable communication cable or re-connect cation cuts cable if cut failure TP1 exhaust Check sensor...
- Page 64 reserved reserved reserved reserved DC main cable voltage extra low DC main cable voltage extra high AC current protection (input side) IPM module abnormity PFC abnormity Compressor start Wiring error or failure IPM module invalid Compressor Check if lack-phase wiring error IPM module reset Re-connect cable or change IPM module...
-
Page 65: Maintenance Of The Unit
extra high temperature IPM module temperature sensor failure reserved IPM adjustment data IPM adjustment data AC input voltage abnomity IPM adjustment data Reserved IPM module current frequence limits IPM module voltage frequence limits Failure of Fan motor drive 8. MAINTENANCE THE UNIT To protect the paintwork, avoid leaning or putting objects on the device. -
Page 66: Cleaning The Air System
Use only pressurized drinking water for cleaning. 8.1 Cleaning the air system The finned heat exchanger, ventilator and condensate outflow should be cleaned of contaminants (leaves, twigs, etc.) before each new heating period. These types of contaminants can be manually removed using compressed air or by flushing with clean water. -
Page 67: Wiring Diagram
There is supply voltage (tripped fuse, power failure). The operating switch on the wired controller is switched on, and whether the correct set point temperature has been set. The set temperature level cannot be reached. Please check whether: The permissible operating conditions for the heat pump have been adhered to (air temperatures too high or too low). - Page 68 Modelo: EBP08WZRN/ EBP12WZRN/ EBP015WZRN...
- Page 69 Modelo: EBP23WZRN...
- Page 70 EBP29WZRN...
- Page 71 EBP34YZRN...
-
Page 72: Specifications
Specification EBP15WZRN EBP08WZRN EBP12WZRN Host model External model capacity(kW) 1.6~7.7 2.7~11.6 3.4~14.8 0.13~1.24 0.18~1.81 0.23~2.36 power input(kW) 6.02~12.6 6.27~14.8 6.15~14.62 Heating* 7.70 11.60 14.80 capacity(kW)Boost Air 26ºC/ 6.26 6.27 6.15 COP Boost Water 26ºC/ capacity (kW) Smart 5.92 8.94 11.44 7.65... - Page 73 External model EBP34YZRN EBP23WZRN EBP29WZRN Host model capacity(kW) 6.6~28.3 4.8~21.6 7.7~33.2 0.46~4.49 0.33~3.42 0.54~5.27 power input (kW) 6.1~14.54 6.36~14.55 6.11~14.6 28.30 21.60 33.2 Heating* capacity(kW) Boost 6.10 Air 26ºC/ 6.36 6.11 COP Boost Water 26ºC 21.95 capacity(kW)Smart 17.17 25.68 Humidity 80% 7.63 3.00 7.64...
-
Page 74: Environmental Information
12. ENVIRONMENTAL INFORMATION This equipment contains fluorinated greenhouse gases covered by the Kyoto Protocol. It should only be serviced or dismantled by professional trained personnel. 13. DISPOSAL REQUIREMENTS Dismantling of the unit, treatment of the refrigerant, of oil and of other parts must be done in accordance with relevant local and national legislation. - Page 75 WARRANTY CONDITIONS EAS ELECTRIC offers a repair guarantee against all manufacturing defects, including labour and spare parts, within the terms and conditions indicated below: 3 years: Residential Range, Commercial Range, VRF for domestic use, M-Thermal Monoblock and Biblock, Fan Coils for domestic use, DHW aerothermal storage heaters, Swimming Pool Heat Pumps, Domestic Minichillers, Compact solar heaters, Thermosiphons, Purifiers, Dehumidifiers and other air treatment appliances.
- Page 76 INVERTER SWIMMING POOL HEAT PUMP EBP Series Pool Comfort WI-FI APP INSTRUCTION MANUAL...
- Page 77 Content 1. The connection of Wi-Fi kits ........... 3 2. Install the App ............... 5 3. Register ..................6 4. App configuration ............... 7 5. App operation ............... 10...
-
Page 78: The Connection Of Wi-Fi Kits
1. The connection of Wi-Fi kits 1.1 The requirements of Wi-Fi kits’ connection Items Shapes Quantity Notes Wi-Fi module -------- Packaged as Cable I (Length: accessories in the 50cm) heat pump unit. Cable II (Length: 15m) 1.2 The dimension of Wi-Fi module 1.3 Description of the Wi-Fi module... - Page 79 After the unit power on, the indicator Power will be lighted. indicator 1. During Wi-Fi configuration, the indicator will be kept flashing. 2. After connecting with Wi-Fi, it will be Wi-Fi lighted. indicator 3. The indicator will be extinguished without internet connection. When communication normal...
-
Page 80: Install The App
Please disconnect the cable of controller and PCB through the connectors. Cable II is connected with the cable from PCB and connected with controller I. Please put the cable II and connectors between cable II and cable I in the heat pump unit. 2. -
Page 81: Register
3. Register Open the App. After click ‘Allow’, enter next interface. Click ‘Agree’. Choose country and type mobile number or email address to get the message of verification code. Please set the password, and remember it. -
Page 82: App Configuration
4. App configuration After setting the password to log in the app, add the device. Click ‘Large Home Applications’ and ‘Water Heater’ to next interface. - Page 83 Please connect the Wi-Fi module with heat pump unit. At the same time, please keep the module and mobile devices can receive the same networks. Power on the heat pump unit, the indicators of power and communication on Wi-Fi module will be lighted. Press the configuration button for 3 seconds.
- Page 84 Click ‘go to connect’ to set the mobile’s Wi-Fi. If the mobile is already connected with Wi-Fi from the router, please type the password and click ‘Confirm’ in the next interface. After click ‘Confirm’, the Wi-Fi module, mobile device and Wi-Fi router begin to be connected.
-
Page 85: App Operation
5. App operation Modify button. Click it to enter the modify interface. - Page 86 Temperature setting bar. Move the ball to right or left by finger to set the setting temperature. Setting temperature value. This value will be changed according to the location of the ball in the temperature setting bar. Inlet water temperature valve. This value is detected by the inlet water temperature sensor in the heat pump unit.
- Page 87 Timer button. Press this button to enter timer interface. Click ‘Add’ to set the schedule. In this interface, set the time and day for timer on and timer off.
- Page 88 After setting, please click ‘Save’ to confirm and save. The timer setting will be displayed in next interface. In this interface, click ‘Add Schedule’ to add another timer on/off. Slide the schedule from right to left to delete the schedule. On/Off button.
- Page 89 Toda la documentación del producto Complete documents about the product Documentation plus complète sur le produit Mais documentação do produto EAS ELECTRIC SMART TECHNOLOGY, S.L.U. P.I. San Carlos, Camino de la Sierra, S/N, Parcela 11 03370 Redován (Alicante) - ESPAÑA...