
Related Manuals for Hawking HNC320W


Summary of Contents for Hawking HNC320W
-
Page 2: Package Contents
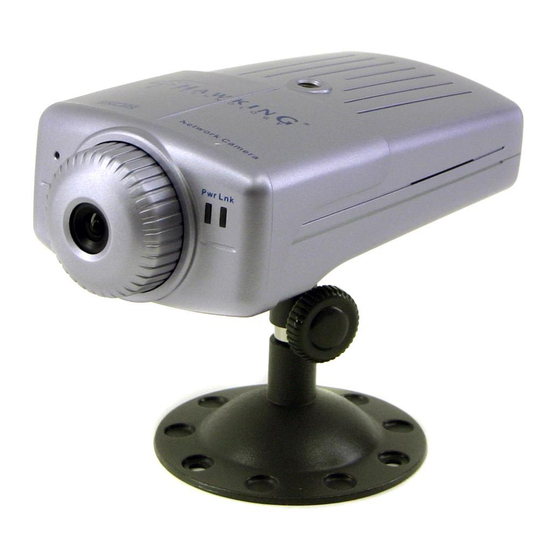
Congratulations on the purchase of your new HNC300 Wired or HNC320W Wireless Network Camera. The HNC300 and HNC320W are high performance standalone camera systems that provide an ideal solution for remote monitoring, surveillance, or sending live video over the Internet. - Page 3 One Quick Installation Guide One Camera Stand Kit One Wireless Antenna (HNC320W only) One Category 5 Ethernet Cable One Power Adapter...
-
Page 4: Cd-Rom Drive
What You Will Need to Get Started Wired Router/Switch/Hub (or Wireless 802.11b/g Router or Access Point [for the HNC320W only]) CD-ROM Drive Web Browser System Requirements CPU: Pentium II, 266 MHz or above Memory Size: 32 MB (64 MB recommended) VGA Card Resolution: 800 x 600 or above Internet Explorer 5.0 or above (ActiveX &... -
Page 5: Installation Diagram
Installation Diagram... - Page 6 (For the HNC320W only) Locate the antenna connector near the center of the rear panel of the camera. Screw the base of the antenna (included with the HNC320W) into the antenna connector. Locate the network cable connector (RJ-45 port) on the left-hand side of the rear panel of the camera.
- Page 7 Insert the Hawking HNC300 Series Installation & Utilities CD into your CD-ROM Drive. When the main page loads, click on Quick Setup Wizard. Click Next.
- Page 8 Click Yes. Click Next.
- Page 9 Click Finish...
- Page 10 HNC300 lick on Start, and locate the Setup Wizard in the Programs menu. When you launch the Setup Wizard, the main window will appear, as shown. The connected camera(s) will be displayed. Select the camera you want (according Address) and click Wizard to begin.
- Page 11 The default Admin ID and Password a re blank. When running t he Setup Wizard for the first time, please leave these two fields blank. Otherwise, input the appropriate Admin ID and Password. Then click OK. In this window, set the IP address, subnet mask, and gateway, such that they correspond...
- Page 12 teps in the previous pages will only occur for the initial setup or after a Factory Default Reset has been performed. For all subsequent set lease follow Steps in the pages that follow. To obtain an IP Address automatically, click on th “Obtain…”...
- Page 13 To protect your camera from unauthorized access and use, you will need to change the Admin ID and Password, which are blank by default. To change them, check both “Change” boxes, and input a new Admin ID and Password Then, click Finish. If you selected “Static”...
- Page 14 Click Reboot to save the new settings. If you would like to see an example of how to view your cam via the Internet, you can click on the link on this page to access the camera’s user’s manual. The setup process has now been completed.
- Page 15 HNC320W Click on Start, and locate the Setup Wizard in the Programs menu. When you l aunch the Setup Wizard, the main window will appear, as shown. The connected camera(s) will be displayed. Select the camera you want (according Address) and click Wizard to begin.
- Page 16 The default Admin ID and Password are blank. When running the Setup Wizard for the first time please leave these two fields blank. Otherwise, input the appropriate Admin ID and Password. Then click OK. In this window, set the IP address, subnet mask, and gateway, such that they correspond...
- Page 17 Steps in the previous pages will only occur for the initial setup or after Factory Default Reset h as been performed. For all subsequent setups, lease follow Steps the pages that follow. To obtain an IP Address automatically, click on the “Obtain…”...
- Page 18 The Connection Mode will depend on how the camera is connected to th network. If you are using router or access point, click on Infrastructure. For peer- to-peer connection, click on Adhoc. The Network Name, Wireless Channel, and Encryption Key must correspond with your wireless network settings.
- Page 19 If you selected “Static” in “4” and input the information manually, the status page shown Figure 7 will appear. It will display your basic authorization information. Click Next to continue. If you did not select “Static” in “4”, the Setup Wizard will proceed directly to “8”.
- Page 20 The setup process has now been completed. After clicking Reboot, the main window Wizard will appear ag ain. Clicking on Access the selected camera will automatically launch the web browser and allow you to view your camera’s images.
- Page 21 LAN. For an example o f how to view your network camera outside of your existing LAN via the Internet, please refer to the section in th “How to View Your Camera via the Internet”.
- Page 22 0.1.1”. Therefore, all devices on your LAN must have IP addresses of e form “10.1.1.x”, where “x” is a number between 0 and 254. When etting the IP address for the network camera, it is recommended (but not required) that you choose...
- Page 23 Click on Start in the bottom left corner of your screen. Then click Network Places.
- Page 24 Click on View Network Connections.
- Page 25 In the Network Connections window, you should see an icon titled Local Area Connection (or something similar). You can access this icon in two ways: a. by clicking or double-clicking on it, or b. by right-clicking then clicking on Status from the resulting menu...
- Page 26 Use this information to set the address Gateway your network camera. Use these common three octets as the first three octets for the IP address your camera. The fourth octet will be a number...