Advertisement
Available languages
Available languages
Quick Links
GUIDE DU PRODUIT
Serial number | Numéro de série
See rating Label on grill for serial number.
Le numéro de série est inscrit sur la plaquette
du produit.
Date purchased | Date d'achat
If you have questions or need assistance
during assembly, please call 1-800-241-7548.
Si vous avez des questions ou si vous
avez besoin d'aide lors de l'assemblage,
veuillez nous contacter : 1-800-241-7548.
Tools Needed for Assembly:
2 Adjustable Wrenches
Phillips Screwdriver
05/11/18 • 42805264
MODÈLE
16202046
Outils requis pour l'assemblage :
2 Clés à molette
Tournevis cruciforme
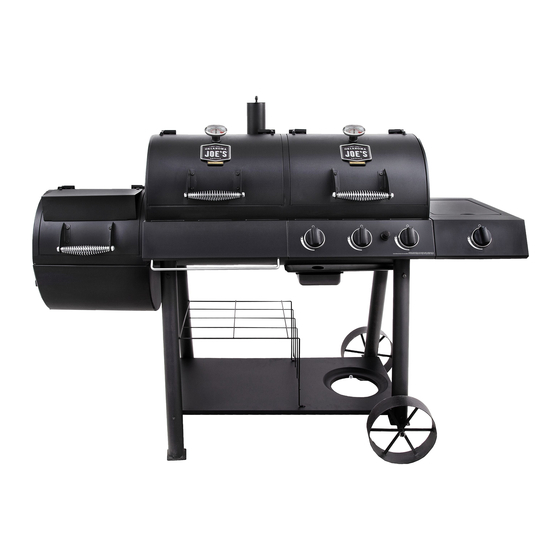
Longhorn
Charcoal/Gas
Smoker and Grill
Gril/Fumoir au
Charbon de bois
et au gaz
Advertisement

Related Manuals for oklahoma joes 16202046


Summary of Contents for oklahoma joes 16202046
- Page 1 GUIDE DU PRODUIT Longhorn MODÈLE Charcoal/Gas 16202046 Smoker and Grill Gril/Fumoir au Charbon de bois et au gaz Serial number | Numéro de série See rating Label on grill for serial number. Le numéro de série est inscrit sur la plaquette du produit.
- Page 2 THIS GRILL IS FOR OUTDOOR USE TABLE OF CONTENTS ONLY. Product Record Information ....... .1 Safety Symbols .
- Page 3 WARNING CAUTION Using pots larger than 6 quarts in capacity could exceed After a charcoal fire appears extinguished, unconsumed weight limit of the side burner shelf or side shelf, resulting embers can retain heat for up to 24 hours, and if exposed to in failure of grill cart components.
- Page 4 Connecting Regulator to the LP Cylinder LP Cylinder Exchange •Many retailers that sell grills offer you the option of replacing 1.LP cylinder must be properly secured onto grill. (Refer to assembly section.) your empty LP cylinder through an exchange service. Use only those reputable exchange companies that inspect, precision fill, 2.Turn all control knobs to the OFF position.
- Page 5 WARNING WARNING • Outdoor gas appliance is not intended to be installed in or • Do not use grill until leak-tested. on a boat. • If a leak is detected at any time, STOP! Turn off gas at source and correct leak. •...
- Page 6 Ignitor Lighting WARNING • Do not lean over grill while lighting. 1. Turn gas burner control valves to (off). For Safe Use of Your Grill and to Avoid Serious Injury: 2. Open lid during lighting or re-lighting. • Do not let children operate or play near grill. 3.
- Page 7 Burner Flame Check NOTE: Your grill may NOT be equipped with a Sideburner! • Remove cooking grates and heat tents. Light burners, rotate knobs from HIGH to LOW. You should see a smaller flame in Sideburner Ignitor Lighting LOW position than seen on HIGH. Perform burner flame check •...
- Page 8 Cleaning the Burner Assembly Follow these instructions to clean and/or replace parts of burner CAUTION assembly or if you have trouble igniting grill. 1. Turn gas off at control knobs and LP cylinder. SPIDER ALERT! 2. Remove cooking grates and heat tents. 3.
- Page 9 PREPARING TO USE YOUR SMOKER COOKING TIPS Building Your Fire Before cooking with your smoker, the following steps should be 1. Stack charcoal briquettes or wood into a pyramid-shaped pile closely followed to both cure the finish and season the interior on top of the charcoal grate or ash pan.
- Page 10 Food Safety SMOKING AND SLOW COOKING Food safety is a very important part of enjoying the outdoor Remove the cooking grill from the firebox and build your fire on cooking experience. To keep food safe from harmful bacteria, top of the fire grate in the firebox. Either charcoal or wood may follow these four basic steps: be used, but wood is the recommended fuel for it’s rate of burn and the flavor it imparts to the food being cooked.
- Page 11 LIMITED WARRANTY This warranty only applies to units purchased from an authorized retailer. Manufacturer warrants to the original consumer-purchaser only that this product shall be free from defects in workmanship and materials after correct assembly and under normal and reasonable home use for the periods indicated below beginning on the date of purchase*.
- Page 12 TABLE DES MATIÈRES CE GRIL EST PRÉVU POUR UTILISATION EXTÉRIEURE Renseignements relatifs au produit .......1 Symboles de sécurité.
- Page 13 PELIGRO ATTENTION ATTENTION L'utilisation de marmites de plus de 6 litres n'est pas Une fois que le feu de charbon de bois semble éteint, les conseiller, car elle pourrait endommager la grille du braises peuvent retenir la chaleur jusqu'à 24 heures et si brûleur latéral ou le brûleur latéral, ce qui peut aussi elles sont exposées à...
- Page 14 Changement de bonbonnes de gaz Connexion du détendeur à la bonbonne de GPL • Beaucoup de commerçants proposent un service de 1. La bouteille de GPL doit être correctement raccordée à remplacement votre bonbonne vide. Utilisez uniquement les votre appareil. (consultez la section de montage). entreprises dignes de confiance qui garantissent leurs 2.
- Page 15 ATTENTION ATTENTION • Cet appareil d'utilisation extérieure ne doit pas être installé • N'utilisez pas l'appareil tant qu'aucun contrôle des fuites dans ou sur un bateau. n'a pas été effectué. • Si une fuite est détectée, ARRÊTEZ TOUT ! Coupez le •...
- Page 16 Instructions d'allumage ATTENTION • Ne vous penchez pas au-dessus du gril lors de l'allumage. 1. Tournez les boutons de commande du brûleur sur la Pour une utilisation sûre de votre appareil et pour position (arrêt). éviter des blessures graves : 2.
- Page 17 Vérification du réglage de la flamme REMARQUE : Votre gril n'est peut-être pas équipé d'un Brûleur latéral. Enlevez les grilles et les cuvettes. Allumez les brûleurs et tournez les boutons de la position HIGH à la position LOW. La Allumage du brûleur latéral flamme doit toujours être plus petite sur la position LOW que sur la position HIGH.
- Page 18 Nettoyage du bloc de brûleurs PELIGRO Suivez les instructions suivantes pour nettoyer ou remplacer ATTENTION des pièces du brûleur, ou si vous éprouvez de la difficulté pour allumer le gril. 1. Fermez tous les boutons de commande, ainsi que la ATTENTION AUX valve de la bonbonne de gaz.
- Page 19 PRÉPARATION ET UTILISATION DE VOTRE FUMOIR CONSEILS POUR LA CUISSON Préparer votre feu Avant d'utiliser votre fumoir pour la cuisson, suivez attentivement 1. Empilez les briquettes de charbon ou le bois en forme de les étapes suivantes pour préparer les surfaces intérieures. Si pyramide sur le dessus de la grille de charbon ou du panier à...
- Page 20 Sécurité alimentaire FUMAGE ET CUISSON LENTE La sécurité alimentaire contribue de façon importante à assurer Enlevez la grille de cuisson du foyer et préparez votre feu sur le une expérience agréable lors d'un gril en plein air. Pour protéger dessus de la grille du foyer. Le charbon ou le bois peuvent être la nourriture des bactéries, respectez les quatre étapes de base utilisés, mais le bois est le combustible recommandé...
- Page 21 GARANTIE LIMITÉE La présente garantie n'est valide que pour les appareils achetés auprès d'un détaillant autorisé. Le fabricant garantit à l'acheteur initial, et uniquement celui-ci, que le produit est exempt de tout défaut de matériel et de main-d'œuvre, dans la mesure où il a été assemblé correctement, qu'il est utilisé de façon normale et raisonnable à...
- Page 22 PARTS DIAGRAM / DIAGRAMME DE PIÈCES...
- Page 23 PARTS LIST Key Qty Description Key Qty Description Smoker Chamber Assembly Butterfly Damper Cool Touch Handle Charcoal Door Latch 3" Professional Temperature Gauge Warming Plate f/ Firebox Main Burner Side Handle Electrode, Short Wire Side Burner Shelf Electrode, Long Wire Side Burner Lid Wire, SB Ignitor Side Burner Pan...
- Page 24 LISTE DES PIÈCES Réf. Qté. Description Réf. Qté. Description Partie inférieure du foyer Kit fumoir Clapet coupe-feu Poignée isolée Loquet à charbon Thermomètre professionnel de 7,5 cm Plaque chauffante du foyer Brûleur principal Poignée latérale Électrode, fil court Tablette du brûleur latéral Électrode, fil long Couvercle du brûleur latéral Fil, allumeur SB...
- Page 25 PARTS LIST ASSEMBLY / MONTAGE On each short leg, slide (1) 12mm flat washer onto axle, followed by a wheel, then another 12mm flat washer. Slide a hitch pin clip into the hole at the end of the axle. Pour chaque pied court, enfilez une (1) rondelle plate de 12 mm sur l'arbre, mettez la roue, puis une autre rondelle plate de 12 mm, faites glisser un clip goupille dans le trou à...
- Page 26 With the aid of a helper, attach the bottom shelf to legs using (4) 1/4-20 x 3” screws and (4) 1/4-20 flange nuts. DO NOT FULLY TIGHTEN THE SCREWS AT THIS TIME! Avec l'aide d'un assistant, fixez l'étagère inférieure aux pieds avec les vis (4) 1/4-20 x 3 » et les écrous (4) 1/4-20. NE SERREZ PAS Bottom Shelf Étagère inférieure 1/4-20 Flange Nut...
- Page 27 Make sure that legs bolts are tight enough so that legs will not slip off the posts. With the assistance of a helper, place the grill onto it’s legs. Once upright, fully tighten the (4) leg bolts. Insert the tank exclusion right end into holes on the bottom shelf. Then align the left end of the tank exclusion with holes on the long legs and slide into place.
- Page 28 Connect firebox lid and firebox bottom using (4) 1/4-20 x 1/2” bolts and (4) 1/4-20 flange nuts. Rapprochez couvercle de la chambre de combustion et la partie inférieure de la chambre de combustion en utilisant les boulons (4) 1/4-20 x 1/2 » et les écrous (4) 1/4-20. Firebox Bottom Partie inférieure du foyer Firebox lid...
- Page 29 With the aid of a helper, connect firebox and smoker chamber using (8) 5/16-18 x 3/4” Bolts, 5/16” lock washers, 5/16” flat washers and 5/16-18 nuts. Tighten securely. Avec l'aide d'un assistant, fixez le foyer au fumoir en utilisant les boulons (8) 5/16-18 x 3/4 », les rondelles de blocage 5/16 » et les rondelles plates 5/16-18.
- Page 30 A. Attach the right side fascia to side shelf with (4) #10 x 3/8” self-tap screws. B. Pre-assemble (4) 1/4-20 x 1/2” bolts and (4) 1/4-20 flange nuts loosely to the right side panel of the smoker, then hang the side shelf onto the screws.
- Page 31 Insert side burner valve into fascia, place bezel on fascia, then install (2) #8-32 x 3/8” screws through bezel, fascia and into valve. B. Press control knob onto side burner valve stem as shown below. A. Insérez la valve du brûleur latéral dans la façade, placez la lunette en plastique sur la façade, puis vissez les vis (2) #8-32x3/8 » à travers ces éléments B.
- Page 32 Place (3) heat tents onto the brackets in the firebox over the burners. Place (3) diffuseurs de chaleur sur les supports sur les brûleurs du foyer. Heat Tents Diffuseurs de chaleur Place charcoal grate assembly into charcoal grill bottom and charcoal grate into firebox bottom. Placez l'ensemble de grilles à...
- Page 33 Place (2) smaller cooking grates into firebox. Then place (4) large cooking grates into smoker chamber. Placez les (2) petites grilles de cuisson dans le foyer. Ensuite, placez les (4) grandes grilles de cuisson dans le fumoir. Smoker Chamber Cooking Grates Grilles de cuisson du fumoir Firebox Cooking Grates Grilles de cuisson du foyer...
- Page 34 Remove electronic ignition module cap, install battery positive out, reinstall cap. Retirez le bouchon du module électronique d'allumage, installez la pile, réinstallez le bouchon.
- Page 35 LP CYLINDER IS SOLD SEPARATELY. Fill and leak check the cylinder before attaching to grill and regulator (see Use & Care section). Once cylinder has been filled and leak checked, place cylinder into hole in bottom shelf. Make sure cylinder valve is facing as shown. Secure cylinder with tank secure screw under bottom shelf.
- Page 36 Install one (1) Temperature Gauge into the threaded bushing located on each lid. Ÿ Align each gauge and then secure with jamb nut. Ÿ Installez (1) l'Indicateur de température dans le raccord fileté situé sur chaque couvercle. Ÿ Alignez chaque jauge, puis fixez-les correctement. Ÿ...
- Page 37 EMERGENCIES: If a gas leak cannot be stopped, or a fire occurs due to gas leakage, call the fire department. Emergencies Possible Cause Prevention/Solution Gas leaking from • Damaged hose. •Turn off gas at LP cylinder or at source on natural gas systems. Discontinue use of cracked/cut/burned hose.
- Page 38 Troubleshooting (continued) Problem Possible Cause Prevention/Solution Sudden drop in gas flow or • Check for gas in LP cylinder. • Out of gas. low flame. • Excess flow valve tripped. • Turn off knobs, wait 30 seconds and light grill. If flames are still low, turn off knobs and LP cylinder valve.
- Page 39 URGENCES : Si une fuite de gaz ne peut être arrêtée ou un incendie se produit en raison d'une fuite de gaz, appelez les pompiers. Urgences Cause possible Prévention/Solution Fuite de gaz sur un tuyau cassé, • Tuyau endommagé. • Fermez l’alimentation en gaz au niveau de la bonbonne ou à la source au niveau du système de coupé...
- Page 40 Résolution des problèmes (suite) Problème Cause possible Prévention/Solution Baisse subite du flux de gaz ou • Il n’y a plus de gaz. • Vérifiez que la bonbonne de GPL contient bien du gaz. flamme faible. • La valve de remplissage excessif a été •...
- Page 43 ©2015 Char-Broil, LLC. Columbus, GA, 31902. Printed in China. Imprimé en Chine. ©2015 Assembly instructions. © 2015 Instructions d'assemblage.