Table of Contents
Advertisement
Quick Links
SERIAL NUMBER:
NÚMERO DE SERIE:
NUMÉRO DE SÉRIE:
______________________________________
See rating label on grill for serial number.
El número de serie se encuentra en la etiqueta
deespecificaciones de la parrilla.
Voir l'étiquette d'évaluation sur le gril pour le numéro
de série.
DATE PURCHASED:
FECHA DE COMPRA:
DATE D'ACHAT:
______________________________________
IMPORTANT: RETAIN FOR FUTURE REFERENCE. READ CAREFULLY.
IMPORTANTE: CONSERVAR PARA FUTURAS REFERENCIAS. LEA CUIDADOSAMENTE.
©
2020 Char-Broil, LLC. Columbus, GA, 31904.
Printed in China. Imprimé en China. Impreso en China.
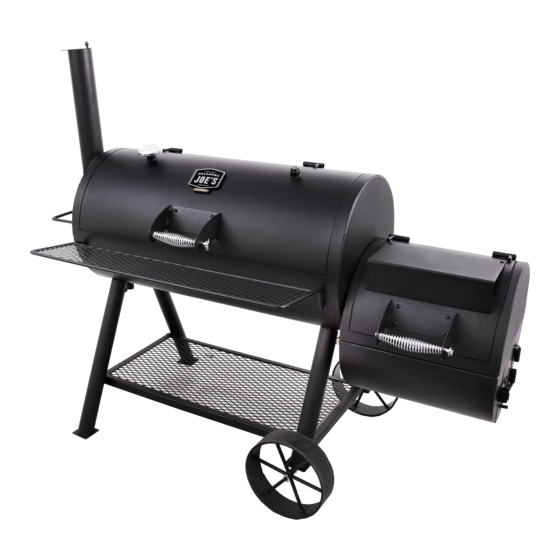
LONGHORN SMOKER
MODEL NUMBER ● NÚMERO DE MODELO: 13201747-50
ASSEMBLY GUIDE ● GUÍA DE MONTAJE
Tools needed for assembly:
Two Adjustable Wrenches
(Not Included)
Herramientas necesarias para
el armado:
Dos llaves regulables
(no Incluido)
PN: 42805282 • 05/26/2020
Advertisement
Table of Contents

Related Manuals for oklahoma joes 13201747-50


Summary of Contents for oklahoma joes 13201747-50
-
Page 1: Product Record Information
LONGHORN SMOKER MODEL NUMBER ● NÚMERO DE MODELO: 13201747-50 ASSEMBLY GUIDE ● GUÍA DE MONTAJE SERIAL NUMBER: Tools needed for assembly: NÚMERO DE SERIE: Two Adjustable Wrenches NUMÉRO DE SÉRIE: ______________________________________ (Not Included) See rating label on grill for serial number. -
Page 2: Table Of Contents
TABLE OF CONTENTS THIS GRILL IS FOR OUTDOOR USE ONLY. Product Record Information ......1 Safety Symbols . -
Page 3: Preparing To Use Your Smoker
PREPARING TO USE YOUR SMOKER WARNING Before cooking with your smoker, the following steps should be closely followed to both cure the finish and season the interior steel. Failure to properly follow these steps may damage the finish and/or impart Most surfaces on this unit are hot when in use. - Page 4 Food Safety SMOKING AND SLOW COOKING Remove the cooking grill from the firebox and build your fire on Food safety is a very important part of enjoying the outdoor top of the fire grate in the firebox. Either charcoal or wood may cooking experience.
-
Page 5: Limited Warranty
LI M ITE D WARRANTY This warranty only applies to units purchased from an authorized retailer. Manufacturer warrants to the original consumer-purchaser only that this product shall be free from defects in workmanship and materials after correct assembly and under normal and reasonable home use for the periods indicated below beginning on the date of purchase . The manufacturer reserves the right to require that defective parts be returned, postage and or freight pre-paid by the consumer for review and examination. - Page 6 ÍNDICE ESTA PARRILLA SOLO SE PUEDE USAR EN EXTERIORES. Registro de información del producto....1 Símbolos de seguridad..........6-7 ADVERTENCIA Preparación para la utilización Fumador....7 Fumador Mantenimiento ......8 El no cumplir con todas las instrucciones del fabricante puede ocasionar lesiones graves y/o daños materiales. Consejos para cocinar..........8 Garantía limitada ............9 Lista de Hardware..........10...
- Page 7 PREPARATIVOS PARA USAR SU AHUMADOR ADVERTENCIA Antes de cocinar con su ahumador, debe seguir al pie de la letra os siguientes pasos para curar el acabado y el acero del interior. Si no cumple con estos requisitos al pie de la letra, se puede dañar el interior La mayoría de las superficies de esta unidad están de la ahumador y los primeros alimentos que cocine podrán tener un calientes cuando está...
- Page 8 CÓMO SABER CUÁNDO ESTÁ LISTO EL FUEGO Nuestras sugerencias: Pollo - Aliso, manzano, nogal americano, mezquite Carne de res - Nogal americano, mezquite, roble La buena calidad del asado al carbón depende de la calidad del fuego Cerdo - Madera de árboles frutales, nogal americano, roble en la ahumador.
- Page 9 G A RA NTÍ A LIM ITA D A Esta garantía solo se aplica a las unidades compradas en un minorista autorizado. El fabricante únicamente garantiza al comprador-consumidor original que este producto estará libre de defectos materiales y de materiales después de corregir el montaje y bajo uso doméstico normal y razonable durante los periodos indicados a continuación a partir de la fecha de la compra .
-
Page 10: Hardware List
HARDWARE HERRAJES 1/4-20 3/8-16 Flange Nut Hex Nut Hitch Pin Qty. 16 Qty. 8 Qty: 2 1/4-20 3/8-16 Pin de enganche brida de la tuerca tuerca hexagonal Cant: 2 Cant. 16 Cant. 8 12mm Flat 3/8" Washer Lock Washer Qty: 4 Qty. -
Page 11: Parts List
PARTS LIST FIREBOX CHAMBER SPRING, F/DAMPER COOKING GRATE, 23”X19” LOGO PLATE COOKING GRATE, 17.1”X19” COOKING GRATE, 14.2”X18.2” ASSEMBLY MANUAL, ENGLISH, SPANISH LISTA DE HERRAJES Parrilla de cocción, 14.2”x18.2” CÁMARA DE FUEGO Resorte, F / Amortiguador Placa de logotipo Parrilla de cocción, 23”x19” Parrilla de cocción, 17.1”x19”... - Page 13 ASSEMBLY ARMADO FIRST, GET A HELPER! This unit is heavy and requires a second person for lifting and moving. NEXT, pick a suitable location to work. Open the carton and slit the corners so that the carton lays flat. This will give you a protective surface during assembly.
- Page 14 With one person on smoke chamber end, roll the unit onto cardboard that was placed on the ground next to the unit. Slide short legs onto posts at right side, with wheels Ÿ facing outward. Slide long legs onto posts at opposite end. Ÿ...
- Page 15 Make sure that leg bolts are tight enough so that legs won't slip off of posts. With the assistance of a helper, roll the unit over and stand it up onto its legs. Once standing, fully tighten the four leg bolts against leg post walls Asegúrese de que los pernos de las patas estén lo suficientemente apretados para que las patas no se salgan de los postes.
-
Page 16: Assembly
Connect firebox lid and firebox bottom using four 1/4- Conecte la tapa cámara de combustión y el fondo con cuatro 20×½" hex head bolts and four 1/4-20 flange nuts. Tighten fogones 1/4-20 x ½ “ y cuatro 1/4-20 tuerca de la perno hexagonal securely. - Page 17 Attach handle to smoke chamber lid and firebox lid using eight 1/4-20×½" screws and 1/4-20 flange nuts. Tighten securely. Adjuntar manejar al humo tapa de la cámara y la tapa del fogón con ocho 1/4-20 x ½ "tornillos y tuercas de 1/4-20. Ajuste con firmeza.
- Page 18 Attach front shelf to smoke chamber by sliding ends of shelf frame into bushing on front of smoke chamber. Temperature Gauge Next, install the Temperature Gauge into the Medidor de temperatura bushing located on the Smoker Chamber Lid. Align gauge and then secure with jamb nut. Adjuntar plataforma frente al humo de la cámara deslizando extremos del marco útil en el casquillo en la parte frontal de la...
- Page 19 PR O D U CT R E G I STRATI O N / R E G I STRAC I Ó N D EL PR O D U CTO / PR O D U CT R E G I STRATI O N / R E G I STRAC I Ó N D EL PR O D U CTO / EN R E GI STR EM ENT D U PR O D UIT EN R E GI STR EM ENT D U PR O D UIT Two convenient ways to register your product:...
- Page 20 WARNING: Combustion byproducts produced when using this product contain chemicals known to the State of California to cause cancer, and birth defects, or other reproductive harm. This product can expose you to lead, which is known to the State of California to cause cancer and birth defects or other repro- ductive harm.