Table of Contents
Advertisement
Quick Links
Serial number | Numéro de série
See rating Label on grill for serial number.
Ce numéro se trouve sur l´étiquette signalétique sur
i´appareil.
Date purchased | Date d'chat
If you have questions or need assistance
during assembly, please call 1-800-241-7548.
Si vous avez des questions ou besoin d´aide
pendant l'assemblage, S'il vous plaît appelez
1-800-241-7548.
Tools needed for assembly:
Phillips screw driver
Two adjustable wrenches
(Tools not provided)
08/14/14 • 42804878
15202037
Outils requis pour l'assemblage :
Tournevis cruciforme
Deux clés à molette
(Outils non prévus)
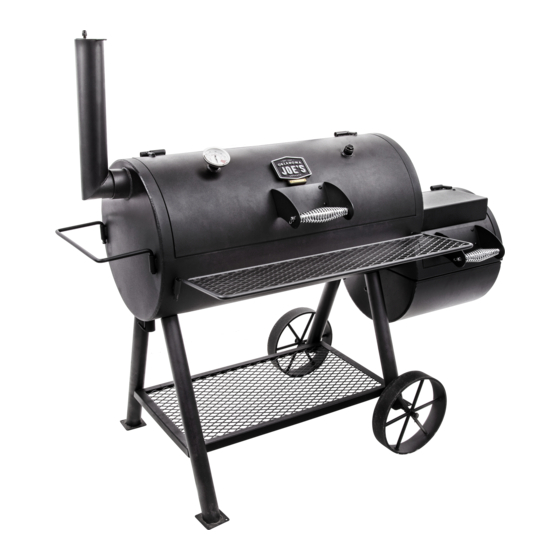
HIGHLAND
OFFSET SMOKER
Advertisement
Chapters
Table of Contents

Related Manuals for oklahoma joes 15202037


Summary of Contents for oklahoma joes 15202037
-
Page 1: Product Record Information
HIGHLAND 15202037 OFFSET SMOKER Serial number | Numéro de série See rating Label on grill for serial number. Ce numéro se trouve sur l´étiquette signalétique sur i´appareil. Date purchased | Date d’chat If you have questions or need assistance during assembly, please call 1-800-241-7548. -
Page 2: Table Of Contents
THIS GRILL IS FOR OUTDOOR USE TABLE OF CONTENTS ONLY. Product Record Information ......1 Safety Symbols . - Page 3 WARNING WARNING Most surfaces on this unit are hot when in use. Use extreme FAILURE TO READ AND FOLLOW INSTRUCTIONS caution. Keep others away from unit Always wear protective FOR LIGHTING CHARCOAL MAY RESULT IN SERIOUS clothing to prevent injury. PERSONAL INJURY AND OR PROPERTY DAMAGE.
-
Page 4: Preparing To Use Your Smoker
PREPARING TO USE YOUR SMOKER COOKING TIPS Building Your Fire Before cooking with your smoker, the following steps should be 1. Stack charcoal briquettes or wood into a pyramid-shaped pile closely followed to both cure the finish and season the interior on top of the charcoal grate or ash pan. - Page 5 Food Safety SMOKING AND SLOW COOKING Food safety is a very important part of enjoying the outdoor Remove the cooking grill from the firebox and build your fire on cooking experience. To keep food safe from harmful bacteria, top of the fire grate in the firebox. Either charcoal or wood may follow these four basic steps: be used, but wood is the recommended fuel for it’s rate of burn and the flavor it imparts to the food being cooked.
-
Page 6: Limited Warranty
LIMITED WARRANTY This warranty only applies to units purchased from an authorized retailer. Manufacturer warrants to the original consumer-purchaser only that this product shall be free from defects in workmanship and materials after correct assembly and under normal and reasonable home use for the periods indicated below beginning on the date of purchase*. -
Page 7: Symboles De Sécurité
TABLE DES MATIÈRES CET APPAREIL EST CONÇU POUR UN USAGE À L'EXTÉRIEUR UNIQUEMENT Information sur le produit ......1 Symboles de sécurité... - Page 8 AVERTISSEMENT AVERTISSEMENT LE FAIT DE NE PAS LIRE ET RESPECTER LES La plupart des surfaces de cet appareil deviennent chaudes INSTRUCTIONS POUR ALLUMER LE CHARBON PEUT pendant l'utilisation. Soyez extrêmement prudent. Gardez ENTRAÎNER DE GRAVES BLESSURES, DES les autres personnes à l'écart de l'appareil. Portez toujours DOMMAGES MATÉRIELS OU LES DEUX.
-
Page 9: Vous Préparer À Utiliser Votre Fumoir
C O N S E I L S POUR LA CUISSON PRÉPARATION ET UTILISATION DE VOTRE FUMOIR COMMENT BÂTIR VOTRE FEU Avant d'utiliser votre fumoir pour la cuisson, suivez attentivement 1. Empilez les briquettes de charbon ou le bois en forme de les étapes suivantes pour préparer le fini et l'acier intérieur. - Page 10 FUMAGE ET CUISSON LENTE Sécurité alimentaire Enlevez la grille de cuisson du foyer et préparez votre feu sur le La sécurité alimentaire contribue de façon importante à assurer dessus de la grille de foyer. Le charbon ou le bois peut être une expérience agréable lors d'un barbecue en plein air.
-
Page 11: Garantie Limitée
GARANTIE LIMITÉE La présente garantie n'est valide que pour les appareils achetés auprès d'un détaillant autorisé. Le fabricant garantit à l'acheteur initial, et uniquement celui-ci, que le produit est exempt de tout défaut de matériel et de main-d'œuvre, dans la mesure où il a été assemblé correctement, qu'il est utilisé de façon normale et raisonnable à... -
Page 12: Parts Diagram
SCHÉMA DES PIÈCES PARTS DIAGRAM... -
Page 13: Parts List
PARTS LIST Key Qty Description SMOKER CHAMBER W/ LID FIREBOX LID FIREBOX CHAMBER TEMPERATURE GAUGE TEMPERATURE GAUGE HOLE PLUG LID HANDLE WARMING SURFACE PLATE, F/ FIREBOX DAMPER ASSEMBLY DOOR LATCH FIRE GRATE COOKING GRATE, SMOKER COOKING GRATE, FIREBOX FRONT SHELF PULL HANDLE WHEEL LONG LEG... -
Page 14: Liste Des Pièces
LISTE DES PIÈCES Clé Quantité Description CUVE DU FUMOIR AVEC COUVERCLE COUVERCLE DU FOYER CUVE DU FOYER THERMOMÈTRE BOUCHON DU THERMOMÈTRE POIGNÉE DU COUVERCLE PLAQUE CHAUFFANTE POUR FOYER ASSEMBLAGE CLAPET VERROU DE PORTE GRILLE DE FOYER GRILLE DE CUISSON, FUMOIR GRILLE DE CUISSON, FOYER ÉTAGÈRE AVANT POIGNÉE... -
Page 15: Assembly
ASSEMBLAGE ASSEMBLY ASSEMBLY FIRST, GET A HELPER! This unit is heavy and requires a second person for lifting and moving. NEXT, pick a suitable location to work. Open the carton and slit the corners so that the carton lays flat. This will give you a protective surface during assembly. - Page 16 With one person on smoke chamber end, roll the unit onto cardboard that was placed on the ground next to the unit. Unit should now be resting on its Long Leg smoke chamber handle brackets with the leg Pied long posts pointing upward.
- Page 17 Make sure that leg bolts are tight enough so that legs won't slip off of posts. With the assistance of a helper, roll the unit over the handle brackets and stand it up onto its legs. Once standing, fully tighten the four leg bolts. S'assurer que les boulons des pieds sont bien serrés afin que les pieds ne se déboîtent pas des supports.
- Page 18 Connect firebox lid and firebox bottom using four 1/4-20×½" hex head bolts and four 1/4-20 flange nuts. Tighten securely. Raccorder le couvercle du foyer au fond du foyer à l'aide des quatre boulons à tête hexagonale 1/4-20×½po et des quatre écrous à...
- Page 19 Attach handle to smoke chamber lid and firebox lid using eight 1/4-20×½" screws and 1/4-20 flange nuts. Tighten securely. Fixer la poignée au couvercle de la cuve du fumoir et au couvercle du foyer à l'aide de huit vis 1/4-20×½po et des écrous à embase 1/4-20.
- Page 20 Attach front shelf to smoke chamber by sliding ends of shelf frame into bushing on front of smoke chamber. Next, install the Temperature Gauge into the Temperature Gauge bushing located on the Smoker Chamber Lid. Align gauge and then secure with jamb nut. Thermomètre Fixer l'étagère avant à...
- Page 21 Container for grease, not supplied Récipient à graisse, non fourni Congratulations! You have completed the assembly of your smoker. Please follow the instructions on page 4 to season your smoker. Félicitations! Vous avez terminé l'assemblage de votre fumoir. Veuillez respecter les consignes indiquées en page 4 pour culotter votre appareil.
- Page 22 Remarques: Notes:...
- Page 24 ©2014 Char-Broil, LLC. Columbus, GA, 31902. Printed in China. Imprimé en Chine. ©2014 Assembly instructions. ©2014 Assemblée des instructions.