Table of Contents
Advertisement
Quick Links
Advertisement
Table of Contents

Related Manuals for IKEA RENODLAD


Summary of Contents for IKEA RENODLAD
- Page 1 RENODLAD...
- Page 2 ENGLISH Please refer to the last page of this manual for the full list of IKEA appointed After Sales Service Provider and relative national phone numbers.
- Page 3 ENGLISH...
-
Page 4: Table Of Contents
Troubleshooting Control panel Technical information Programme selection Environmental concerns Basic settings IKEA guarantee Before first use Daily use Subject to change without notice. Safety information Before the installation and use of the appliance, carefully read the supplied instructions. The manufacturer is not responsible for any injuries or damage that are the result of incorrect installation or usage. - Page 5 ENGLISH Keep children and pets away from the appliance when the • door is open. Children shall not carry out cleaning and user maintenance • of the appliance without supervision. General Safety This appliance is for cleaning household-type dishes and •...
-
Page 6: Safety Instructions
ENGLISH The appliance is to be connected to the water mains using • the new supplied hose-sets. Old hose sets must not be reused. Safety instructions Installation • Connect the mains plug to the mains socket only at the end of the installation. Warning! Only a qualified person Make sure that there is access to the must install this appliance. - Page 7 ENGLISH circuit boards, electronic displays, pressure switches, thermostats and • Do not put flammable products or items sensors, software and firmware including that are wet with flammable products in, reset software. Please note that some of near or on the appliance. these spare parts are only available to •...
-
Page 8: Product Description
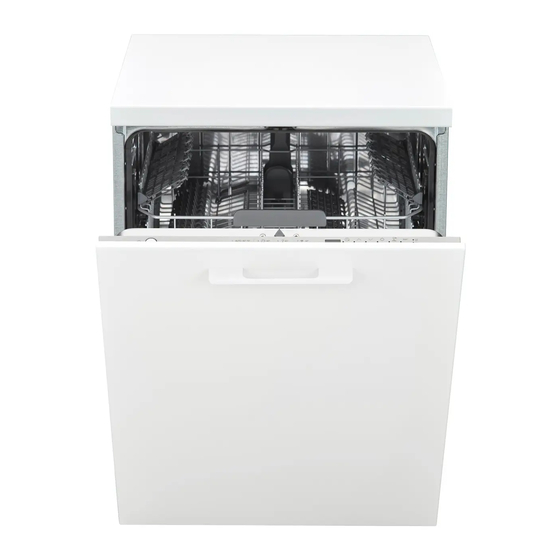
ENGLISH Product description Lower spray arm Lower basket Filters Upper spray arm Rating plate Upper basket Salt container The graphics is a general overview. For more details, refer Rinse aid dispenser to other chapters or documents Detergent dispenser provided with the appliance. Cutlery basket Beam-on-Floor •... -
Page 9: Control Panel
ENGLISH Control panel On/Off button / Reset button Option buttons Delay start button AUTO programme button Display Programme buttons Display Indicator Description Salt indicator. It is on when the salt container needs refilling. Re‐ fer to "Before first use". Machine Care indicator. It is on when the appliance needs inter‐... -
Page 10: Programme Selection
ENGLISH Programme selection Programmes cutlery with normal soil. This is the standard programme for test institutes. AUTO The AUTO programme automatically adjusts the dishwashing cycle to the type of load. The appliance senses the degree of soil and the amount of dishes in the baskets. It adjusts the temperature and quantity of water as well as the wash duration. - Page 11 ENGLISH Programme Dishwasher Degree of soil Programme phases Options load All degrees of Not applicable • Prewash soil Crockery, cut‐ Fresh, lightly • Dishwashing 60 °C • lery dried-on • Intermediate rinse • • Final rinse 50 °C • AutoOpen Crockery, cut‐...
-
Page 12: Basic Settings
ENGLISH Water (l) Energy (kWh) Duration (min) 1)2) Programme 3.7 - 4.5 0.02 - 0.05 9.3 - 11.4 0.82 - 0.94 9.1 - 11.1 1.01 - 1.13 9.2 - 11.2 0.96 - 1.08 0.835 8.2 - 11.2 0.67 - 1.08 120 - 170 Machine Care 8.4 - 10.2... - Page 13 ENGLISH Number Setting Values Factory Description setting Key tones 1F (on) / 0F Activate or deactivate the sound of the (off) buttons when pressed. Latest pro‐ 1H (on) / Enable or disable the automatic selec‐ gramme selec‐ 0H (off) tion of the most recently used pro‐ tion gramme and options.
- Page 14 ENGLISH German de‐ French de‐ mmol/l mg/l (ppm) Clarke de‐ Water softener grees (°dH) grees (°fH) grees level <4 <7 <0.7 <70 < 5 1) Factory setting. 2) Do not use salt at this level. Regardless of the type of detergent used, programme).
- Page 15 ENGLISH When the rinse aid chamber is empty, the Caution! If children, pets or rinse aid indicator turns on. If the drying people with disabilities have results are satisfactory while using multi- access to the appliance, tablets only, you can deactivate the deactivate AutoOpen.
-
Page 16: Before First Use
ENGLISH How to navigate in setting mode 1. Use Previous or Next to select the desired setting. You can navigate in setting mode using The display shows the current setting value programme buttons. (a digit and the dedicated letter). 2. Press OK to enter the setting. The current setting value flashes. - Page 17 ENGLISH Filling the salt container Filling the rinse aid dispenser Put 1 litre of water in Put 1 kg of salt in the the salt container salt container. (only for the first time). To adjust the released quantity of rinse aid, turn the selector between Turn the cap of the position 1 (lowest...
-
Page 18: Daily Use
ENGLISH Daily use 1. Open the water tap. 2. Press and hold until the appliance is activated. 3. Fill the salt container if it is empty. 4. Fill the rinse aid dispenser if it is empty. 5. Load the baskets. 6. - Page 19 ENGLISH 2. Press the button dedicated to the option 3. Close the appliance door to start the you want to activate. countdown. • The light related to the button is on. During the countdown, it is not possible to • The display shows the updated change the delay time and the programme programme duration.
-
Page 20: Hints And Tips
ENGLISH The function activates automatically: The Auto Off function switches the appliance • After up to 15 seconds once the off automatically. programme is complete. All buttons are inactive except for the on/off • After 5 minutes if a programme was not button. - Page 21 ENGLISH water hardness. Refer to the instructions Loading the baskets on the detergent packaging. Refer to the supplied leaflet with • Always use the correct quantity of rinse examples of the load of the aid. Insufficient dosage of rinse aid baskets.
-
Page 22: Care And Cleaning
ENGLISH Care and cleaning Internal cleaning Warning! Before any maintenance other than running • Clean the appliance interior with a soft the programme Machine Care, damp cloth. deactivate the appliance and • Do not use abrasive products, abrasive disconnect the mains plug from cleaning pads, sharp tools, strong the main socket. - Page 23 ENGLISH Cleaning the filters Put the flat filter (A) Reassemble the back in place. Make filters (B) and (C). Put Make sure that there The filter system is sure that it is them back in the are no residues of made of three parts.
-
Page 24: Troubleshooting
ENGLISH Cleaning the lower spray arm We recommend to clean the lower spray arm regularly to prevent soil from clogging the holes. Clogged holes can cause unsatisfactory washing results. To install the spray arm back, press it downwards. Cleaning the upper spray arm Do not remove the upper spray arm. - Page 25 ENGLISH Problem and alarm code Possible cause and solution The appliance does not fill • Make sure that the water tap is open. with water. • Make sure that the pressure of the water supply is not too The display shows i10 or i11. low.
- Page 26 ENGLISH Problem and alarm code Possible cause and solution The programme lasts too • If the delay start option is set, cancel the delay setting or long. wait for the end of the countdown. • Activating options can increase the programme duration. The remaining time in the •...
- Page 27 ENGLISH The product number code (PNC) The display shows the PNC of your appliance. If you contact an Authorised Service Centre, 2. To exit the PNC presentation, press and you need to provide the product number hold simultaneously code of your appliance. about 3 seconds.
- Page 28 ENGLISH Problem Possible cause and solution Unusual foam during washing. • Use the detergent designed specifically for dishwash‐ ers. • There is a leak in the rinse aid dispenser. Contact an Au‐ thorised Service Centre. Traces of rust on cutlery. •...
-
Page 29: Technical Information
Do not dispose of IKEA guarantee How long is the IKEA guarantee valid? This guarantee is valid for 5 years from the original date of purchase of your appliance... - Page 30 ENGLISH at IKEA. The original sales receipt is required supply, damage caused by abnormal as proof of purchase. If service work is environmental conditions. carried out under guarantee, this will not • Consumable parts including batteries and extend the guarantee period for the lamps.
- Page 31 Please refer to the last page of this manual demands. However these conditions do not for the full list of IKEA appointed contacts limit in any way consumer rights described and relative national phone numbers.
- Page 32 Magyarország 06-1-252-1773 Belföldi díjszabás Hétköznap 8.00 és 17.00 óra között 050-7111267 ma-vr: 8.00 - 21.00 Nederland Geen extra kosten. (0900-BEL IKEA) zat: 9.00 - 21.00 Luxembourg +31 507111267 Alleen lokaal tarief. zon / pub. vakantie: 10.00 - 18.00 (internationaal) Norge l i t Österreich...
- Page 36 21552 © Inter IKEA Systems B.V. 2022 AA-2189642-3...