Table of Contents
Advertisement
Advertisement
Table of Contents

Related Manuals for IKEA RENODLAD


Summary of Contents for IKEA RENODLAD
- Page 1 RENODLAD...
- Page 2 ENGLISH Please refer to the chapter IKEA GUARANTEE for contact details of the after sales customer service centre.
- Page 3 ENGLISH...
-
Page 4: Table Of Contents
Troubleshooting Before first use Technical information Programmes Environmental concerns Options IKEA guarantee Settings Subject to change without notice. Safety information Before the installation and use of the appliance, carefully read the supplied instructions. The manufacturer is not responsible for any injuries or damages that are the result of incorrect installation or usage. - Page 5 ENGLISH Children shall not carry out cleaning and user maintenance of • the appliance without supervision. General Safety This appliance is intended to be used in household and • similar applications such as: farm houses; staff kitchen areas in shops, offices and other –...
-
Page 6: Safety Instructions
ENGLISH Safety instructions • This appliance complies with the E.E.C. Installation Directives. Warning! Only a qualified • UK and Ireland only. This appliance is person must install this fitted with a 13 A mains plug. If it is appliance. necessary to change the mains plug fuse, use only a 13 A ASTA (BS 1362) fuse. -
Page 7: Product Description
ENGLISH • Do not remove the dishes from the • To replace the internal lighting, contact appliance until the programme is the Authorised Service Centre. complete. Some detergent may remain Service on the dishes. • The appliance can release hot steam if •... -
Page 8: Control Panel
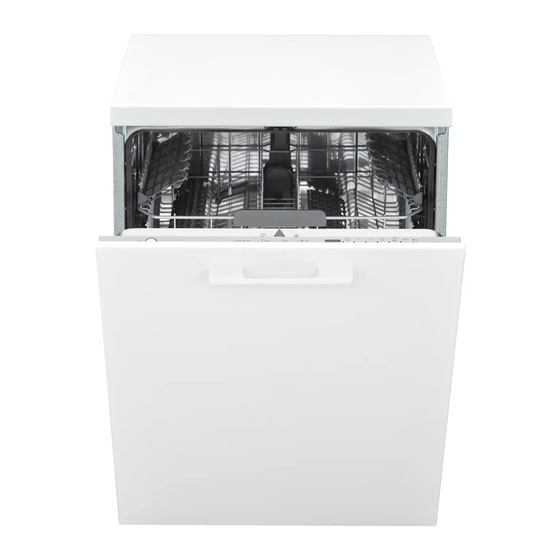
ENGLISH Rating plate Cutlery basket Air vent Lower basket Rinse aid dispenser Upper basket Detergent dispenser Beam-on-Floor Beam-on-Floor is off when the appliance is deactivated. Beam-on-Floor is a light that is displayed on the floor below the appliance door. When AutoOpen is activated •... -
Page 9: Before First Use
ENGLISH Before first use Caution! Remove the protection film from the control panel. 1. Fill the rinse aid dispenser. 2. Open the water tap. 3. Start the programme (P3) to remove any residuals from the manufacturing process. Do not use detergent and do not put dishes in the baskets. - Page 10 ENGLISH Programme Degree of soil Programme phases Options Type of load • Heavy soil • Prewash • ExtraHygiene • Crockery, cutlery, • Wash 70 °C • DryPlus pots and pans • Rinse • Dry • Fresh soil • Wash 60 °C •...
-
Page 11: Options
ENGLISH Water Energy Duration Programme (kWh) (min) 10.5 11.4 0.76 12 - 14 0.7 - 0.9 82 - 92 0.01 9.0 - 10.0 1.1 - 1.3 230 - 250 1) The pressure and the temperature of the water, the variations of the mains supply, the options and the quantity of dishes can change the values. -
Page 12: Settings
ENGLISH The related indicator is on. Activating options can affect the The display shows the updated programme water and energy consumption duration. as well as the programme duration. ExtraHygiene This option provides better hygiene results DryPlus by keeping the temperature at 70 °C for at Activate this option to boost the drying least 10 minutes during last rinsing phase. - Page 13 ENGLISH Level 0 deactivates the rinse aid dispenser indicators flash and no rinse aid is released. and the display is blank. Factory setting: level 4. The rinse aid empty notification How to set the rinse aid level The rinse aid helps to dry the dishes without streaks and stains.
-
Page 14: Daily Use
ENGLISH To improve the drying performance refer to • The indicator still flashes. the DryPlus option or activate AutoOpen. • The display shows the current setting. – = the acoustic signal is Do not try to close the appliance deactivated. door within 2 minutes after –... - Page 15 ENGLISH The function comes into operation: Using the detergent • 5 minutes after the completion of the programme. • After 5 minutes if the programme has not started. Starting a programme Caution! Do not remove the baskets from the dishwasher before a wash cycle.
-
Page 16: Hints And Tips
ENGLISH Opening the door while the appliance Cancelling the programme operates Press and hold RESET until the appliance is in programme selection mode. Opening the door while a programme is Make sure that there is detergent in the running stops the appliance. It may affect detergent dispenser before you start a new the energy consumption and the programme. -
Page 17: Care And Cleaning
ENGLISH detergent residues on the tableware, we • Make sure that the spray arm can move recommend that you use the tablets with freely before you start a programme. long programmes. Before starting a programme • Do not use more than the correct quantity of detergent. - Page 18 ENGLISH Cleaning the filters Put the flat filter (A) Assemble filters (B) back in place. Make and (C). Put them Make sure that sure that it is into position in filter there are no correctly positioned (A). Turn the handle residues of food or under the 2 guides clockwise until it...
-
Page 19: Troubleshooting
ENGLISH turn it counterclockwise until it locks into Cleaning the upper spray arm place. We recommend to clean the upper spray arm regularly to prevent soil from clogging the holes. Clogged holes can cause unsatisfactory washing results. 1. Pull out the upper basket. 2. - Page 20 ENGLISH Authorised Service Centre, check if you can With some problems, the display shows solve the problem by yourself with the help an alarm code. of the information in the table. The majority of problems that can occur can be solved without the need to contact Warning! Repairs not properly an Authorised Service Centre.
- Page 21 ENGLISH Problem and alarm code Possible solution • The appliance is not levelled. Loosen or tighten the ad- Small leak from the appli- justable feet (if applicable). ance door. • The appliance door is not centred on the tub. Adjust the rear foot (if applicable).
- Page 22 ENGLISH Problem Possible cause and solution • The release quantity of rinse aid is too much. Adjust There are whitish streaks or the rinse aid level to a lower level. bluish layers on glasses and • The quantity of detergent is too much. dishes.
-
Page 23: Technical Information
This guarantee is valid for 5 years from the original date of purchase of Your appliance Who will execute the service? at IKEA Pty Ltd, ABN 84006270757 or at IKEA service provider will provide the serv- Cebas Pty Ltd, ABN 15 009 156 003 (Both ice through its own service operations or Trading as IKEA). - Page 24 Contact - IKEA Customer Service at Australia. www.IKEA.com.au What will IKEA do to correct the problem? For Western Australian and South IKEA appointed service provider will exam- Australian customers please contact: ine the product and decide, at its sole dis- cretion, if it is covered under this guarantee.
- Page 25 What you must do to make a claim under transports the product to their home or the guarantee: other address, IKEA is not liable for any damage that may occur during transport. To make a claim under the guarantee However, if IKEA delivers the product to...
- Page 26 3. Ask for clarification on user manual con- carry out the job. tents and specifications of the IKEA ap- It is your proof of purchase and pliance. required for the guarantee to To ensure that we provide you with the best apply.
- Page 27 ENGLISH...
- Page 28 21552 © Inter IKEA Systems B.V. 2018 AA-2096916-2...