
Related Manuals for Rangemaster RMB6013BL/SS


Summary of Contents for Rangemaster RMB6013BL/SS
- Page 1 RMB6013BL/SS 13 Function Single Oven User Guide & Installation & Service Instructions U111363 - 01...
-
Page 3: Table Of Contents
Contents Before You Start... Cooking Table Installation and Maintenance Cleaning Your Oven Electrical Safety Essential Information Before First Use Control Panel and Doors Personal Safety Oven Cleaning Steam assisted cleaning Oven Overview Changing the bulb Setting the time Troubleshooting Changing the time Installation Using the oven Change a function mode... -
Page 5: Before You Start
Before You Start... Thank you for buying a Rangemaster appliance. Read the instructions before installing or using It should give you many years trouble-free this appliance. cooking if installed and operated correctly. It is The rating plate is located on the right side •... -
Page 6: Before First Use
Before First Use Fig. 1.1 Before using the oven for the first time clean it thoroughly. Switch off the unit at the isolator or mains supply. Remove all packing materials and accessories. Using hot water and a mild detergent, wipe the oven interior and then rinse carefully with a damp cloth. -
Page 7: Cleaning
Care should be taken to avoid touching The appliance is not intended to be the heating elements inside the main operated by means of external timer or oven. separated remote-control system. Whole chickens and large joints of meat This appliance can be used by children should be defrosted thoroughly in the aged from 8 years and above and refrigerator. -
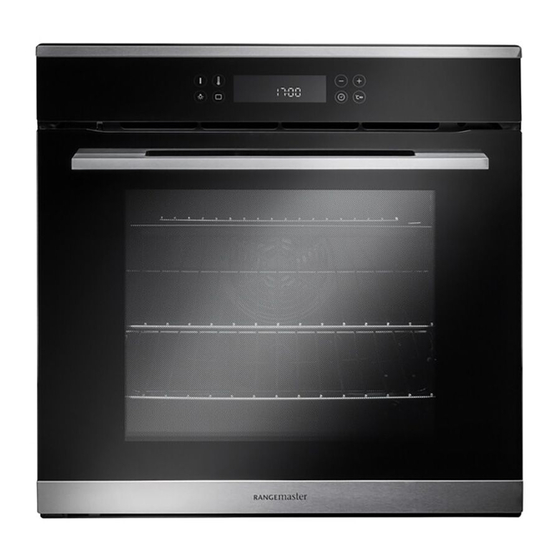
Page 8: Oven Overview
Oven Overview Fig. 2.1 88:88 88:88 ArtNo.325-0011 - BI oven R6012 The oven (Fig. 2.1) has a 10-function oven cavity with a TFT Fig. 2.2 screen and touch sensitive control panel. Checking the Parts The oven is supplied with the following parts: •... -
Page 9: Setting The Time
Once the cooker is connected and switched on, the display If the clock time needs to be reset or adjusted, please follow will start to flash. The clock must be set to the time of day the procedure below. before the oven will work. Setting the time Changing the time Step 1. -
Page 10: Using The Oven
Using the oven Please read the following steps before using the oven. Step 1. Switch on. Step 7. Set the temperature - decrease. 9:03 9:03 Step 8. Press the temperature button to start and confirm Step 2. Function display will flash. selection. -
Page 11: Change A Function Mode
Change a function mode Change a function temperature Step 1. Press the Function button the display will flash. Step 1. Press temperature until display flashes. 180c 180c 180c 180c Step 2. Choose a function. Step 2. Set the temperature - increase. 180c 180c 180c... -
Page 12: To Stop The Oven At A Specific Time Of Day
To stop the oven at a specific time Step 1. of day Please set the oven function first. You have set the required temperature and function mode 210c 210c and you would like the oven to automatically stop. 0:00 This features works by knowing the cooking duration. For example if the time is 13:30 and the food is required to bake for 45 minutes, the oven will stop working at 14:15. -
Page 13: To Start And Stop The Oven Automatically
To start and stop the oven automatically Please set the oven function first. The timer allows you to automatically start and stop by a Step 4. Set the end time - increase. combination of the length of the cooking time and the stop time. -
Page 14: Setting The Minute Minder
To set the child lock Setting the minute minder Step 1. In standby mode press the function and clock The minute minder can only be used when the oven has no cook function selected. Step 1. 09.03 0:00 0:00 9:00 9:00 Press for 1 seconds. -
Page 15: Using The Rapid Heat
Using the rapid heat Rapid Heat allows you to preheat the oven quickly. Before using this function remove all oven trays. DO NOT put food in the oven when using the rapid heat function. This will effect your cooking process. All heating elements are used. -
Page 16: Setting A Memory
Setting a memory The memory function can be used to save a frequently used setting. Step 6. Set a frequently used temperature - decrease. Step 1. Switch on. 9:03 9:03 Step 2. Function display will flash. Step 7. Firmly press the rapid heat button until a tone is emitted. -
Page 17: Function Overview
Function Overview No Function Mode Selected This function uses the upper and lower heating elements. Natural convection Conventional heat creates a perfect cooking zone in the centre of the oven, ideal for dark fruit cakes and pastries. This function radiates the heat from the grill element and the top element. This fully Grill temperature variable grill is ideal for grilling a family meal. - Page 18 For each grill function please note: • Always grill with the oven door closed. • Put the grill pan as close to the grill as possible. • DO NOT grill for more than 30 minutes at a time. • Preheat the grill for up to five minutes with the oven door closed.
-
Page 19: Cooking Tips
Cooking Tips Tips on Cooking with the Timer General Oven Tips If you want to cook more than one dish, choose dishes that The wire shelves should always be pushed firmly to the back require approximately the same cooking time. However, of the oven. -
Page 20: Cooking Table
Cooking Table The oven control settings and cooking times given in the table below are intended to be used Top (T) AS A GUIDE ONLY. Individual tastes may require the temperature to be altered to provide a preferred result. ArtNo.050-0007 Centre (C) Oven shelf positions Food is cooked at lower temperature in a fan oven than in a conventional oven. -
Page 21: Cleaning Your Oven
Cleaning Your Oven Essential Information Fig. 6.1 Allow the oven to cool and isolate the electricity supply before carrying out any thorough cleaning and maintenance. Never use paint solvents, washing soda, caustic ArtNo.325-0001 - BI oven door hinges cleaners, biological powders, bleach, chlorine based bleach cleaners, coarse abrasives or salt. -
Page 22: Oven
Removing the glass from the door Fig. 6.4 Open the oven door so you are able to access the screws on the edge of the oven door (Fig. 6.4). Remove the 2 screws (Fig. 6.4). Remove the plate from the top od the oven door (Fig. 6.5). Carefully remove the inner galss from the door and place ona soft, flat surface. - Page 23 IMPORTANT Never use screwdrivers or other utensils to remove the light cover. This could damage the enamel of the oven or the lamp holder. Remove only by hand. Never replace the bulb with bare hands as contamination from your fingers can cause premature failure.
-
Page 24: Troubleshooting
Troubleshooting DocNo.054-0001 - Troubleshooting BI oven Steam is coming from the oven. Oven temperature getting hotter as the cooker gets older. When cooking foods with a high water content (e.g. oven If turning the temperature down using the oven control knob chips) there may be some steam visible at the top of the door. -
Page 25: Installation
INSTALLATION Check the appliance is electrically safe and gas sound when you have finished. Installation DocNo.064-0003 - Installation - R6012 oven Dear Installer Location of the Oven Before you start your installation, please complete the details The oven may be installed in a kitchen/kitchen diner but NOT BELOW. -
Page 26: Positioning The Oven
INSTALLATION Check the appliance is electrically safe and gas sound when you have finished. Positioning the Oven Provision for Ventilation If installing below an existing hob the gas connection must Failure to allow adequate ventilation to the appliance may be on the right-hand side as shown in Fig. 8.1 from the rear result in overheating or damage to adjacent units and could of the hob. - Page 27 INSTALLATION Check the appliance is electrically safe and gas sound when you have finished. IMPORTANT Fig. 8.1 If installing below an existing hob the gas connection must be on the right-hand side as shown in Fig. 8.1 from the rear of the hob. Right-hand Gas Connection Fig.
- Page 28 INSTALLATION Check the appliance is electrically safe and gas sound when you have finished. Fig. 8.3 Fig. 8.4 IMPORTANT IMPORTANT If installing the base panel leave a space as indicated in Stand away from louvers positioned below the control Fig. 8.3 to allow for air circulation. panel.
-
Page 29: Electrical Connection
INSTALLATION Check the appliance is electrically safe and gas sound when you have finished. Electrical Connection DOUBLE POLE SWITCHED Fig. 8.7 FUSE SPUR OUTLET This appliance must be installed by a qualified electrician to comply with the relevant Institution of Engineering and Technology (I.E.T.) regulations and also the local electricity supply company requirements. -
Page 30: Current Operated Earth Leakage Breakers
INSTALLATION Check the appliance is electrically safe and gas sound when you have finished. Current Operated Earth Leakage Breakers Where the installation is protected by a 30mA sensitivity residual current device (RCD), the combined use of your appliance and other domestic appliances may occasionally cause nuisance tripping. -
Page 31: Circuit Diagram
Circuit Diagram • DocNo.094-0003 - Circuit diagram R6012 oven Circulation fan Light Bottom Grill Top out Grill Back Grill Top in Grill... -
Page 32: 10. Technical Data
577.2 mm 594 mm Width 548 mm 594 mm Depth 550 mm 571 mm Oven Data Brand Rangemaster Model identification (RMB6013BL/SS) Type of oven Electric Mass 35.2 Number of cavities Efficiency Fuel type Electric Cavity type *Drop Down Door Multifunction* Volume... -
Page 33: 11. Warranty/After Sales Service
Any cosmetic damage to the appliance must be reported within 90 days of delivery. Please note that AGA Rangemaster Limited have appointed UK Warranty Solutions to administer in warranty repairs on our behalf. If you make a request for an in warranty repair, your details will be held by Warranty Solutions. - Page 34 NOTES...
- Page 35 NOTES...
- Page 36 Clarence Street, Royal Leamington Spa, Warwickshire, CV31 2AD, England. Tel: +44 (0) 800 8046261 E-mail: consumers@agarangemaster.co.uk...