Table of Contents
Advertisement
Quick Links
Advertisement
Table of Contents

Related Manuals for Rangemaster RMB45MCBL/SS


Summary of Contents for Rangemaster RMB45MCBL/SS
-
Page 1: User Guide
RMB45MCBL/SS User Guide & Installation & Service Instructions U110666 - 03... -
Page 3: Table Of Contents
Contents Before You Start... Installation Installation and Maintenance Before The Installation Before First Use Location of the Oven Personal Safety Electrical Connection Cleaning Circuit Diagram Oven Overview Technical Data Setting the clock for the first time Warranty/After Sales Service Changing the time What kind of ovenware can be used? Cooking with microwave Using the Microwave... -
Page 4: Before You Start... 1 3. Installation
Before You Start... Personal Safety Thank you for buying a Rangemaster Microwave Combo Oven. It should give you many years trouble-free cooking if Accessible parts will become hot during use and installed and operated correctly. It is important that you read... -
Page 5: Cleaning 2 4. Circuit Diagram
This appliance can be used by children aged from 8 years and above and persons with reduced physical, sensory or mental capabilities or lack of experience and knowledge if they have been given supervision or instruction concerning use of the appliance in a safe way and understand the hazards involved. -
Page 6: Oven Overview
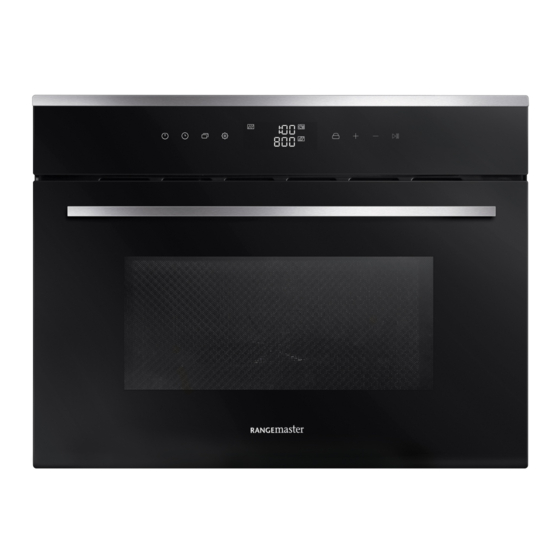
Oven Overview Fig. 2.1 Fig. 2.2 The Microwave Combo oven (Fig. 2.1) has a 8-function oven cavity with a touch sensitive control panel. Key: Fig. 2.1 Key: Fig. 2.2 Function Display ON /OFF button Microwave Cooking Duration Controls Timer Setting Grill 10. -
Page 7: Setting The Clock For The First Time
Setting the clock for the first time Changing the time Step 1. Firmly press the Step 2. Firmly press the Step 1. Set the hour by pressing the +. "Standby" button. setting button. Step 2. Decrease the hour. Step 3. Increase the hour. Step 3. -
Page 8: What Kind Of Ovenware Can Be Used
What kind of ovenware can be Grilling In the case of the grill function, the ovenware should be used? resistant to temperature of at least 300°C. Plastic dishes are not suitable for the grill function. Microwave function Metal pans, dishes or containers with metal parts or Combination functions decorations cannot be used in the microwave. - Page 9 set just the cooking time necessary and you should keep a close eye on the cooking process. • If you have several containers, such as cups, for example, set them out uniformly on the turntable plate • DO NOT seal plastic bags with metal clips. Use plastic clips instead.
-
Page 10: Using The Microwave
Using the Microwave Step 1. Firmly press the "Standby" button. Step 7. Increase the power rating. Step 2. Overview of the display Step 8. Decrease the power rating. Microwave Time Power rating Step 9. Press the "Pause/Start" button to confirm the Step 3. -
Page 11: Setting The Delayed Start For The Microwave
Setting the delayed start for the Microwave Step 1. Firmly press the "Standby" button. Step 7. Increase the power rating. Step 2. Overview of the display Step 8. Decrease the power rating. Microwave Time Power rating Step 9. After setting the power ratings. Press the "Timer" Step 3. -
Page 12: Cooking With The Grill
Cooking with the Grill Using the Grill Table 2.6 page 28 Step 1. Firmly press the "Standby" button. IMPORTANT POINTS: • There will be some smoke and smell when the grill is used for the first time. That is because of oil left from the manufacture process. -
Page 13: Setting The Delayed Start For The Grill
Setting the delayed start for the Grill Step 7. Press "Start" to confirm start time. Once set, the Step 1. Firmly press the "Standby" button. display will show the function and "AUTO" text. NOTE: Step 2. Press the + button to choose Grill At the end of each cooking process the oven will emit 3 Grill Time... -
Page 14: Using The Convection
Using the Convection Step 1. Firmly press the "Standby" button. Step 7. Decrease temperature. Step 2. Press the + button to choose Convection. Step 8. Press the "Pause/Start" button to confirm the setting. Convection Time Temperature Step 9. Press the "Childlock" button, to confirm if the Step 3. -
Page 15: Setting The Delayed Start For The Convection
Setting the delayed start for the Convection Step 1. Firmly press the "Standby" button. Step 7. Decrease temperature. Step 8. After setting the temperature. Press the "Timer" Step 2. Press the + button to choose Convection. button twice to set the delayed start. The current time will appear. -
Page 16: Using The Microwave Grill
Using the Microwave Grill Step 5. Increments of -30secs. The microwave and the grill work simultaneously and it is ideal for quickly browning foods after cooking. Make sure your cookware and/or dish is suitable for microwave grill and that it is also suitable for microwave use. The cookware and/or dish to be used in the combined function should adhere to Table 2.2 Microwave Grill ratings. -
Page 17: Setting The Delayed Start For The Microwave Grill
Setting the delayed start for the Microwave Grill Step 1. Firmly press the "Standby" button. Step 7. Increase the power rating. Step 2. Press the + button to choose Microwave Grill. Step 8. Decrease the power rating. Microwave Grill Time Power rating Step 9. -
Page 18: Using The Grill Convection
Using the Grill Convection Step 1. Firmly press the "Standby" button. Step 7. Increase temperature. Step 2. Press the + button to choose Grill Convection. Step 8. Decrease temperature. Grill Convection Time Temperature Step 9. Press the "Pause/Start" button to confirm the Step 3. -
Page 19: Setting The Delayed Start For The Grill Convection
Setting the delayed start for the Grill Convection Step 1. Firmly press the "Standby" button. Step 7. Increase temperature. Step 2. Press the + button to choose Grill Convection. Step 8. Decrease temperature. Grill Convection Time Temperature Step 8. After setting the temperature. Press the "Timer" Step 3. -
Page 20: Using The Microwave Convection
Using the Microwave Convection Step 1. Firmly press the "Standby" button. Step 7. Increase the power rating. Step 2. Press the + button to choose Step 8. Decrease the power rating. Microwave Convection. Microwave Time Convection Power rating Step 9. Press the "Pause/Start" button to confirm the Step 3. -
Page 21: Setting The Delayed Start For The Microwave Convection
Setting the delayed start for the Microwave Convection Step 1. Firmly press the "Standby" button. Step 7. Increase the power rating. Step 2. Press the + button to choose Step 8. Decrease the power rating. Microwave Convection. Microwave Time Convection Power rating Step 9. -
Page 22: Using The Microwave Grill Convection
Using the Microwave Grill Convection Step 1. Firmly press the "Standby" button. Step 7. Increase the power rating. Step 2. Press the + button to choose Step 8. Decrease the power rating. Microwave Grill Convection. Microwave Grill Time Convection Power rating Step 3. -
Page 23: Setting The Delayed Start For The Microwave Grill Convection
Setting the delayed start for the Microwave Grill Convection Step 1. Firmly press the "Standby" button. Step 7. Increase the power rating. Step 2. Press the + button to choose Step 8. Decrease the power rating. Microwave Grill Convection. Microwave Grill Time Convection Power rating... -
Page 24: Defrosting With Microwaves
Defrosting with microwaves • When defrosting, use only dishes that are appropriate for microwaves. • The defrost function by weight and the tables refer Table 2.5 page 28. • The defrosting time depends on the quantity and thickness of the food. When freezing food keep the defrosting process in mind. -
Page 25: Using The Defrost
Using the Defrost Half way through the defrost process, the appliance will stop and emit 3 beeps every 30 seconds. The defrost icon will become static and the word "turn" will appear. Open the door, turn the food over and press the Start / Pause button to continue defrosting. -
Page 26: Setting The Delayed Start For Defrost
Setting the delayed start for Defrost Step 1. Firmly press the "Standby" button. Step 6. Decrease the weight. Step 2. Press the + button to choose Defrost Step 7. After setting the weight. Press the "Timer" button twice to set the delayed start. The current time will appear. Defrost Program Weight... -
Page 27: Pause During Cooking
Pause during cooking Modifying Parameters The parameters of weight, time and temperature can only be modified when the cooking has been stopped. Press the "Pause/Start" button. If you need to change the cooking duration, press the "Timer" to change the time. Cancel cooking To cancel the cooking process, press the "Standby"... -
Page 28: Cooling Fan
Cooling Fan Always keep the door and the oven front very clean to ensure that the door opens and closes properly. The appliance is equipped with a cooling fan which comes Make sure water does not permeate into the microwave into operation as soon as a cooking function starts. -
Page 29: Troubleshooting
Troubleshooting Fig. 2.3 Replacing The Light Bulb Fig. 2.3 Take off the plug from power supply. Take off the lampshade Take down halogen lamp Warning: Hot lamp! Fill new halogen lamp (230V-25W). Operate according to the instruction. Install lampshade well. Connect the power. -
Page 30: Standing Time
The control settings and cooking times given in the tables are intended to be used AS A GUIDE ONLY. Individual tastes may require the temperature to be altered to provide a preferred result. 1000W 800W 600W 400W 200W Display High Medium High Medium Medium Low... - Page 31 Follow up Time Name of food Weight (g) Defrosting (min) Frequency of turnover (min) 5-10 5-10 10-12 10-15 Meat (veal, beef, pork) 1000 21-23 20-30 1500 32-34 20-30 2000 43-45 25-35 8-10 10-15 Beef stew 1000 17-19 20-30 10-15 Minced meat 10-14 20-30 10-15...
-
Page 32: Installation And Maintenance 1 Before The Installation
INSTALLATION Check the appliance is electrically safe and gas sound when you have finished. Installation Dear Installer Before The Installation Before you start your installation, please complete the details Open the oven door and take out all the accessories and below. - Page 33 INSTALLATION Check the appliance is electrically safe and gas sound when you have finished. Fig. 3.1 min 500 cm min 500 min 500 cm 500 cm All dimensions in mm unless otherwise shown...
- Page 34 INSTALLATION Check the appliance is electrically safe and gas sound when you have finished. DO NOT use the handle to lift the oven...
-
Page 35: Personal Safety 1 Electrical Connection
INSTALLATION Check the appliance is electrically safe and gas sound when you have finished. Electrical Connection DOUBLE POLE SWITCHED Fig. 3.2 FUSE SPUR OUTLET This appliance must be installed by a qualified electrician to comply with the relevant Institution of Engineering and Technology (I.E.T.) regulations and also the local electricity supply company requirements. - Page 36 Circuit Diagram PCB board Light Ground terminal Turntable motor Monitor switch Furnace chamber thermostat Magnetron thermostat High tension transformer Cooling Fan Top Element Back Element Circulating Fan...
-
Page 37: Technical Data
544 mm 595 mm Depth 514 mm 535 mm Mass (kg) Data Brand Rangemaster Model identification RMB45MCBL/SS Type of drawer Electric Number of cavities Volume Litres Max load 38.0 Maximum total electrical load at 230 V 1.400 kW (approximate total including, oven lights, power steam/oven etc.) -
Page 38: Warranty/After Sales Service
Warranty/After Sales Service DocNo.111-0003 Warranty No.10 If consultation or technical assistance is needed, please provide the local authorised service agent with the purchase invoice and the product code/serial number. The 2 years free maintenance for the operation of the appliance started from the date of purchase of this product. Any cosmetic damage to the appliance must be reported within 90 days of delivery. - Page 39 Notes...
- Page 40 Clarence Street, Royal Leamington Spa, Warwickshire, CV31 2AD, England. Tel: +44 (0) 800 8046261 E-mail: consumers@agarangemaster.co.uk...