Chapters
Table of Contents

Related Manuals for Fagor 6FID-4GL X


Summary of Contents for Fagor 6FID-4GL X
- Page 1 INSTRUCTIONS FOR USE AND MAINTENANCE MANUEL D'INSTRUCTIONS ÈÍCTPÓÊÖÈß ÏO OÁCËÓÆÈBAHÈÞ È ÝÊCÏËÓATAÖÈÈ 6FI-4GLS X 6FI-4GLST X 6FID-4GL X 6FID-4GL B 6FID-4GLS X 6FID-31ML X 6FID-31MLS X...
- Page 2 ATTENTION ! 1. Read this instruction manual thoroughly before installing or using the hob. 2. This hob must be installed according to the relevant regulations and used only in well ventilated rooms. 3. Before installing this appliance, check whether local gas supply terms (gas type and pressure) and settings match.
-
Page 3: Table Of Contents
TABLE OF CONTENTS OV ERV I EW ........................ 3 HOB APPLICATION ............................3 TECHNICAL DATA............................3 HOB MODELS.............................3 SAFETY GUIDELINES..........................4 PREPARATION............................5 I N ST ALLAT I ON ......................5 GENERAL NOTES ............................5 GAS HOB INSTALLATION .........................6 CONNECTING THE HOB TO THE NATURAL GAS SUPPLY ..............7 CONNECTING THE HOB TO THE LIQUID GAS BOTTLE ................7 NOZZLE REPLACEMENT ..........................8 ADJUSTING CONTROL KNOBS........................8... -
Page 4: Ov Erv I Ew
OVERVIEW 1 OV ERV I EW 1 .1 H OB APPLI CAT I ON This gas-electric hob is intended for domestic cooking only. It must not be used for any other purpose. 1 .2 T ECH N I CAL DAT A Table 1 Total height Overall... -
Page 5: Safety Guidelines
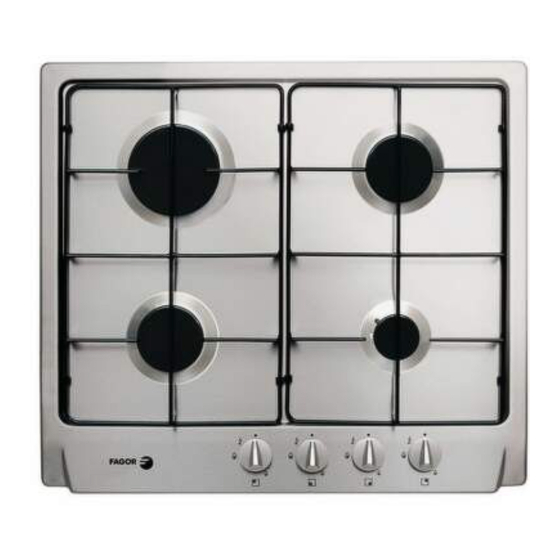
OVERVIEW 6 FI -4 GLST X ; Rapid burner R Triple-crown burner TC 3,0 kW 3,8 kW Auxiliary burner AUX Semi-rapid burner SR 1,0 kW 1,75 kW Control knob for TC burner Control knob for AUX burner Control knob for R burner Control knob for SR burner Fig. -
Page 6: Preparation
INSTALLATION In case of a gas leakage: immediately close the valve of the gas system or gas bottle ventilate the room thoroughly call gas service During this time do not: light matches or smoke turn on or turn off electrical devices (radio, door bell, light) or mechanical devices that spark. -
Page 7: Gas Hob Installation
INSTALLATION There must not be any cabinet fitted right above the hob. In case of mounting a horizontal partition "A" under the hob, leave the distance at least 150mm between the hob and the partition (Fig. 6). Fig. 5 Fig. 6 2 .2 GAS H OB I N ST ALLAT I ON 1. -
Page 8: Connecting The Hob To The Natural Gas Supply
INSTALLATION 6. After installing the hob, the horizontal partition "A" may be placed under the worktop which will protect the user against accidental touching of a hot hob from the bottom. Fig. 9 Fig. 10 2 .3 CON N ECT I N G T H E H OB T O T H E N AT U RAL GAS SU PPLY At t e nt ion ! 1 . -
Page 9: Nozzle Replacement
INSTALLATION AT T EN T I ON ! 1 . Che c k ing t he le a k a ge w it h a n ope n fla m e (e .g. w it h a m a t c h or a c a ndle ) is una c c e pt a ble . -
Page 10: Connecting The Hob To The Mains
OPERATION Then: – open the gas flow with a knob and light the adjusted burner, – set the knob in the simmering position . and then, without changing that position, remove it from the tap's mandrel turn the adjusting screw "A" (Fig. 13) and observe the flame; set such a height of a flame so as it will not be extinguished by a small draught and while quickly turning the knob from full flame position to the economical flame position... -
Page 11: Flame Adjusting
OPERATION For the proper operation ensure that burners and igniters are clean and dry. If the hob is equipped with a flame failure protection after igniting the burner keep the control knob fully pushed for a while to activate the protection. Do not overload the grates. -
Page 12: Turning Off Burners
OPERATION if the flame goes out, repeat these steps keeping the knob pushed for 5 seconds longer adjust to the desired flame height between 3 .1 .3 T U RN I N G OFF BU RN ERS Turn the control knob clockwise to the zero position marked " ". 3 .1 .4 OPERAT I N G T H E H OB SU PPLI ED WI T H LI QU I D GAS FROM BOT T LE Before igniting the first burner, open the gas bottle valve and then ignite burners as described above. -
Page 13: Operating The Hot Plate
OPERATION 3 .2 OPERAT I N G T H E H OT PLAT E 3 .2 .1 OPERAT I N G H I N T S Keep the plate clean. Dirty plate does not transfer all power. Except first use, turn on the plate only after putting a pot on it. Never put wet vessels on the plate as moisture causes corrosion. -
Page 14: Vessel Selection
OPERATION Cook ing Roa st ing Turn the knob to position 6 and wait till the Turn the knob to position 6 and heat the oil. Then put ingredients into vessel and turn the liquid starts boiling and turn to position 2 for knob to position 4. -
Page 15: Clean I N G An D M Ai N T En An
CLEANING AND MAINTENANCE 4 CLEAN I N G AN D M AI N T EN AN CE At t e nt ion ! Be fore c le a ning, you m ust disc onne c t t he hob’s plug from t he soc k e t a nd t urn off a ll burne rs. -
Page 16: Abn Orm Al H Ob Operat I
ABNORMAL HOB OPERATION Cleaned burner parts should be thoroughly dried because if they are wet the gas will not burn or will burn improperly. After drying, re-install the burner elements in the order reverse to that used during their removal and do not damage igniters and thermocouple ends.Cleaning the electric plate Clean the plate with a soft cloth or a sponge. - Page 17 ATTENTION ! 1. Lisez entièrement ce manuel d'instructions avant d'installer ou d'utiliser la table de cuisson. 2. Cette table de cuisson doit être installée conformément aux réglementations en vigueur et utilisée uniquement dans des pièces correctement ventilées. 3. Avant d'installer cet appareil, assurez-vous que les conditions locales en termes d'alimentation en gaz (type de gaz et pression) correspondent aux paramètres de la table de cuisson.
- Page 18 SOMMAIRE PRESEN T AT I ON ....................... 3 CHAMP D'APPLICATION DE LA TABLE DE CUISSON................3 DONNEES TECHNIQUES ..........................3 MODELES DE TABLES DE CUISSON ......................3 DIRECTIVES DE SECURITE........................4 PREPARATION............................5 I N ST ALLAT I ON ......................5 REMARQUES D'ORDRE GENERAL......................5 INSTALLATION DE LA TABLE DE CUISSON AU GAZ ................6 RACCORDEMENT DE LA TABLE DE CUISSON AU GAZ NATUREL............7 RACCORDEMENT DE LA TABLE DE CUISSON A UNE BONBONNE DE GAZ LIQUIDE ......8 REMPLACEMENT DES BUSES.........................8...
-
Page 19: Presen T At I On
PRESENTATION 1 PRESEN T AT I ON 1 .1 CH AM P D'APPLI CAT I ON DE LA T ABLE DE CU I SSON Cette table de cuisson au gaz et à l'électricité est destinée à un usage domestique uniquement. Elle ne doit être utilisée à... -
Page 20: Directives De Securite
PRESENTATION Fig. 1 6 FI -4 GLST X Brűleur rapide R Brűleur triple couronne TC 3,0 kW 3,8 kW Brűleur semi-rapide SR Brűleur auxiliaire AUX 1,75 kW 1,0 kW Bouton de commande du brűleur TC Bouton de commande du brűleur AUX Bouton de commande du brűleur SR Bouton de commande du brűleur R Fig. -
Page 21: Preparation
UTILISATION Lorsqu'elle est active, la table de cuisson produit de la chaleur et de l'humidité dans la pièce où elle est installée. Assurez-vous que cette pièce est correctement ventilée. Des trous d'aération naturels doivent être ouverts ; autrement, un mécanisme de ventilation (hotte d'aspiration avec extracteur) doit être installé. -
Page 22: Installation De La Table De Cuisson Au Gaz
UTILISATION Le mur à proximité du côté arrière de la table de cuisson doit être construit dans un matériau non combustible. Une distance de 100 mm au minimum doit être maintenue entre les bords des côtés de la table de cuisson et tout meuble adjacent. -
Page 23: Raccordement De La Table De Cuisson Au Gaz Naturel
UTILISATION 4. Placez la table de cuisson au milieu de la découpe et exercez une pression de sorte à faire adhérer le joint adhésif sur le plan de travail. 5. Fixez la table de cuisson à l'aide des quatre supports inclus avec les autres pièces de montage (Fig. -
Page 24: Raccordement De La Table De Cuisson A Une Bonbonne De Gaz Liquide
UTILISATION 2 .4 RACCORDEM EN T T ABLE CU I SSON U N E BON BON N E DE GAZ LI QU I DE Cette table de cuisson doit être adaptée pour une utilisation avec du gaz liquide. A cette fin, les buses des brûleurs doivent être remplacées et les boutons de commande doivent être réglés. -
Page 25: Reglage Des Boutons De Commande
UTILISATION Fig. 12 2 .6 REGLAGE DES BOU T ON S DE COM M AN DE REGLAGE DES ROBINETS Le réglage du robinet gaz consiste à la mise en position de la flamme minimum du robinetdu brûleur. Pour le faire il faut : –... -
Page 26: T I Li Sat I
UTILISATION La puissance du réseau électrique est suffisante pour assurer la consommation de la table de cuisson. At t e nt ion ! La fic he doit ê t re inst a llé e pa r un m ont e ur a gré é qua lifié . La prise de c oura nt de la t a ble de c uisson doit ê... -
Page 27: Allumage Des Brûleurs
UTILISATION La hauteur de la flamme dépend de la position du bouton de commande (Fig. 16). Réglez la flamme uniquement entre La flamme ne doit pas s'étendre au-delà du fond du récipient, mais uniquement sur les 2/3 de sa surface. De cette manière, le gaz aura une efficacité optimale et la flamme ne roussira pas les casseroles et les poêles. -
Page 28: Sélection Des Récipients
UTILISATION Fermez le robinet de la bonbonne de gaz Une fois la flamme éteinte, fermez le bouton de commande correspondant Le robinet de la bonbonne de gaz doit être fermé lorsque vous n'utilisez pas la table de cuisson. 3 .1 .5 SELECT I ON DES RECI PI EN T S Fig. -
Page 29: Bouton De Commande De La Plaque Électrique
UTILISATION N'aspergez jamais une plaque chaude avec de l'eau froide. Eteignez la plaque quelques minutes avant la fin de la cuisson ; la plaque accumulant la chaleur, elle reste chaude quelques temps après sa désactivation. N'utilisez pas la plaque pour préparer de la nourriture emballée dans de l'aluminium ou dans des conteneurs en plastique. -
Page 30: Sélection Des Récipients
NETTOYAGE ET ENTRETIEN AT T EN T I ON ! La pla que re st e c ha ude que lque s t e m ps a prè s sa dé sa c t iva t ion. N e la t ouc he z pa s e t n'y pose z a uc un ré... -
Page 31: Nettoyage De La Table De Cuisson Et Des Bruleurs
NETTOYAGE ET ENTRETIEN Afin d'éviter d'endommager les surimpressions, utilisez des liquides nettoyants doux et ne comportant pas d'agents abrasifs pour nettoyer le panneau et les boutons de commande. Pour garantir le bon fonctionnement de la table de cuisson, assurez-vous que les éléments des brûleurs et les allumeurs sont propres et secs. -
Page 32: Nettoyage De La Plaque Electrique
FONCTIONNEMENT ANORMAL DE LA TABLE DE CUISSON 4 .3 N ET T OY AGE DE LA PLAQU E ELECT RI QU E Nettoyez la plaque à l'aide d'un linge doux ou d'une éponge non abrasive. Les bagues de finition plaquées en nickel doivent être nettoyées à l'aide d'agents non corrosifs. - Page 33 FONCTIONNEMENT ANORMAL DE LA TABLE DE CUISSON At t e nt ion ! 1. Si a prè s a voir suivi le s inst ruc t ions c i-de ssus, la t a ble de c uisson ne fonc t ionne t oujours pa s norm a le m e nt , a dre sse z-vous à...
- Page 34 ___________________ .___________________ ._________________ ____________ .___________ ._____________ _______________________________________________________________________________ __________________________________________ ___________________________________________ “____” _______________________ ....................1 )..........4 ......................2 )..........1 ....................1 ........................1 — 6...
- Page 35 1) 73/23/EEC — 2) 89/336/EEC — 3) 90/396/EEC — [GAD].
- Page 36 ....................4 ..........................4 .......................4 ...........................4 ......................5 ............................6 ......................7 ...........................7 ....................7 ............8 ....9 ............................9 .........................10 .............11 ................11 ..........................11 ........................12 ..........................12 ..........................12 ...13 ............................13 ......................14 3.7.1 ...................14 3.7.2 .....................14 3.7.3 ..........................15 ....................16 ........................16 ................16 ....................17 ..................17...
- Page 37 ~ 230 , 50 AUX 1,0 SR 1,75 TC 3,8 / 1500 6FI-4GLSX; 6FID-4GLSX; 6FID-4GLX; 6FID-4GLB дняя г ope a лк Бы т c pa я г ope a R лк 1,75 кВт 3,0 кВт Ma a л я г ope a AUX лк...
- Page 38 6FI-4GLSTX Б льш я a г ope a-TC лк Бы т c pa я г ope a R лк 3,8 kW 3,0 кВт дняя г ope a лк Ma a л я г ope a AUX лк 1,75 кВт кВт Py a чк...
- Page 39 «6»,...
- Page 40 . 4), « », . 5). . 60 . 6.
- Page 41 . 5). « » ( . 3), . 10...
- Page 42 . 10). G 20 X072 Z097 Y118 K1,35 G 30 – – – – – –...
- Page 43 . 11 « » . 12 – – – « » ( . 15) 2 - 4...
- Page 44 . 13...
- Page 45 0 — — — . 14 . 15 . 14. . 15). 6FID-31MLX; 6FID-4GLX; 6FID-4GLB 6FI-4GLSX; 6FID-4GLSX; 6FI-4GLSTX;6FID-31MLSX « ». « ».
- Page 46 23 — 30 18 — 28 16 — 26 14 — 22 12 — 16 . 16 . 17 . 18...
- Page 47 3.7.1 3.7.2 . 19 . 19).
- Page 48 ó ó 3.7.3 ó Fig. 20 Fig. 21...
- Page 49 22). . 22 . 23). . 23 . 11),...
- Page 50 . 24...
- Page 52 INFORMATION FOR THE CORRECT DISPOSAL OF ELECTRICAL AND When the appliance reaches the end of its service life, you should not dispose of it with the general domestic waste. It can be taken free of charge to the local administrations' specific selective collection centres, or to distributors who provide this service.