Kyocera ECOSYS PA2100CX Operation Manual
Hide thumbs
Also See for ECOSYS PA2100CX:
- First steps quick manual (32 pages) ,
- Setup manual (2 pages) ,
- Quick manual (28 pages)
Table of Contents
Advertisement
Quick Links
Advertisement
Table of Contents
Troubleshooting

Related Manuals for Kyocera ECOSYS PA2100CX


Summary of Contents for Kyocera ECOSYS PA2100CX
- Page 1 Operation Guide ECOSYS PA2100cwx ECOSYS PA2100cx ・ Printer Driver & Utility Install ・ Manual Download Refer to the following URL. https:/ /kyocera.info/ ➡ Please scan the code on the right. Or please check the following URL. https:/ /kyocera.inst-guide.com/tb11f/...
- Page 2 Please read this Operation Guide before using the machine. To maintain quality, we recommend using genuine Kyocera toner containers, which must pass numerous quality inspections.
-
Page 3: Table Of Contents
Contents Preface ............................. i Contents ..........................ii Machine Features ........................vi Guides Provided with the Machine ..................viii About the Operation Guide (this Guide) ................ix Structure of the guide....................ix Conventions Used in This Guide..................x Menu Map ..........................xii Legal and Safety Information .............. - Page 4 Setting Wi-Fi Direct ....................2-26 Energy Saver function ....................2-29 Auto Sleep ....................... 2-29 Sleep Level Set....................... 2-30 Power Off Rule (models for Europe) ............... 2-31 Quiet Mode ........................2-32 Installing Software ......................2-33 Software on DVD (Windows) .................. 2-33 Installing Software in Windows ................
- Page 5 Toner Status Tab ....................4-18 Alert Tab ........................4-19 Status Monitor Context Menu .................. 4-19 Status Monitor Notification Settings ................ 4-20 Operation on the Machine or Work from Your Home ......5-1 Loading Paper in the Multipurpose Tray ................. 5-2 Canceling Jobs ........................
- Page 6 Using Job Accounting ....................7-19 Login/Logout ......................7-19 Apply Limit ....................... 7-20 Unknown ID Job ......................7-21 Administrator settings ....................7-22 Troubleshooting ..................8-1 Regular Maintenance ......................8-2 Cleaning ........................8-2 Cleaning Paper Transfer Unit ..................8-2 Toner Container Replacement .................. 8-3 Loading Paper ......................
-
Page 7: Machine Features
> Machine Features Machine Features The machine is equipped with many useful functions. Here are some examples. Save energy and cost Save energy as needed Use less toner for printing Reduce paper use (Energy Saver function) (EcoPrint) (Paper Saving Printing) The machine is equipped with Energy You can save toner consumption with this You can print originals on both sides of... - Page 8 > Machine Features Use functions more efficiently Make the machine quiet Install the machine without concerning Use USB drive (Quiet Mode) the network cables (Wireless Network) (USB Drive) You can make the machine quiet by If there is a wireless LAN environment, it It is useful when you need to print reducing its running noise.
-
Page 9: Guides Provided With The Machine
Work using the Kyocera Remote Work Assistant User Guide machine remotely from Explains how to use the Kyocera Remote Work Assistant application to view the counter your home information, send fax remotely and store image/job logs. Install the following versions of Adobe Reader to view the manuals. -
Page 10: About The Operation Guide (This Guide)
> About the Operation Guide (this Guide) About the Operation Guide (this Guide) Structure of the guide The Operation Guide contains the following chapters. Chapter Contents Legal and Safety Information Provides precautions regarding use of the machine and trademark information. Installing and Setting up the Explains part names, cable connections, installation of the software, login, logout, and Machine... -
Page 11: Conventions Used In This Guide
> About the Operation Guide (this Guide) Conventions Used in This Guide Adobe Reader XI is used as an example in the explanations below. Click an item in the Table of Click to move from the current page to the previously Contents to jump to the displayed page. - Page 12 > About the Operation Guide (this Guide) Conventions used in procedures for operating the machine In this Operation Guide, continuous operation is as follows: Actual procedure Procedure indicated in this guide ► Select the [Menu] key. [Menu] key > [▲] [] key > [Device Common] > [ ] key ...
-
Page 13: Menu Map
> Menu Map Menu Map This is a list of menus displayed on the message display. Depending on the settings, some menus may not be displayed. Some menu names may differ from their reference titles. Report Print Print Menu Map (page 6-4) Print Status Page... - Page 14 > Menu Map Print Settings Paper Source (page 6-8) Auto Cass.Change (page 6-8) MP Tray Priority (page 6-8) Paper Feed Mode (page 6-8) Duplex (page 6-8) Override A4/LT (page 6-8) Emulation Error Report (page 6-8) Color Mode (page 6-8) Print Quality Gloss Mode (page 6-9)
- Page 15 > Menu Map Wired Network TCP/IP DHCP (page 6-11) Auto-IP (page 6-11) IP Address (page 6-11) Subnet Mask (page 6-11) Gateway (page 6-11) TCP/IP (IPv6) RA(Stateless) (page 6-12) DHCPv6 (page 6-12) LAN Interface (page 6-12) Restart Network (page 6-12) Network Settings Communication (page 6-13)
- Page 16 > Menu Map Device Common Message Language (page 6-17) Date Setting Date (Year/Mon/Day) (page 6-17) Time (Hour:Min:Sec) (page 6-17) Date Format (page 6-17) Time Zone (page 6-17) Summer Time (page 6-17) Buzzer Key Confirmation (page 6-18) Job End (page 6-18) Ready (page 6-18)
- Page 17 > Menu Map Security Security Level (page 6-22) DataSanitization (page 6-23) User/Job Account User Login Set. Login Type (page 7-3) Key Login (page 7-4) Job Accounting (page 7-7) AccountingAccess (page 7-8) Select Account Counter (page 7-17) Color Counter (page 7-17) Restriction (page 7-11)
-
Page 18: Legal And Safety Information
Legal and Safety Information Please read this information before using your machine. This chapter provides information on the following topics. Notice ................................. 1-2 Safety Conventions in This Guide ......................1-2 Environment ............................. 1-3 Precautions for Use ..........................1-4 Laser Safety (Europe) ..........................1-5 SAFETY OF LASER BEAM (USA) ...................... -
Page 19: Notice
Legal and Safety Information > Notice Notice Safety Conventions in This Guide The sections of this guide and parts of the machine marked with symbols are safety warnings meant to protect the user, other individuals and surrounding objects, and ensure correct and safe usage of the machine. The symbols and their meanings are indicated below. -
Page 20: Environment
Legal and Safety Information > Notice Environment The service environmental conditions are as follows: Temperature 50 to 90.5°F (10 to 32.5°C) Humidity 10 to 80% Avoid the following locations when selecting a site for the machine. • Avoid locations near a window or with exposure to direct sunlight. •... -
Page 21: Precautions For Use
Legal and Safety Information > Notice Precautions for Use Cautions when handling consumables CAUTION Do not attempt to incinerate parts which contain toner. Dangerous sparks may cause burns. Keep parts which contain toner out of the reach of children. If toner happens to spill from parts which contain toner, avoid inhalation and ingestion, as well as contact with your eyes and skin. -
Page 22: Laser Safety (Europe)
Legal and Safety Information > Notice Laser Safety (Europe) Laser radiation could be hazardous to the human body. For this reason, laser radiation emitted inside this machine is hermetically sealed within the protective housing and external cover. In the normal operation of the product by user, no radiation can leak from the machine. -
Page 23: Safety Of Laser Beam (Usa)
Legal and Safety Information > Notice SAFETY OF LASER BEAM (USA) 1. Safety of laser beam This machine has been certified by the manufacturer to Class 1 level under the radiation performance standards established by the U.S.DHHS (Department of Health and Human Services) in 1968. This indicates that the product is safe to use during normal operation and maintenance. -
Page 24: Safety Instructions Regarding The Disconnection Of Power
Compliance and Conformity Hereby, KYOCERA Document Solutions Inc. declares that the radio equipment type ECOSYS PA2100cwx is in compliance with Directive 2014/53/EU. The full text of the EU declaration of conformity is available at the following internet address: https://www.kyoceradocumentsolutions.eu/index/service/dlc.html... -
Page 25: Other Precautions (For Users In California, The United States)
Legal and Safety Information > Notice Industry Canada statement: This device contains licence-exempt transmitter(s) / receiver(s) that complies with Innovation, Science and Economic Development Canada’s licence-exempt RSS (s). Operation is subject to the following two conditions: (1) This device may not cause interference. (2) This device must accept any interference, including interference that may cause undesired operation of the device. -
Page 26: Limited Use Of This Product (If Equipped)
Legal and Safety Information > Notice • Contents of email messages Illegal Intrusion A third party with malicious intent may gain unauthorized access to personal or company networks and conduct the following illegal actions. • Extracting personal and confidential information (information leak) •... -
Page 27: Legal Information
Legal and Safety Information > Notice Legal Information Copying or other reproduction of all or part of this guide without the prior written consent of KYOCERA Document Solutions Inc. is prohibited. Regarding Trade Names • PRESCRIBE and ECOSYS are registered trademark of Kyocera Corporation. - Page 28 Open Source Software License For the “Open Source Software license, go into the following URL and select Country > Product Name > OS > Language and then, refer to the “OSS_Notice” from the manual tab in the “Download”. https://kyocera.info/ 1-11...
-
Page 29: Energy Saving Control Function
Legal and Safety Information > Notice Energy Saving Control Function The device comes equipped with a Sleep where printer functions remain in a waiting state but power consumption is reduced to a minimum after a certain amount of time elapses since the device was last used. If the machine is not used while in sleep mode, the power automatically turns off. -
Page 30: Installing And Setting Up The Machine
Installing and Setting up the Machine This chapter provides information for the administrator of this machine, such as part names, cable connection, and software installation. Part Names (Machine Exterior) .......................... 2-2 Part Names (Connectors/Interior) ........................2-3 Part Names (With Optional Equipments Attached) .................... 2-5 Connecting the Machine and Other Devices ..................... -
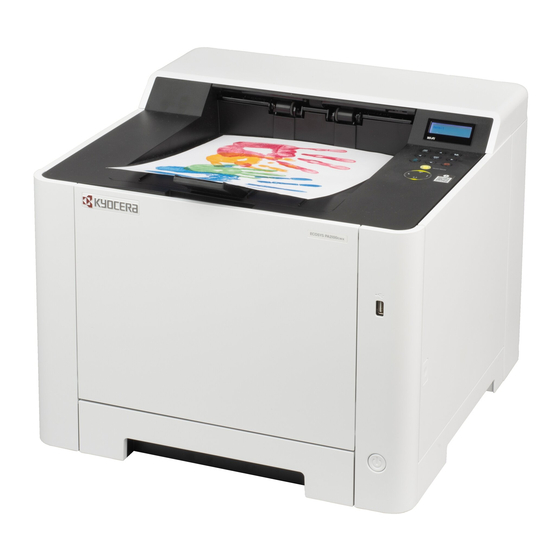
Page 31: Part Names (Machine Exterior)
Installing and Setting up the Machine > Part Names (Machine Exterior) Part Names (Machine Exterior) 1 Top Tray 6 Button (Right Cover Open) 2 Paper Stopper 7 USB Port 3 Cassette 1 8 Right Cover 4 Power Switch 9 Operation Panel 5 Handles 10 Anti-theft Lock Slot 11 Rear Cover 1... -
Page 32: Part Names (Connectors/Interior)
Installing and Setting up the Machine > Part Names (Connectors/Interior) Part Names (Connectors/Interior) 1 USB Interface Connector 6 Multipurpose Tray 2 Network Interface Connector 7 Tray Extension 3 Feed Cover 8 Paper Width Guides 4 Paper Length Guide 9 Fuser Cover 5 Paper Width Guides... - Page 33 Installing and Setting up the Machine > Part Names (Connectors/Interior) 101112 13 10 Toner Container (Yellow) 13 Toner Container (Black) 11 Toner Container (Cyan) 14 Toner Container Lock Lever 12 Toner Container (Magenta)
-
Page 34: Part Names (With Optional Equipments Attached)
Installing and Setting up the Machine > Part Names (With Optional Equipments Attached) Part Names (With Optional Equipments Attached) 1 Cassette 2 2 Rear Cover 2 Optional Equipment (page 9-2) -
Page 35: Connecting The Machine And Other Devices
Installing and Setting up the Machine > Connecting the Machine and Other Devices Connecting the Machine and Other Devices Prepare the cables necessary to suit the environment and purpose of the machine use. When Connecting the Machine to the PC via USB When Connecting the Machine to the PC or Tablet by network cable, Wi-Fi, or Wi-Fi direct Network cable connection... -
Page 36: Connecting Cables
Installing and Setting up the Machine > Connecting Cables Connecting Cables Connecting LAN Cable IMPORTANT Make sure that the power to the machine is turned off. Power Off (page 2-9) Connect the cable to the machine. Connect the LAN cable to the network interface connector. Connect the other end of the cable to the hub or the PC. -
Page 37: Connecting Usb Cable
Installing and Setting up the Machine > Connecting Cables Connecting USB Cable IMPORTANT Make sure that the power to the machine is turned off. Power Off (page 2-9) Connect the cable to the machine. Connect the USB cable to the USB interface connector. Connect the other end of the cable to the PC. -
Page 38: Power On/Off
Installing and Setting up the Machine > Power On/Off Power On/Off Power On Turn the power switch on. Power Off Turn the power switch off. It takes about 3 minutes for power off. CAUTION If this machine will be left unused for an extended period (e.g. overnight), turn it off at the power switch. If the machine will not be used for an even longer period of time (e.g. -
Page 39: Using The Operation Panel
Installing and Setting up the Machine > Using the Operation Panel Using the Operation Panel Operation Panel Keys 2, 3 1 [Menu] key: Displays the Menu screen. 2 Arrow keys: Increments or decrements numbers, or selects menu in the message display. When a specific error occurs, select the [►] ( ) key to show the Help screen. -
Page 40: Operation Method
Installing and Setting up the Machine > Using the Operation Panel Operation Method Displaying the Menus and Configuring Settings Select the [Menu] key to display the setting menus. Select the [▲] key, [▼] key, [◄] key, [►] key, or [OK] key to select a menu, and perform settings. -
Page 41: Selecting A Menu
Installing and Setting up the Machine > Using the Operation Panel Selecting a Menu The setting menu is hierarchical. Select the [▲] or [▼] key to display the desired menu. • If the selected menu has a sub-menu, ">" is displayed after the menu. Paper Settings >... -
Page 42: Login/Logout
Installing and Setting up the Machine > Login/Logout Login/Logout If you are setting a function that requires administrator rights, you must enter your administrator ID and administrator password. NOTE The factory default administrator ID and administrator password are both set as 2100. Login Enter the administrator ID. -
Page 43: Logout
Installing and Setting up the Machine > Login/Logout Logout Select the [Logout] key to exit the setting menu screen and log out. You will return to the normal screen. Users are automatically logged out in the following circumstances: • When the machine enters the sleep state. •... -
Page 44: Default Settings Of The Machine
Installing and Setting up the Machine > Default Settings of the Machine Default Settings of the Machine Before using this machine, configure such settings as date and time, network configuration, and energy saving functions as needed. NOTE The default settings of the machine can be changed in System Menu. For settings that are configurable from System Menu, refer to the following: Setup and Registration (System Menu) (page 6-1) Setting Date and Time... - Page 45 Installing and Setting up the Machine > Default Settings of the Machine Configure the settings. [▲] [▼] key > [Time Zone] > [OK] key > Select the time zone > [OK] key > [▲] [▼] key > [Date (Year/Mon/Day)] > [OK] key > Set the date > [OK] key > [▲] [▼] key > [Time (Hour:Min:Sec)] >...
-
Page 46: Network Setup
Installing and Setting up the Machine > Network Setup Network Setup Configuring the Wired Network The machine is equipped with network interface, which is compatible with network protocols such as TCP/IP (IPv4), TCP/IP (IPv6), NetBEUI, and IPSec. It enables network printing on the Windows, Macintosh, UNIX and other platforms. Set up TCP/IP (IPv4) to connect to the Windows network. - Page 47 Installing and Setting up the Machine > Network Setup 11Set the default gateway. NOTE You can set any value between 000 and 255. Select the [▲] or [▼] key to enter a number. Select the [◄] or [►] key to move the cursor left or right. 12Select the [OK] key.
-
Page 48: Configuring The Wireless Network
Installing and Setting up the Machine > Network Setup Configuring the Wireless Network When the wireless network function is available on the machine and the connection settings are configured, it is possible to print in a wireless network (wireless LAN) environment. The configuration methods are as follows: Configuration Method Description Reference Page... - Page 49 Launch the Wi-Fi Setup Tool. Launch a web browser. Enter "https://kyocera.info/" to the browser's address bar or location bar. Enter and search the product name, and select this product from the candidate list. Change the selected operating system and its language setting as needed.
- Page 50 Installing and Setting up the Machine > Network Setup Utility tab > "Wi-Fi Setup Tool" The Wi-Fi Setup Tool will be downloaded. Double-click the downloaded installer to launch. NOTE • Installation on Windows must be done by a user logged on with administrator privileges.
- Page 51 Connect a computer or a handheld device with the machine. Setting Wi-Fi Direct (page 2-26) Launch the Wi-Fi Setup Tool. Launch a web browser. Enter "https://kyocera.info/" to the browser's address bar or location bar. Enter and search the product name, and select this product from the candidate list. 2-22...
- Page 52 Installing and Setting up the Machine > Network Setup Change the selected operating system and its language setting as needed. Utility tab > "Wi-Fi Setup Tool" The Wi-Fi Setup Tool will be downloaded. Double-click the downloaded installer to launch. NOTE •...
- Page 53 Installing and Setting up the Machine > Network Setup Configure the settings. Follow the on-screen instructions that appear in the tool. The network is configured. Configuring Network Connection Using the Push Button If your router supports WPS, you can configure network connection using the push button. Configure the network between the computer and the router (access point).
- Page 54 Installing and Setting up the Machine > Network Setup Access the setup screen of the router and enter the PIN written down in step 4. The network between the printer and the router is configured. If the network connection between this machine and the router is complete, [Wi-Fi] indicator will light up. Install the printer driver for wireless network connection on your computer.
-
Page 55: Setting Wi-Fi Direct
Installing and Setting up the Machine > Network Setup Setting Wi-Fi Direct When the wireless network function is available on the machine, setting Wi-Fi Direct enables you to print from the Wi-Fi Direct environment. The configuration methods are as follows: Configuring the Connection from the Operation Panel on This Machine Connecting to Computers or Handheld Devices that Support Wi-Fi Direct Display the screen. - Page 56 Installing and Setting up the Machine > Network Setup NOTE Enter an ID consisting of between 1 and 16 numbers. Select the [▲] or [▼] key to enter a number. Select the [◄] or [►] key to move the cursor left or right. The factory default settings for the administrator ID is set as 2100 Enter the administrator password and select the [OK] key.
- Page 57 Installing and Setting up the Machine > Network Setup Enter the administrator password and select the [OK] key. NOTE Enter a password consisting of between 0 (no settings) and 16 numbers. Select the [▲] or [▼] key to enter a number. Select the [◄] or [►] key to move the cursor left or right.
-
Page 58: Energy Saver Function
Installing and Setting up the Machine > Energy Saver function Energy Saver function If a certain period of time elapses after the machine is last used, the machine automatically enters sleep mode, which minimizes power consumption. If the machine is not used while in sleep mode, the power automatically turns off. Auto Sleep Auto Sleep automatically switches the machine into Sleep if left idle for a preset time. -
Page 59: Sleep Level Set
Installing and Setting up the Machine > Energy Saver function Set the Sleep time. Enter the Sleep time. NOTE You can set any value from 1 to 60 minutes. Select the [▲] or [▼] key to enter a number. Select the [◄] or [►] key to move the cursor left or right. Select the [OK] key. -
Page 60: Power Off Rule (Models For Europe)
Installing and Setting up the Machine > Energy Saver function Select the Sleep level. [▲] [] key > [Quick Recovery] or [Energy Saver] > [OK] key When [Energy Saver] is set, next go on to set whether or not to use Energy Saver mode for each function. -
Page 61: Quiet Mode
Installing and Setting up the Machine > Quiet Mode Quiet Mode Lower print speed for quiet processing. Select this mode when the running noise is uncomfortable. When the [Quiet Mode] key is selected, the [Quiet Mode] key blinks and Quiet Mode is enabled. [Quiet Mode] key NOTE The processing speed will be slower than normal when in Quiet Mode. -
Page 62: Installing Software
Installing and Setting up the Machine > Installing Software Installing Software To use printer function, TWAIN/WIA connection, or network fax function, download and install prerequisite softwares from our website (https://kyocera.info/). Software on DVD (Windows) Express Software Description Install KX DRIVER This driver enables files on a computer to be printed by the machine. -
Page 63: Installing Software In Windows
Download a software from the website. Launch a web browser. Enter "https://kyocera.info/" to the browser's address bar or location bar. Enter and search the product name, and select this product from the candidate list. Change the selected operating system and its language setting as needed. - Page 64 Install a software by using a web installer downloaded from our website. Download a software from the website. Launch a web browser. Enter "https://kyocera.info/" to the browser's address bar or location bar. Enter and search the product name, and select this product from the candidate list. 2-35...
- Page 65 Installing and Setting up the Machine > Installing Software Change the selected operating system and its language setting as needed. Utility tab > "Web installer" A web installer will be downloaded. Double-click the downloaded installer to launch. NOTE • Installation on Windows must be done by a user logged on with administrator privileges. •...
- Page 66 Installing and Setting up the Machine > Installing Software Display the screen. 1 Read the license agreement. 2 Click [Accept] if there is no problem. Click [Install]. Select a model and click [Next]. NOTE • The machine cannot be detected unless it is on. If the computer fails to detect the machine, verify that it is connected to the computer via a network or USB cable.
- Page 67 Installing and Setting up the Machine > Installing Software Install the softwares. Select softwares you want to install. NOTE Softwares recommended to install have in their checkboxes by default. Configure them as needed. Click [Install]. When [Install] is clicked, a screen which asks for cooperation for data collection may appear.
-
Page 68: Uninstalling The Software
Uninstallation on Windows must be done by a user logged on with administrator privileges. Display the screen. Click Search box in taskbar, and enter "Uninstall Kyocera Product Library" in the search box. Select [Uninstall Kyocera Product Library] in the search list. -
Page 69: Installing Software In Mac Computer
• When printing via AirPrint, you do not have to install the software. Download a software from the website. Launch a web browser. Enter "https://kyocera.info/" to the browser's address bar or location bar. Enter and search the product name, and select this product from the candidate list. 2-40... - Page 70 Installing and Setting up the Machine > Installing Software Change the selected operating system and its language setting as needed. Driver tab or Utility tab > of the software you want to download An installer of the selected software will be downloaded. Install the Printer Driver.
- Page 71 Installing and Setting up the Machine > Installing Software Configure the printer. Open System Preferences and add the printer. Select [Default] and click the item that appears in "Name" and then select the driver in "Use". NOTE When using an IP connection, click the IP icon for an IP connection and then enter the host name or IP address.
-
Page 72: Checking The Counter
Installing and Setting up the Machine > Checking the Counter Checking the Counter Check the number of sheets printed. Display the screen. [Menu] key > [▲] [] key > [Counter] > [►] key Check the counter. Select the item you want to check. 2-43... -
Page 73: Additional Preparations For The Administrator
Installing and Setting up the Machine > Additional Preparations for the Administrator Additional Preparations for the Administrator In addition to the information provided in this chapter, the administrator of this machine should check the following, and configure the settings as needed. Strengthening the Security One user with administrator rights has been pre-registered in the machine. -
Page 74: Command Center Rx
Installing and Setting up the Machine > Command Center RX Command Center RX If the machine is connected to the network, you can configure various settings using Command Center RX. This section explains how to access Command Center RX, and how to change security settings and the host name. Command Center RX User Guide NOTE To fully access the features of the Command Center RX pages, enter the User Name and Password and click [Login]. -
Page 75: Accessing Command Center Rx
Installing and Setting up the Machine > Command Center RX Accessing Command Center RX Display the screen. Launch your Web browser. In the address or location bar, enter the machine's IP address or the host name. Print the status page to check the machine's IP address and the host name. [Menu] key >... -
Page 76: Changing Security Settings
Installing and Setting up the Machine > Command Center RX Changing Security Settings Display the screen. Launch your Web browser. In the address or location bar, enter the machine's IP address or the host name. Print the status page to check the machine's IP address and the host name. [Menu] key >... - Page 77 Installing and Setting up the Machine > Command Center RX Configure the Security Settings. From the [Security Settings] menu, select the setting you want to configure. NOTE For details on settings related to certificates, refer to the following: Command Center RX User Guide 2-48...
-
Page 78: Changing Device Information
Installing and Setting up the Machine > Command Center RX Changing Device Information Display the screen. Launch your Web browser. In the address or location bar, enter the machine's IP address or the host name. Print the status page to check the machine's IP address and the host name. [Menu] key >... - Page 79 Installing and Setting up the Machine > Command Center RX Specify the host name. Enter the device information, and then click [Submit]. IMPORTANT After changing the setting, restart the network or turn the machine OFF and then ON. To restart the network, click [Reset] in the [Management Settings] menu, and then click [Restart Network] in "Restart".
-
Page 80: E-Mail Settings
Installing and Setting up the Machine > Command Center RX E-mail Settings By configuring the SMTP settings, it is possible to send E-mail notices when jobs have been completed. To use this function, this machine must be connected to a mail server using the SMTP protocol. In addition, configure the following. - Page 81 Installing and Setting up the Machine > Command Center RX From the [Network Settings] menu, click [Protocol]. Configure the settings. Set "SMTP (E-mail TX)" to [On] in the "Send Protocols". 2-52...
- Page 82 Installing and Setting up the Machine > Command Center RX Display the screen. Display the E-mail Settings screen. From the [Function Settings] menu, click [E-mail]. Configure the settings. Enter "SMTP" and "E-mail Send Settings" items. Setting Description SMTP Set to send e-mail from the machine. SMTP Protocol Displays the SMTP protocol settings.
- Page 83 Installing and Setting up the Machine > Command Center RX Setting Description POP3 POP3 Protocol You don't need to set the following items when you only enable the function of sending e-mail from the machine. Set Check Interval the following items if you want to enable the function of receiving e-mail on the machine.
-
Page 84: Preparation Before Use
Preparation before Use This chapter explains the following operations. Loading Paper ..............................3-2 Precaution for Loading Paper ........................3-2 Selecting the Paper Feeder Units ......................3-3 Loading in the Cassette 1 ........................3-4 Loading in the Cassette 2 ........................3-7 Precautions for Outputting Paper ........................ -
Page 85: Loading Paper
Preparation before Use > Loading Paper Loading Paper Load paper in the cassettes. Precaution for Loading Paper When you open a new package of paper, fan the sheets to separate them slightly prior to loading in the following steps. Fan the paper, then tap it on a level surface. In addition, note the following points. -
Page 86: Selecting The Paper Feeder Units
Preparation before Use > Loading Paper Selecting the Paper Feeder Units Select the paper feeder units according to the size and type of paper. Name Paper Size Paper Type Capacity Page Cassette 1 A4, B5, A5-R, A5, A6, B6, Legal, Plain, Preprinted, Bond, Recycled, 250 sheets page 3-4... -
Page 87: Loading In The Cassette 1
Preparation before Use > Loading Paper Loading in the Cassette 1 Pull the Cassette 1 completely out of the machine. Adjust the paper length guide to the paper size required. When using Folio, Oficio II or Legal NOTE In some regions the cassette comes with a cover. If the cassette has a cover, open the cover to adjust the guide. - Page 88 Preparation before Use > Loading Paper Adjust the position of the paper width guides located on the left and right sides of the Cassette 1. Load paper. NOTE If the cassette has a cover, close the cover. IMPORTANT • Load the paper with the print side facing up. •...
- Page 89 Preparation before Use > Loading Paper Gently push the Cassette 1 back in. NOTE When Folio, Oficio II, or Legal is used, the cassette will extend out from the machine. Display the screen. [Menu] key > [▲] [▼] key > [Paper Settings] > [►] key > [▲] [▼] key > [Cassette1 Size] > [►] key Configure the function.
-
Page 90: Loading In The Cassette 2
Preparation before Use > Loading Paper Loading in the Cassette 2 Pull the Cassette 2 completely out of the machine. Adjust the paper length guide to the paper size required. Adjust the position of the paper width guides located on the left and right sides of the Cassette 2. - Page 91 Preparation before Use > Loading Paper Load paper. IMPORTANT • Load the paper with the print side facing up. • After removing new paper from its packaging, fan the paper before loading it in the multipurpose tray. Precaution for Loading Paper (page 3-2) •...
-
Page 92: Precautions For Outputting Paper
Preparation before Use > Precautions for Outputting Paper Precautions for Outputting Paper Paper Stopper When using paper B5/letter or larger, open the paper stopper shown in the figure. -
Page 93: Printing From Pc
Printing from PC This chapter explains the following topics: Printer Driver Properties Screen ........................4-2 Displaying the Printer Driver Help ......................4-3 Changing the Default Printer Driver Settings (Windows 10) ..............4-3 Printing from PC ..............................4-4 Printing on Standard Sized Paper ......................4-4 Printing on Non-standard Sized Paper .................... -
Page 94: Printer Driver Properties Screen
Printing from PC > Printer Driver Properties Screen Printer Driver Properties Screen The printer driver Properties screen allows you to configure a variety of print-related settings. Printer Driver User Guide Description [Quick Print] tab Provides icons that can be used to easily configure frequently used functions. Each time you click an icon, it changes to an image resembling the print results and applies the settings. -
Page 95: Displaying The Printer Driver Help
Printing from PC > Printer Driver Properties Screen Displaying the Printer Driver Help The printer driver includes Help. To learn about print settings, open the printer driver print settings screen and display Help as explained below. 1 Click the [?] button in the upper right corner of the screen. -
Page 96: Printing From Pc
Printing from PC > Printing from PC Printing from PC This section provides the printing method using the KX DRIVER. NOTE • To print the document from applications, install the printer driver on your computer from the supplied DVD (Product Library). •... - Page 97 Printing from PC > Printing from PC To print on the special paper such as thick paper or transparency, click "Media type" menu and select the media type. Click [OK] button to return to the Print dialog box. Start printing. Click the [OK] button.
-
Page 98: Printing On Non-Standard Sized Paper
Printing from PC > Printing from PC Printing on Non-standard Sized Paper If you loaded a paper size that is not included in the print sizes of the machine, register the paper size in the [Basic] tab of the print settings screen of the printer driver. The registered size can be selected from the "Print size"... - Page 99 Printing from PC > Printing from PC Click the [New] button. Enter the paper size. Enter the name of the paper. Click the [Save] button. Click the [OK] button. Click the [OK] button. Display the print settings screen. Click [File] and select [Print] in the application. Select the paper size and type of non-standard size paper.
- Page 100 Printing from PC > Printing from PC Select the machine from the "Printer" menu and click the [Properties] button. Select the [Basic] tab. Click "Print size" menu and select the paper size registered in step 2. To print on the special paper such as thick paper or transparency, click "Media type" menu and select the media type.
-
Page 101: Canceling Printing From A Computer
Printing from PC > Printing from PC Canceling Printing from a Computer To cancel a print job executed using the printer driver before the printer begins printing, do the following: NOTE When canceling printing from this machine, refer to the following: Canceling Jobs (page 5-5) Double-click the printer icon ( ) displayed on the taskbar at... -
Page 102: Printing From The Handheld Device
Printing from PC > Printing from the Handheld Device Printing from the Handheld Device This machine supports the AirPrint, Mopria and Wi-Fi Direct. According to the supported OS and application, you can print the job from any handheld device or computer without installing a printer driver. -
Page 103: Printing Data Saved In The Printer
Printing from PC > Printing Data Saved in the Printer Printing Data Saved in the Printer You can save the print job into the Job Box of this device and print it as necessary. To use the Stored Job Box and the Quick Copy Box, an SD/SDHC memory card must be installed in the device. -
Page 104: Printing Document From Quick Copy Box
Printing from PC > Printing Data Saved in the Printer Printing Document from Quick Copy Box Quick Copy feature facilitates additional prints of a document already printed. Activating Quick Copy and printing a document using the printer driver allow the print data to be stored in the Quick Copy Job Box. When additional copies are required, you can reprint the required number of copies from the operation panel. -
Page 105: Printing Document From Proof And Hold Box
Printing from PC > Printing Data Saved in the Printer Printing Document from Proof and Hold Box The Proof and Hold feature produces only a single proof print of multiple-print job and holds printing of the remaining copies. Printing a multiple-print job in Proof and Hold using the printer driver allows only a single copy to be printed while maintaining the document data in the Job Box. -
Page 106: Printing Documents From Private Print Box
Printing from PC > Printing Data Saved in the Printer Printing Documents from Private Print Box In Private Printing, you can specify that a job is not to be printed until you operate the machine. When sending the job from the application software, specify a 4-digit access code in the printer driver. The job is released for printing by entering the access code on the operation panel, ensuring confidentiality of the print job. -
Page 107: Printing Document From Stored Job Box
Printing from PC > Printing Data Saved in the Printer Printing Document from Stored Job Box In Stored Job, the print data sent from the application is saved to the machine. You can set up an access code as necessary. If you set up an access code, enter the access code when printing. Print data will be stored in the Stored Job Box after printing. -
Page 108: Job Box Setting
Printing from PC > Job Box Setting Job Box Setting Configures settings for Job Box. Display the screen. [Menu] key > [▲] [] key > [Job Box] > [►] key > [▲] [] key > [Job Box Configuration] > [►] key Configure the settings. -
Page 109: Monitoring The Printer Status (Status Monitor)
Printing from PC > Monitoring the Printer Status (Status Monitor) Monitoring the Printer Status (Status Monitor) The Status Monitor monitors the machine status and provides an ongoing reporting function. NOTE When you activate Status Monitor, check the status below. • KX DRIVER is installed. •... -
Page 110: Printing Progress Tab
Printing from PC > Monitoring the Printer Status (Status Monitor) Printing Progress Tab The status of the print jobs is displayed. 1 Status icon 2 Job list Select a job on the job list and it can be canceled using the menu displayed with a right-click. Paper Tray Status Tab Information is displayed about the paper in the printer and about the amount of paper remaining. -
Page 111: Alert Tab
Printing from PC > Monitoring the Printer Status (Status Monitor) Alert Tab If an error occurs, a notice is displayed using a 3D image and a message. Status Monitor Context Menu The following menu is displayed when the settings icon is clicked. •... -
Page 112: Status Monitor Notification Settings
Printing from PC > Monitoring the Printer Status (Status Monitor) Status Monitor Notification Settings Click the setting icon to display valid events in the status monitor notification screen. Select whether notification is performed when an error in the event list occurs. Select Enable event notification. -
Page 113: Operation On The Machine Or Work From Your Home
Operation on the Machine or Work from Your Home This chapter explains the following topics: Loading Paper in the Multipurpose Tray ......................5-2 Canceling Jobs ..............................5-5 Using Document Boxes ............................. 5-6 What is Job Box? ............................. 5-6 What is USB Drive Box? .......................... 5-6 Operating using Removable USB Drive ...................... -
Page 114: Loading Paper In The Multipurpose Tray
Operation on the Machine or Work from Your Home > Loading Paper in the Multipurpose Tray Loading Paper in the Multipurpose Tray For details of the supported paper sizes, refer to the following: Choosing the Appropriate Paper (page 9-9) For the paper type setting, refer to the following: Type Adjust Setting (page 6-7) Be sure to use the multipurpose tray when you print on any special paper. - Page 115 Operation on the Machine or Work from Your Home > Loading Paper in the Multipurpose Tray Adjust the multipurpose tray size. Paper sizes are marked on the multipurpose tray. Load paper. Insert the paper along the paper width guides into the tray until it stops. After removing new paper from its packaging, fan the paper before loading it in the multipurpose tray.
- Page 116 Operation on the Machine or Work from Your Home > Loading Paper in the Multipurpose Tray When you load envelopes or cardstock in the multipurpose tray Load the paper with the print side facing up. For the procedure for printing, refer to the following: Printer Driver User Guide Example: When printing the address.
-
Page 117: Canceling Jobs
Operation on the Machine or Work from Your Home > Canceling Jobs Canceling Jobs While the printer displays "Processing", select [Cancel] key. "?" appears on the message display followed by the job name currently in progress. Cancel a job. Select the job to cancel, and select the [OK] key. The job is canceled. -
Page 118: Using Document Boxes
Operation on the Machine or Work from Your Home > Using Document Boxes Using Document Boxes The available Document Boxes are as follows: Job Box and Removable Memory Box. What is Job Box? Job Box is a generic name for the "Private Print/Stored Job Box" and "Quick Copy/Proof and Hold Box". These Job Boxes cannot be created or deleted by a user. -
Page 119: Operating Using Removable Usb Drive
Operation on the Machine or Work from Your Home > Operating using Removable USB Drive Operating using Removable USB Drive Plugging USB drive directly into the machine enables you to quickly and easily print the files stored in the USB drive without having to use a computer. -
Page 120: Print A File List
Operation on the Machine or Work from Your Home > Operating using Removable USB Drive Print the document. [▲] [] key > [Print File] > [OK] key > [OK] key Select the document, and select the [OK] key. Select the [OK] key. Enter the print quantity, and select the [OK] key. -
Page 121: Remote Work Assistant
Counter: You can view and export print counter information. • Log Settings: You can store images and job logs for print jobs. For details on how to install and operate the Kyocera Remote Work Assistant, refer to the following. Kyocera Remote Work Assistant User Guide... -
Page 122: Setup And Registration (System Menu)
Setup and Registration (System Menu) This chapter explains the following topics: System Menu ..............................6-2 Operation Method ............................ 6-2 Menu Settings ............................6-3 Report Print .............................. 6-4 Paper Settings ............................6-6 Print Settings ............................6-8 Wi-Fi Direct Set ............................6-10 Wi-Fi Settings ............................ -
Page 123: System Menu
Setup and Registration (System Menu) > System Menu System Menu Configure settings related to overall machine operation. Operation Method Select the [Menu] key to show the settings on the message display. Then, select from the settings displayed. Operation Method (page 2-11) NOTE In order to change settings that require administer privileges, you must log in with administrator privileges. -
Page 124: Menu Settings
Setup and Registration (System Menu) > System Menu Menu Settings This section explains the functions that can be configured in Menu. To configure the settings, select the item in System Menu and select the setting item. For details on each function, see the table below. Item Description Reference Page... -
Page 125: Report Print
Setup and Registration (System Menu) > System Menu Item Description Reference Page Administrator The Administrator setting is a function that identifies a user who can use page 6-24 the printer and manage other users. Adjust/Maintenance Adjust printing quality and conduct machine maintenance. page 6-24 Restart Printer Restart the machine without turning the power switch off. - Page 126 Setup and Registration (System Menu) > System Menu Item Description Print Fonts List Prints the font list, allowing you to check the font samples installed in the machine. Print RAM Disk File List You can print a list of the files in the RAM disk. NOTE This setting is displayed when [RAM Disk Mode] is set to [On].
-
Page 127: Paper Settings
Setup and Registration (System Menu) > System Menu Paper Settings [Menu] key > [▲] [▼] key > [Paper Settings] > [►] key Configure settings for paper. Item Description MP Tray Size Select the paper size to be used in the multipurpose tray. Values: Envelope Monarch, Envelope #10, Envelope DL, Envelope C5, Executive, Letter, Legal, A4, B5, A5-R, A5, A6, B6, Envelope #9, Envelope #6, ISO B5, Custom, Hagaki (Cardstock), OufukuHagaki (Return postcard), Oficio II, 216 ×... - Page 128 Setup and Registration (System Menu) > System Menu Type Adjust Setting The following media type and paper weight combinations are available. Paper Weight Weight (g/m Paper Weight Weight (g/m Light 52 g/m² to 59 g/m² Heavy 1 106 g/m² to 135 g/m² Normal 1 60 g/m²...
-
Page 129: Print Settings
Setup and Registration (System Menu) > System Menu Print Settings [Menu] key > [▲] [▼] key > [Print Settings] > [►] key Configure settings for printing. Item Description Paper Source Select the default paper source from Cassette 1 (2) and multipurpose tray. Values: MP Tray, Cassette 1 (2) NOTE [Cassette 2] is shown when the optional paper feeder is installed. - Page 130 Setup and Registration (System Menu) > System Menu Item Description Print Quality Set the Print Quality. Gloss Mode Gloss Mode increases the effect of glossiness in printing. However, printing takes longer time. Values: Off, On IMPORTANT Gloss mode is not available when [LABELS] and [TRANSPARENCY] is selected as the paper type setting.
-
Page 131: Wi-Fi Direct Set
Setup and Registration (System Menu) > System Menu Wi-Fi Direct Set [Menu] key > [▲] [▼] key > [Wi-Fi Direct Set] > [►] key Set Wi-Fi Direct. NOTE This function is displayed when the wireless network function is available on the machine. Wi-Fi Direct Item Description... - Page 132 Setup and Registration (System Menu) > System Menu TCP/IP Item Description TCP/IP Select whether to use TCP/IP (IPv4) Protocol. Value: Off, On DHCP Select whether to use the DHCP (IPv4) server. Value: Off, On Auto-IP Select whether to use Auto-IP. Value: Off, On IP Address Set the IP address.
-
Page 133: Wired Network
Setup and Registration (System Menu) > System Menu TCP/IP (IPv6) Item Description TCP/IP (IPv6) Select whether to use TCP/IP (IPv6). Value: Off, On RA(Stateless) Select whether to use RA (Stateless). Value: Off, On NOTE This function is displayed when [TCP/IP (IPv6)] is set to [On]. DHCPv6 Select whether to use the DHCP (IPv6) server. -
Page 134: Network Settings
Setup and Registration (System Menu) > System Menu Network Settings [Menu] key > [▲] [▼] key > [Network Settings] > [►] key Configure network settings. Item Description Communication Select the network to be used for the send function and the network authentication. Value: Wi-Fi, Wired Network SSL Server Select whether to use SSL. - Page 135 Setup and Registration (System Menu) > System Menu Item Description SNMP Select whether to communicate using SNMP. Value: Off, On Wi-Fi Direct Set whether to enable this function for each network. Value: Disable, Enable Wi-Fi NOTE Wired Network This function is displayed when [SNMP] is set to [On]. SMTP Select whether to send E-mail using SMTP.
- Page 136 Setup and Registration (System Menu) > System Menu Item Description HTTP Select whether to communicate using HTTP. Value: Off, On Wi-Fi Direct Set whether to enable this function for each network. Value: Disable, Enable Wi-Fi NOTE Wired Network This function is displayed when [HTTP] is set to [On]. *2, *3 HTTPS Select whether to communicate using HTTPS.
- Page 137 Setup and Registration (System Menu) > System Menu Item Description *2, *3 ThinPrint over SSL To use the Thin Print over SSL protocol, set [ThinPrint Over SSL] to [On]. Value: Off, On NOTE • This function is displayed when [ThinPrint] is set to [On]. •...
-
Page 138: Device Common
Setup and Registration (System Menu) > System Menu Device Common Configures overall machine operation. Message Language [Menu] key > [▲] [▼] key > [Device Common] > [►] key > [▲] [▼] key > [Message Language] > [OK] key Item Description Message Language Select the language displayed on the message display. - Page 139 Setup and Registration (System Menu) > System Menu Buzzer [Menu] key > [▲] [▼] key > [Device Common] > [►] key > [▲] [▼] key > [Buzzer] > [►] key Set options for buzzer sound during the machine operations. Item Description Key Confirmation Emit a sound when a key is selected on the operation panel.
- Page 140 Setup and Registration (System Menu) > System Menu Error Handling [Menu] key > [▲] [▼] key > [Device Common] > [►] key > [▲] [▼] key > [Error Handling] > [►] key Select whether to cancel or continue the job when error has occurred. Item Description Duplex...
- Page 141 Setup and Registration (System Menu) > System Menu Item Description Auto Error Clear If an error occurs during processing, processing stops to wait for the next step to be taken by the user. In the Auto Error Clear mode, automatically clear the error after a set amount of time elapses.
- Page 142 Setup and Registration (System Menu) > System Menu Item Description USB Host Set whether or not the machine enters Power Off mode for USB host. Value: Off, On RAM Disk Set whether or not the machine enters Power Off mode for RAM Disk. Value: Off, On Power Off Timer (models for Europe) [Menu] key >...
-
Page 143: Security
Setup and Registration (System Menu) > System Menu Security The security functions can be set up to protect printer operation and the print data. I/F Block [Menu] key > [▲] [▼] key > [Security] > [►] key > [▲] [▼] key > [I/F Block] > [►] key This allows you to protect this machine by blocking the interface with external devices such as USB hosts. -
Page 144: User/Job Account
Setup and Registration (System Menu) > System Menu DataSanitization [Menu] key > [▲] [▼] key > [Security] > [►] key > [▲] [▼] key > [DataSanitization] > [OK] key Item Description Data Sanitization Return the following information registered in the machine to the factory defaults. •... -
Page 145: Administrator
Setup and Registration (System Menu) > System Menu Administrator [Menu] key > [▲] [▼] key > [Administrator] > [►] key The Administrator setting is a function that identifies a user who can use the printer and manage other users. Administrator settings (page 7-22) Adjust/Maintenance [Menu] key >... - Page 146 Setup and Registration (System Menu) > System Menu Item Description Wi-Fi Status Check the wireless LAN status. NetwkName(SSID) Check the SSID (Service Set Identifier) of the wireless LAN to which the machine connects. NOTE • This function is displayed when [Wi-Fi] is set to [On]. •...
-
Page 147: Wi-Fi Direct
Setup and Registration (System Menu) > System Menu Wi-Fi Direct [Menu] key > [▲] [▼] key > [Wi-Fi Direct] Information on the device that is connected by Wi-Fi Direct appears. NOTE This function is displayed when the wireless network function is available on the machine. Item Description Wi-Fi Direct... -
Page 148: User Authentication And Accounting (User Login, Job Accounting)
User Authentication and Accounting (User Login, Job Accounting) This chapter explains the following topics: Overview of User Login Administration ......................7-2 Enabling User Login Administration ........................7-3 Key Login ..............................7-4 Using User Login Administration ........................7-5 Login/Logout ............................7-5 Overview of Job Accounting .......................... -
Page 149: Overview Of User Login Administration
User Authentication and Accounting (User Login, Job Accounting) > Overview of User Login Administration Overview of User Login Administration User login administration specifies how the user access is administered on this machine. An ID card is used for machine login. NOTE To use user authentication, the Card Authentication Kit is required. -
Page 150: Enabling User Login Administration
User Authentication and Accounting (User Login, Job Accounting) > Enabling User Login Administration Enabling User Login Administration NOTE This functions appears when the Card Authentication Kit is activated. Card Authentication Kit(B) "Card Authentication Kit" (page 9-2) Display the screen. [Menu] key > [▲] [▼] key > [User/Job Account] > [►] key Enter the administrator ID and select the [OK] key. -
Page 151: Key Login
User Authentication and Accounting (User Login, Job Accounting) > Enabling User Login Administration Key Login Set whether or not login by arrow keys is allowed when user authentication is enabled. NOTE • This functions appears when the Card Authentication Kit is activated. Card Authentication Kit(B) "Card Authentication Kit"... -
Page 152: Using User Login Administration
User Authentication and Accounting (User Login, Job Accounting) > Using User Login Administration Using User Login Administration This section explains procedures while setting job accounting. Login/Logout When User Login is enabled, the ID card authentication screen will appear each time the machine is used. Login Place the ID card on the ID card reader. -
Page 153: Overview Of Job Accounting
User Authentication and Accounting (User Login, Job Accounting) > Overview of Job Accounting Overview of Job Accounting Job accounting manages the print count accumulated by individual accounts by assigning an ID to each account. Enable job Setting an Enter the assigned account Count the number of pages accounting. -
Page 154: Enabling Job Accounting
User Authentication and Accounting (User Login, Job Accounting) > Enabling Job Accounting Enabling Job Accounting Display the screen. [Menu] key > [▲] [▼] key > [User/Job Account] > [►] key Enter the administrator ID and select the [OK] key. NOTE Enter an ID consisting of between 1 and 16 numbers. -
Page 155: Job Accounting Access
User Authentication and Accounting (User Login, Job Accounting) > Enabling Job Accounting Job Accounting Access Display the screen. [Menu] key > [▲] [▼] key > [User/Job Account] > [►] key Enter the administrator ID and select the [OK] key. NOTE Enter an ID consisting of between 1 and 16 numbers. -
Page 156: Job Accounting (Local)
User Authentication and Accounting (User Login, Job Accounting) > Job Accounting (Local) Job Accounting (Local) You can add, change and delete an account and set the restriction for each account. Adding an Account Up to 20 individual accounts can be added. NOTE Because account IDs are managed as numeric strings, "1"... - Page 157 User Authentication and Accounting (User Login, Job Accounting) > Job Accounting (Local) Enter the account ID. Enter the account name. NOTE You can set a number from 1 to 8 digits. Select the [▲] or [▼] key to enter a number. Select the [◄] or [►] key to move the cursor left or right.
-
Page 158: Restricting The Use Of The Machine
User Authentication and Accounting (User Login, Job Accounting) > Job Accounting (Local) Restricting the Use of the Machine This section explains how to restrict the use of the machine by account or the number of sheets available. Restriction Items Item Descriptions Restriction Limits the total number of sheets used for printing. - Page 159 User Authentication and Accounting (User Login, Job Accounting) > Job Accounting (Local) Configure the settings. Select the account you want to change and select the [OK] key. Select the [►] key. [▲] [▼] key > [Restriction] or [Color Restriction] > [OK] key [▲] [▼] key >...
-
Page 160: Editing An Account
User Authentication and Accounting (User Login, Job Accounting) > Job Accounting (Local) Editing an Account This changes the registered account information. Display the screen. [Menu] key > [▲] [▼] key > [User/Job Account] > [►] key Enter the administrator ID and select the [OK] key. NOTE Enter an ID consisting of between 1 and 16 numbers. -
Page 161: Deleting An Account
User Authentication and Accounting (User Login, Job Accounting) > Job Accounting (Local) Deleting an Account NOTE Because account IDs are managed as numeric strings, "1" and "001" are handled as different accounts. Also, once Job Accounting is enabled, no jobs are printed unless information is attached showing the accounts from which the jobs are being printed. -
Page 162: Job Accounting For Printing
User Authentication and Accounting (User Login, Job Accounting) > Job Accounting (Local) Job Accounting for Printing The number of jobs to be printed from the computer can be managed by Job Accounting. Setting Printer Driver To manage the number of jobs to be printed from the PC on the network, you need configure the following settings by using the printer driver on the PC. - Page 163 User Authentication and Accounting (User Login, Job Accounting) > Job Accounting (Local) Click [OK]. NOTE For other settings of job accounting, refer to the following: Printer Driver User Guide 7-16...
-
Page 164: Configuring Job Accounting
User Authentication and Accounting (User Login, Job Accounting) > Configuring Job Accounting Configuring Job Accounting Counting the Number of Pages Printed Counts are classified into Total Job Accounting and Each Job Accounting. A new count can also be started after resetting the count data which was stored for a certain period of time. - Page 165 User Authentication and Accounting (User Login, Job Accounting) > Configuring Job Accounting Enter the administrator ID and select the [OK] key. NOTE Enter an ID consisting of between 1 and 16 numbers. Select the [▲] or [▼] key to enter a number. Select the [◄] or [►] key to move the cursor left or right.
-
Page 166: Using Job Accounting
User Authentication and Accounting (User Login, Job Accounting) > Using Job Accounting Using Job Accounting This section explains procedures while setting job accounting. Login/Logout If job accounting is enabled, an account ID entry screen appears each time you use this machine. Login When the screen for entry of account codes on the machine appears, perform the following. -
Page 167: Apply Limit
User Authentication and Accounting (User Login, Job Accounting) > Using Job Accounting Apply Limit Use this to specify the action taken when a department exceeds its printing limits. [Menu] key > [▲] [▼] key > [User/Job Account] > [►] key > [▲] [▼] key > [Apply Limit] > [►] key For details on each function, see the table below. -
Page 168: Unknown Id Job
User Authentication and Accounting (User Login, Job Accounting) > Unknown ID Job Unknown ID Job This specifies the behavior for handling the jobs sent with unknown or unsent login user names or User ID. If the User Login is set to invalid and Job Accounting is set to valid, follow the procedure when the Account ID is unknown. The setting items are as follows. -
Page 169: Administrator Settings
User Authentication and Accounting (User Login, Job Accounting) > Administrator settings Administrator settings The Administrator setting is a function that identifies a user who can use the printer and manage other users. When using the Security and Job Accounting functions, the administrator ID and password set here are authenticated, and settings can be specified after they are properly authenticated. -
Page 170: Troubleshooting
Troubleshooting This chapter explains the following topics: Regular Maintenance ............................8-2 Cleaning ..............................8-2 Cleaning Paper Transfer Unit ........................8-2 Toner Container Replacement ......................... 8-3 Loading Paper ............................8-6 Troubleshooting ..............................8-7 Solving Malfunctions ..........................8-7 Machine Operation Trouble ........................8-7 Printed Image Trouble .......................... -
Page 171: Regular Maintenance
Troubleshooting > Regular Maintenance Regular Maintenance Cleaning Clean the machine regularly to ensure optimum printing quality. CAUTION For safety, always unplug the power cable before cleaning the machine. Cleaning Paper Transfer Unit The paper transfer unit should be cleaned each time the toner container is replaced. To maintain optimum print quality, it is also recommended that the inside of the machine be cleaned once a month as well as when the toner container is replaced. -
Page 172: Toner Container Replacement
• The average number of pages that can be printed with each of the toner containers provided with the machine is 1,500 pages. • To maintain quality, we recommend using genuine Kyocera toner containers, which must pass numerous quality inspections. - Page 173 Troubleshooting > Regular Maintenance Replacing the Toner Container Installation procedures of the toner container is same for every color. Here, we'll explain the procedures for the yellow toner container, as an example. Open the right cover. Unlock the toner container. Remove the toner container.
- Page 174 Troubleshooting > Regular Maintenance Remove the new toner container from the box. IMPORTANT Do not touch the points shown below. Shake the toner container. 5 ~ 6 5 ~ 6 Install the toner container.
-
Page 175: Loading Paper
Troubleshooting > Regular Maintenance Close the right cover. NOTE • If the right cover does not close, check that the new toner container is installed correctly. • Return the exhausted toner container to your dealer or service representative. The collected toner container will be recycled or disposed in accordance with the relevant regulations. -
Page 176: Troubleshooting
Troubleshooting > Troubleshooting Troubleshooting Solving Malfunctions The table below provides general guidelines for problem solving. If a problem occurs with your machine, look into the checkpoints and perform procedures indicated on the following pages. If the problem persists, contact your Service Representative. NOTE When contacting us, the serial number will be necessary. - Page 177 Troubleshooting > Troubleshooting Reference Symptom Checkpoints Corrective Actions Page Printouts are curled. ― Turn the paper over in the cassette, or page 3-2 turn the orientation 180 degrees around in which the paper is positioned. Is the paper damp? Replace the paper with new paper. page 3-2 Cannot print.
-
Page 178: Printed Image Trouble
Troubleshooting > Troubleshooting Printed Image Trouble When the following printed image trouble occurs, implement appropriate procedures. Reference Symptom Checkpoints Corrective Actions Page Printed images are totally Is the paper damp? Replace the paper with new paper. page 3-2 too light. Is the toner distributed evenly within the Shake the toner container from side to page 8-3... - Page 179 Troubleshooting > Troubleshooting Reference Symptom Checkpoints Corrective Actions Page Printed images are fuzzy. Is the device used in an environment Use in an environment that has suitable ― with high humidity or where the humidity. temperature or humidity changes suddenly? ―...
-
Page 180: Color Printing Trouble
Troubleshooting > Troubleshooting Reference Symptom Checkpoints Corrective Actions Page Part of the image is ― Open and then close the rear cover. ― periodically faint or shows ― Select the [Menu] key > [Adjust/Maintenance] ― white lines. > [Service] > [Drum] > [OK] > [OK]. ―... -
Page 181: Responding To Messages
Troubleshooting > Troubleshooting Responding to Messages If the message display or the computer displays any of these messages, follow the corresponding procedure. NOTE When contacting us, the serial number will be necessary. To check the serial number, refer to the following: Checking the Equipment's Serial Number (page i) Reference Message... - Page 182 Troubleshooting > Troubleshooting Reference Message Checkpoints Corrective Actions Page Cannot connect server ― The job is canceled. Select [Go] key. ― Press Go Check the connection status with the server. Cannot connect to ― Set machine time to match the page 2-15 Authentication Server server's time.
- Page 183 Troubleshooting > Troubleshooting Reference Message Checkpoints Corrective Actions Page Enter Account ― An account code must be entered. ― This message is displayed if you try to print from the operation panel (e.g. printing a status page or using the Job Retention function) when the Job Accounting function is enabled.
- Page 184 Troubleshooting > Troubleshooting Reference Message Checkpoints Corrective Actions Page Illegal Account ― The account ID was incorrect when page 7-9 processing the job externally. The Press GO job is canceled. Select the [GO] key. Incorrect login info. ― The login user name or password ―...
- Page 185 Troubleshooting > Troubleshooting Reference Message Checkpoints Corrective Actions Page Low security ― This message is displayed when ― Low was selected in Security Level. Low temperature. ― Adjust the temperature and the ― humidity of your room Adjust room temp. Reference Message Checkpoints...
- Page 186 Troubleshooting > Troubleshooting Reference Message Checkpoints Corrective Actions Page Paper jam ― If a paper jam occurs, the machine page 8-25 will stop and the location of the jam ##################### will be indicated on the screen. Leave the machine on and select [Help].
- Page 187 Troubleshooting > Troubleshooting Reference Message Checkpoints Corrective Actions Page SD card error. ― An error has occurred on the SD ― card. Job is canceled. Select [GO]. Press GO The error code is as follows. 04: Insufficient space on the SD card to complete this operation.
- Page 188 Troubleshooting > Troubleshooting Reference Message Checkpoints Corrective Actions Page Wrong Account ― Displayed when an attempt is made page 7-9 to register an account in the Job Accounting menu by entering an account code that already exists. Wrong ID ― Incorrect administrator ID.
-
Page 189: Adjustment/Maintenance
Troubleshooting > Adjustment/Maintenance Adjustment/Maintenance Overview of Adjustment/Maintenance If there is an image problem and the message to run adjustment or maintenance menu appears, run Adjustment/ Maintenance in the system menu. The table below lists the item you can carry out. Item Description Reference Page... -
Page 190: Registration Procedure
Troubleshooting > Adjustment/Maintenance Registration Procedure This function is available to resolve color drift. If it is not resolved by normal registration or to perform more detailed settings, use the detailed registration. IMPORTANT Before performing registration, be sure to perform Color Calibration. If color drift remains, perform color registration. - Page 191 Troubleshooting > Adjustment/Maintenance Chart Example Display the correction menu [Menu] key > [▲] [▼] key > [Adjust/Maintenance] > [►] key > [▲] [▼] key > [Registration Normal] > [►] key > [▲] [▼] key > [Adjust Magenta] > [OK] key The magenta correction menu appears.
- Page 192 Troubleshooting > Adjustment/Maintenance Select the [◄] or [►] key to change the L, V, and R items, select the [▲] or [▼] key to enter the values read from the chart, and select the [OK] key. To increase the value from 0 up to a maximum of 9, select the [▲] key. To decrease the value, select the [▼] key.
- Page 193 Troubleshooting > Adjustment/Maintenance Chart Example Display the correction menu. [Menu] key > [▲] [▼] key > [Adjust/Maintenance] > [►] key > [▲] [▼] key > [Registration Details] > [►] key > [▲] [▼] key > [M 12345 3] > [OK] key The magenta correction menu appears.
-
Page 194: Clearing Paper Jams
Troubleshooting > Clearing Paper Jams Clearing Paper Jams If a paper jam occurs, the message display will display "Paper Jam." and the machine will stop. Refer to these procedures to remove the jammed paper. Jam Location Indicators 1 Shows the location of a paper jam. Paper jam Cassette 1 NOTE... -
Page 195: Remove Any Jammed Paper In Cassette 1
Troubleshooting > Clearing Paper Jams Remove any jammed paper in Cassette 1 CAUTION • Do not reuse jammed papers. • If the paper tears during removal, be sure to remove any loose scraps of paper from inside the machine. Scraps of paper left in the machine could cause subsequent jamming. Pull Cassette 1 out toward you until it stops. -
Page 196: Remove Any Jammed Paper In Cassette 2
Troubleshooting > Clearing Paper Jams Remove any jammed paper in Cassette 2 CAUTION • Do not reuse jammed papers. • If the paper tears during removal, be sure to remove any loose scraps of paper from inside the machine. Scraps of paper left in the machine could cause subsequent jamming. Open Rear Cover 2. - Page 197 Troubleshooting > Clearing Paper Jams Pull Cassette 2 out toward you until it stops. Remove any jammed paper. Push Cassette 2 back in. 8-28...
-
Page 198: Remove Any Jammed Paper In The Multipurpose Tray
Troubleshooting > Clearing Paper Jams Remove any jammed paper in the Multipurpose Tray CAUTION • Do not reuse jammed papers. • If the paper tears during removal, be sure to remove any loose scraps of paper from inside the machine. Scraps of paper left in the machine could cause subsequent jamming. - Page 199 Troubleshooting > Clearing Paper Jams Pull Cassette 1 out toward you until it stops. Open Feed Cover. Remove any jammed paper. Push Feed Cover back in. 8-30...
- Page 200 Troubleshooting > Clearing Paper Jams Push Cassette 1 back in. Open the multipurpose tray. Reload the paper. 8-31...
-
Page 201: Remove Any Jammed Paper In Rear Cover 1
Troubleshooting > Clearing Paper Jams Remove any jammed paper in Rear Cover 1 CAUTION The fixing unit is extremely hot. Take sufficient care when working in this area, as there is a danger of getting burned. Open Rear Cover 1. Remove any jammed paper. - Page 202 Troubleshooting > Clearing Paper Jams Remove any jammed paper. Open the feed cover (B). Remove any jammed paper. Open the duplex unit (C). 8-33...
- Page 203 Troubleshooting > Clearing Paper Jams Remove any jammed paper. Push Rear Cover 1. 8-34...
-
Page 204: Appendix
Appendix This chapter explains the following topics: Optional Equipment ............................9-2 Overview of Optional Equipment ......................9-2 Optional Applications ..........................9-5 Starting Application Use ........................... 9-5 Checking Details of Application ....................... 9-6 Paper ................................. 9-8 Basic Paper Specifications ........................9-8 Choosing the Appropriate Paper ...................... -
Page 205: Optional Equipment
Appendix > Optional Equipment Optional Equipment Overview of Optional Equipment The following optional equipment is available for the machine. (2) Card Authentication Kit (B) (1) PF-5110 Software option (3) UG-33 (4) SD/SDHC Memory Card (1) PF-5110 "Paper Feeder" The paper feeder can be installed in the machine. Loading in the Cassette 2 (page 3-7) (2) Card Authentication Kit(B) "Card Authentication Kit"... - Page 206 Appendix > Optional Equipment (4) "SD/SDHC Memory Card" An SD/SDHC memory card is useful for storing fonts, macros, and overlays. The machine is equipped with a slot for an SDHC memory card with a maximum size of 32 GB, and an SD memory card with a maximum size of 2 GB. IMPORTANT Unencrypted data is saved on the SD/SDHC memory card.
- Page 207 Appendix > Optional Equipment Replace the covers.
-
Page 208: Optional Applications
Appendix > Optional Equipment Optional Applications The applications listed below are installed on this machine. Application Card Authentication Kit ThinPrint Option This can be used on a trial basis for a limited time. NOTE • Restrictions such as the number of times the application can be used during the trial period differ depending on the application. -
Page 209: Checking Details Of Application
Appendix > Optional Equipment Activate the application. Select [Details] of the application you will start using, and select the [►] key. [▲] [▼] key > [Official] > [OK] key > [OK] key To use the application as a trial, select [Trial] without entering the license key. Enter the license key >... - Page 210 Appendix > Optional Equipment Item Function Name License Trial Counts Date of Trial Extend Trial Period Status Extend the trial period. [◄] [►] key > [Extend Trial Period] > [OK] key > [OK] key The trial period is extended.
-
Page 211: Paper
Appendix > Paper Paper This section explains the paper sizes and types that can be used in the paper source. For details on the sizes, types, and number of sheets of paper that can be loaded in each paper tray, refer to the following: Specifications (page 9-16) Basic Paper Specifications... -
Page 212: Choosing The Appropriate Paper
Appendix > Paper Choosing the Appropriate Paper This section describes guidelines for choosing paper. Condition Avoid using paper with bent corners or that is curled, dirty, or torn. Do not use paper that has a rough surface or paper fiber lint, or that is especially delicate. Use of paper in any of these conditions will not only deliver poor copies but may also cause jams and shorten the useful life of the machine. - Page 213 Appendix > Paper Other Paper Specifications Porosity: The density of the paper fibers. Stiffness: Paper must be stiff enough or it may buckle in the machine, causing jams. Curl: Most paper naturally tends to curl after the package is opened. When paper passes through the fixing unit, it curls upward slightly.
- Page 214 Appendix > Paper Paper Sizes that can be Used with This Machine Paper of the following sizes is supported by the machine. Measurements in the table take into account a ±0.7 mm dimensional accuracy for length and width. Corner angles must be 90°...
-
Page 215: Special Paper
Appendix > Paper Special Paper This section describes printing onto special paper and print media. Special Paper that can be Used with This Machine • Transparencies • Preprinted paper • Bond paper • Recycled paper • Thin paper • Letterhead •... - Page 216 Appendix > Paper Label Be sure to feed labels from the multipurpose tray. For selecting labels, use extreme care so that the adhesive may not come in direct contact with any part of the machine and that the labels are not easily peeled from the carrier sheet. Adhesives that stick to the drum or rollers and peeled labels remaining in the machine may cause a failure.
- Page 217 Appendix > Paper Hagaki (Cardstock) Burrs Burrs Before loading Hagaki (Cardstock) into the multipurpose tray, fan them and align the edges. If the Hagaki (Cardstock) paper is curled, straighten it before loading. Printing onto curled Hagaki (Cardstock) may cause jams. Use unfolded Oufuku hagaki (Return postcard) (available at post offices).
- Page 218 Appendix > Paper Preprinted Paper Preprinted paper must conform to the specifications. Basic Paper Specifications (page 9-8) The colored ink must be able to withstand the heat of printing. It must be resistant to silicone oil as well. Do not use paper with a treated surface such as glossy paper used for calendars.
-
Page 219: Specifications
Appendix > Specifications Specifications IMPORTANT Specifications are subject to change without notice. Machine Item Description Type Desktop Printing Method Electrophotography by semiconductor laser Paper Weight Cassette 60 to 163 g/m Multipurpose 60 to 220 g/m , 230 g/m (Cardstock) Tray Paper Type Cassette Plain, Rough, Recycled, Preprinted, Bond, Color, Prepunched,... - Page 220 Appendix > Specifications Item Description Operating Temperature 10 to 32.5°C/50 to 90.5°F Environment Humidity 10 to 80 % Altitude 3,500 m/11,482 ft maximum Brightness 1,500 lux maximum Dimension (W × D × H) 16.15" × 16.15" × 12.96" 410 × 410 × 329 mm Weight Approx.
-
Page 221: Printer Functions
Appendix > Specifications Printer Functions Item Description Printing Speed Black and White Printing Full Color Printing A4/A5 21 sheets/min 21 sheets/min Letter 22 sheets/min 22 sheets/min Legal 18 sheets/min 18 sheets/min 22 sheets/min 22 sheets/min A5-R 22 sheets/min 22 sheets/min 22 sheets/min 22 sheets/min 22 sheets/min... -
Page 222: Paper Feeder
Appendix > Specifications Paper Feeder Item Description Paper Supply Method Friction retard feeder (No. Sheets: 250, 80 g/m , 1 cassette) Paper Size A4, B5, A5-R, A5, A6, B6, Letter, Legal, Folio, 216 × 340 mm, Statement-R, Executive, Oficio II, 16K, B5(ISO), Custom (105 ×... -
Page 223: Glossary
Appendix > Glossary Glossary Accessibility The machine is designed featuring good accessibility even for the elderly and those who are physically challenged or visually impaired. Apple Talk AppleTalk offers file sharing and printer sharing and it also enables you to utilize application software that is on another computer on the same AppleTalk network. - Page 224 The Job Box function stores print data on the printer and allows users to print single or multiple copies of the stored data later using the printer's operation panel. KPDL (Kyocera Page Description Language) Kyocera's PostScript page description language compatible with Adobe PostScript Level 3. 9-21...
- Page 225 Appendix > Glossary Multipurpose (MP) Tray The paper supply tray on the front side of the machine. Use this tray instead of the cassettes when printing onto envelopes, Hagaki (Cardstock), transparencies, or labels. NetBEUI (NetBIOS Extended User Interface) An interface, developed by IBM in 1985, as an update from NetBIOS. It enables more advanced functions on smaller networks than other protocols such as TCP/IP, etc.
- Page 226 Appendix > Glossary SMTP (Simple Mail Transfer Protocol) A protocol for E-mail transmission over the Internet or an intranet. It is used for transferring mail between mail servers as well as for sending mail from clients to their servers. Status Page The page lists machine conditions.
-
Page 227: Index
Index Date Setting Date 6-17 Date Format 6-17 Summer Time 6-17 Time 6-17 Accessibility 9-20 Time Zone 6-17 Adjustment/Maintenance 6-24 Default Gateway 9-20 Administrator 6-24 Settings 6-11 AirPrint 4-10 Device Common 6-17 Anti-theft Lock Slot Buzzer 6-18 AppleTalk 9-20 ColorToner Empty 6-19 Auto Error Clear 6-20... - Page 228 viii Guides Provided with the Machine Login 2-13 Logout 2-14 Low Toner Alert 6-21 Handles Network Settings 6-14 Help Screen 2-12 HTTP Network Settings 6-15 HTTPS Management Network Settings 6-15 Media Type Setting Message Language 6-17 Monotype Imaging License Agreement 1-11 Mopria 4-10...
- Page 229 Paper Width Guides 2-3, 3-4, Responding to Messages 8-12 Part Names Restart Printer 6-24 PDF/A 9-22 Right Cover POP3 9-22 Network Settings 6-14 PostScript 9-22 Safety Conventions in This Guide Power Cable SD Card Connecting Format 6-18 Power Management 1-12 Security 6-22 Power Off...
- Page 230 ThinPrint over SSL Network Settings 6-16 TIFF/JPEG Size Default Time 6-17 Time Zone 6-17 Timer Auto Error Clear 6-20 Auto Panel Reset 6-19 Error Clear Timer 6-20 FormFeed TimeOut 6-20 Panel Reset Timer 6-19 Power Off Timer 6-21 Sleep Timer 6-19 Toner Container (Black) Toner Container (Cyan)
- Page 232 8F, No. 288 Nanjing Road West, Huangpu District, Phone: +1-305-421-6640 Shanghai,200003, China Fax: +1-305-421-6666 Phone: +86-21-5301-1777 Fax: +86-21-5302-8300 KYOCERA Document Solutions Canada , Ltd. KYOCERA Document Solutions 6120 Kestrel Rd., Mississauga, ON L5T 1S8, Canada (Thailand) Corp., Ltd. Phone: +1-905-670-4425...
- Page 233 KYOCERA Document Solutions South Africa (Pty) Ltd. KYOCERA Document Solutions Espana, S.A. KYOCERA House, Hertford Office Park, Edificio Kyocera, Avda. de Manacor No.2, 90 Bekker Road (Cnr. Allandale), Midrand, South Africa 28290 Las Matas (Madrid), Spain Phone: +27-11-540-2600 Phone: +34-91-6318392...
- Page 234 © 2022 KYOCERA Document Solutions Inc. 2022.1 is a trademark of KYOCERA Corporation C09KDENEN100...