Table of Contents
Advertisement
Quick Links
BEFORE USE, PLEASE READ AND FOLLOW ALL SAFETY RULES AND OPERATING INSTRUCTIONS.
Write Serial No. (on bottom of unit) here:
________________________________
ELECTRIC COOKTOP
OWNER'S MANUAL
Model Numbers: CR2B12ST / LCR12B
Felix Storch, Inc.
An ISO 9001:2015 registered company
770 Garrison Avenue
Bronx, New York 10474
www.summitappliance.com
Advertisement
Table of Contents

Related Manuals for Summit CR2B12ST


Summary of Contents for Summit CR2B12ST
- Page 1 ELECTRIC COOKTOP OWNER'S MANUAL Model Numbers: CR2B12ST / LCR12B BEFORE USE, PLEASE READ AND FOLLOW ALL SAFETY RULES AND OPERATING INSTRUCTIONS. Felix Storch, Inc. Write Serial No. (on bottom of unit) here: An ISO 9001:2015 registered company 770 Garrison Avenue...
-
Page 2: Table Of Contents
TABLE OF CONTENTS Important Safeguards Location of Parts Installation Instructions Before Using Your Appliance Installation of Your Appliance Electrical Connection Operating Your Appliance Operating Your Cooktop Operating Indicators Residual Heat Indicator Cookware Selection Care and Maintenance Cleaning Your Appliance Troubleshooting Limited Warranty... -
Page 3: Important Safeguards
IMPORTANT SAFEGUARDS Before the appliance is used, it must be properly positioned and installed as described in this manual, so read the manual carefully. To reduce the risk of fire, electrical shock or injury when using the appliance, follow basic precautions, including the following: Plug into a grounded 3-prong outlet, do not remove grounding prong, do not use an adapter, and do not use an extension cord. - Page 4 state and local codes. A standard electrical supply (115 V AC only, 60 Hz), properly grounded in accordance with the National Electrical Code and local codes and ordinances, is required. Do not kink or pinch the power supply cord of the appliance. The size of the fuse (or circuit breaker) should be 20 amperes.
-
Page 5: Location Of Parts
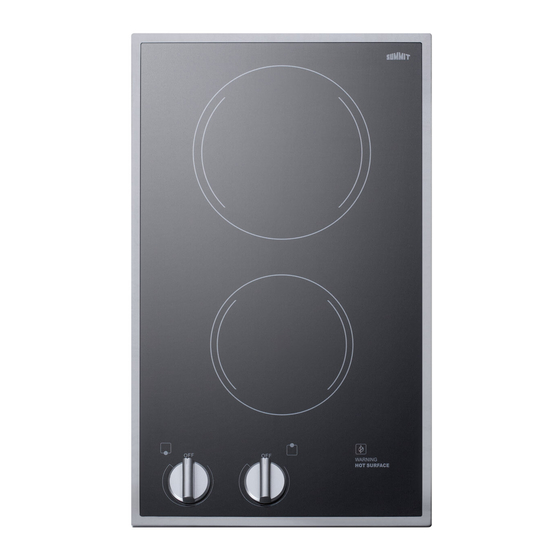
LOCATION OF PARTS BURNER(900W/7") BURNER(500W/5 ") OPERATING INDICATOR RESIDUAL HEAT INDICATOR CONTROL KNOB... -
Page 6: Installation Instructions
INSTALLATION INSTRUCTIONS BEFORE USING YOUR APPLIANCE Remove the exterior packing. Check if there is any damage to the unit. Clean the unit. A thorough cleaning with a recommended cooktop cleaner will provide a clean, shiny coating on the cooktop surface. INSTALLATION OF YOUR APPLIANCE NOTE: Your ceramic cooktop can be used as a portable unit or it can be inserted into a prepared cutout in your countertop. - Page 7 Before making the countertop cutout, check for clearance. Check to see if the cooktop will clear the front and side walls of the base cabinet. It is also important to provide enough ventilation. Adequate ventilation of the space below the countertop must be provided to ensure proper operation of the cooktop.
-
Page 8: Electrical Connection
ELECTRICAL CONNECTION WARNING Improper connection of the equipment-grounding can result in the risk of electrical shock. If the power cord of the unit is damaged, have it replaced by an authorized service center. This appliance should be properly grounded for your safety. The power cord of the appliance is equipped with a grounded plug which mates with standard three-prong wall outlets to minimize the possibility of electrical shock. -
Page 9: Operating Your Appliance
OPERATING YOUR APPLIANCE OPERATING YOUR COOKTOP Any burner can be turned on by pushing the control knob down and turning it clockwise or counter- clockwise to the desired setting. To adjust the setting, turn the knob without pressing down. The burner is turned off by turning the control knob clockwise or counter-clockwise to "0FF". -
Page 10: Care And Maintenance
CARE AND MAINTENANCE CLEANING YOUR APPLIANCE Do not use a steam cleaner to clean this appliance. Steam could penetrate electrical components and cause a short circuit. Pressurized steam could cause permanent damage to the surface and to components for which the manufacturer cannot accept responsibility. Do not use any sharp, pointed objects which could damage the seal between the ceramic surface, the surrounding frame and the countertop. -
Page 11: Troubleshooting
TROUBLESHOOTING You can solve many common problems easily, saving you the cost of a possible service call. Try the suggestions below to see if you can solve the problem before calling a service technician. Troubleshooting Guide PROBLEM POSSIBLE CAUSE Not connected to power supply. The appliance does not operate. -
Page 12: Limited Warranty
LIMITED WARRANTY ONE-YEAR LIMITED WARRANTY Within the 48 contiguous United States, for one year from the date of purchase, when this appliance is operated and maintained according to instructions attached to or furnished with the product, warrantor will pay for factory-specified parts and repair labor to correct defects in materials or workmanship. Service must be provided by a designated service company.