Table of Contents
Advertisement
Available languages
Available languages
Quick Links
ELECTRIC COOKTOP /
TABLE DE CUISSON ÉLECTRIQUE
Owner's Manual / Mode d'emploi
Models / Modèles: CR2B22ST / LCR22B
BEFORE USE, PLEASE READ AND FOLLOW ALL SAFETY RULES AND OPERATING INSTRUCTIONS.
AVANT UTILISATION, VEUILLEZ LIRE ET SUIVRE TOUTES LES RÈGLES DE SÉCURITÉ ET LES
INSTRUCTIONS D'UTILISATION.
FELIX STORCH, INC.
Write Serial No. (on bottom of unit) here:
An ISO 9001:2015 registered company
Inscrivez le numéro de série (au bas de l'unité) ici:
770 Garrison Avenue
Bronx, New York 10474
______________________________
www.summitappliance.com
Advertisement
Chapters
Table of Contents

Related Manuals for Summit CR2B22ST


Summary of Contents for Summit CR2B22ST
- Page 1 TABLE DE CUISSON ÉLECTRIQUE Owner’s Manual / Mode d’emploi Models / Modèles: CR2B22ST / LCR22B BEFORE USE, PLEASE READ AND FOLLOW ALL SAFETY RULES AND OPERATING INSTRUCTIONS. AVANT UTILISATION, VEUILLEZ LIRE ET SUIVRE TOUTES LES RÈGLES DE SÉCURITÉ ET LES INSTRUCTIONS D'UTILISATION.
-
Page 2: Table Of Contents
TABLE OF CONTENTS Appliance Safety Important Safeguards 2 - 4 Location of Parts Installation Instructions 6 - 9 Before Using Your Appliance Installation of Your Appliance 6 - 7 Electrical Connection 8 - 9 Operating Your Appliance Operating Your Cooktop Operating Indicators Cookware Selection Care and Maintenance... -
Page 3: Appliance Safety
APPLIANCE SAFETY Your safety and the safety of others are very important. We have provided many important safety messages in this manual and on your appliance. Always read and obey all safety messages. This is the Safety Alert Symbol. The symbol alerts you to potential hazards that can kill or injure you and others. - Page 4 FOLLOW WARNING CALLOUTS BELOW ONLY WHEN APPLICABLE TO YOUR MODEL This appliance is only intended for residential cooking. The manufacturer cannot be held responsible for damage or injury caused by improper use or for uses other than those for which this appliance is intended.
- Page 5 Use Only Dry Potholders – Moist or damp potholders on hot surfaces may result in burns from steam. Do not let potholder touch hot heating elements. Do not use a towel or other bulky cloth. Make Sure Reflector Pans or Drip Bowls Are in Place – Absence of these pans or bowls during cooking may subject wiring or components underneath to damage.
-
Page 6: Locationof Parts
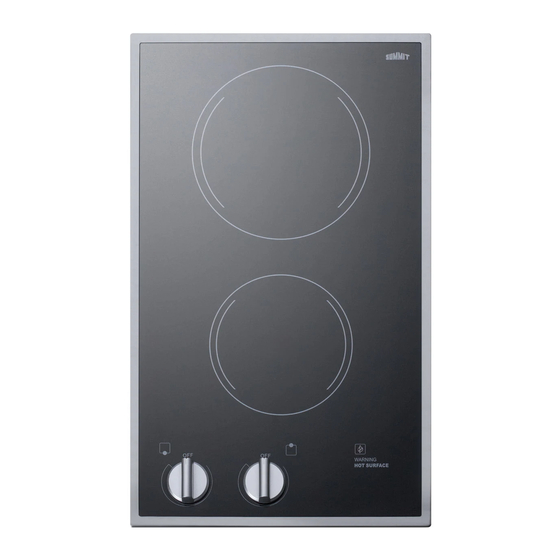
LOCATIONOF PARTS BURNER(1800W/7") BURNER(1200W/5 ") OPERATING INDICATOR RESIDUAL HEAT INDICATOR CONTROL KNOB... -
Page 7: Installation Instructions
INSTALLATION INSTRUCTIONS BEFORE USING YOUR APPLIANCE Remove the exterior packing. Check if there is any damage to the unit. Clean the unit. A thorough cleaning with a recommended cooktop cleaner will provide a clean, shiny coating on the cooktop surface. INSTALLATION OF YOUR APPLIANCE Follow these directions to prepare the countertop cutout and install your cooktop: 1. - Page 8 the cooktop. Heat transferred from the cooktop bottom pan during operation will overheat an improperly ventilated area. Allow a 2" minimum clearance between the bottom of the metal pan of the cooktop and any combustible surface located below, i.e.: the upper edge of a drawer installed below the cooktop. Failure to provide proper clearances and ventilation may result in a fire hazard.
-
Page 9: Electrical Connection
ELECTRICAL CONNECTION WARNING Improper connection of the equipment-grounding can result in the risk of electrical shock. If the power cord of the unitis damaged, have it replaced by an authorized service center. The appliance must be properly installed and grounded by a qualified technician in accordance with the National Electrical Code ANSI/NFPA No. - Page 10 2. 4-Wire Power Cord Installation IMPORTANT: Use the 4-wire cable from power supply where local codes do not permit connecting the frame-ground conductor to the neutral (white) junction box wire. 1. Disconnect power 2. Remove junction box cover if present. 3.
-
Page 11: Operating Your Appliance
OPERATING YOUR APPLIANCE OPERATING YOUR COOKTOP Any burner can be turned on by pushing the control knob down and turning it clockwise or counter- clockwise to the desired setting. To adjust the setting, turn the knob without pressing down. The burner is turned off by turning the control knob clockwise or counter-clockwise to "OFF". -
Page 12: Care And Maintenance
CARE AND MAINTENANCE CLEANING YOUR APPLIANCE Do not use a steam cleaner to clean this appliance. Steam could penetrate electrical components and cause a short circuit. Pressurized steam could cause permanent damage to the surface and to components for which the manufacturer cannot accept responsibility. Do not use any sharp, pointed objects which could damage the seal between the ceramic surface, the surrounding frame and the countertop. -
Page 13: Troubleshooting
TROUBLESHOOTING You can solve many common problems easily, saving you the cost of a possible service call. Try the suggestions below to see if you can solve the problem before calling a service technician. Troubleshooting Guide PROBLEM POSSIBLE CAUSE Not connected to power supply. The appliance does not operate. -
Page 14: Limited Warranty
LIMITED WARRANTY ONE-YEAR LIMITED WARRANTY Within the 48 contiguous United States, for one year from the date of purchase, when this appliance is operated and maintained according to instructions attached to or furnished with the product, warrantor will pay for factory-specified parts and repair labor to correct defects in materials or workmanship. Service must be provided by a designated service company. -
Page 15: French Version Of This Manual
TABLE DES MATIÈRES Sécurité de l'appareil Mesure de sécurité importantes 15 - 17 Emplacement des pièces Instructions d'installation 19 - 23 Avant d'utiliser votre apparei Installation de votre appareil 19 - 21 Connexion électrique 22 - 23 Utilisation de votre appareil Utiliser votre table de cuisson Indicateurs de fonctionnement Sélection des ustensiles de cuisson... -
Page 16: Sécurité De L'appareil
SÉCURITÉ DE L'APPAREIL Votre sécurité et celle des autres sont très importantes. Nous avons fourni de nombreux messages de sécurité importants dans ce manuel et sur votre appareil. Toujours lire et obéir à tous les messages de sécurité. C'est le symbole d'alerte de sécurité. Le symbole vous avertit des dangers potentiels qui peuvent tuer ou blesser vous et d'autres. - Page 17 AVERTISSEMENT SUIVEZ LES AVERTISSEMENTS CI-DESSOUS UNIQUEMENT LORSQU’ILS SONT APPLICABLES À VOTRE MODÈLE Cet appareil est uniquement destiné à la cuisine résidentielle. Le fabricant ne peut être tenu responsable des dommages ou des blessures résultant d'une utilisation incorrecte ou pour des utilisations autres que celles auxquelles cet appareil est destiné.
- Page 18 Ne touchez pas les éléments chauffants ou les zones proches des éléments chauffants - Les éléments chauffants peuvent être chauds même s'ils sont de couleur sombre. Les zones proches des éléments chauffants peuvent devenir suffisamment chaudes pour causer des brûlures. Pendant et après l'utilisation, ne touchez pas et ne laissez pas les vêtements ou autres matériaux inflammables entrer en contact avec les éléments chauffants ou les zones proches des éléments chauffants avant qu'ils n'aient eu le temps de refroidir.
-
Page 19: Emplacement Des Pièces
EMPLACEMENT DES PIÈCES BR LEUR(1800W/7") BR LEUR (1200W/5 ") INDICATEUR DE FONCTIONNEMENT INDICATEUR DE CHALEUR R SIDUELLE BOUTON DE CONTROLE... -
Page 20: Instructions D'installation
INSTRUCTIONS D’INSTALLATION AVANT D'UTILISER VOTRE APPAREIL Retirez l'emballage extérieur. Vérifiez si l'appareil est endommagé. Nettoyez l'appareil. Un nettoyage en profondeur avec un nettoyant pour table de cuisson recommandé donnera un revêtement propre et brillant à la surface de la table de cuisson. INSTALLATION DE VOTRE APPAREIL Suivez ces instructions pour préparer la découpe du comptoir et installer votre table de cuisson : 1. - Page 21 Avant de découper le comptoir, vérifiez le jeu. Vérifiez si la table de cuisson dégage les parois avant et latérales de l’armoire de base. Il est également important de prévoir une ventilation suffisante. Une ventilation adéquate de l'espace sous le comptoir doit être fournie pour assurer le bon fonctionnement de la table de cuisson.
- Page 22 2. Installer la table de cuisson Quatre supports de montage sont fournis avec la table de cuisson électrique. Ces supports sont conçus pour maintenir la table de cuisson fermement en place. La table de cuisson doit être collée au comptoir en utilisant un composé...
-
Page 23: Connexion Électrique
CONNEXION ÉLECTRIQUE AVERTISSEMENT Une mauvaise connexion de la mise à la terre de l'équipement peut entraîner un risque de choc électrique. Si le cordon d'alimentation de l'appareil est endommagé, faites-le remplacer par un centre de service autorisé. L'appareil doit être correctement installé et mis à la terre par un technicien qualifié conformément au code électrique national ANSI / NFPA N °... - Page 24 boîte de jonction à l'aide de l'écrou de fil répertorié UL. 8. Installez le couvercle de la boîte de jonction. 9. Rebranchez le courant. 2. Installation du cordon d'alimentation à 4 fils IMPORTANT: Utilisez le câble à 4 fils de l'alimentation électrique lorsque les codes locaux ne permettent pas de connecter le conducteur de masse du châssis au fil neutre (blanc) de la boîte de jonction.
-
Page 25: Utilisation De Votre Appareil
UTILISATION DE VOTRE APPAREIL UTILISER VOTRE TABLE DE CUISSON Vous pouvez allumer n’importe quel brûleur en poussant le bouton de commande vers le bas et en le tournant dans le sens des aiguilles d’une montre ou dans le sens inverse des aiguilles d’une montre pour obtenir le réglage souhaité. -
Page 26: Dépannage
DÉPANNAGE Vous pouvez résoudre facilement de nombreux problèmes courants et économiser ainsi le coût d'un appel de service éventuel. Essayez les suggestions ci-dessous pour voir si vous pouvez résoudre le problème avant d'appeler un technicien de maintenance. PROBLÈME CAUSE POSSIBLE L'appareil ne fonctionne pas. -
Page 27: Soin Et Entretien
SOIN ET ENTRETIEN NETTOYER VOTRE APPAREIL N'utilisez pas de nettoyeur à vapeur pour nettoyer cet appareil. La vapeur pourrait pénétrer dans les composants électriques et provoquer un court-circuit. La vapeur sous pression pourrait causer des dommages permanents à la surface et aux composants pour lesquels le fabricant ne peut être tenu responsable. -
Page 28: Garantie Limitée
GARANTIE LIMITÉE UN AN DE GARANTIE LIMITÉE Dans les 48 États américains contigus, pendant un an de la date d’achat, lorsque cet appareil est utilisé et entretenu conformément aux instructions jointes à ou fournies avec le produit, le garant paiera pour les pièces spécifiées en usine et pour la main-d’œuvre pour corriger les défauts de matériaux ou de fabrication.