Summit CR2110 Instruction Manual
Ceramic glass electric cooktop
Hide thumbs
Also See for CR2110:
- Instruction manual (16 pages) ,
- Instruction manual (16 pages) ,
- Instruction manual (16 pages)
Table of Contents
Advertisement
Quick Links
INSTRUCTION MANUAL
Electric Cooktop Models
CR2110
CR2110WH
CR2220
CR2220WH
Please read these instructions in their entirety before
installation and use of your cooktop.
SAVE THIS MANUAL FOR FUTURE REFERENCE.
for Ceramic Glass
CR2110TK15
CR2110WHTK15
CR2220TK15
CR2220WHTK15
An ISO 9001:2015 registered company
Felix Storch, Inc.
Summit Appliance Division
770 Garrison Avenue
Bronx, NY 10474
www.summitappliance .com
Advertisement
Table of Contents

Related Manuals for Summit CR2110


Summary of Contents for Summit CR2110
- Page 1 CR2220WHTK15 Please read these instructions in their entirety before installation and use of your cooktop. SAVE THIS MANUAL FOR FUTURE REFERENCE. Felix Storch, Inc. Summit Appliance Division An ISO 9001:2015 registered company 770 Garrison Avenue Bronx, NY 10474 www.summitappliance .com...
-
Page 2: Table Of Contents
Table of Contents Product Specifications ..................2 Safety Instructions ..................3 - 4 Installation Instructions for Ceramic Glass Cooktops ......5 - 11 Step #1: Unpacking the Cooktop ............... 5 Step #2: Check the Electrical Supply Requirements ......... 6 Step #3: Countertop Preparation ............7 - 9 Step #4: Installing the Cooktop ............ -
Page 3: Product Specifications
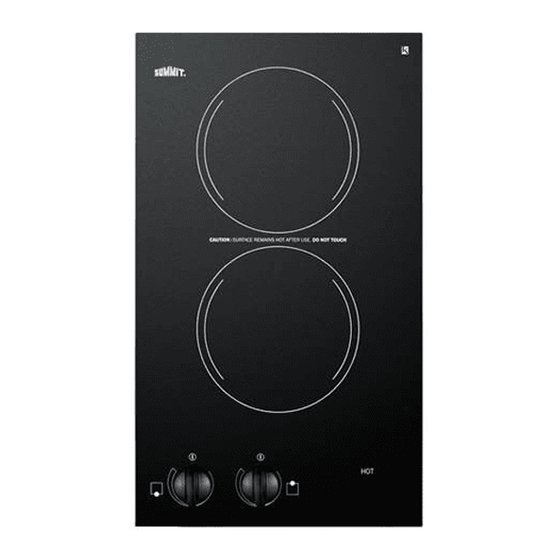
Product Specifications All models have double burners. CR2110: 120V AC – two 6” (140 mm) burners @ 1200 watts each CR2220: 220V AC – two 6” (140 mm) burners @ 1200 watts each 11¾” x 19⅝” x 2⅛” Overall dimensions: (300 mm x 500 mm x 55,3 mm) 11⅛”... -
Page 4: Safety Instructions
User Servicing Do not repair or replace any part of the appliance. If service ever becomes necessary, this appliance should be serviced by AUTHORIZED PERSONNEL ONLY or call SUMMIT Customer Service at 1-800-932-4267. Keep flammable materials away from the cooktop. - Page 5 Do not cook on a broken cooktop. If your cooktop should break, cleaning solutions and spillovers may penetrate the broken cooktop and create a risk of electric shock. Immediately contact an authorized service center or call the SUMMIT Customer Service at 1-800- 932-4267. ...
-
Page 6: Installation Instructions For Ceramic Glass Cooktops
Verify and identify the package contents. The following items should be included in the carton. If any components are missing or damaged, call SUMMIT immediately. ● Ceramic glass cooktop ●... -
Page 7: Step #2: Check The Electrical Supply Requirements
The following table provides the correct voltage, amperage and frequency that must be supplied to the cooktop. Maximum Required SUMMIT Minimum Connected Power Supply Model # Wire Size Load Input CR2110/ 120V 2400 Watts #12 AWG AC/25A/60Hz WH/TK15 CR2220/ 220V 2400 Watts #16 AWG AC/10A/60Hz WH/TK15... -
Page 8: Step #3: Countertop Preparation
Step #3 Countertop Preparation Please read this section prior to making cutout for the cooktop. It is important to plan ahead for installation of the cooktop, keeping the following dimensions in mind (please refer to Fig. 2). 13 inches maximum depth of overhead cabinets 36 inches is minimum height of countertop above floor... - Page 9 Before making the countertop cutout, check for clearance. Check to see if the cooktop will clear the front and side walls of the base cabinet. It is also important to provide enough ventilation. Adequate ventilation of the space below the countertop must be provided to ensure proper operation of the cooktop.
-
Page 10: Step #4: Installing The Cooktop
NOTE: When making the countertop, radius the corner of the cutout (1/4” radius is typical). This will prevent cracking of the countertop. Follow manufacturer’s instructions regarding minimum corner radius and reinforcement of corners. Step #4 Installing the Cooktop Attach the cooktop carriers by the screws as shown in Fig.8. After this, stick on the self-adhesive sealant as described below. - Page 11 The frame should be as flush with the countertop as possible. Attach the mounting brackets supplied with the SUMMIT cooktop (refer to Figs. 6-7-8) to the inside bottom surface of the cutout. The brackets are to be mounted on opposing sides.
-
Page 12: Step #5: Electrical Connection
Clean the cooktop before you use it for the first time. A thorough cleaning with a cooktop cleaner will provide a clean, shiny coating on the cooktop surface. The next sections of the manual cover cooktop operation, maintenance and service information. Please keep these instructions with the SUMMIT cooktop for future reference. -
Page 13: Operation
Operation READ AFETY NSTRUCTIONS BEFORE OPERATING YOUR APPLIANCE. The cooking surface areas of your glass ceramic cooktop are identified by permanent patterns in the cooktop. The appliance is easy to maintain and easy to clean. Keeping the cooktop at top performance levels can be achieved by following the simple guidelines for use and cleaning below. -
Page 14: Controls & Indicators
Controls & Indicators Each of the cooking area controls has an infinite selection of heat settings. The control settings begin at low and increase heat output by cycling the heating elements between OFF and full power as you turn the knob clockwise. The heating elements will stay at full power for longer periods and at zero power for shorter periods as you turn the knob clockwise, thus increasing the heat output. - Page 15 Notes...
-
Page 16: Limited Warranty
Note: Nickel is a component in all stainless steel and some other metal components. Call customer service toll-free in the U.S.A. @ 1-800-932-4267, Monday to Friday 9:00 am. - 5:00 p.m. (ET). Order parts online at www.summitappliance.com/support Felix Storch, Inc. Phone: (718) 893-3900 Summit Appliance Division Fax: (844) 478-8799 770 Garrison Avenue www.summitappliance.com...