Rangemaster RMB9048BL/SS User Manual & Installation & Service Instructions
Hide thumbs
Also See for RMB9048BL/SS:
- User manual (24 pages) ,
- User manual & installation & service instructions (24 pages)

Related Manuals for Rangemaster RMB9048BL/SS


Summary of Contents for Rangemaster RMB9048BL/SS
- Page 1 RMB9048BL/SS Electric Oven User Guide & Installation & Service Instructions U110593 - 07...
-
Page 3: Table Of Contents
Contents Before You Start... 10. Installation Installation and Maintenance Dear Installer Electrical Safety Location of the Oven Before First Use Positioning the Oven Personal Safety Provision for Ventilation Cleaning Electrical Connection Levelling Oven Overview Customer Care Function Overview 11. Circuit Diagram Programming Overview 12. -
Page 4: Before You Start
Before You Start... • Before electrical reconnection, check that the appliance Thank you for buying a Rangemaster appliance. It should give you many years trouble-free cooking if installed and operated is electrically safe. correctly. It is important that you read this section before you The appliance should be powered down before start. -
Page 5: Cleaning
Cooking high moisture content foods can create a Fig. 1.1 ‘steam burst’ when the oven door is opened. When opening the oven stand well back and allow any steam to disperse (Fig. 1.1). When the oven is on, DO NOT leave the oven door open for longer than necessary. -
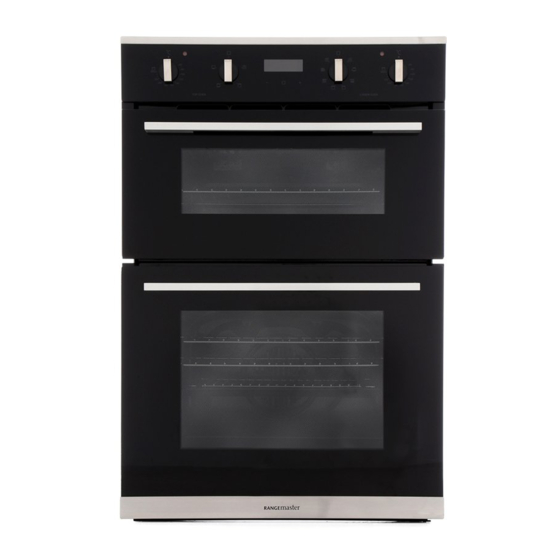
Page 6: Oven Overview
Oven Overview DocNo.024-0005 - Overview - R9049 oven Fig. 2.1 Top Oven Light Grill Conventional Base Heat Lower Oven Light Conventional Fan with lower heat Top heat Grill Fanned grill Fan oven Defrost Checking the Parts • 6x woodscrews (4 mm x 25 mm) Top Oven •... -
Page 7: Function Overview
Function Overview Lower Oven Function Modes Temperatures are achieved quicker, reducing or even removing the need for preheating. Both cooking No Function Mode Selected temperatures and cooking times can be reduced for a more energy efficient cooking programme. Defrost Using only the fan, this function circulates the air around the oven cavity, speeding up the Oven Light natural defrost process. -
Page 8: Programming Overview
Programming Overview Oven Shelf levels Fig. 4.1 Always count shelf levels from the bottom upwards (Fig. 4.1) When correctly installed, your product will meet all safety requirements laid down for this type of product. However, special care should be taken around the rear or the underneath of the appliance as these areas are not designed or intended to be touched and may contain sharp or rough edges that... -
Page 9: Setting The Time
Setting the time Changing the time Once the appliance is connected and switched on, the display If the clock time needs to be reset or adjusted, please follow will start to flash. The clock must be set to the time of day the procedure below. -
Page 10: Setting The Minute Minder
Setting the minute minder The minute minder can be used when the oven is switched on or off. It can be set for up to 23 hours and 59 minutes. Step 1. Press “Menu” button 3x until the minute minder indicator flashes. -
Page 11: Setting The Semi-Automatic Cooking On The Lower Oven
Setting the Semi-automatic cooking on the lower oven The lower oven can be set to switch off automatically with a preset time of 10 hours. Cannot be used on the top oven. Step 1. Select the function and temperature for the lower Step 6. -
Page 12: Setting The Automatic Cooking (Delayed Start) On The Lower Oven
Setting the Automatic cooking on the lower oven (Delayed Start) The lower oven can be set to switch off automatically with a preset time of 10 hours. Cannot be used on the top oven. Step 6. Calculate the time for the cooking to finish. Press Step 1. -
Page 13: Cooking Tips
Cooking Tips Tips on Cooking with the Timer General Oven Tips If you want to cook more than one dish, choose dishes that The wire shelves should always be pushed firmly to the back require approximately the same cooking time. However, of the oven. -
Page 14: Cooking Table
Cooking Table The oven control settings and cooking times given in the table below are intended to be used Top (T) AS A GUIDE ONLY. Individual tastes may require the temperature to be altered to provide a preferred result. ArtNo.050-0007 Centre (C) Oven shelf positions Food is cooked at lower temperature in a fan oven than in a conventional oven. -
Page 15: Cleaning Your Oven Essential Information
Cleaning Your Oven Essential Information Allow the oven to cool and isolate the electricity supply before carrying out any thorough cleaning and maintenance. Never use paint solvents, washing soda, caustic cleaners, biological powders, bleach, chlorine based bleach cleaners, coarse abrasives or salt. Do not mix different cleaning products –... -
Page 16: Oven
Removing the Oven Door Fig. 7.1 To aid cleaning and to make access to the oven cavity easier, the oven door can be removed. Open the door to the full extent. Unlock the locking ArtNo.325-0001 - BI oven door hinges clips on both the left and right hinges (Fig. -
Page 17: Changing The Bulb
Changing the bulb Fig. 7.5 Oven light Fig. 7.5 You can buy a replacement bulb (which is not covered under ArtNo.324-0005 Oven light bulb the warranty) from a good electrical shop. Ask for a 15 W – 230 V lamp, FOR OVENS. It must be a special bulb, heat resistant to 300 °C. -
Page 18: Oven Shelves
Oven Shelves Removing the runners in the oven Check the oven is cool and switched off. Open the oven door. Remove all shelves for either the top oven (Fig. 8.1) or main oven (Fig. 8.3). Slightly squeeze the bottom two row of the runner under the screw. -
Page 19: Troubleshooting
Troubleshooting DocNo.054-0001 - Troubleshooting BI oven Steam is coming from the oven. Oven temperature getting hotter as the cooker gets older. When cooking foods with a high water content (e.g. oven If turning the temperature down using the oven control knob chips) there may be some steam visible at the top of the door. -
Page 20: Installation
INSTALLATION Check the appliance is electrically safe and gas sound when you have finished. 10. Installation Dear Installer Location of the Oven Before you start your installation, please complete the details The oven may be installed in a kitchen/kitchen diner but NOT below. -
Page 21: Positioning The Oven
INSTALLATION Check the appliance is electrically safe and gas sound when you have finished. Positioning the Oven Provision for Ventilation The oven can be installed at high level in a tall kitchen unit Failure to allow adequate ventilation to the appliance may and depending on the type of installation it is designed to fit result in overheating or damage to adjacent units and could into a standard 600 mm wide cabinet housing (Fig. - Page 22 INSTALLATION Check the appliance is electrically safe and gas sound when you have finished. Fig. 10.1 IMPORTANT Minimum of 560 mm of depth is required for sufficient ventilation IMPORTANT The underside of the cabinet should be opened to allow for correct air circulation.
- Page 23 INSTALLATION Check the appliance is electrically safe and gas sound when you have finished. Fig. 10.3 Fig. 10.4 IMPORTANT IMPORTANT Stand away from louvers positioned below the control panel. Hot air can cause burns to hands, face and eyes. If installing the base panel leave a space as indicated in Fig.
-
Page 24: Electrical Connection
INSTALLATION Check the appliance is electrically safe and gas sound when you have finished. Electrical Connection Fig. 10.6 This appliance must be installed by a qualified electrician 220 - 240V to comply with the relevant Institute of Engineering and Technology (I.E.T.) regulations and also the local electricity supply company requirements. -
Page 25: Circuit Diagram
11. Circuit Diagram Top Grill Bottom Grill Light Heat dissipation fan Circulation fan Back Grill Temperature adjuster Thermostat switch Temperature adjuster Electronic timer Temperature adjuster Lamp Light Thermostat switch Top Grill Bottom Grill Thermal cut-out... -
Page 26: Technical Data
Dimensions Dimensions Oven (excluding front frame) Oven (including front frame) Height Width Depth Oven Data Brand Rangemaster Model identification RMB9048BL/SS Type of oven Electric Mass Number of cavities Top Oven Efficiency Fuel type Electric Cavity type Multifunction* *Drop Down Door... -
Page 27: Warranty/After Sales Service
Any cosmetic damage to the appliance must be reported within 90 days of delivery. Please note that AGA Rangemaster Limited have appointed UK Warranty Solutions to administer in warranty repairs on our behalf. If you make a request for an in warranty repair, your details will be held by Warranty Solutions. - Page 28 Clarence Street, Royal Leamington Spa, Warwickshire, CV31 2AD, England. Tel: +44 (0) 800 8046261 E-mail: consumers@agarangemaster.co.uk...