Table of Contents
Advertisement
Quick Links
Advertisement
Table of Contents

Related Manuals for Yamaha DRX-730BL


Summary of Contents for Yamaha DRX-730BL
-
Page 2: Special Message Section
Yamaha. This product should be used only with the components supplied or; a cart, rack, or stand that is recommended by Yamaha. If a cart, etc., is used, please observe all safety markings and instructions that accom- pany the accessory product. - Page 3 Yamaha service personnel. • Use the specified adaptor (PA-6 or an equivalent recommended by Yamaha) only. Using the wrong adaptor can result in damage to the instrument or overheating. • Before cleaning the instrument, always remove the electric plug from the outlet.
-
Page 4: Important Features
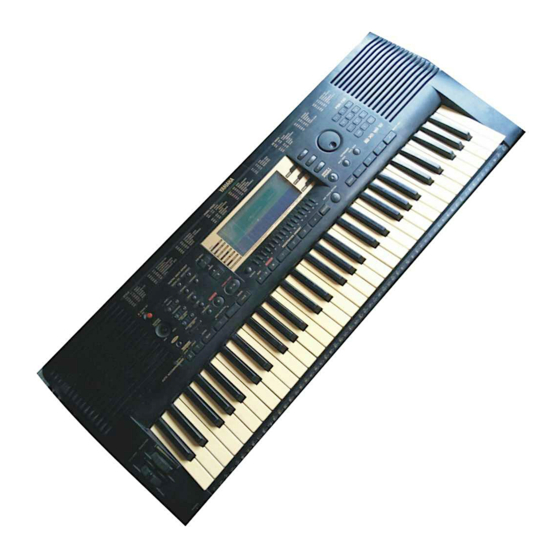
You are the proud owner of a fine electronic keyboard. The Yamaha PSR-730/630 PortaTone combines the most advanced tone generation technology with state-of-the-art digital electronics and features to give you stunning sound quality with maximum musical enjoyment. A large graphic display and easy-to-use interface also greatly enhance the operability of this advanced instrument. -
Page 5: Packing List
(page 121) MIDI templates for easy MIDI settings (page 129). XG is a new MIDI format created by Yamaha which significantly improves and expands upon the “GM Sys- tem Level 1” standard by providing a greater variety of high-quality voices plus considerably enhanced effect operation while being fully compatible with GM. -
Page 6: Table Of Contents
Panel Controls The Music Stand ... 7 Basic Display Operation The Display Icons ... 8 The Menus ... 10 Shortcuts ... 11 Setting Up Power Supply ... 12 Using An Optional AC Power Adaptor ... 12 Using Batteries ... 12 Connections ... - Page 7 Using Commercially Available Music Collections (Sold Separately) ... 66 The Sample Disk ... 66 Format ... 67 Save ... 68 Load ... 70 Disk Copy ... 72 Song Copy ... 73 Delete File ... 75 Song Playback Song Playback Procedure ... 76 Song Volume Control ...
-
Page 8: Panel Controls
Panel Controls PSR-730 STYLE 001 ~ 011 8BEAT 012 ~ 019 16BEAT 020 ~ 022 6/8 BALLAD 023 ~ 030 DANCE 031 ~ 034 DISCO 035 ~ 041 ROCK STAND BY MASTER VOLUME DEMO SYNC STOP START AUTO ACCOMPANIMENT PITCH BEND MODULATION PHONES CLICK... -
Page 9: The Music Stand
Top Panel Controls STAND BY/ON Switch ... page 14 MASTER VOLUME Control... page 14 DEMO Button ... page 14 TEMPO Buttons ... page 26 TRANSPOSE Buttons ... page 56 ACCOMPANIMENT/SONG VOLUME Buttons ... pages 29,78 AUTO ACCOMPANIMENT SECTION • AUTO ACCOMPANIMENT ON/OFF Button ... -
Page 10: Basic Display Operation
Basic Display Operation The PSR-730/630 LCD panel is a large multi-function type that simultaneously displays and provides access to a number of important parameters. Basic operation of the display as well as the MENU and SUB MENU buttons, and the meaning of the icons which appear in the display, are summarized briefly below. - Page 11 TEMPO Shows the current tempo of accompani- ment/song playback (page 26). TRANSPOSE The current transpose value (page 56). ACMP/SONG VOLUME In Song/Style Mode (page 11), the ac- companiment or song volume is displayed (pagse 29,78). REPEAT Indicates the “A” and “B” repeat points when programming a repeat section, and whether REPEAT PLAY is on or off (page 80).
-
Page 12: The Menus
Basic Display Operation The Menus MENU Main Menu Selection (VOICE/STYLE/SONG Buttons) You can select one of the three main VOICE/STYLE/SONG menus by pressing the appropriate button to the right of the display. The menu icon selected. Selecting Other Menus (MENU [ ], [ ] Buttons) You can select one of the seven “DISK”... -
Page 13: Shortcuts
There are two modes in the PSR-730/630: Style Mode and Song Mode, and normally one of them is selected. Pressing the STYLE button selects Style Mode, lighting the STYLE icon, while pressing the Song button selects Song Mode and lights the SONG icon, displaying the current mode. Style Mode * Pressing the START/STOP button will start accompaniment playback. -
Page 14: Setting Up
Follow the instructions below according to the power source you intend to use. Using An Optional AC Power Adaptor z Plug an optional Yamaha PA-6 Power Adaptor into a wall AC outlet. x Then plug the DC output cable from the PA-6 into the DC IN 10-12V jack on the rear panel of the PSR-730/630. -
Page 15: Connections
The sustain function causes the sound from a depressed key to continue, even after the key is released. Plug an optional Yamaha FC4 or FC5 footswitch into the sustain jack and use it to switch sustain on and off. The footswitch con-... -
Page 16: The Demonstration
The Demonstration Once you’ve set up your PSR-730/630, try listening to the pre-programmed demonstration songs. A total of 15 demo songs are provided. Switch ON Turn the power ON by pressing the [STAND BY/ON] switch. Set an Initial Volume Level Turn the [MASTER VOLUME] control up (clockwise) about a quarter-turn from its minimum position. - Page 17 Skip to the Beginning Of a Different Demo Song While the demonstration is playing you can select any of the demo songs by using the [–] and [+] buttons. Playback will skip to the beginning of the selected song. R & B Stop When Done Press the [DEMO] button or the [START/STOP] button to stop demo playback.
-
Page 18: Playing The Psr-730/630
Playing the PSR-730/630 The PSR-730/630 actually includes two voice sets: the “panel” voices and percussion kits, and the XG voices. The panel voices include 215 “pitched” voices (200 “pitched” voices for PSR-630) and 12 drum kits, while the XG voice set includes 480 voices. When an XG voice is selected, an XG icon of the display. -
Page 19: Selecting & Playing R1 Voices
Selecting & Playing R1 Voices Select the VOICE Menu Press the [VOICE] button so that the triangular indicator appears in the display next to “VOICE” to the right of the display. The number and name of the currently selected “R1” voice appears on the top right of the display panel when the VOICE menu is selected. - Page 20 Playing the PSR-730/630 One- or two-digit voice numbers can be entered without leading zeros. To select voice number “23”, for example, simply press the [2] button and then the [3] button. The bars below the voice number on the display will flash for a few seconds, and then disappear when the selected voice number has been recognized by the PSR- 730/630.
-
Page 21: Keyboard Percussion
Keyboard Percussion When one of the 12 panel DRUM KIT voices are selected you can play different drums and percussion instruments on the keyboard. The drums and percussion instruments played by the various keys are marked by symbols below the keys. S t d . -
Page 22: The Split Voice Mode
Playing the PSR-730/630 The Split Voice Mode The SPLIT VOICE mode lets you play different voices with the left and right hands. The “split point” forms a boundary on the keyboard with the R voice playing on the right side, and the L voice on the left. The SPLIT VOICE mode is engaged by pressing the [SPLIT VOICE] button. -
Page 23: Changing The Split Voice Split Point
Changing the SPLIT VOICE Split Point The SPLIT VOICE split point can be set to any key on the PSR-730/630 keyboard to match your individual playing requirements. Select the SPLIT VOICE Split Point Function Use the MENU [ ] and [ ] buttons to the left of the display to move the triangular indicator next to “OVERALL”... -
Page 24: Auto Accompaniment
Auto Accompaniment The PSR-730/630 has 100 different accompaniment “styles” from every musical type that can be used to provide fully-orchestrated or rhythm-only accompaniment. Just select one of the many styles available and play along. What is Auto Accompaniment? With the Auto Accompaniment feature, all you have to do is play the chords in your song and the accompaniment style that matches your music will automatically play along following the same chord progression. - Page 25 Find the style you want by referring to the style list (page 142), then pressing the [1]– [0] number buttons, enter the 1-3 digits of its style number. Example: Select style number “24” (Dance Pop 2) Press number buttons [2], [4] in sequence. D a n c e P o You can also change style numbers using the [+], [–] buttons or the Data Dial.
- Page 26 Auto Accompaniment Start with an introduction followed by the MAIN A section Press the [INTRO] button so that its indicator lights, press the MAIN/AUTO FILL [A] button (not necessary if its indicator is already flashing), then press [START/STOP]. SYNC STOP START IMENT Start with an introduction followed by the MAIN B section...
- Page 27 Play the Melody with the Accompaniment As soon as you play any chord that the PSR-730/630 can “recognize” on the left- hand section of the keyboard, the PSR-730/630 will automatically begin to play the chord along with the selected rhythm and an appropriate bass line. The name of the current chord will appear on the display.
-
Page 28: Changing Tempo
Auto Accompaniment Changing Tempo You can change the tempo for accompaniment or song playback. When you select a different style while the accompaniment is not playing, the “default” tempo for that style is also selected, and the tempo is displayed immediately above “TEMPO”... -
Page 29: Accompaniment Sections
Accompaniment Sections There are 8 types of Auto Accompaniment sections that allow you to vary the arrangement of the accompaniment to match the song you are playing. They are: Intro, Main A and B, Fill-in (AA, AB, BA, BB) and Ending. By switching between them while playing you can put together a single song. -
Page 30: Accompaniment Track Muting
Auto Accompaniment Accompaniment Track Muting The PSR-730/630 has eight accompaniment tracks — RHYTHM 1, RHYTHM 2, BASS, CHORD 1, CHORD 2, PAD, PHRASE 1, and PHRASE 2 — that you can control to modify the “orchestration” and therefore the overall sound of the accompa- niment. -
Page 31: Using Virtual Arranger
Using Virtual Arranger When the Virtual Arranger function is turned on while Auto Accompaniment is active, simply pressing chords in the auto accompaniment section causes the Auto Accompaniment to automatically play slightly different chord variations, which creates a livelier and more melodic accompaniment. Turning the Virtual Arranger function off returns to normal Auto Accompaniment. -
Page 32: Changing The Accompaniment Split Point
Auto Accompaniment Changing the Accompaniment Split Point The AUTO ACCOMPANIMENT split point (the boundary point between the melody section and accompaniment section) can be set to any key on the PSR-730/630 keyboard to match your individual playing requirements. Select the Accompaniment Split Point Function Use the MENU [ ] and [ ] buttons to the left of the display to move the triangular indicator next to “OVERALL”... -
Page 33: Interaction Between The Auto Accompaniment And Split Voice Split Points
Interaction Between the AUTO ACCOMPANIMENT and SPLIT VOICE Split Points The SPLIT VOICE split point (page 21) and AUTO ACCOMPANIMENT split point can be independently specified, with the following limitations. The SPLIT VOICE split point cannot be set at a lower key than the AUTO ACCOMPANIMENT split point (if you attempt to do this the AUTO ACCOMPANIMENT split point will be set to the same key as the SPLIT VOICE split point). - Page 34 Auto Accompaniment Then use the SUB MENU [ ] and [ ] buttons to select the “FingerMode” function from within the OVERALL menu. The abbreviated name of the current fingering mode will appear to the right of “FingerMode” on the top line of the display. F i n g e r M o Select the Required Fingering Mode Use the [–] and [+] buttons or Data Dial to select the desired fingering mode:...
- Page 35 The FINGERED 1 Mode F i n g e r M o The Fingered 1 mode lets you finger your own chords on the AUTO ACCOMPA- NIMENT section of the keyboard (i.e. all keys to the left of and including the split- point key —...
- Page 36 Auto Accompaniment Example for “C” chords Csus Caug (#11) The FINGERED 2 Mode F i n g e r M o This is essentially the same as the FINGERED 1 mode, described above, except that the FINGERED 2 mode additionally allows you to specify the lowest note of each chord —...
-
Page 37: The Stop Accompaniment Function
The MULTI-FINGER Mode (Multi) F i n g e r M o This is the default accompaniment mode. The MULTI-FINGER mode auto- matically detects SINGLE FINGER or FINGERED 1 chord fingerings, so you can use either type of fingering without having to switch fingering modes. The Stop Accompaniment Function While the SINGLE FINGER, FINGERED 1, FINGERED 2, or MULTI-FIN- GER mode is selected chords played in the AUTO ACCOMPNIMENT section of... -
Page 38: Applying Groove & Dynamics
Auto Accompaniment Applying Groove & Dynamics When you press the [GROOVE & DYNAMICS] button, the GROOVE & DYNAM- ICS icon will light, and the Groove & Dynamics effect will be applied to the accompaniment. G r a Arranging the Groove & Dynamics Effect (User Settings) You can arrange any of the Groove &... - Page 39 Beat Groove Template List The templates in this list shift the timing of the accompaniments by beats. These templates add lifelike effect to your accompaniments by converting a specific beat to another and slightly shifting the converted beat. Name: Indicates each template name. No.1"Thru”...
- Page 40 Auto Accompaniment Measure Groove Template List The templates in this list shift the timing of the accompaniments by measures. These templates add lifelike effect to your accompaniments by hastening or delaying the timing of the first beat of every measure. Name: Indicates each template name and content.
- Page 41 Name Thru 8beat_on 8beat_off 16beat_on 16beat_off 2nd Beat_Off Dance Disco Techno Fusion Reggae BossaNova Tango Rhumba Bass Rhumba Chord Latin Samba Set the Dynamics Rate The Dynamics Rate sets the amount of the Dynamics template applied to the PSR- 730/630 within the range, 0-100%. Use the SUB MENU [s] and [t] buttons to select the “DynamcsRate”...
-
Page 42: One Touch Setting
Auto Accompaniment Set the Boost Rate The Boost Rate strengthens or weakens the Accompaniment by offsetting the velocity value of the Style data, within the range, 0-100 (original)-400%. Use the SUB MENU [s] and [t] buttons to select the “BoostRate” function from within the GROOVE &... -
Page 43: Select A Style
Select a Style Select the STYLE menu and select an accompaniment style as described on page Press the [ONE TOUCH SETTING] Button Press the [ONE TOUCH SETTING] button. The ONE TOUCH SETTING and REGIST [1] icons will appear in the display, and the One Touch Setting type 1 panel settings will be recalled. -
Page 44: Digital Effects
Digital Effects With the digital effects built into the PSR-730/630 you can add ambiance and depth to your music in a variety of ways—such as adding reverb that makes you sound like you are playing in a concert hall or adding harmony notes for a full, rich sound With the PSR-730, you can take advantage of even more sophisticated features like the Multi Effect function that lets apply several effects together or the Digital Equalizer that lets you adjust volume for each of 5 frequency bands. -
Page 45: Reverb
Reverb If you press the [REVERB] button, the REVERB icon will light up, and the Reverb effect will be turned on. After setting the Reverb type, the effect will be applied to the R1 voice from the keyboard. REVERB Selecting a Reverb Type Select one of the 13 Reverb types. -
Page 46: Chorus
Digital Effects Chorus If you press the [CHORUS] button, the CHORUS icon will light up, and the Chorus effect will be turned on. After setting the Chorus type, the effect will be applied to the R1 voice from the keyboard. Selecting a Chorus Type Select one of the 10 Chorus types. -
Page 47: Dsp
If you press the [DSP] button, the DSP icon will light up, and the DSP effect will be turned on. After setting the DSP type, the effect will be applied when you play the R1, R2 and L voice from the keyboard. Select the DSP Type The PSR-730/630 features an extensive range of 46 DSP (Digital Signal Processor) effects. -
Page 48: Dsp Return Level
Digital Effects Use the MENU [ ] and [ ] buttons to move the triangular indicator in the display next to “DIGITAL EFFECT”. Then use the SUB MENU [ ] and [ ] buttons to select “DSP”. After a few seconds the name of the currently selected DSP effect will appear on the right of the top line of the display. -
Page 49: Harmony
Harmony If you press the [HARMONY] button, the HARMONY icon will light up, and the Harmony effect will be turned on. After setting the Harmony type, it will be applied to the R1 voice. The Harmonies except for the types 6, 7 and 9 are applied to the R1 voice according to the chords detected in the Accompaniment section. -
Page 50: Adjusting The Harmony Volume
Digital Effects Adjusting the Harmony Volume The volume of the harmony sound in relation to the keyboard sound can be adjusted for Harmony types 1 through 16 as follows: Use the MENU [ ] and [ ] buttons to move the triangular indicator in the display next to “DIGITAL EFFECT”, then use the SUB MENU [ ] and [ ] buttons to select “Harm.Vol”. -
Page 51: Applying Multi Effect (Psr-730)
Applying Multi Effect Pressing the [MULTI EFFECT] button will cause the Multi Effect icon to light on the display. After making part settings for Effect 1/2 and type settings, the Multi Effect will be applied. Setting Parts for Effect 1/2 Select a part each for Effect 1 and Effect 2 Effect 1 ... -
Page 52: Select The Effect Type For Effect 1/2
Digital Effects Select the Effect Type for Effect 1/2 Select one of the 42 effect types for Effect 1 and Effect 2 Use the MENU [ ] and [ ] buttons to move the triangular indicator in the display next to “DIGITAL EFFECT”. The icon for “DIGITAL EFFECT” will light. Then use the SUB MENU [ ] and [ ] buttons to select “Effect1”... -
Page 53: The Digital Equalizer (Psr-730)
The Digital Equalizer Usually an equalizer is used to correct the sound output from amps or speakers to match the special character of the room. The sound is divided into several frequency bands, then by raising or lowering the level for each band, the correction is made. Adjusting the sound you play according to the genre—classical music more refined, pops music more crisp, and rock music more dynamic—can also serve to draw out the special characteristics of the music and make your performance more enjoyable. -
Page 54: Selecting A Digital Eq Type
Digital Effects Selecting a Digital EQ Type. Select one of the 5 Digital EQ types. Use the MENU [ ] and [ ] buttons to move the triangular indicator in the display next to “DIGITAL EFFECT”. Then use the SUB MENU [ ] and [ ] buttons to select “EQ Type”. The name of the currently selected Digital EQ type will appear on the right of the top line of the display. -
Page 55: Setting The Gain (User Setting)
Setting the Gain (User Setting) You can change the settings for any of the 5 preset equalizer types, adjusting the output to meet your own needs. Select the equalizer type you wish to use as a base for your settings, then use the SUB MENU [ ] and [ ] buttons to select “LowGain”.The current LowGain value for the type you selected will be shown on the right of the upper line of the display. -
Page 56: The Pitch Bend Wheel
The Pitch Bend Wheel Use the PSR-730/630 pitch bend wheel to bend notes up (roll the wheel away from you) or down (roll the wheel toward you) while playing the keyboard. The pitch bend wheel is self- centering and will automatically return to nornal pitch when released. Setting the Pitch Bend Range The maximum pitch bend range can be set via the PITCH BEND RANGE function in the OVERALL function group. -
Page 57: The Modulation Wheel (Psr-730)
The Modulation Wheel The Modulation function applies a vibrato effect to notes played on the keyboard (R1, R2, L voices). Rolling the MODULATION wheel all the way towards yourself minimizes the depth of the effect, while rotating it away from yourself increases it. Changing the Modulation Wheel Function It’s possible to change the effect that is applied when you rotate the MODULA- TION Wheel. -
Page 58: Transpose
Transpose This functions allow the overall pitch of the PSR-730/630 to be transposed up or down by a maximum of one octave in semitone increments. Setting Transposition Use the TRANSPOSE [ ] and [ ] buttons to set the desired degree of transposi- tion. -
Page 59: Registration Memory
Registration Memory The PSR-730/630 Registration Memory feature can be used to memorize 128 complete control-panel setups (32 banks, 4 setups each) that you can recall whenever needed. • The PSR-730/630’s initial Registration Memory [1]–[4] settings (when it shipped from the factory) are the same panel settings as when the power switch is first turned on. -
Page 60: Naming The Registration Banks
Registration Memory On the PSR-730, there are BANK [ ] and [ ] buttons. Pressing these buttons will directly bring up the registration bank sub menu (example: Bank 1) of the “Regist Memory”, main menu item, and all you have to do is add the correct number. Register the Settings While holding the [MEMORY] button, press one of the REGISTRATION MEMORY buttons —... - Page 61 Referring to the information below, use the [1]–[0] number buttons, the [+], [–] buttons or the Data Dial to enter the name. [+]... Select letter (cursor moves right) [–] ... Select letter (cursor moves left) Dial ... Change Character [1]–[0] ... ”Jump” entry [Character List] •...
-
Page 62: Recall The Registered Panel Settings
Registration Memory Recall the Registered Panel Settings Simply select the appropriate bank as described above, then press the desired REGISTRATION MEMORY button at any time to recall the memorized settings. The corresponding Registration Memory number will appear above “REGISTRATION” in the display, and the appropriate setting changes will appear in the display. B a n k 0 3 : The Accompanient Freeze Function When the FREEZE function is engaged, the accompaniment parameters listed... -
Page 63: The Multi Pads
The Multi Pads The PSR-730/630 MULTI PADS can be used to play a number of short pre-recorded rhythmic and melodic sequences that can be used to add impact and variety to your keyboard performances. You can also record your own MULTI PAD phrases as described in “MULTI PAD Recording”... -
Page 64: Playing The Multi Pads
The Multi Pads Playing the MULTI PADs Simply tap any of the MULTI PADs at any time to play back the corresponding phrase at the currently set tempo. MULTI PAD playback begins as soon as the button is pressed. You can even play two, three, or four MULTI PADs at the same time. Also, you can create “retriggered sample”... -
Page 65: Turning The Chord Match Function On/Off
Turning the CHORD MATCH Function On/Off The CHORD MATCH function can be individually turned on or off for each of the MULTI PADs, as described below. Select the MULTI PAD Function Use the MENU [ ] and [ ] buttons to select the MULTI PAD function so that the triangular indicator in the display appears next to “MULTI PAD”... -
Page 66: Disk Operations
Disk Operations There is a disk drive installed in the PSR-730/630. By inserting a floppy disk into it, you can do many things: record and playback user songs, save and load user styles (page 98), user pads (page 106), or registration memory data (page 57). You can save any number of user styles and registration data on floppy disks, make song libraries or find many other ways to make playing the PSR-730/630 more efficient. -
Page 67: User Song Data
User Song Data User song data is saved directly to the disk without saving it in the PSR-730/630 itself. User Song User Style/User Pad/Registration Memory Data The PSR-730/630 has User Style, User Pad and Registration Memory functions installed. The data recorded with these functions can also be saved individually or gathered together to floppy disks and also the data (files) saved on disks can be loaded individually or gathered together into the PSR-730/630. -
Page 68: Using Commercially Available Music Collections (Sold Separately)
(Sold Separately) The PSR-730/630 can playback commercially available XG/GM music collection or YAMAHA DOC collection (Disk Orchestra Collection) disk files. It can also load styles collected on YAMAHA style file disks. The PSR-730/630 can handle music disks (floppy disks) that bear the following... -
Page 69: Format
Format Setting up commercially available floppy disks (3.5 inch, 2HD/2DD type) for use with the PSR-730/630 is called formatting Follow the steps below to format a disk. Insert the Disk into the Disk Drive Insert a commercially available 3.5 inch floppy disk (unformatted) into the disk drive, with the shutter on the disk towards the drive, and with the label side facing upward. -
Page 70: Save
Disk Operations Save You can save PSR-730/630 user styles, user pad (banks 37-40) and registration memory data (banks 01-32) on floppy disks. Insert a Formatted Floppy Disk. If a disk has not been already inserted in the drive, insert a formatted floppy disk. Select a Save Function SUB MENU MENU... - Page 71 Save File Confirmation Use the SUB MENU [ ] button so that “Save File...” appears on the display, showing the new file the data will be saved to. S a v e F i l To overwrite the data already saved to an existing file, use the [–] and [+] buttons or the Data Dial to select the file you want to overwrite.
-
Page 72: Load
630. You can also load style data from the included Sample Disk or commercially available Yamaha Style File disks. Insert the Floppy Disk into the Disk Drive. Insert the floppy disk that has the data you want to load into the floppy disk drive. - Page 73 Select the Data to Be Loaded If Necessary If the file type selected in step 4 was “Style,” “Pad,” or “Regist,” press the SUB MENU [ ] button so that the sub menu “Source:...” (load data selection screen) is displayed. S o u r c e : By setting the “source”...
-
Page 74: Disk Copy
Disk Operations Execute the Load Operation E x e c u t e ? Press the [+] (YES) button, and the load operation will start. Once started, the operation can’t be canceled. As the file is loading, “Now Loading” will appear on the top line of the display. N o w L o a d When the load operation is finished, the display will return to the “Load From Disk? YES”... -
Page 75: Song Copy
Press the [+] (YES) Button Make sure that the disk you wish to copy from (source disk) is inserted in the disk drive, then press the [+] (YES) button. “Now Reading” will appear on the display. N o w R e a d The contents of the disk will be copied to the PSR-730/630, and when reading is finished, “Insert Copy Disk”... - Page 76 Disk Operations Select a Song Copy Function Use the MENU [ ] and [ ] buttons to select the Disk function so that the triangular indicator in the display appears next to “DISK” to the left of the display. Use the SUB MENU [ ] and [ ] buttons so that “Song Copy? YES” appears on the display.
-
Page 77: Delete File
Delete File You can delete saved data (User Songs, User Styles, User Pads, or Registration Memory) from the floppy disk in file units. Insert the Floppy Disk into the Disk Drive Insert the disk with the files you want to delete into the disk drive. Select a Delete File Function Use the MENU [ ] and [ ] buttons to select the Disk function so that the triangular indicator in the display appears next to “DISK”... -
Page 78: Song Playback
Song Playback You can playback a wonderful variety of songs on the PSR-730/630, including the preset demo songs, the songs on the included Sample Disk, the User Songs you record on a floppy disk and the songs on commercially available XG/GM song collection disks. Except for the preset demo songs, a floppy disk must be inserted in the disk drive to playback a song. - Page 79 The songs will be displayed in sequence, as follows: Demo Song (001) m Disk Song (001) m Demo Song (001)... Selecting a Disk Song Quickly When selecting a Demo Song, hold the [3] button down until the enter the Disk Song number using the [1]–[0] number buttons. Example) Selecting Disk Song number 2 Press [3] and hold until the DISK icon lights Press [2]...
-
Page 80: Song Volume Control
Song Playback Song Volume Control The volume of song playback can be adjusted for the best balance in relation to notes from the keyboard. While in Song Mode (the SONG VOLUME [ ] and [ ] buttons. When either button is pressed the current song volume setting will appear on the top line of the display for a few seconds. -
Page 81: Minus-One Practice
Minus-one Practice You can turn-off (mute) any of the parts of a song while it is playing, then practice playing that part yourself along with the other tracks of the song. This is called Minus- one playback. Choose any one of the demo or sample disk songs, press one of the TRACK buttons 1-16 below the display, muting the part you want to play, and then try playing yourself. -
Page 82: Repeat Play
Song Playback Repeat Play This function allows you to specify any section of a Demo or Sample disk song for continuous repeat playback. Select the A-B Repeat Parameter While the SONG menu is selected, but no recording is in progress, use the SUB MENU [ ] and [ ] buttons to select the “A-B Repeat”... -
Page 83: Song Repeat
Song Repeat The Song Repeat feature is handy when you want to repeat playback of a particular song. Select a Song Number To select the song, see (page 76). Turn on the Song Repeat After making sure that the “SONG” menu is selected, use the SUB MENU [ ] and [ ] buttons so that “SongRepeat”... -
Page 84: Next Song
Song Playback Next Song The Next Song feature is handy when the next song you want to play isn’t the one with the next song number. Select the first song you want to play To select the song, see (page 76). Select the next song After making sure that the “SONG”... -
Page 85: Song Recording
Song Recording You can record your own music performance on a floppy disk as a user song. • User Songs are recorded on floppy disks. They can’t be recorded unless a floppy disk is in- serted into the disk drive. •... -
Page 86: Quick Recording Procedure
Song Recording Quick Recording Procedure With quick recording, you can use 5 tracks for recording each song. ACMP track ... Used to record auto accompaniment notes (such MELODY 1–4 track ... Used to record keyboard melody notes. Insert Floppy Disk and Change to Record Mode Insert the floppy disk you will use to record the user song into the floppy disk drive. - Page 87 Select the SONG Record Mode Press the [SONG] button to select the SONG record mode. The SONG menu icon will light. The beat indicator dots will flash at the currently set tempo, indicating that the record ready (Synchro Start) mode is engaged. The track bars for MELODY 1–4 and ACMP tracks will flash at the bottom of the display (Record Ready Mode).
-
Page 88: Rehearsal Mode
Song Recording PHRASE PHRASE Recording the ACMP track If you press the TRACK button below the ACMP track, the ACMP track bar will light and the ACMP track will be selected as the recording track. (If you do this when AUTO ACCOMPANIMENT is off, AUTO ACCOMPANIMENT will automatically be turned on.) PHRASE PHRASE... -
Page 89: Stop Recording
• Before actually starting to record you can try playing the PSR-730/630 the way it is set up by using the “Rehearsal Mode”: press the [SYNC START] button to temporarily disen- gage the record ready mode, rehearse as necessary, then press the [SYNC START] button again to return to the record ready mode. -
Page 90: Multi Recording Procedure
Song Recording Multi Recording Procedure With Multi Recording, you can record up to 16 tracks for a single song. The default settings for the tracks are as follows: Track 1 ... For recording keyboard playing (R1 part). Track 2 ... For recording keyboard playing (R2 part). Track 3 ... - Page 91 Press the TRACK button to select one of the tracks 1–16 for recording. For example, if you press the Track button below the track 1, the track 1 bar will light, showing that the track 1 is selected for recording. If you press the same TRACK button once again, the track bar will go out and that track will not be recorded.
-
Page 92: About The Recording With The Digital Effects Applied
Song Recording The harmony notes (type 7–16) can be recorded to the tracks 6–8. To record harmony notes, first turn Harmony on and then press the TRACK buttons numbered 6–8 to select 6–8 tracks for recording. HARMONY RHYTHM ACCOMPANIMENT ON / OFF Start/Stop Recording Record the track(s) in the same way as steps 5-7 for Quick Recording. - Page 93 DSP type effects can be set and recorded for R1/R2/L part(s) when used as System effect and for R1 part when used as Insertion effect. They can’t be recorded for the track used as the Accompaniment and/or Harmony part. During playback, only the latest setting will be effective if several types are used for the tracks in a song (the latest setting priority).
-
Page 94: Punch In/Punch Out
Song Recording The data recorded on tracks for keyboard playing (R1/R2/L) can be re-recorded in parts with the Punch In/Punch Out feature. Before re-recording Recording start (Punch In) After Re-recording Previously played data In the Record Ready Mode (page 88) for the track you will re-record or in the Rehearsal Mode, use the SUB MENU [ ] and [ ] buttons so that “Punch In:Off”... -
Page 95: Quantize
With the Quantize feature, the timing of data recorded in a user songs can be adjusted. In the Record Ready Mode for the track you want to quantize (page 88) or in the Rehearsal Mode, use the SUB MENU [ ] and [ ] buttons so that “Quantize: YES” appears on the display. -
Page 96: Naming User Songs
Song Recording You can give your own name (8 characters or less) to user songs. In the Record Ready Mode (pages 84, 88) for the song you want to name, or in the Rehearsal Mode, use the SUB MENU [ ] and [ ] buttons so that “Song Name” appears on the display. - Page 97 Use the TRACK buttons to select the track you want to clear. The track bar for the track you selected will light steadily and the track bars for the other tracks will be turned off. Quick Record RHYTHM RHYTHM BASS CHORD CHORD ACCOMPANIMENT TRACK...
-
Page 98: Song Edit
Song Recording Clearing an Entire Song Use the song selection sub menu (pages 85, 88) to be sure that you have selected the song that you want to clear. While the SONG record-ready or rehearsal mode (page 87) is engaged use the SUB MENU [ ] and [ ] buttons to select the “Song Clear? YES”... - Page 99 Press the TRACK button to select the track you will edit. The track bar for the selected track will light. RHYTHM RHYTHM BASS CHORD CHORD ACCOMPANIMENT TRACK Use the SUB MENU [ ] button so that the voice parameter you wish to change appears on the display.
-
Page 100: Style Recording
Style Recording The PSR-730/630 lets you record up to three original “user styles” which can be used for auto- accompaniment in the same way as the preset styles. The user styles are recorded as style numbers 101, 102, 103, and 104, and each style can be recorded with the full complement of 8 tracks (RHYTHM 1, RHYTHM 2, BASS, CHORD 1, CHORD 2, PAD, PHRASE 1, PHRASE 2) and 5 sections (INTRO, MAIN A, MAIN B, ENDING, FILL). - Page 101 Engage the Record Ready Mode Press the [RECORD] button to engage the record ready mode. The [RECORD] button indicator will light, and the SONG, STYLE, and MULTI PAD [1] … [4] icons will flash, indicating that you must select one of the corresponding record modes.
- Page 102 Style Recording If Necessary, Select a User Style Number If the desired user style is not already selected, use the [–] and [+] buttons, [1]–[0] number buttons, or the Data Dial to select it. Select a Section to Record Press the [INTRO], MAIN [A]/[B], [ENDING], or [FILL] button to select a section for recording.
-
Page 103: Rehearsal Mode
RHYTHM RHYTHM Rehearsal Mode If the [SYNC START] button is pressed while in Record Ready Mode, it will be canceled (the beat lamps will go out) and the PSR-730/630 will enter Rehearsal Mode. In this mode, you can try playing your song before actually recording it. - Page 104 Style Recording Observe the following rules when recording the MAIN and FILL sections: • Use only the CM7 scale tones when recording the BASS and PHRASE tracks (i.e. C, D, E, G, A, and B). • Use only the chord tones when recording the CHORD and PAD tracks (i.e. C, E, G, and B).
-
Page 105: Drum Cancel
Drum Cancel This function makes it possible to erase specific drum instruments from the RHYTHM 1 and RHYTHM 2 tracks. It’s handy, for example, when you want to erase just the bass drum recorded on the RHYTHM 1 track. While recording either the RHYTHM 1 or RHYTHM 2 track, use the SUB MENU [ ] and [ ] buttons to select “Drum Cancel”. -
Page 106: Naming Styles
Style Recording Quantize Value Quarter note Quarter note triplet Eighth note Eighth note triplet Sixteenth note Sixteenth note triplet Thirty-second note Press the SUB MENU [ ] button once so that “Execute? NO/YES” appears on the display. Then press the [+] (YES) button to execute the quantize function, or the [–] (NO) button to cancel (the display will return to “Quantize? YES”). -
Page 107: Clearing User Style Data
Clearing User Style Data This function makes it possible to clear unneeded data from the PSR-730/630 User Style tracks. Clearing an Entire Style While the STYLE record-ready or rehearsal mode is engaged use the SUB MENU [ ] and [ ] buttons to select the “All Clear? YES” function, then press the [+] (YES) button: “Are You Sure? NO/YES”... -
Page 108: Multi Pad Recording
Multi Pad Recording In addition to the preset MULTI PAD sets, the PSR-730/630 has 16 user-recordable sets that you can use to store your own creations. • Material recorded in the MULTI PADs will be retained even after turning the power off. - Page 109 Select the MULTI PAD Record Mode Press any MULTI PAD button ([1] … [4]) to select the MULTI PAD record mode (the MULTI PAD button you press will be selected for recording). The MULTI PAD menu will automatically be selected and a user pad set number will appear on the top line of the display.
- Page 110 Multi Pad Recording Record Recording will begin as soon as you play a note on the keyboard (synchro start) or press the [START/STOP] button, and the BEAT indicator dots will begin to indicate the current beat as in the Auto Accompaniment mode. If you are recording a Chord Match phrase, be sure to base your phrase on a CM7 chord to ensure proper Chord Match operation.
-
Page 111: Naming Pads
Naming Pads You can give your own name (8 characters or less) to user pad sets. With the Pad Record Ready Mode (or Rehearsal Mode) engaged and the target Pad set selected, use the SUB MENU [ ] and [ ] buttons so that “Pad Naming...” appears on the display. -
Page 112: Revoicing
Revoicing The PSR-730/630 REVOICE function lets you change the following parameters for the R1, R2 and L voices and the AUTO ACCOMPANIMENT tracks. Revoice Parameters Parameter Display Voice Voice Name Volume Volume Octave Octave Reverb Depth RevDepth Chorus Depth ChoDepth DSP Depth DspDepth Revoicing the R1, R2, and L Voices... - Page 113 If Necessary Select a Voice to Revoice Use the three rightmost TRACK buttons to select the voice you want to revoice: L, R2, or R1. The selected tracks will be bracketed by two horizontal bars. Select and Edit the Revoice Parameters Use the SUB MENU [ ] and [ ] buttons to select the desired parameter.
-
Page 114: Revoicing A Style
Revoicing Revoicing a Style Select the STYLE REVOICE Mode While the STYLE menu and the style you want to revoice are selected, press the [REVOICE] button (actually, the order here is not important: you can also press the [STYLE] button after pressing the [REVOICE] button). The [REVOICE] button indicator will light and the RHYTHM 1 track will be bracketed by two horizontal bars (i.e. - Page 115 Select and Edit the Revoice Parameters Use the SUB MENU [ ] and [ ] buttons to select the desired parameter. The name of the selected parameter will appear on the top line of the display to the right of the parameter’s current value. Use the [–] and [+] buttons, the number buttons, or the data dial to set the parameter’s value as required.
-
Page 116: Overall Functions
Overall Functions Some of the functions in the OVERALL function group have already been described in appropriate sections of this manual. Others will be introduced for the first time in this section. Refer to the chart below for the page numbers on which each function is described. The chart also lists the full name of each function, the abbreviated name which appears on the display, and the available settings or range of settings. -
Page 117: Touch Sensitivity
Touch Sensitivity This function sets the keyboard touch sensitivity. The range is from “0” to “127”. The higher the value the higher the sensitivity. When the touch sensitivity value is set to “0”, “Off” appears in the display and the same volume is produced no matter how hard you play the keys. -
Page 118: Song Transpose
Overall Functions Song Transpose This function allows you to transpose only the song to be played back. That means you can play along with your desired song (Minus-one function) in the desired key without affecting your performance. S o n g T r a n Metronome When turned “on”... -
Page 119: Pedal
Pedal The various functions can be assigned to the Pedals 1/2: the footswitch connected to the SUSTAIN jack (Pedal 1) and the foot controller connected to the FOOT VOL. jack (Pedal 2) on the rear panel. Select the Functions to Be Controlled by the Pedals Select one of the 16 functions that can be controlled by Pedal 1, and one of the 24 functions that can be controlled by Pedal 2. - Page 120 Overall Functions Only Pedal 2 Functions EXPRESSION R1 VOLUME R2 VOLUME L VOLUME ACMP/SONG VOLUME HARMONY VOLUME BRIGHTNESS RESONANCE Polarity Change (Normal/Reverse) You can change the polarity of PEDAL 1/2 (foot switch/foot controller). For example, when you are controlling volume with the foot controller, you can set whether it increases or decreases when you step on the pedal.
-
Page 121: Midi Functions
MIDI Functions In the rear panel of your PSR-730/630, there are MIDI terminals (MIDI IN, MIDI OUT), a TO HOST terminal, and a HOST SELECT switch. By using the MIDI functions you can expand your musical possibilities. This section explains what MIDI is, and what it can do, as well as how you can use MIDI on your PSR-730/630. - Page 122 MIDI Functions MIDI is an acronym that stands for Musical Instrument Digital Interface, which allows electronic musical instruments to communicate with each other, by sending and receiving compatible Note, Control Change, Program Change and various other types of MIDI data, or messages. The PSR-730/630 can control a MIDI device by transmitting note related data and various types of controller data.
-
Page 123: Midi Terminal/To Host Terminal
QY700, etc. MIDI Functions • When using the TO HOST terminal to connect to a personal computer using Windows, a Yamaha MIDI driver must be installed in the personal computer. The Yamaha MIDI driver can be obtained at Yamaha’s home page on the World Wide Web, <http://www.yamaha.co.jp/... -
Page 124: Connecting To A Personal Computer (To Host Terminal/Host Select Switch)
MIDI Functions Play music from another keyboard (no tone generator) using the PSR-730/630 XG tone generator. PSR-730/630 MIDI receive settings (page 126). Record performance data (1-16 channels) using the PSR-730/630 Auto Accompa- niment and Multi Pad features on a external sequencer (such as a personal computer). - Page 125 Computer (sequencer software) MIDI OUT MIDI IN When using a MIDI interface with a Macintosh series computer, connect the RS- 422 terminal of the computer (modem or printer terminal) to the MIDI interface, then connect the MIDI OUT terminal on the MIDI interface to the MIDI IN terminal of the PSR-730/630, as show in the diagram below.
-
Page 126: Connect Using The To Host Terminal
MIDI Functions Connect using the TO HOST terminal Connect the serial port of the personal computer (RS-232C terminal or RS-422 terminal) to the TO HOST terminal of the PSR-730/630. For the connection cable, use the cable below (sold separately) that matches the personal computer type. -
Page 127: The Psr-730/630 Midi Functions
The PSR-730/630 MIDI Functions The PSR-730/630 has the following MIDI functions. Function Display Transmit Channel TransmitCh~ Transmit Track TransmitTr Receive Channel Receive Ch Receive Mode ReceiveMode Normal, Off, Remote, Bass, Chord Local Control Local~~~ External Clock Ext.Clock Initial Data Send Init.Send Template Template... -
Page 128: Receive Channel & Receive Mode
MIDI Functions Transmit Track The “Transmit Tr” function selects the track to be transmitted via the transmit channel specified by the Transmit Channel function, above. The available settings are as follows: T r a n s m i t Right1 Right-hand keyboard playing (R1 voice) Right2 Right-hand keyboard playing (R2 voice) -
Page 129: Local Control
Receive Mode The “ReceiveMode” function specifies the receive mode for the channel selected via the Receive Channel function, above. The receive mode settings are as follows: R e c e i v e M o d e : N o r m a l Normal Received MIDI data is sent directly to the PSR-730/630 tone generator. -
Page 130: Clock
MIDI Functions Clock Reception of an external MIDI clock signal can be enabled or disabled as required. When disabled (“Off”), all of the time-based functions (Auto Accompaniment, SONG recording and playback, etc.) are controlled by its own internal clock. When MIDI clock reception is enabled (“On”), however, all timing is controlled by an external MIDI clock signal received via the MIDI IN terminal (in this case the PSR-730/630 TEMPO setting has no effect). -
Page 131: Midi Template
MIDI Template The MIDI settings can be collected into a template (pattern). Just by selecting the template that fits your purpose, you can set all the MIDI settings in one operation. Use the MENU [ ] and [ ] buttons to select the MIDI menu so that the triangular indicator in the display appears next to “MIDI”... -
Page 132: Appendix
Appendix PSR-730/630 Display MENU/SUB MENU Structure MENU VOICE STYLE STYLE REC SONG SONG REC SUB MENU Grand Piano (R1 voice name) ... R1 voice selection ... 17 8Beat Pop1 (Style name) ... Accompaniment style selection ... 22 V.Arranger ... Virtual Arranger on/off ... 29 UserSty1 ... - Page 133 MENU DISK Load From Disk? ... Loading data from a disk ... 70 Save To Disk? ... Saving data to a disk ... 68 Format Disk? ... Formatting a disk ... 67 Disk Copy? ... Copying disk ... 72 Song Copy? ... Copying a song in a disk ... 73 Delete File? ...
- Page 134 PSR-730/630 Display MENU/SUB MENU Structure MENU OVERALL GROOVE & DYNAMICS (PSR-730) • Sub-menu items with “ jump directly to the associated sub-menu function). In addition to the shortuts listed above, the [DUAL VOICE] button can be held to jump to the R2 voice revoice function, and the [SPLIT VOICE] button can be held to jump to the L voice revoice function.
-
Page 135: Voice List
Voice List Maximum Polyphony The PSR-730 has 64-note maximum polyphony and the PSR-630 has 32. Auto Accompaniment uses a number of the available notes, so when Auto Accompaniment is used the total number of notes that can be played on the keyboard is correspondingly reduced. - Page 136 Voice List MIDI Bank Select Voice Program Change Number Number Ensemble Solo Brass Brass Ensemble Reed Voice Voice Name Number Contrabass Harp Hackbrett Shamisen Koto Sitar Banjo Strings OrchStrings Symphon. Str SlowStrings Str.Quartet ConcertoStr MarcatoStrs ChamberStrs Mellow Orch TremoloStrs PizzStrings Syn Strings Analog Strs Choir...
-
Page 137: Voice List
[PSR-630] Panel Voice List MIDI Bank Select Voice Program Change Number Number Piano Grand Piano BrightPiano Honky Tonk Midi Grand CP 80 Galaxy EP DX Modern Funk EP Modern EP Hyper Tines New Tines Venus EP Tremolo EP Rock Piano Clavi Wah Clavi Harpsichord... - Page 138 Voice List MIDI Bank Select Voice Program Change Number Number Solo Brass Brass Ensemble Reed Pipe Synth Lead Voice Voice Name Number SoloTrumpet SoftTrumpet Flugel Horn Muted Trp Trombone MelTrombone French Horn Tuba BigBandBrs BrasSection MellowBrass Small Brass Pop Brass MellowHorns BallroomBrs Full Horns...
- Page 139 [PSR-730/630] XG Voice List MIDI PSR-730 PSR-630 Bank Select Program Voice Voice Voice Name Change MSB LSB Number Number Number Piano 228 213 GrandPno 229 214 GrndPnoK 230 215 MelloGrP 231 216 PianoStr 232 217 Dream 233 218 BritePno 234 219 BritPnoK 235 220 E.Grand...
- Page 140 Voice List MIDI PSR-730 PSR-630 Bank Select Program Voice Voice Voice Name Change MSB LSB Number Number Number 410 395 60sStrng 411 396 Orchestr 412 397 Orchstr2 413 398 TremOrch 414 399 VeloStr 415 400 Strings2 416 401 S.SlwStr 417 402 LegatoSt 418 403 Warm Str...
- Page 141 MIDI PSR-730 PSR-630 Bank Select Program Voice Voice Voice Name Change MSB LSB Number Number Number 597 582 Ring Pad 598 583 Ritual 599 584 ToHeaven 600 585 Night 601 586 Glisten 602 587 BelChoir 603 588 Echoes 604 589 EchoPad2 605 590 Echo Pan...
-
Page 142: Drum Kit List
Drum Kit List • “<——” indicates that the drum kit is the same as “Standard Kit1”. • Each percussion voice uses one note. • The note numbers and note names printed on the keyboard are one octave higher than the MIDI note numbers and note names shown in the list. - Page 143 PSR-730 Voice# PSR-630 Voice# Bank MSB# Bank LSB# Program Change# MIDI Dance Kit Note# Note C#-1 <—— <—— <—— <—— D#-1 <—— <—— <—— <—— <—— <—— F#-1 <—— <—— <—— <—— G#-1 <—— <—— <—— <—— A#-1 <—— <—— <——...
-
Page 144: Style List
Style List Name 8BEAT 8Beat Pop 1 8Beat Pop 2 8Beat Uptempo 8Beat Standard Folkrock Pop Rock 1 Pop Rock 2 8Beat Medium 8Beat Ballad Epic Ballad Piano Ballad 16BEAT 16Beat Pop 16Beat Shuffle 1 16Beat Shuffle 2 16Beat Ballad 1 16Beat Ballad 2 16Beat Ballad 3 Funk 1... -
Page 145: About Digital Effects (Reverb/Chorus/Dsp)
About Digital Effects (Reverb/Chorus/DSP) There are three types of digital effects installed in the PSR-630: the reverb effect (system effect), the chorus effect (system effect) and the DSP effect (can be set as either as a system effect or insertion effect). In the PSR-730, the Multi Effect (EFFECT 1/2: insertion) is added to the three PSR-630 effects, for a total of five effects. -
Page 146: When Dsp Type Is Selected As A Insertion Effect
About Digital Effects (Reverb/Chorus/DSP) When DSP type Is Selected as a Insertion Effect • The three PSR-630 effects or the five PSR-730 effects will be connected as shown below. • Since the PSR-730 Multi Effect (EFFECT 1/2) is an insertion effect, it will be applied to only one part from among the R1/R2/L parts. - Page 147 The Digital Effect List Effect Type REVERB 01~04 Hall1~4 05~08 Room1~4 09, 10 Stage1, 2 11, 12 Plate1, 2 CHORUS 01~05 Chorus1~5 06~09 Flanger1~4 01~04 Hall1~4 05~08 Room1~4 09, 10 Stage1, 2 11, 12 Plate1, 2 13, 14 Early Reflection1, 2 Gate Reverb Reverse Gate 17~21...
- Page 148 About Digital Effects (Reverb/Chorus/DSP) The Multi Effect List (PSR-730) Effect Type 01~04 Hall1~4 05~08 Room1~4 09, 10 Stage1, 2 11, 12 Plate1, 2 13~17 Chorus1~5 18~21 Flanger1~4 Symphonic Phaser 24~28 Rotary Speaker 1~5 29, 30 Tremolo 1, 2 Guitar Tremolo Auto Pan Auto Wah Delay L, C, R...
-
Page 149: Harmony Type List
Harmony Type List Type Duet Trio 4Part 4 Part Jazz Country Octave Tremolo Tremolo Duet Tremolo Octave Strumming Trio Delay Vibraphone & Jazz Guitar Trumpet & Sax Back Vocal Strings Forest Description This harmony type produces a duophonic melody with the second voice below the melody line. -
Page 150: Refining User Styles With Style File Format
See page 150 for the available chord types, chord notes and scale notes. The Style File Format (SFF) is a compilation of all of Yamaha’s auto accompaniment know-how into a single unified format. Since the PSR-730/630 supports the SFF format, you can enjoy many styles in addition to the 100 preset SFF styles. - Page 151 NTT (Note Transposition Table) Setting Note Transposition table setting Set the table for making the chord change (transposition) in the source pattern. There are 6 tables, as explained below. Bypass No transposition is done. Melody This table is suitable for melody line transposition. Use it for tracks with melodies like PHRASE 1/2.
-
Page 152: About The Source Chord Type
Refining User Styles with Style File Format About the Source Chord Type When you change the chord of the source pattern from the default CM7 to others (see “Source Pattern Settings” on page 148), the chord notes and scale notes will change depending on the currently selected chord type. -
Page 153: Troubleshooting
Troubleshooting Something not working as it should? In many cases what appears to be a malfunction can be traced to a simple error that can be remedied immediately. Before assuming that your PSR- 730/630 is faulty, please check the following points. PROBLEM The speakers produce a “pop”... -
Page 154: Data Backup & Initialization
Data Backup & Initialization Data Backup Except for the data listed below, all PSR-730/630 panel settings are reset to their initial settings whenever the power is turned on. • Registration Memory • User Style Data • User Pad Data • MIDI Transmit Settings •... -
Page 155: Midi Data Format
BnH,42H SOFT PEDAL BnH,43H REVERB SEND LEVEL BnH,5BH VARIATION SEND LEVEL BnH,5EH <YAMAHA MIDI FORMAT> <UNIVERSAL> F0H 7FH...F7H F0H 7EH...F7H <XG STANDARD> F0H 43H 1nH 4CH aaH aaH aaH ddH F0H 43H 0nH 4CH bbH bbH aaH aaH aaH ddH...ddH ccH F7H... - Page 156 ALL NOTES OFF OMNI OFF OMNI ON MONO POLY PROGRAM CHANGE CHANNEL AFTER TOUCH PITCH BEND CHANGE SYSTEM EXCLUSIVE MESSAGE <YAMAHA MIDI FORMAT> <UNIVERSAL> UNIVERSAL REALTIME UNIVERSAL NON-REALTIME <XG STANDARD> XG PARAMETER CHANGE XG BULK DUMP PARAMETER REQUEST DUMP REQUEST <CLAVINOVA MIDI COMPLIANCE>...
- Page 157 400ms, the MIDI Receive Buffer will be cleared, and all notes, including those being sustained, will be cut OFF. Also, all control values will be reset to their factory defaults. (3-6) SYSTEM EXCLUSIVE MESSAGE (3-6-1) YAMAHA MIDI FORMAT (3-6-1-1) SECTION CONTROL binary 11110000...
- Page 158 MIDI Data Format (3-6-1-2) TEMPO CONTROL binary hexadecimal 11110000 Exclusive status 01000011 YAMAHA ID 01111110 Style 00000000 0ttttttt Tempo4 0ttttttt Tempo3 0ttttttt Tempo2 0ttttttt Tempo1 11110111 End of Exclusive The internal clock will be set to the received Tempo value.
- Page 159 Drums Setup Data(Individual note unit) System Information (3-6-4) SPECIAL OPERATORS (3-6-4-1) VOLUME ,EXPRESSION AND PAN REALTIME CONTROL OFF binary hexadecimal 11110000 Exclusive status 01000011 YAMAHA ID 01110011 Clavinova ID 01000101 CVP-98/96/94/92 ID 00010001 Sub ID 0000nnnn N = MIDI Channel...
- Page 160 MIDI Data Format < Table 1-3 > MIDI Parameter table ( System information ) Address Size Data Prameter Name 20..7F Model Name TOTAL SIZE 10 (Transmitted by Dump Request. Not received. Bulk Dump Only) < Table 1-4 > MIDI Parameter Change table (EFFECT 1) Address Size Data...
- Page 161 Address Size Data Prameter Name 00..7F Vari. Param. 6 MSB 00..7F Vari. Param. 6 LSB 00..7F Vari. Param. 7 MSB 00..7F Vari. Param. 7 LSB 00..7F Vari. Param. 8 MSB 00..7F Vari. Param. 8 LSB 00..7F Vari. Param. 9 MSB 00..7F Vari.
- Page 162 MIDI Data Format Address Size Data Prameter Name 00..7F Insertion Parameter7 00..7F Insertion Parameter8 00..7F Insertion Parameter9 00..7F Insertion Parameter10 00..7F Insertion Part 00..7F MW INS CTRL DPT 00..7F BEND INS CTRL DPT 00..7F CAT INS CTRL DPT 00..7F Not Used 00..7F Not Used TOTAL SIZE 12...
- Page 163 Address Size Data Prameter Name 00..7F Reverb Send 00..7F Variation Send 00..7F Vibrato Rate 00..7F Vibrato Depth 00..7F Vibrato Delay 00..7F Filter Cutoff Freq. 00..7F Filter Resonance 00..7F EG Attack Time 00..7F EG Decay Time 00..7F EG Release Time 28..58 MW Pitch Control 00..7F MW Filter Control...
- Page 164 MIDI Data Format < Table 1-8 > MIDI Parameter Change table ( DRUM SETUP ) Address Size Data Prameter Name 00..7F Pitch Coarse 00..7F Pitch Fine 00..7F Level 00..7F Alternate Group 00..7F 00..7F Reverb Send Level 00..7F Chorus Send Level 00..7F Variation Send Level 00..01...
-
Page 165: Dsp Effect Type
DSP(VARIATIOM) EFFECT TYPE TYPE TYPE LSB NO EFFECT [1]HALL1 [2]HALL2 [4]ROOM1 ROOM2 [5]ROOM2 [7]STAGE1 [8]STAGE2 PLATE DELAY L,C,R [18]DELAY L,R [19]ECHO [20]CROSS DELAY GATE REVERB REVERS GATE 012..015 NO EFFECT WHITE ROOM TUNNEL CANYON BASEMENT KARAOKE 1 KARAOKE 2 KARAOKE 3 021..063 NO EFFECT THRU... - Page 166 MIDI Data Format < Table 1-10 > Effect Parameter List HALL1,HALL2, ROOM1,ROOM2,ROOM3, STAGE1,STAGE2 PLATE (reverb, variation, insertion block) Parameter Reverb Time 0.3–30.0s Diffusion 0–10 Initial Delay 0–63 HPF Cutoff Thru–8.0kHz LPF Cutoff 1.0k–Thru Dry/Wet D63>W – D=W – D<W63 Rev Delay 0–63 Density 0–4 (reverb, variation block)
- Page 167 SYMPHONIC (chorus, variation, insertion block) Parameter LFO Frequency 0.00Hz–39.7Hz LFO Depth 0–127 Delay Offset 0–127 EQ Low Frequency 32Hz–2.0kHz EQ Low Gain -12–+12dB EQ High Frequency 500Hz–16.0kHz EQ High Gain -12–+12dB Dry/Wet D63>W – D=W – D<W63 EQ Mid Frequency 100Hz–10.0kHz (variation block) EQ Mid Gain -12–+12dB (variation block)
- Page 168 MIDI Data Format AMP SIMULATOR (variation, insertion block) Parameter Drive 0–127 AMP Type Off,Stack,Combo,Tube LPF Cutoff 1.0k–Thru Output Level 0–127 Dry/Wet D63>W – D=W – D<W63 Edge(Clip Curve) 0–127 3BAND EQ(MONO) (variation, insertion block) Parameter EQ Low Gain -12–+12dB EQ Mid Frequency 100Hz–10.0kHz EQ Mid Gain -12–+12dB...
- Page 169 < Table 1-11 > Effect Data Value Assign Table Table#1 Table#4 LFO Frequency Reverb time Data Value Data Value Data Value Data Value Data 0.00 1.35 2.69 8.41 0.04 1.39 2.78 8.75 0.08 1.43 2.86 9.08 0.13 1.47 2.94 9.42 0.17 1.51 3.03...
-
Page 170: Midi Implementation Chart
MIDI Implementation Chart [Portable Keyboard] Model: PSR-730 Function Basic Default 1~16 Channel Changed 1~16 Default Mode Messages Altered ************** Note 0~127 Number : True voice ************** Velocity Note ON O 9nH, v=1~127 Note OFF X 9nH, v=0 After key’s Touch Ch’s Pitch Bender Control Change... - Page 171 [Portable Keyboard] Model: PSR-630 Function Basic Default 1~16 Channel Changed 1~16 Default Mode Messages Altered ************** Note 0~127 Number : True voice ************** Velocity Note ON O 9nH, v=1~127 Note OFF X 9nH, v=0 After key’s Touch Ch’s Pitch Bender Control Change 0, 32 7, 10, 11...
- Page 172 MIDI Implementation Chart The tracks for each channel can be selected on the panel. See page 125 for more information. Incoming MIDI messages control the PSR-730/630 as 16 channel multi timbral tone generator when initially shipped (factory set). The MIDI messages don’t affect the panel controls including the Panel Voice selection since they are directly sent to the tone generator of the PSR-730/630.
-
Page 173: Specifications
Specifications Keyboards • 61 standard-size keys (C1 — C6) with touch response. Display • Large multi-function LCD display Setup • Stand by/ON • Master Volume : MIN — MAX Control & Number Buttons • MENU , VOICE, STYLE, SONG, SUB MENU , [1] —... -
Page 174: Index
Index AC power adaptor ... 12 Accompaniment styles ... 22 Accompaniment tracks, song ... 86 Auto accompaniment ... 22 Auto accompaniment on/off ... 23 Auto Fill ... 27 AUX OUT ... 13 Bank, registration ... 57 Batteries ... 12 Beat Groove ... 36 Beat indicator ... - Page 175 Panel controls ... 6 Pedal Function list ... 117 Phones jack ... 13 Pitch Bend ... 54 Polarity ... 118 Polyphony ... 133 Power supply ... 12 Precautions ... 1 R1, R2, & L voices ... 16 Receive channel & mode ... 126 Record Ready Mode ...
-
Page 176: Limited Warranty
PSR SERIES OF PORTATONE ELECTRONIC KEYBOARDS If during the first 90 days that immediately follows the purchase date, your new Yamaha product covered by this warranty is found to have a defect in material and/or workmanship, Yamaha and/or its authorized representative will repair such defect without charge for parts or labor. - Page 177 For details of products, please contact your nearest Yamaha or the authorized distributor listed below. Pour plus de détails sur les produits, veuillez-vous adresser à Yamaha ou au distributeur le plus proche de vous figurant dans la liste suivante. NORTH AMERICA CANADA Yamaha Canada Music Ltd.
- Page 178 M.D.G., EMI Division © 1997 Yamaha Corporation VY78900 808POCP3.3-05E0 Printed in Japan...