THOMSON Speedtouch 580 Setup And User Manual
Wireless multi-user adsl gateway
Hide thumbs
Also See for Speedtouch 580:
- Cli reference manual (428 pages) ,
- Installation and setup manual (50 pages) ,
- User manual (126 pages)

Related Manuals for THOMSON Speedtouch 580


Summary of Contents for THOMSON Speedtouch 580
- Page 1 SpeedTouch™580 Wireless Multi-User ADSL Gateway Setup and User’s Guide Release R1.0 (R4.2.7)
- Page 3 SpeedTouch™ Setup and User’s Guide Release R1.0 (R4.2.7)
- Page 4 Status v3.0 Reference E-DOC-CTC-20040123-0001 Short Title Setup and User's Guide ST580(i) R1.0 (R4.2.7) (en) Copyright © 2004 THOMSON. All rights reserved. Passing on, and copying of this document, use and communication of its contents is not permitted without written authorization from THOMSON.
-
Page 5: Table Of Contents
Contents 1 SpeedTouch™ Installation ... 5 Getting Acquainted with the SpeedTouch™... 6 Setting Up the SpeedTouch™... 9 2 SpeedTouch™ Local Networking Setup... 11 Ethernet Connection Setup ... 12 USB Connection Setup for Microsoft Windows... 13 Wireless Connection Setup ... 16 2.3.1 First-time Wireless Client Association...19 2.3.2... - Page 6 Connect to the Internet via a Host PPPoE Dial-in Client ... 41 4.2.1 Using an MS Windows XP BroadBand Connection... 42 4.2.2 Using the Mac OS X PPPoE Dial-in Client ... 46 5 SpeedTouch™ Web Interface... 49 Basic Task Links ... 53 Advanced Topics Menu Links ...
-
Page 7: Speedtouch™ Installation
Touch™580 Wireless Multi-User ADSL Gateway and in getting connected quickly to the Internet. Terminology Generally, the SpeedTouch™580(i) will be referred to as SpeedTouch™ in this Setup and User’s Guide unless specifically indicated. Safety instructions Before connecting the SpeedTouch™, please read the SpeedTouch™ Quick Installation Guide and Safety Instructions. -
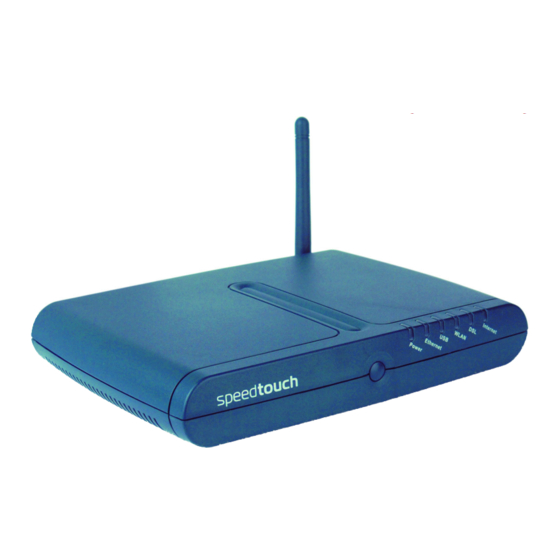
Page 8: Getting Acquainted With The Speedtouch
1 SpeedTouch™ Installation 1.1 Getting Acquainted with the SpeedTouch™ Introducing the Prior to proceeding, please make sure to read first the SpeedTouch™ Quick Installation SpeedTouch™ Guide. It provides important package content and safety information. Check whether all items are present in your package. In the event of damaged or missing items, please contact your local product dealer for further information. - Page 9 Indicator Name WLAN Internet Back panel layout The following connectors are available on the SpeedTouch™580: a four port 10/ 100Base-T Half-/Full-duplex auto-sensing MDI/MDI-X Ethernet switch, a USB port and a DSL line port. E-DOC-CTC-20040123-0001 v3.0 Description Color State Green Flashing...
- Page 10 1 SpeedTouch™ Installation Ethernet port LEDs Each of the yellow marked Ethernet ports on the rear panel has one LED (B) to indicate the connection integrity (activity). Depending on the SpeedTouch™ product you are using, a second LED (A) may be provided to indicate the 10/100Base-T selection: Indicator Name (Optional)
-
Page 11: Setting Up The Speedtouch
1.2 Setting Up the SpeedTouch™ Wall mounting The SpeedTouch™580 can be mounted on a wall using the two mounting brackets at assembly the bottom or can setup in an upright position using a stand or the standard desktop 'mount'. For more information please see SpeedTouch™... - Page 12 ADSL and telephone signals. Push in the button to switch on the SpeedTouch™580. Push to release the button to switch off the SpeedTouch™580. “7.5 Troubleshooting” on page “2 SpeedTouch™ Local Networking Setup” on page 11 to set up E-DOC-CTC-20040123-0001 v3.0...
-
Page 13: Speedtouch™ Local Networking Setup
The SpeedTouch™ Wi-Fi™ certified IEEE 802.11g compliant wireless access point allows multiple computers to connect wirelessly to your local network over the Speed- Touch™ Wireless LAN environment. The SpeedTouch™580 is backward compatible with IEEE802.11b. This means that IEEE802.11b and IEEE802.11g devices can coexist in the same wireless network. -
Page 14: Ethernet Connection Setup
2 SpeedTouch™ Local Networking Setup 2.1 Ethernet Connection Setup Local network The SpeedTouch™ Ethernet ports on the back panel allow you to connect the Speed- Touch™ to an existing 10 or 100Base-T Ethernet network or one (or more) computer(s) with installed Ethernet card. Using the SpeedTouch™... -
Page 15: Usb Connection Setup For Microsoft Windows
It is strongly advised to remove any SpeedTouch™ USB driver installation that may reside on your PC before you install the USB drivers from the SpeedTouch™ Setup CD-ROM delivered with your SpeedTouch™580(i) product. Make sure both your PC and SpeedTouch™ are turned on and operational. - Page 16 2 SpeedTouch™ Local Networking Setup The Windows Found New Hardware Wizard appears: This wizard will guide you through the installation procedure of the USB drivers. Click Next to continue. The following window allows you to select locations where it should search for drivers: Insert the SpeedTouch™...
- Page 17 2 SpeedTouch™ Local Networking Setup Verifying USB The SpeedTouch™ USB connection is represented as a local network interface. You can connectivity easily check this interface by opening the Network Connections window from Windows’ Control Panel: Connecting to the To continue with preparing the SpeedTouch™ for internet connectivity, see Internet “3 SpeedTouch™...
-
Page 18: Wireless Connection Setup
2.3 Wireless Connection Setup Introduction The SpeedTouch™580 features a Wireless LAN Access Point (AP) which behaves as a networking hub allowing to wirelessly interconnect several devices to the local (W)LAN and provide - via the SpeedTouch™ DSL router - access to the public network, e.g. the Internet. - Page 19 WEP relies on a secret key that is shared between the wireless client (e.g. a laptop with a wireless client and the SpeedTouch™580). The fixed secret key is used to encrypt data before they are transmitted. I.e. during transmission between client and access point (“in the air”) the information in the packets is encrypted.
- Page 20 This level uses Wi-Fi Protected Access (WPA) to provide state of the art security. This also means that only recent wireless clients will have implemented WPA, and that older wireless clients (without WPA) will not interoperate with the SpeedTouch™580 at this security level.
-
Page 21: First-Time Wireless Client Association
Registration is not activated. The Access Control List is open and empty. No wireless client will be denied access to the SpeedTouch™580 on base of it’s physical hardware address. The default wireless settings may differ from the settings listed above depending on your Service Provider’s requirements. - Page 22 2 SpeedTouch™ Local Networking Setup First-time association Below an example is provided, showing how the SpeedTouch™ wireless network is example presented towards an MS Windows XP system: When you click the network icon, the following window appears: Select Allow me to connect to the selected wireless network, even though it is not secure to unlock the connect button and click Connect to trigger the actual association.
-
Page 23: Connecting Wireless Clients
2.3.2 Connecting Wireless Clients Before you connect In case the SpeedTouch™ has not been configured before (the SpeedTouch™ is still in other wireless clients its default configuration), it is recommended to proceed first with the configuration setup procedures as described in For enhanced security, after going through the SpeedTouch™... - Page 24 WLAN client software to initiate the associa- tion. Successfully registered stations are associated to the SpeedTouch™580 WLAN. Depending on your WLAN client adapter a wireless icon may become green or a message similar to the following may appear: “Successfully joined Wireless net- work SpeedTouch012345”.
-
Page 25: Speedtouch™ Configuration Setup
3 SpeedTouch™ Configuration Setup Internet connectivity Some configuration may be required to prepare the SpeedTouch™ for Internet connec- tivity. Before setting up the SpeedTouch™ for Internet connectivity, make sure that the SpeedTouch™ is prepared as described in page You can configure the SpeedTouch™: •... -
Page 26: Microsoft Windows Speedtouch™ Configuration Setup
3 SpeedTouch™ Configuration Setup 3.1 Microsoft Windows SpeedTouch™ Configuration Setup Supported MS One of the following MS Windows OSs must be installed on your PC(s): Windows OSs • • • • • You may need the MS Windows installation CD-ROM during installation. The SpeedTouch™... - Page 27 Detection of the Proceed as follows: SpeedTouch™ E-DOC-CTC-20040123-0001 v3.0 Insert the SpeedTouch™ Setup CD-ROM in your PC's CD-ROM drive. The SpeedTouch™ CD Browser will start automatically. If the SpeedTouch™ CD Browser window does not appear automati- Note cally, open a Run window via Start > Run from the Start menu and enter the following path: D:\Menu.exe, where D stands for the drive letter of your CD-ROM drive.
- Page 28 3 SpeedTouch™ Configuration Setup The Initial Setup window appears: Click Setup my SpeedTouch™ to start the SpeedTouch™ Setup wizard. The Welcome to the SpeedTouch™ Setup Wizard window appears: Click Next. The Software License Agreement window appears: You must accept before continuing. Click Yes to accept. If you accepted this License Agreement in a previous configuration Note setup, this window will not be shown anymore.
- Page 29 If more than one device is found, a list of available devices will be provided. If this is the case, select your SpeedTouch™ device (SpeedTouch™580) and click Next. If the Setup wizard does not find any SpeedTouch™ on the network an Note error window appears.
- Page 30 3 SpeedTouch™ Configuration Setup Configuration of the Proceed as follows: SpeedTouch™ (and PC) As soon as the SpeedTouch™ Setup wizard has detected your SpeedTouch™ device, you can proceed with the configuration procedure. If the SpeedTouch™ has been configured before: Note •...
- Page 31 E-DOC-CTC-20040123-0001 v3.0 As soon as the SpeedTouch™ Setup wizard completed the update of the Speed- Touch™ configuration and reconfigured your PC, following window will appear: Click Finish to close the wizard. Due to the reconfiguration the SpeedTouch™’s IP configuration or Note wireless access point settings may have been changed.
- Page 32 3 SpeedTouch™ Configuration Setup Additional configuration Some additional configuration may be needed: • • • MS Windows IP configuration Most Service profiles will enable the SpeedTouch™ DHCP server. Since by default a PC’s Ethernet interface is configured for obtaining its IP configuration dynami- cally (DHCP client), in most cases, no additional configuration is required.
-
Page 33: Operating System Independent Speedtouch™ Configuration Setup
3.2 Operating System Independent SpeedTouch™ Configuration Setup Supported Systems As the SpeedTouch™ is OS-independent, this configuration setup can be used from any computer system. Prerequisites Make sure that: • • • • • SpeedTouch™ SpeedTouch™ Easy Setup consists of two parts: Easy Setup •... - Page 34 3 SpeedTouch™ Configuration Setup Configuration of the Proceed as follows: SpeedTouch™ Open a web browser and browse to the SpeedTouch™ web pages at http://10.0.0.138. See “5 SpeedTouch™ Web Interface” on page 49 information. If you can not access the SpeedTouch™ web pages, it is probably not in Note its default state.
- Page 35 Additional configuration Some additional configuration may be needed: • Note E-DOC-CTC-20040123-0001 v3.0 Easy Setup will update the SpeedTouch™ configuration according to the Service profile. You can follow the configuration progress in following window: As soon as Easy Setup completed the update of the SpeedTouch™ configuration, following window will appear: Click Finish to close the wizard.
- Page 36 3 SpeedTouch™ Configuration Setup E-DOC-CTC-20040123-0001 v3.0...
-
Page 37: Speedtouch™ Internet Connectivity
4 SpeedTouch™ Internet Connectivity Introduction This chapter provides information on how to configure your SpeedTouch™ according to your preferences and how to access the Internet. Access methods As soon as the SpeedTouch™ and your computers have been configured as outlined in “3 SpeedTouch™... -
Page 38: Internet Connections Via Speedtouch™'S Embedded Ppp Dial-In Client
4 SpeedTouch™ Internet Connectivity 4.1 Internet Connections via SpeedTouch™’s Embedded PPP Dial-in Client Introduction The SpeedTouch™ supports both most popular connection methods: PPP over ATM (PPPoA) and PPP over Ethernet (PPPoE). The connection method depends on the service profile you selected to configure the SpeedTouch™... -
Page 39: Using The Ms Windows Xp Internet Gateway Device Control Agent
4.1.1 Using the MS Windows XP Internet Gateway Device Control Agent Introduction MS Windows XP users can easily establish PPP sessions, without the need of first browsing to the SpeedTouch™ web pages, due to MS Windows XP’s Internet Gateway Device Discovery and Control Client that allows you to control the SpeedTouch™ directly from you PC. - Page 40 4 SpeedTouch™ Internet Connectivity The connected Internet As long as the SpeedTouch™’s embedded PPP dial-in client is connected, you are able to Gateway overview the connection status and some counters by double-clicking the Internet Connection icon in your PC’s Network Connections window: More detailed monitoring is provided via: •...
-
Page 41: Using The Speedtouch™ Web
4.1.2 Using the SpeedTouch™ Web Pages Introduction As the SpeedTouch™ web pages are controllable from any Operating System with an installed web browser, the method to establish PPP sessions described below can be used by any computer system. Starting an Internet Proceed as follows: session As a result SpeedTouch™’s embedded PPP dial-in client establishes the Internet connec-... - Page 42 4 SpeedTouch™ Internet Connectivity During the Internet You are able to overview and monitor your Internet connectivity as long as the session session is running via: • • Terminating an Internet To close an active Routed PPP connection: session As a result SpeedTouch™’s embedded PPP dial-in client will close the Internet connec- tion.
-
Page 43: Connect To The Internet Via A Host Pppoe Dial-In Client
4.2 Connect to the Internet via a Host PPPoE Dial- in Client Introduction This section explains how you can connect to the Internet using a Broadband PPPoE dial-in application. The PPP over Ethernet connection scenario provides PPP-like dial-in behavior over the virtual Ethernet segment. To be able to use a broadband dial-in application on your computer for connecting to the Internet, the SpeedTouch™... -
Page 44: Using An Ms Windows Xp Broadband Connection
4 SpeedTouch™ Internet Connectivity 4.2.1 Using an MS Windows XP BroadBand Connection Configuring a Proceed as follows: broadband connection On the Start menu, click (Settings >) Control Panel. The Control Panel window appears. Go to (Network and Internet Connec- tions >) Network Connections. - Page 45 E-DOC-CTC-20040123-0001 v3.0 In the next window, select Connect using a broadband connection that requires a user name and password: Click Next to continue. In the next window, give a name to the connection you are creating, e.g. MyISP: In the next window, select whether the connection is available to any user or only to yourself: If you want to share this connection with other users you must select Note...
- Page 46 4 SpeedTouch™ Internet Connectivity Starting a broadband Proceed as follows: Internet session You can open your web browser and surf the Internet. At the end of the configuration the following window appears: Click Finish to complete the configuration. The Connect MyISP window (see below) appears. On the Start menu, point Connect To and click the name of the connection you’ve created e.g.
- Page 47 Terminating a Proceed as follows: broadband Internet session The connection is released. As a result no Internet connectivity exists anymore. E-DOC-CTC-20040123-0001 v3.0 On the Start menu, point Connect To and click the name of the connection you’ve created e.g. MyISP. If you are using the Classic Start menu go to Start >...
-
Page 48: Using The Mac Os X Pppoe Dial-In Client
4 SpeedTouch™ Internet Connectivity 4.2.2 Using the Mac OS X PPPoE Dial-in Client Configuring a Proceed as follows: broadband connection On the Apple menu, click System Preferences. The System Preferences window appears. Click the Network icon. The Network window appears. Make sure Built-in Ethernet is selected in the Show list and click the PPPoE tab: Enter the Account Name and Password provided by your Service Provider. - Page 49 Starting a broadband Proceed as follows: Internet session As soon as the connection is established you can open your web browser and surf the Internet. Terminating a Proceed as follows: broadband Internet session The connection is released. As a result no Internet connectivity exists anymore. E-DOC-CTC-20040123-0001 v3.0 Click the Internet Connect dockling.
- Page 50 4 SpeedTouch™ Internet Connectivity E-DOC-CTC-20040123-0001 v3.0...
-
Page 51: Speedtouch™ Web Interface
5 SpeedTouch™ Web Interface Introduction The SpeedTouch™ comes with integrated configuration web pages. It allows you to configure your SpeedTouch™ simply by using a web browser from any local computer connected to the SpeedTouch™. In most cases the SpeedTouch™ is correctly configured for your internet connectivity via the appropriate configuration profile/file and no further configuration on the web interface is needed. - Page 52 5 SpeedTouch™ Web Interface Access to the If your computer is UPnP™ enabled you can access the pages as follows: SpeedTouch™ web interface via UPnP™ The SpeedTouch™ As a result the System Information page appears: Start Page Note Click (Settings >) Control Panel on the Start menu to open the Control Panel.
- Page 53 Topic menu and links On the left of each of the SpeedTouch™ web pages a topics menu is provided. This menu navigates you via links through all configurational aspects of the SpeedTouch™. For your convenience the links are sorted in two drop-down topics menus: Basic and Advanced.
- Page 54 5 SpeedTouch™ Web Interface Save all The Save All link on the menu allows you to save the SpeedTouch™ settings. It is advised to back-up your saved configuration on a regular basis. This can be done via System link in the Advanced menu. Help he Help link in the topics menu header allows you to browse the SpeedTouch™...
-
Page 55: Basic Task Links
5.1 Basic Task Links System Information he System Information page is the SpeedTouch™ home page. It consists of four sections: • • • E-DOC-CTC-20040123-0001 v3.0 Select Diagnostics to view the results of the System Self Test, LAN connectivity and DSL synchronization test: Select Service Info to view the current physical status of the ADSL line: The DSL Statistics allow you to view: •... - Page 56 5 SpeedTouch™ Web Interface • Connections he Connections page allows you to establish dial-in connections, if applicable how to use the Dial-in Connections table. For more information on the configuration and use of PPP connections, see the applica- tion notes “The SpeedTouch™ Routed PPPoA Packet Service” and “The SpeedTouch™ Routed PPPoE Packet Service”.
- Page 57 Wireless The SpeedTouch™ Wireless page offers three tabs to configure the SpeedTouch™580 wireless module: • • • Access point settings Select Access Point Settings to view the Access Point Settings page: By default the SpeedTouch™ broadcasts its Network Name (SSID) to the WLAN clients.
- Page 58 By default the interoperability mode allows both IEEE 802.11g compliant wire- less clients as well as IEEE 802.11b clients to connect to your SpeedTouch™580. To change: Select the desired option (“802.11g and b” or “802.11g only”) Click Apply to apply your changes.
- Page 59 Select Framebursting to enhance the performance of wireless networks by improving the efficiency between the client and the wireless access point if you have mainly downstream traffic i.e. from the SpeedTouch™580. If selected, it becomes active after you click Apply.
- Page 60 5 SpeedTouch™ Web Interface Security Select Security to: • Choose and configure a security level: By default all security is disabled. Select the desired security configuration (WEP or WPA-PSK) to enhance your security level: To enable level 1 - WEP Select the entry Security Level 1 WEP which allows you to proceed with the following window: Select how you intend to enter the WEP key.
- Page 61 E-DOC-CTC-20040123-0001 v3.0 To enable level 2 - WPA-PSK Select the entry Security level 2 - WPA-PSK which allows you to pro- ceed with the following window: Define your passphrase. The passphrase must consist of 8 to 64 ASCII characters. Note Select an encryption method.
- Page 62 View the current Access Control List (ACL) and ACL Access Mode. Via this table you can manually add or delete wireless clients and configure how wire- less clients are allowed to connect to the SpeedTouch™580 WLAN. The following table is shown: Following ACL Access modes exists.
- Page 63 By default new clients with the correct wireless settings (Network Name and, if required, Network key) are automatically allowed to associate to the Speed- Touch™580. However, the associated stations are NOT automatically added to the ACL. If needed you can manually add them.
- Page 64 Add the wireless client’s physical hardware address (MAC address). Whether the wireless client is allowed (select ‘yes’) or not (select ‘no’) to exchange data between the wireless clients and the SpeedTouch™580. You can also add currently associated stations semi-automatically via Note the Associated Stations table.
- Page 65 Associated stations Select Associated Stations to view all wireless stations that are currently associated to the SpeedTouch™580 access point: To add an associated station to the ACL: E-DOC-CTC-20040123-0001 v3.0 Select the entry you want to explicitly add to the ACL. Associated stations that are not present in the ACL yet are identified by the name: Not Registered (ACL).
- Page 66 AutoRefresh to apply your changes and to start automatic update of the table (using the new refresh rate). Select View All to view all system log messages the SpeedTouch™580 has gener- ated. Select View Important Only to view messages the SpeedTouch™580 gener- ated to notify a important system events: •...
-
Page 67: Advanced Topics Menu Links
5.2 Advanced Topics Menu Links Diagnostics The Diagnostics page consists of three expandable sections: • • E-DOC-CTC-20040123-0001 v3.0 Expand the System section to view some important system information: Expand the LAN section to view the LAN configuration: 5 SpeedTouch™ Web Interface... - Page 68 5 SpeedTouch™ Web Interface • Expand subsequently the Wan, DSL and Connections sections to view the current DSL state and connection information: Click to perform an IP connectivity test. E-DOC-CTC-20040123-0001 v3.0...
- Page 69 5 SpeedTouch™ Web Interface Easy Setup Click this link to start the SpeedTouch™ Easy Setup wizard. “3.2 Operating System Independent SpeedTouch™ Configuration Setup” on page 31 for more information. IP Addresses he IP Addresses page allows you to view or add/delete specific IP address entries for SpeedTouch™'s interfaces: When adding an IP address, all essential IP routes will be automatically be added to the SpeedTouch™...
- Page 70 5 SpeedTouch™ Web Interface NAPT he Network Address and Port Translation (NAPT) page allows you to: • • View or add/delete specific static NAPT entries: To add static NAPT entries proceed as follows: Click New. Specify the outside address and inside address for the entry as well as the protocol and port to which the entry applies.
- Page 71 • • E-DOC-CTC-20040123-0001 v3.0 Define a Default Server: By specifying a default server IP address (e.g. 10.0.0.154 as shown above), all incoming connections that don’t match a specifically configured static NAPT entry will be forwarded to the device with this IP address. This setting should be adequate for most server applications and eliminates the need for specific static NAPT entries.
- Page 72 5 SpeedTouch™ Web Interface DHCP he Dynamic Host Configuration Protocol (DHCP) page allows you to: • Click The DHCP Server tab to access the DHCP server pages. • Select Server Config to enable/disable the SpeedTouch™ (Auto)DHCP server: Depending on the DHCP server status, following Status message can be displayed: •...
- Page 73 E-DOC-CTC-20040123-0001 v3.0 Under Properties, you are able to select: • DHCP server Enables the SpeedTouch™ DHCP server. If it was not running, it will be enabled immediately. • Auto DHCP The SpeedTouch™ will not start its DHCP server immediately, but will first probe the network for a possible concurrent DHCP server for some period of time (set by Client timeout in seconds).
- Page 74 5 SpeedTouch™ Web Interface • • Click the DHCP Relay tab to view the DHCP relay pages. The DHCP relay agent allows you to use DHCP clients and DHCP servers available on different networks. • Select Relay Config to view the current SpeedTouch™ DHCP relay status: Via this table you can also manually add static SpeedTouch™...
- Page 75 he Dynamic Name System (DNS) page allows you to: • • System lick this link to display the Configuration page. This page allows you to: • E-DOC-CTC-20040123-0001 v3.0 View the current SpeedTouch™ DNS server hostname leases: Via this table you can also add static DNS hostname entries. This may be useful for devices which do not support DNS, e.g.
- Page 76 The SpeedTouch™ prompts you to confirm the reset to defaults. Click Yes to load the default configuration. The SpeedTouch™ is now in its default configuration. For your convenience the configuration of the SpeedTouch™580 Note wireless access point is temporarily preserved to assure wireless connectivity after restoring the defaults.
- Page 77 Enter User id and Password (maximum 16 characters) of your choice and re-enter your password in the appropriate field. Click Apply to apply the System password and Save all Note Templates Click this link to display the Templates page. This page allows you to: •...
- Page 78 5 SpeedTouch™ Web Interface E-DOC-CTC-20040123-0001 v3.0...
-
Page 79: Speedtouch™ Napt Manager
6 SpeedTouch™ NAPT Manager Introduction The SpeedTouch™ Network Address Port Translation (NAPT) Manager is designed to simplify the configuration of the SpeedTouch™ NAPT engine. Rather than defining the required NAPT entries for a certain application and adding them via the SpeedTouch™ web pages, the NAPT Manager offers you a selection of most popular host applications for which the configuration of NAPT entries can be done automatically. - Page 80 6 SpeedTouch™ NAPT Manager The SpeedTouch™ CD Browser menu appears: Click Configuration. The following window appears: Click Configure NAPT Settings. The NAPT Manager window appears: Click Next. E-DOC-CTC-20040123-0001 v3.0...
- Page 81 This is indicated by the following window: If more than one device is found, a list of available devices will be provided. If this is the case, select your SpeedTouch™ device (SpeedTouch™580) and click Next. If the SpeedTouch™ Setup Wizard does not find any SpeedTouch™ on Note the network an error window appears.
- Page 82 6 SpeedTouch™ NAPT Manager Configuration of the Proceed as follows: SpeedTouch™ As soon as the NAPT Manager has detected your SpeedTouch™ device you can proceed with the configuration procedure. The SpeedTouch™ may be protected by a system password. You must Note provide user name and system password to continue with the configu- ration.
- Page 83 E-DOC-CTC-20040123-0001 v3.0 • Manually add a static NAPT entries: Click the Advanced tab. Select a protocol in the Protocol list and enter Port and Host IP address in the appropriate fields. By default, the IP address of the PC from which you are running the NAPT Manager will be taken as host IP address.
- Page 84 6 SpeedTouch™ NAPT Manager Note As soon as the NAPT Manager completed the update of the SpeedTouch™ NAPT configuration, following window will appear: Click Finish to close the NAPT Manager. The NAPT manager allows you to delete or modify configured NAPT mappings via the same procedure.
-
Page 85: Support
7 Support In this chapter This chapter contains the following topics: SpeedTouch™ Wall Mount SpeedTouch™ System Software Upgrade SpeedTouch™ Default Configuration UPnP™ on Windows XP Systems Troubleshooting E-DOC-CTC-20040123-0001 v3.0 Topic 7 Support Page... -
Page 86: Speedtouch™ Wall Mount
7 Support 7.1 SpeedTouch™ Wall Mount Wall mount The SpeedTouch™580 can be wall-mounted by using two screws and the molded mounting brackets on the bottom of the SpeedTouch™580. You must provide the screws. To mount the SpeedTouch™580 on a wall or other vertical surface: Drill 2 holes in the wall or other vertical surface where you want to place the SpeedTouch™580. -
Page 87: Speedtouch™ System Software Upgrade
7.2 SpeedTouch™ System Software Upgrade Introduction This chapter describes how to upgrade the SpeedTouch™ system software. System software For checking the availability of new system software version packages: updates (all OSs) • • • System software All system software packages for the SpeedTouch™ are digitally signed and encrypted. packages and security Packages that may have come corrupted, or been altered in any way, will not be accepted by the SpeedTouch™. -
Page 88: Upgrade Via The Speedtouch™ Upgrade Wizard
7 Support 7.2.1 Upgrade via the SpeedTouch™ Upgrade Wizard Introduction The procedures described in this section are valid only in case: • • • During the upgrade procedure in most cases configuration settings are backed up by the wizard and restored after uploading the system software. Starting the Depending on your Operating System, you must start the SpeedTouch™... - Page 89 E-DOC-CTC-20040123-0001 v3.0 The SpeedTouch™ CD Browser menu appears: Click Diagnostics & Maintenance. The following window appears: Click Upgrade My SpeedTouch™. “ Upgrade procedure” on page 89 to continue. 7 Support...
- Page 90 7 Support On Mac OS X Proceed as follows: Insert the SpeedTouch™ Setup CD-ROM in your PC's CD-ROM drive. Open the CD-ROM and browse to the osx folder. In the osx folder double-click upgradeST.pkg to install the SpeedTouch™ Upgrade application. The installation wizard may prompt you for authentication.
- Page 91 Upgrade procedure E-DOC-CTC-20040123-0001 v3.0 The Welcome to the SpeedTouch™ Upgrade Wizard window appears: Click Next. The SpeedTouch™ Software License Agreement window appears: You must accept before continuing. Click Yes to accept. If you accepted this License Agreement in a previous upgrade, this Note window will not be shown anymore.
- Page 92 If more than one device is found, a list of available devices will be provided. If this is the case, select your SpeedTouch™ device (SpeedTouch™580) and click Next. If the wizard does not find any SpeedTouch™ on the network an error Note window appears.
- Page 93 E-DOC-CTC-20040123-0001 v3.0 The following window allows you to overview your selection: Click Next to continue. You can follow the upgrade progress in following window: After upgrading the SpeedTouch™, a final window appears to announce that the upgrade has been successful Click Finish to close the wizard.
- Page 94 7 Support System software Via the identical procedure it is also possible - although not recommended - to down- downgrade grade the SpeedTouch™ by uploading an older system software than the current running version. However, be aware that functionality added by previous upgrades may be lost, that system password settings may be lost as well as end-to-end connectivity and other configuration settings.
-
Page 95: Manual System Software Management Via Bootp Server
7.2.2 Manual System Software Management via BOOTP Server SpeedTouch™ system The SpeedTouch™ system software is based on BOOTP, a standard mechanism used software management for booting diskless stations. The SpeedTouch™ is able to slip in BOOTP mode, allowing a BOOTP server to manage the SpeedTouch™... - Page 96 7 Support Procedure To upgrade/restore the SpeedTouch™ system software: In a preliminary step, make sure that your SpeedTouch™ is powered off and that a BOOTP server is readily installed on the computer from which you intend to per- form the system software upgrade. Configure the BOOTP server to use the SpeedTouch™...
-
Page 97: Speedtouch™ Default Configuration
7.3 SpeedTouch™ Default Configuration Reset to default Proceed as follows: configuration The SpeedTouch™ reboots and will come online again with factory settings. WLAN clients You will need to re-associate and register your WLAN clients, using the factory defaults WLAN settings. See E-DOC-CTC-20040123-0001 v3.0 Make sure the SpeedTouch™... -
Page 98: Upnp™ On Windows Xp Systems
7 Support 7.4 UPnP™ on Windows XP Systems Adding UPnP™ If you are running Microsoft Windows XP, it is recommended to add the UPnP™ component to your system. Proceed as follows: For more information on UPnP™ and SpeedTouch™ UPnP™ features go to the UPnP™... - Page 99 Your MS Windows XP system is able to discover and control Internet Gateway Devices Gateway Device (IGD), like the SpeedTouch™580 on your local network. Therefore it is recommended Discovery and Control to add the IGD Discovery and Control client to your system.
-
Page 100: Troubleshooting
7 Support 7.5 Troubleshooting Configuration problems In case your SpeedTouch™ is unreachable due to misconfiguration, you might consider a hardware reset to factory defaults as described in uration” on page However, note that resetting the SpeedTouch™ to its factory settings will revoke all the changes you made to the configuration. - Page 101 Problem LAN LED does not light up. Link integrity/Activity LED of Ethernet port does not light up. Poor SpeedTouch™ performance. SpeedTouch™ is not detected by MS Windows XP’s UPnP™ or Internet Gateway Device Control Client. No Line synchronization achieved. DSL/WAN LED off or flashing. Bad regular telephone service E-DOC-CTC-20040123-0001 v3.0 7 Support...
- Page 102 7 Support E-DOC-CTC-20040123-0001 v3.0...
-
Page 104: Need More Help
Need more help? Additional help is available online at www.speedtouch.com.