
Related Manuals for Sega Sonic QuadAir


Summary of Contents for Sega Sonic QuadAir
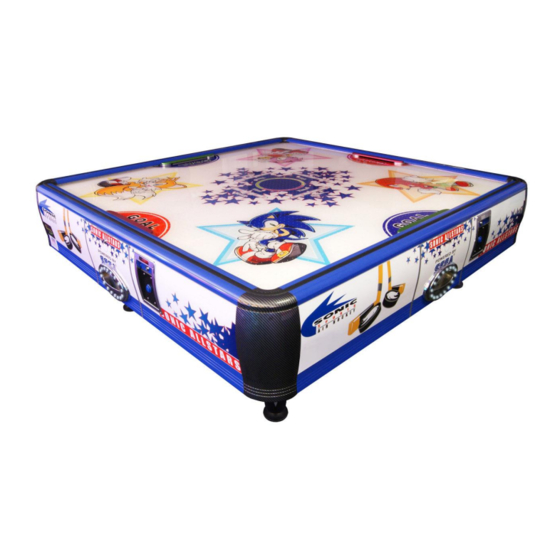
- Page 1 Version 9.26.12 Sonic QuadAir Air Hockey Table Owners Manual Assembly operation and care instuctions. Serial # Distributed By Sales Person Technical Service # QUADAIR PATENTED WORLDWIDE...
- Page 2 Forward First, we would like to thank you very much for purchasing the QuadAir from Barron Games International. [This product is a multi-player game for an entertainment centerpiece.] For your own safety, please read through this instruction manual that we have prepared for you thoroughly, and take precautions when using the product.
-
Page 3: Assembly Procedures
Assembly Procedures 1. Use scissors or a knife to cut* through the packing tape. *Do not cut too deep or you will damage the unit. The wooden side is the bottom surface of the QuadAir. 2. Open the cardboard box to ensure the wooden side is facing up and the playfield is facing down to the floor. - Page 4 Use a screw driver or drill to unscrew the 4 screws on the panel with the sticker “PARTS” on it. Once the panel is opened, please take out the parts indicated below. For Legs 16 Roundhead screws M8x25 16 Flat washers M8x16 For machine 3 serial number 2868 QuadAir keys...
- Page 5 After taking out the keys, open the center door panel, and take out all other parts from inside of the machine’s body. (Do not remove air blower) Power cord holder. 4 QuadAir Plastic Legs 2 Accessory boxes 4 Adjustable Leg Levelers (Accessories inside the box are illustrated below) 20 Pucks...
- Page 6 Take out the 4 QuadAir plastic legs and screw the adjustable leg levelers onto the base of the legs. Place the legs on the bottom surface of the table. Ensure alignment and then attach with the big flathead screw M5x35 and washer M8x16. *Make sure grey surface is facing out.
-
Page 7: Risk Of Electric Shock
Safety Instructions for use and play. Risk of Electric Shock Hazardous voltage which can cause electrical shock exists inside the equipment. Only qualified personnel should work inside the equipment. Playing Warnings Do not hit the puck with the mallet when the puck is not level and flat. - Page 8 BEWARE OF ATTENTION ELECTRIC SHOCK...
- Page 9 ATTENTION This game features flashing lights which may not be suitable for photosensitive epilepsy...
- Page 10 Manual for the software of the machine First, ensure the power is off. Open the door with a key. Hold the panel's handle and pull it out until half of the power panel is exposed. Handle on the panel Open the door with a key Descriptions of internal hardware Power supply Sound board...
- Page 11 Function Descriptions of all hardware Note: Avoid electric shock. Do not touch open terminals or exposed wires. Please turn off the game to perform repairs. BEWARE OF ELECTRIC SHOCK Power Supply Provides power to all internal components, such as the motherboard, coin mechanism, motor...
-
Page 12: Dip Switch Adjustment
Descriptions of light signals and DIP Switches Error Lights Light A Goal Sensor Signal Light B Start Button Light Signal Light C Coin Mechanism Light Signal Light D Ticket Light Signal Light E Rail Noise Strike Light signal Right side of table Rail adjustment for sensitivity A B C D E Left side of table... - Page 13 Description of Motherboard Controls DIP SW1 Game DIP SW2 Transform SD card Slot Volume Test NO-NC button adjustment knob LEDA: Running LED lights around table NC2 : Display panel connection outlet NC313 : Direct Current (DC) Input outlet NC35 : A1 Output Control point NC36 : B1 Output Control point NC311 : Electro-magnet switch for goal gates (solenoid) Nc3 : Rail Strike Detector...
- Page 14 29/30...
- Page 16 Ref # Part # Description 3202004 Air Hockey Key #2868 3213082 Solenoid Brackets 3601007 Power Cord (U.S. Style) 3604056 QuadAir Coin Mech w/LED Indicator 3605091 Goal Solenoid DC 12V Power Supply NES-100-12-+12V 3605117 Power Supply NES-100-5+5V 3605118 3607050 Blower Motor 110V 3611010 Speaker 3612370 Optical Goal Sensor 3619007 Rail Sensor Chip (27mm)
- Page 17 Ref # Part # Description 3501053 QuadAir Black Rubber Perimeter Rail Trim 616030028 Leg Leveler 616030029 Air Hockey Leg (400mm) 3207534 QuadAir Goal Bar Red 3207536 QuadAir Goal Bar Green 3704009 Play Field Aeresol Polish (non-ammonia) 616030003 Hockey Mallet (Orange) w/Rubber Grip 616030002 Hockey Mallet (Blue) w/Rubber Grip 3399184...
- Page 18 Ref # Part # Description 3399160 Blower Gasket 3303733 QuadAir LED Cover 3612399 Blue LED Ring for Puck Bay...
- Page 19 How to fix the goal gate. Moving Solenoid Solenoid Capture Goal Gate If the gate is clicking, it is because the solenoid is not catching in the Solenoid Capture hole. During shipment and instillation the solenoid can bend inward toward the gate.
- Page 20 Barron Games QuadAir Goal Gate Assembly Goal Gate Troubleshooting Manual...
- Page 21 Barron Games QuadAir Goal Gate Assembly Remove the screws from the left and right side of the goal gate assembly The internal parts of the goal gate assembly will now be exposed...
- Page 22 Barron Games QuadAir Goal Gate Assembly Remove all four screws Remove the motor...
- Page 23 Barron Games QuadAir Goal Gate Assembly Enlarged motor 1) Remove the gear screws using an Allen 2) Pull the gear straight up...
- Page 24 Barron Games QuadAir Goal Gate Assembly Pull up to remove the gear Remove all three screws...
- Page 25 Barron Games QuadAir Goal Gate Assembly Fully detached motor...
- Page 26 Barron Games QuadAir Goal Gate Assembly Attention: Please note that there are two different size screws used on the QuadAir motor. Screws (1) and (2) are longer then (3), and they must all be placed back into the same holes they came from. A misplaced screw will damage the internal workings of these motors.
- Page 27 For Spares and Technical Service please contact SEGA TOTAL SOLUTIONS. SEGA TOTAL SOLUTIONS 42 Barwell Business Park Leatherhead Road Chessington Surrey KT9 2NY United Kingdom +44 (0)208 391 8072 technical@sega.co.uk 84 Aero Drive | Suite 4 | Buffalo, NY 14225 USA...