Table of Contents
Advertisement
Quick Links
Manual Outline
1 - Important Information
A - Specifications
B - Maintenance
C - General Information
D - Jet Installation
2 - Electrical
A - Ignition
B - Charging and Starting System
C - Timing, Synchronizing, and Adjusting
3 - Fuel System
A - Fuel Pump
B - Direct Fuel Injection
C - Oil Injection
D - Emissions
4 - Powerhead
A - Powerhead
B - Cooling
5 - Pump Unit
A - Pump Unit
Important Information
Electrical
Fuel System
Powerhead
Pump Unit
1
2
3
4
5
Page iii
Advertisement
Chapters
Table of Contents
Troubleshooting

Related Manuals for Mercury 200 OptiMax Jet Drive


Summary of Contents for Mercury 200 OptiMax Jet Drive
- Page 1 Manual Outline Important Information 1 - Important Information A - Specifications Electrical B - Maintenance C - General Information D - Jet Installation Fuel System 2 - Electrical A - Ignition B - Charging and Starting System Powerhead C - Timing, Synchronizing, and Adjusting 3 - Fuel System A - Fuel Pump Pump Unit...
- Page 2 OptiMax Jet Drive Starting Serial Number 0E435816 for Powerhead Starting Serial Number 0E379931 for Pump Unit...
- Page 3 NOTE: Indicates information that helps in the understanding of a particular step or action. This manual has been written and published by the Service Department of Mercury Marine to aid our dealers’ mechanics and company service personnel when servicing the products described herein. We reserve the right to make changes to this manual without prior notification.
- Page 4 WARNING Avoid fire or explosion hazard. Electrical, ignition, and fuel system components on Mercury Marine products comply with federal and international standards to minimize risk of fire or explosion. Do not use replacement electrical or fuel system components that do not comply with these standards. When servicing the electrical and fuel systems, properly install and tighten all components.
- Page 5 Page iv...
-
Page 6: Table Of Contents
Specifications Important Information Section 1A - Specifications Table of Contents General Specifications............1A-2 Fuel Rail Specifications............1A-4 Maintenance Specifications..........1A-2 Fuel System Specifications..........1A-4 Ignition Specifications............1A-3 Air Compressor Specifications...........1A-5 Charging and Starting Specifications.........1A-3 Powerhead Specifications..........1A-6 Fuel Specifications.............1A-4 Cooling System Specifications...........1A-6 Fuel Lift Pump Specifications..........1A-4 Wear Ring/Impeller Specifications........1A-6 90-8M0050731 MAY 2011 Page 1A-1... -
Page 7: General Specifications
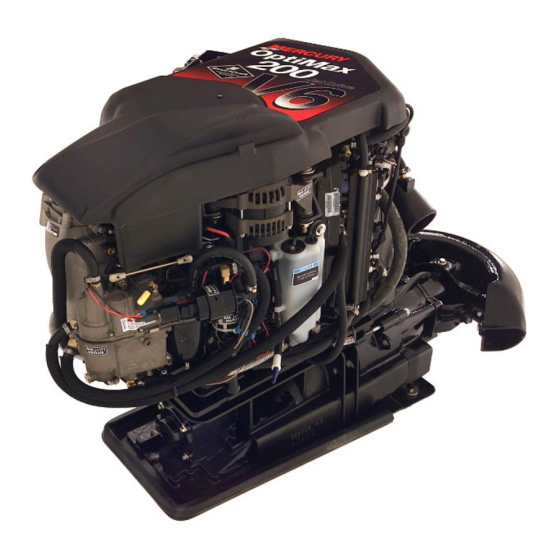
Specifications General Specifications Model Specifications Kilowatts (horsepower) 149.1 kW (200 hp) Weight Powerhead 116.6 kg (257 lb) Pump unit 49 kg (110 lb) Displacement (all HP) 2.5 liter (153 in³) Idle 900–1000 RPM 5150–5650 RPM RPM limit (Guardian) 6300 RPM Induction system Throttle body aspiration Computer controlled sequential... -
Page 8: Ignition Specifications
Specifications Ignition Specifications Ignition Specifications Type Digital inductive Spark plug NGK IZFR6J Spark plug gap 1.1 mm (0.043 in.) Maximum timing Not adjustable; PCM controlled Idle timing Not adjustable; PCM controlled Throttle position sensor At idle 0.4–1.3 VDC At WOT 4.0–4.7 VDC Charging and Starting Specifications Charging and Starting Specifications at 21 °C (70 °F) -
Page 9: Fuel Specifications
Specifications Fuel Specifications Fuel Specifications Fuel Gasoline with oil injection Recommended gasoline Unleaded 87 octane minimum Direct fuel injected (DFI) 2‑cycle Outboard Oil or Recommended oil Premium Plus 2‑cycle TC‑W3 Outboard Oil Gasoline/oil ratio At idle 300–400:1 At wide‑open throttle 40:1 Fuel Lift Pump Specifications Fuel Lift Pump Specifications... -
Page 10: Air Compressor Specifications
Specifications Fuel System Specifications High‑pressure fuel pump pressure 751.5 ± 14 kPa (109 ± 2 psi) Air pressure 655 ± 14 kPa (95 ± 2 psi) Fuel/air differential 103.5 kPa (15 psi) High‑pressure fuel pump amp 10–14 A High‑pressure fuel pump ohm resistance 1.0–1.8 Ω... -
Page 11: Powerhead Specifications
Specifications Powerhead Specifications Powerhead Specifications Number of cylinders Displacement 2.5 liter (153 in³) Stroke 67.3 mm (2.65 in.) Standard cylinder bore diameter 88.925 mm (3.501 in.) Cylinder bore maximum taper (service) 0.076 mm (0.003 in.) Cylinder bore maximum out of round (service) 0.076 mm (0.003 in.) Oversize cylinder bore diameter ‑... - Page 12 Maintenance Important Information Section 1B - Maintenance Table of Contents Maintenance Specifications..........1B-2 Removal..............1B-7 Inspection and Maintenance Schedule......1B-2 Installation..............1B-8 Prior to Every Use............1B-2 Compressor Air Intake Filter..........1B-8 After Each Saltwater or Polluted Water Use....1B-2 Removal..............1B-9 Every 10 Hours or Once A Month, Whichever Occurs Installation..............1B-9 First.................1B-2 Flushing the Cooling System..........1B-9...
-
Page 13: Maintenance Specifications
Maintenance Maintenance Specifications Maintenance Specifications Recommended fuel type Unleaded 87 octane minimum Recommended oil TC‑W3 Premium Plus or OptiMax 2‑Cycle Outboard Oil Oil tank capacity Engine reservoir capacity 0.71 liter (0.44 US quart) External tank 11.4 liter (12 US quart) Spark plug type NGK IZFR6J Spark plug gap... -
Page 14: Every 100 Hours Or Once A Month, Whichever Occurs First
• Drain and replace stator housing lubricant. See Stator Assembly Lubricant. • Remove impeller and lubricate impeller shaft with Quicksilver or Mercury Precision 2‑4‑C w/Teflon to prevent impeller from seizing to the shaft. • Inspect alternator belt. See Alternator Belt Inspection. -
Page 15: Hydro-Surge Grate
Maintenance Description lb‑in. lb‑ft Front screws Rear screws IMPORTANT: Do not operate the jet drive without the water intake grate installed. Hydro‑Surge Grate The hydro‑surge grate is spring‑loaded. If the intake gets plugged, the pump suction will pull open the grate, and the water will push the blockage pass the grate and clear the intake. -
Page 16: Fuses
Maintenance Disconnect the wire from the bottom of the filter. Remove the filter (a) by turning the filter in the direction of the arrow (clockwise). Tip the filter to drain the fluid into a suitable container. Water separating fuel filter 44939 Lubricate the sealing ring on the filter with oil. -
Page 17: Battery Inspection
Maintenance Battery Inspection The battery should be inspected at periodic intervals to ensure proper engine starting capability. IMPORTANT: Read the safety and maintenance instructions which accompany your battery. Turn off the engine before servicing the battery. Ensure the battery is secure against movement. Battery cable terminals should be clean, tight, and correctly installed. -
Page 18: Flywheel Cover Removal And Installation
Maintenance Open J‑clips to move fuel/air lines out of the way. Expansion chamber 44480 Remove the spark plug boots by twisting the rubber boots slightly and pull off. 26899 Remove the spark plugs to inspect. Replace the spark plug if the electrode is worn or the insulator is rough, cracked, broken, blistered, or fouled. -
Page 19: Installation
Maintenance Remove the cover by lifting off from the back of the engine. Flywheel cover Retaining strap 44578 Installation Lower the cover opening onto the air plenum intake flange. Tilt the cover side to side until the cover slides down onto the intake flange. -
Page 20: Removal
Maintenance Removal Remove flywheel cover from engine. Snap out the retainer and remove filter. Retainer Filter 29397 Installation Install filter into cover. Secure filter into cover with retainer. Flushing the Cooling System Flushing the cooling system is essential after each use in saltwater, after the boat has run aground, or when the overheat warning horn sounds. -
Page 21: Corrosion Control Anodes
This model has three corrosion control anodes: One on the bottom of the nozzle, one on the reverse gate, and one under the rudder. Anodes help protect the Mercury Jet Drive against galvanic corrosion by sacrificing its metal to be slowly eroded instead of the Mercury Jet Drive metals. -
Page 22: Belt Tensioner Idler Pulley Lubrication
In either case, have the drive housing checked by your authorized Mercury Marine dealer. Water in the lubricant can cause premature gear or bearing failure or, in freezing weather, damage to the drive housing. -
Page 23: Adding Lubricant
In either case, have the stator checked by your authorized Mercury Marine dealer. Water in the lubricant can cause premature bearing failure or, in freezing weather, damage to the stator. -
Page 24: Submerged Power Package
11. Check that the bottom edge of the reverse gate is above the outside diameter of the rudder. If the reverse gate is below the outer diameter of the rudder, do not operate the boat. See an authorized Mercury Marine dealer for proper adjustment. -
Page 25: Protecting Internal Engine Components
Maintenance Place the outboard in water or connect a flushing attachment for circulating cooling water. Run the engine at 2000 RPM for 25 minutes to allow the treated fuel to fill the fuel system. Protecting Internal Engine Components NOTE: Make sure the fuel system has been prepared for storage. Remove the spark plugs and using Oil Syringe 803976T, add approximately 30 ml (1 oz) of 2‑cycle TC‑W3 engine oil into each spark plug hole. - Page 26 200 OptiMax SportJet Powerhead Aft View....1C-9 Analysis..............1C-15 200 OptiMax SportJet Powerhead Top View....1C-10 Shipping of Hazardous Material (HazMat) and Engine/ Mercury Jet Pump Starboard View......1C-11 Components Containing Hazardous Material....1C-15 Mercury Jet Pump Port View........1C-11 Outboard Service Bulletin 2008‑07......1C-15 Conditions Affecting Performance........1C-12 Overview of Regulations...........1C-15...
-
Page 27: General Specifications
General Information General Specifications Model Specifications Kilowatts (horsepower) 149.1 kW (200 hp) Weight Powerhead 116.6 kg (257 lb) Pump unit 49 kg (110 lb) Displacement (all HP) 2.5 liter (153 in³) Idle 900–1000 RPM 5150–5650 RPM RPM limit (Guardian) 6300 RPM Induction system Throttle body aspiration Computer controlled sequential... -
Page 28: Serial Number Location
Model # XXXXXXX XXXXXXX Serial # Serial Number XXXXXXX XXXXXX Mercury Marine Brunswick Corp. Fond du Lac, WI 54935 Assembled in the USA from US and foreign components 44931 IMPORTANT: For convenience, stickers listing the pump model and serial number and the bar code information are supplied in an envelope affixed to the pump unit. -
Page 29: Powerhead Views
General Information Powerhead Views 200 OptiMax SportJet Powerhead Front View 45357 Flywheel Alternator Fuel lift pump Fuel filter Vapor separator tank (VST) VST drain plug VST fuel inlet hose Oil pump inlet hose Expansion chamber 10 - Oil pump 11 - 14 pin engine harness connector 12 - Starter motor solenoid... - Page 30 General Information Notes: 90-8M0050731 MAY 2011 Page 1C-5...
-
Page 31: 200 Optimax Sportjet Powerhead Port View
General Information 200 OptiMax SportJet Powerhead Port View 45359 Page 1C-6 90-8M0050731 MAY 2011... - Page 32 General Information Alternator 19 - Fuse cover Water bypass fitting 20 - Throttle stop Compressor coolant hose 21 - Excess air hose to adapter plate Air compressor inlet 22 - 2 psi check valve Air compressor 23 - Inlet oil hose filter Air compressor temperature sensor 24 - Oil reservoir hose...
-
Page 33: 200 Optimax Sportjet Powerhead Starboard View
General Information 200 OptiMax SportJet Powerhead Starboard View 45358 SmartCraft connector CDS connector Starter motor Starter motor solenoid Air handler assembly Positive 12 volt cable Oil pump inlet hose Oil pump Fuel inlet hose 10 - Engine control module (ECM) 11 - Negative battery cable 12 -... -
Page 34: 200 Optimax Sportjet Powerhead Aft View
General Information 200 OptiMax SportJet Powerhead Aft View 45360 80 psi air hose Water pressure sensor SmartCraft connector Cover Expansion chamber Expansion chamber coolant hose Exhaust pipe coolant hose T‑fitting Water bypass hose 10 - Air compressor inlet 11 - Air compressor 90-8M0050731 MAY 2011 Page 1C-9... -
Page 35: 200 Optimax Sportjet Powerhead Top View
General Information 200 OptiMax SportJet Powerhead Top View Air compressor pulley Air compressor inlet Water bypass hose Air compressor coolant hose Belt tensioner Tensioner grease fitting Alternator Fuel inlet to fuel/separator Fuel lift pump 10 - Fuel filter 11 - Vapor separator tank (VST) vent fitting 12 -... -
Page 36: Mercury Jet Pump Starboard View
General Information Mercury Jet Pump Starboard View 45362 Reverse gate Shift cable assembly Hull Shift cable assembly/through‑the‑hull fitting Water intake Wear ring Trim plate Stator Mercury Jet Pump Port View 45363 Reverse gate Steering cable assembly Hull Steering cable assembly/through‑the‑hull fitting... -
Page 37: Conditions Affecting Performance
30% relative humidity, at 25 °C (77 °F) temperature, and a barometric pressure of 29.61 inches of mercury (in. Hg). Summer conditions of high temperature, low barometric pressure, and high humidity all combine to reduce the engine power. This, in turn, is reflected in decreased boat speeds as much as 3 to 5 km/h (2 to 3 MPH) in some cases. -
Page 38: Ventilation
General Information Ventilation Ventilation occurs when air is drawn from the water’s surface (excessive trim out angle) or from the engine exhaust flow (in reverse) into the impeller blades. These air bubbles strike the impeller blade surface and cause erosion of the blade surface. If allowed to continue, eventual blade failure (breakage) will occur. -
Page 39: Compression Check
General Information Add approximately 30 ml (1 oz) of engine oil into each spark plug hole. Rotate the flywheel manually several times to distribute the oil in the cylinders. Install the spark plugs. Drain the water from the oil injection system as follows: Remove the remote oil hose (black without blue stripe) from the pulse fitting on the starboard side of the engine. -
Page 40: Cylinder Leakage Testing
General Information Cylinder Leakage Testing IMPORTANT: Refer to the Master Specifications for the firing order of the engine. NOTE: Cylinder leakage testing, along with compression testing, can help pinpoint the source of a mechanical failure by gauging the amount of leakage in a cylinder. Refer to the manufacturer's tester instructions for proper testing procedures. Cylinder Leakage Tester Snap‑On EEPV309A Remove all of the spark plugs from cylinders except for cylinder #1. -
Page 41: Overview Of Training Requirements
General Information Overview of Training Requirements Current U.S. Department of Transportation (DOT) regulations require initial training (and recurrent training) of all employees who perform work functions covered by the Hazardous Materials Regulations. Any employee who works in a shipping, receiving, or material handling area;... - Page 42 General Information Mix 16 ml (1/2 oz) of dishwashing liquid in 4 liter (1 US gal) of cool water to use as a wetting solution. NOTE: Leave the protective masking on the face of the decal until the final steps of decal installation. This will ensure the vinyl decal keeps its shape during installation.
- Page 43 General Information Notes: Page 1C-18 90-8M0050731 MAY 2011...
- Page 44 Jet Installation Important Information Section 1D - Jet Installation Table of Contents General Information............1D-2 Removal..............1D-16 Notice to Installer............1D-2 Installation..............1D-17 Torque Specifications..........1D-2 Installing the Throttle Cable ..........1D-17 Before Starting the Engine.........1D-3 Fuel Hose and Vent Hose Connections......1D-18 Important Information............1D-3 Battery Cable Connections..........1D-19 Fuel Requirements.............1D-3 Battery Cable Installation Requirements....1D-19 Oil Recommendation..........1D-3...
-
Page 45: General Information
IMPORTANT: Indicates information or instructions that are necessary for a particular step or action. NOTE: Indicates information that helps in the understanding of a particular step or action. This installation section has been written and published by the service department of Mercury Marine to aid installers when installing the products described herein. -
Page 46: Before Starting The Engine
IMPORTANT: Oil must be NMMA certified TC‑W3 2‑Cycle oil. Periodically consult with your dealer to get the latest gasoline and oil recommendations. If Mercury Precision or Quicksilver 2‑Cycle Outboard Oil is not available, substitute another brand of 2‑Cycle outboard oil that is NMMA Certified TC‑W3. The use of an inferior 2‑Cycle outboard oil can reduce engine durability. -
Page 47: Start In Gear Protection
Genuine Mercury Precision or Quicksilver Accessories have been specifically designed and tested for this outboard. Some accessories not manufactured or sold by Mercury Marine are not designed to be safely used with this outboard or outboard operating system. Acquire and read the installation, operation, and maintenance manuals for all selected accessories. -
Page 48: Fuel Requirements
An outside PVC jacket with increased UV resistance to prevent browning of the exterior surface. The new low permeation fuel hose from Mercury Marine will have a different compound number printed on the hose. The red print on the older non‑low permeation hose will change to the blue print on the new low permeation hose. -
Page 49: Installation Requirements
The fuel system components on Mercury engines will withstand up to 10% alcohol content in the gasoline. We do not know what percentage of alcohol the boat's fuel system will withstand. The boat manufacturer must have specific recommendations on the boat's fuel system components (fuel tanks, fuel lines, and fittings). -
Page 50: Boat Construction
Water that runs on or is splashed in the air intake may enter the engine and cause serious damage to internal engine parts. IMPORTANT: Mercury Marine will not honor any warranty claim for engine damage as a result of water entry. Engine Compartment Ventilation The engine compartment must provide a sufficient volume of air for engine breathing and also must vent any fumes in accordance with industry standards (ABYC, NMMA, etc.), federal standards, and U.S. -
Page 51: Exhaust And Engine Height
Damage caused by water in the engine will not be covered by Mercury Marine Limited Warranty, unless this damage is the result of defective parts. -
Page 52: Instrumentation
Parts Accessories Guide for selection. If other than Mercury Precision or Quicksilver electrical accessories are to be used, it is good practice to use waterproof ignition components (ignition switch, lanyard stop switch, etc.). A typical jet boat of this nature will see water splashed on these components. -
Page 53: Installing The Jet Pump
The steering cable should be able to withstand the steering loads imparted on it by the rudder METHOD FOR CONTROLLING LOCATION AND SIZE Mercury Marine recommends that the tunnel opening be done as a part of the manufacture of the tunnel. This will ensure consistency of location as well as size. - Page 54 Jet Installation IMPORTANT: Avoid gluing the flexible sealing lips to the tunnel. 44445 Glue front portion of grommet Flexible sealing lips to tunnel Tube Ref No. Description Where Used Part No. Loctite 454 Prism Instant Front portion of grommet Adhesive Gel Install the through‑the‑hull fitting bellow assemblies into the tunnel.
- Page 55 Jet Installation Install a nut on the steering cable and route the cable through the flange on the side of the wear ring. Steering cable Flange on the wear ring 20044 Install the tab washer and outer nut on the steering cable. Locate the bent tab on the tab washer into the tab hole.
- Page 56 Jet Installation 11. Spray soapy water on the inside surface of the tunnel grommet and on the ride plate seal. Tunnel grommet Ride plate seal 5627 NOTE: When installing the pump in the tunnel, ensure that cables are below the tunnel grommet flange on the pump to prevent pinching of the cables between the pump and boat.
-
Page 57: Installing The Flush Kit
Jet Installation 13. Install the gasket and O‑ring seal on the jet pump. Gasket O‑ring seal 44454 14. Install the drive housing cover on the jet pump with four M10 x 1.5 nuts. Tighten the nuts to the specified torque. M10 x 1.5 nut (4) Drive housing cover 20063... -
Page 58: Installing The Powerhead
Jet Installation Attach the other end of the flush hose to the flush adapter. Fasten with a cable tie clamp as shown. Flush adapter Cable tie Flush hose 43949 IMPORTANT: Before mounting the flush adapter bracket, route the adapter and hose to the selected mounting location. Hose routing must not interfere with throttle or control linkage. -
Page 59: Flywheel Cover Removal And Installation
Jet Installation Lubricate the driveshaft splines with Special Lubricant 101. Powerhead gasket Water inlet O‑ring Driveshaft opening O‑ring 20289 Tube Ref No. Description Where Used Part No. Special Lubricant 101 Driveshaft splines 92-802865Q02 Lower the powerhead onto the drive housing cover. Align the driveshaft splines with the crankshaft. Secure the powerhead to the drive housing cover with eleven M10 x 1.5 nuts. -
Page 60: Installation
Jet Installation Remove the cover by lifting off from the back of the engine. Flywheel cover Retaining strap 44578 Installation Lower the cover opening onto the air plenum intake flange. Tilt the cover side to side until the cover slides down onto the intake flange. -
Page 61: Fuel Hose And Vent Hose Connections
Jet Installation Attach the throttle cable to the throttle lever. Secure with a washer and locknut. Tighten to the specified value. Washer and locknut Throttle cable Throttle lever 7738 Description lb‑in. lb‑ft Throttle cable locknut Tighten, then loosen 1/4 turn Adjust the cable barrel so that the installed throttle cable will hold the idle stop screw against the stop. -
Page 62: Battery Cable Connections
Jet Installation NOTE: The vapor separator tank (VST) must be vented to the fuel tank. The vent hose must comply with the U.S. Coast Guard/ABYC regulations. Connect a vent hose between the fuel tank and the fitting on the vapor separator tank. Secure the hose to the fitting with a U.S. -
Page 63: Remote Harness Connection
Jet Installation Fasten the negative (–) battery cable to the grounding bolt located on the engine block below the starter motor. Seal the connection with Liquid Neoprene. Positive battery cable attaching location Negative battery cable attaching location 44239 Tube Ref No. Description Where Used Part No. -
Page 64: Oil Injection Hose Connections
Jet Installation Oil Injection Hose Connections Mount and restrain the oil tank in a suitable location where the hoses are able to extend to the hose fittings on the engine. Oil tank 2683 Arrange the hoses so they will not get pinched, kinked, sharply bent, or stretched. Remove the shipping cap from the fitting on the oil filter and connect the oil hose with the blue stripe to the fitting. - Page 65 Jet Installation WARNING Proper installation and maintenance is essential for the steering system to function. Use only the recommended hardware when installing the steering system. Follow all installation specifications and recommended maintenance procedures. 5559 Thread the cable end adapter onto the steering cable 14 turns to allow for adjustment. Cable end adapter 5560 WARNING...
- Page 66 Jet Installation Secure the cable nut with the tab washer by bending a tab over the flat of the cable nut. Bellows nut Steering arm Bolt Locknut Flat washer Cable nuts Tab washer ‑ bend tab against cable nut 44658 Description lb‑in.
-
Page 67: Shift Cable Adjustment
Jet Installation 14. Secure the bellows to the through‑the‑hull fitting with a clamp. Slide the slit adapter over the cable. Apply Perfect Seal to the slit and push the slit adapter into the bellows. Secure with a clamp. Steering cable, through‑the‑hull fitting, and bellows assembly Through‑the‑hull fitting and nut Clamp... - Page 68 Jet Installation Position and install the bellows onto the cable conduit as shown. Fasten the ends with a clamp and cable tie. Bellows Clamp Cable tie 25.4 mm (1 in.) 5567 Loosen the locknuts and unfasten the top end of the shift cable retainer. NOTE: Locknuts do not have to be removed to open the shift cable retainer.
- Page 69 Jet Installation Adjust shift cable as follows: Shift the control box into the forward shift position. Position the reverse gate against the forward stop. With the reverse gate at this position, adjust the cable barrel to fit into the barrel holder with slight tension of the reverse gate against the stop. After adjusting the shift cable, secure the cable barrel in place with the shift cable retainer.
-
Page 70: Filling The Fuel System
Jet Installation 10. Secure the bellows to the through‑the‑hull fitting with a clamp. Slide the slit adapter over the cable. Apply Perfect Seal to the slit and push the slit adapter into the bellows. Secure with a clamp. 5571 Steering cable, through‑the‑hull fitting, and bellows assembly Through‑the‑hull fitting and nut Clamp Bellows... -
Page 71: Priming The Oil Pump (If Required)
Jet Installation If the oil level is less than 118 ml (4 oz), loosen the vent cap. Use a squirt can and fill the tank with at least 118 ml (4 oz) of the recommended oil. Tighten the vent cap. Engine‑mounted oil reservoir tank Vent cap 7745... -
Page 72: Trim Plate Adjustment
Jet Installation Priming the pump will remove any air that may be in the pump, oil supply hose, or internal passages. Toolbox icon Active Diagnostics icon Oil Pump Prime test 44392 Trim Plate Adjustment The jet drive unit trim plate is factory set for general applications. Should a particular boat experience porpoising problems, the trim plate can be adjusted as follows: Loosen both jam nuts on the trim plate (one starboard and one port). -
Page 73: Features
Jet Installation Features Bilge Siphon Feature The sport jet incorporates an automatic bilge siphoning feature. The bilge siphon is working whenever the engine is operating above idle speeds. Maximum performance of the bilge siphon is achieved above 3000 RPM. A hose is attached to the jet pump nozzle, routed to the engine compartment, and placed in the bilge. - Page 74 Jet Installation Select the mounting location for the through‑the‑hull fitting as follows: Transom (top view) Mounting zones 50 mm (2 in.) minimum Waterline Transom (back view) 5638 • The through‑the‑hull fitting must be mounted in either side of the transom within the mounting zones "b." •...
-
Page 75: Installing The Exhaust System
Jet Installation Ensure that the hose slopes at a minimum rate of 25 mm (1 in.) drop per 30 mm (12 in.) of hose. Water bypass hose Hose clamp Through‑the‑hull fitting 44949 Installing the Exhaust System General Exhaust System Notes IMPORTANT: Failure to follow current marine industry guidelines (NMMA, ABYC, U.S. -
Page 76: Top View
Jet Installation Top View 5511 878147‑A1 muffler assembly, port 22.8 cm (9.0 in.) with 7.6 cm (3.0 in.) outlet 7.6 cm (3.0 in.) O.D. tubing 57885‑A1 flange assembly (two required) 878148‑A1 muffler assembly, starboard 22.8 cm (9.0 in) with 7.6 cm (3.0 in.) outlet •... -
Page 77: Aft View
• Final system installation shall be reviewed by a Mercury Marine field representative using a modified expansion chamber to ensure back pressure does not exceed 10.3 kg (1.8 psi) at 304.8 m (1000 ft) above sea level or less. This test needs to be performed with the boat in the water and under way. -
Page 78: Side View
Jet Installation Side View 5550 Bottom edge of the muffler outlet tube 5.1 cm (2.0 in.) Waterline Covers 5.1 cm (2.0 in.) 5° outlet angle • Measure the bottom edge of the muffler outlet tube to ensure that the lowest possible location of the bottom edge of the muffler tube never gets within 5.1 cm (2.0 in.) of the maximum depth waterline. -
Page 79: Side View Of Expansion Chamber Outlet Pipe And Exhaust Pipe Connection
Jet Installation Side View of Expansion Chamber Outlet Pipe and Exhaust Pipe Connection IMPORTANT: A spacer must be used with all 7.6 cm (3.0 in.) tube applications. A spacer having a 6.73 cm (2.65 in.) I.D. and a 7.6 cm (3.0 in.) O.D. needs to be installed over the expansion chamber outlets. Spacer 5551 Inner Sleeve Liner Fabrication... - Page 80 Jet Installation Engine Break-in Procedure Step 1: First 40 minutes - Keep the boat on the trailer. Place the boat and trailer in water that is deep enough to submerge the water intake grate. Keep the bow attached and tight to the trailer, but remove or loosen the rear straps to allow the boat to float at the rear.
-
Page 81: Predelivery Inspection
Jet Installation Predelivery Inspection Check/ Check/ Not Applicable CHECK BEFORE RUNNING Not Applicable ON THE WATER TEST Adjust Adjust Idle________ RPM, within ⃞ ⃞ Water hose connection torqued ⃞ ⃞ specifications Cover plate and adapter plate Forward ‑ Neutral ‑ Reverse ⃞... - Page 82 Ignition Electrical Section 2A - Ignition Table of Contents Ignition Specifications............2A-2 Ignition Coils..............2A-18 Electrical Components............2A-4 Ignition Coil Test............2A-18 Electrical Plate Hardware...........2A-6 Ignition Coil Removal and Installation.......2A-20 Electrical Plate Engine Harness.........2A-8 Crankshaft Position Sensor (CPS)........2A-21 Troubleshooting without a Computer Diagnostic System Crankshaft Position Sensor (CPS) Removal and (CDS)................2A-10 Installation.............2A-22...
-
Page 83: Ignition Specifications
Ignition Ignition Specifications Ignition Specifications Type Digital inductive Spark plug NGK IZFR6J Spark plug gap 1.1 mm (0.043 in.) Maximum timing Not adjustable; PCM controlled Idle timing Not adjustable; PCM controlled Throttle position sensor At idle 0.4–1.3 VDC At WOT 4.0–4.7 VDC Lubricant, Sealant, Adhesives Tube Ref No. - Page 84 Ignition Notes: 90-8M0050731 MAY 2011 Page 2A-3...
-
Page 85: Electrical Components
Ignition Electrical Components 19 20 44730 Page 2A-4 90-8M0050731 MAY 2011... - Page 86 Ignition Electrical Components Torque Ref. No. Qty. Description lb‑in. lb‑ft Electrical plate Propulsion control module (PCM) Grommet Bushing Washer Screw (M6 x 25) 11.5 100 amp fuse harness assembly Starter cable assembly Black cable assembly Solenoid assembly Lockwasher Cap nut and nut (10‑32) Nut (5/16‑18) Grommet Bushing...
-
Page 87: Electrical Plate Hardware
Ignition Electrical Plate Hardware 17 18 44729 Page 2A-6 90-8M0050731 MAY 2011... - Page 88 Ignition Electrical Plate Hardware Torque Ref. No. Qty. Description lb‑in. lb‑ft Electrical plate Clip Clip Clip Screw (M6 x 10) Grommet Bushing Bushing Stud (M6 x 50) Washer Nut (M6) Cable tie clip Clip Clip Cable tie Cover Sleeve Flange screw (M6 x 14) 90-8M0050731 MAY 2011 Page 2A-7...
-
Page 89: Electrical Plate Engine Harness
Ignition Electrical Plate Engine Harness 44731 Page 2A-8 90-8M0050731 MAY 2011... - Page 90 Ignition Electrical Plate Engine Harness Torque Ref. No. Qty. Description lb‑in. lb‑ft Engine harness Fuse cover Weather cap connector Fuse cover Fuse (20 A, yellow) Fuse (15 A, blue) Fuse (5 A, brown) Fuse (5 A, brown) 90-8M0050731 MAY 2011 Page 2A-9...
-
Page 91: Troubleshooting Without A Computer Diagnostic System (Cds)
Troubleshooting with the Computer Diagnostic System (CDS) The computer diagnostic system (CDS) is designed to help technicians diagnose and repair Mercury Marine 2 and 4 cycle engines. Attach the diagnostic cable to the PCM diagnostic connector. This will enable the technician to monitor sensors, PCM data values, and the real time status of the switches. -
Page 92: Troubleshooting Guide
Ignition Troubleshooting Guide 1. Engine Cranks, but Will Not Start Cause Action 1.0 Lanyard stop switch in wrong position Reset lanyard stop switch. 1.1 Weak battery or bad starter motor, battery voltage Replace/charge battery. Inspect condition of starter motor. drops below 8 volts while cranking (PCM cuts out Check condition of battery terminals and cables. - Page 93 Check throttle cam setup on induction manifold. Inspect linkage and roller. 5.3 Throttle incorrectly adjusted If throttle plate stop screws have been tampered with, contact Mercury Marine Service Department for correct adjustment procedures. 5.4 Bad coil/weak spark Refer to 3.5.
-
Page 94: Wire Color Code Abbreviations
Ignition 6. Engine Runs Rough Above 3000 RPM Cause Action 6.1 Fouled spark plug Refer to 3.2. Refer to 7.4 and 7.5. 6.2 Speed reduction 6.3 Low air pressure in rails Refer to 1.2. Refer to 2.4. 6.4 TPS malfunction 7. -
Page 95: Theory Of Operation - Internal Ignition Coil Driver Models
Ignition Theory of Operation ‑ Internal Ignition Coil Driver Models When the ignition key is turned to the "RUN" position, battery voltage is supplied to the electrical system through the main power relay. If the propulsion control module (PCM) does not sense engine rotation within a certain time period, the relay is turned off. Engine rotation will engage the relay. -
Page 96: Main Power Relay (Mpr)
Ignition Main Power Relay (MPR) The main power relay (MPR) is located on the starboard side of the engine. The MPR is controlled by the PCM. After the first system power up, the MPR is active for approximately five seconds. The PCM will deactivate the MPR unless the crankshaft position sensor signals the PCM to initiate the MPR. -
Page 97: Flywheel
Ignition Flywheel Flywheel Cover Removal and Installation Removal Detach the retaining strap. Remove the cover by lifting off from the back of the engine. Flywheel cover Retaining strap 44578 Installation Lower the cover opening onto the air plenum intake flange. Tilt the cover side to side until the cover slides down onto the intake flange. -
Page 98: Propulsion Control Module (Pcm)
Ignition Propulsion Control Module (PCM) The PCM requires 8 VDC minimum to operate. If the PCM should fail, the engine will stop running. Some inputs to the PCM can be monitored and tested using the computer diagnostic system (CDS). Computer Diagnostic System (CDS) Order through SPX The PCM controls the following functions: •... -
Page 99: Ignition Coils
Ignition PCM Installation Secure the PCM to the powerhead with the M6 x 25 screws, bushings, and grommets. Tighten the screws to the specified torque. Secure the bracket to the PCM with a M6 x 14 screw. Tighten the screw to the specified torque. Connect the engine harness connectors to the PCM. - Page 100 Ignition Ignition Coil Resistance Test Remove the ignition coils from the electrical plate. Refer to Ignition Coil Removal. 36993 Black Meter Lead Secondary Secondary Primary EST Pin A EST Pin B Battery + Pin E Tower Low Pin C Ground Pin D Secondary No Continuity No Continuity...
-
Page 101: Ignition Coil Removal And Installation
Ignition Ignition Coil Removal and Installation Ignition Coil Removal WARNING Performing service or maintenance without first disconnecting the battery can cause product damage, personal injury, or death due to fire, explosion, electrical shock, or unexpected engine starting. Always disconnect the battery cables from the battery before maintaining, servicing, installing, or removing engine or drive components. -
Page 102: Crankshaft Position Sensor (Cps)
Ignition Connect the battery cables to the batteries. Crankshaft Position Sensor (CPS) 15146 The crankshaft position sensor is located at the top of the cylinder block next to the flywheel. The sensor contains a magnet which is positioned next to the flywheel's lower ring gear. This ring gear has missing teeth at specific locations. The close proximity of the crankshaft position sensor magnet to the teeth allows a magnetic field to be created each time a tooth passes the sensor. -
Page 103: Crankshaft Position Sensor (Cps) Removal And Installation
Ignition Crankshaft Position Sensor (CPS) Removal and Installation WARNING Performing service or maintenance without first disconnecting the battery can cause product damage, personal injury, or death due to fire, explosion, electrical shock, or unexpected engine starting. Always disconnect the battery cables from the battery before maintaining, servicing, installing, or removing engine or drive components. -
Page 104: Throttle Position Sensor (Tps) Troubleshooting
Ignition Throttle Position Sensor Specifications Model year 2001 and newer Idle 0.4–1.3 VDC Wide‑open throttle 4.0–4.7 VDC Throttle position sensor Throttle cam 45712 Throttle Position Sensor (TPS) Troubleshooting If the throttle position sensor is out of the intended operating range when the engine is started, the propulsion control module (PCM) will sense that the throttle position sensor (TPS) has failed. - Page 105 Ignition Install the TPS link arm assembly onto the TPS lever. Verify the TPS lever is engaged with the TPS. 45713 Sensor bracket TPS cover Screw (10‑32 x 2) (3) Throttle link arm assembly TPS lever Screw (M6 x 25) (3) Washer (3) Grommet (3) Bushing (3)
-
Page 106: Manifold Absolute Pressure (Map) Sensor
Ignition Manifold Absolute Pressure (MAP) Sensor The manifold absolute pressure (MAP) sensor measures the changes in the intake manifold pressure. It is located at the top of the intake manifold. When the key is turned "ON" the MAP sensor reads the ambient atmospheric pressure. This information is used by the PCM as an indication of altitude and is referred to as BARRO. -
Page 107: Temperature Sensors
Ignition Meter Test Leads Meter Scale Reading (Ω) at 20 °C (68 °F) Black Auto 4.28 kΩ ± 30% Auto 98.6 kΩ ± 30% Auto 4.28 kΩ ± 30% Auto 102.6 kΩ ± 30% Auto 98.6 kΩ ± 30% Auto 102.6 kΩ... - Page 108 Ignition The sensor can be tested with an ohmmeter by heating or cooling the end of the sensor at a controlled temperature. If the readings do not match those in the table, replace the sensor and retest. Cylinder Head Coolant Temperature Sensor Ohm Test Centigrade ‑10 °C 20 °C...
-
Page 109: Manifold Intake Air Temperature (Mat) Sensor
Ignition Manifold Intake Air Temperature (MAT) Sensor The manifold intake air temperature sensor is a thermistor that controls a signal voltage to the PCM. It is located on the intake manifold. It informs the PCM of the air temperature inside the intake manifold. The PCM adjusts the fuel injection duration needed to run the engine at optimum efficiency according to the MAT information. -
Page 110: Guardian System Activation
Ignition IMPORTANT: The Guardian System cannot guarantee that powerhead damage will not occur when adverse operating conditions are encountered. The Guardian System is designed to 1) warn the boat operator that the engine is operating under adverse conditions and 2) reduce power by limiting maximum RPM in an attempt to avoid or reduce the possibility of engine damage. The boat operator is ultimately responsible for proper engine operation. - Page 111 Ignition Warning Horn Function Sound Description Start up One beep Normal system test. Low oil reserve Four beeps every Oil level is low in the engine‑mounted oil reservoir. Refill the engine‑mounted oil two minutes reservoir and the remote oil tank. Water in fuel Four beeps every Water in the water separating fuel filter reaches the full level.
- Page 112 Charging and Starting System Electrical Section 2B - Charging and Starting System Table of Contents Charging and Starting Specifications.........2B-2 Alternator Description..........2B-12 Flywheel/Alternator............2B-4 Diagnosis of Alternator System on the Engine..2B-13 Starter Motor Components..........2B-6 Alternator System Circuitry Test.......2B-14 Wire Color Code Abbreviations..........2B-8 Current Output............2B-16 Battery................2B-8 Alternator Removal and Installation......2B-17...
-
Page 113: Charging And Starting Specifications
Charging and Starting System Charging and Starting Specifications Charging and Starting Specifications at 21 °C (70 °F) Alternator output (regulated) Output at the battery at 2000 RPM 28–36 A Output at the alternator at 2000 RPM 42–48 A Voltage set point 14.5 ±... - Page 114 Charging and Starting System Flywheel Puller 91‑849154T 1 Removes the flywheel from the crankshaft 7617 DMT 2004 Digital Multimeter 91‑892647A01 Measures RPM on spark ignition (SI) engines, ohms, amperes, AC and DC voltages; records maximums and minimums simultaneously, and accurately reads H z TEMP in high RFI environments.
-
Page 115: Flywheel/Alternator
Charging and Starting System Flywheel/Alternator 1421 Page 2B-4 90-8M0050731 MAY 2011... - Page 116 Charging and Starting System Flywheel/Alternator Torque Ref. No. Qty. Description lb‑in. lb‑ft Alternator Bolt (M10 x 100) (stainless steel) Bolt (M10 x 120) (stainless steel) Washer (0.390 x 1.00 x 0.06) Mount Bracket Washer (0.406 x 1.250 x 0.089) Bracket Nut (M10) Bolt (M10 x 55) Cable assembly...
-
Page 117: Starter Motor Components
Charging and Starting System Starter Motor Components 4253 Page 2B-6 90-8M0050731 MAY 2011... - Page 118 Charging and Starting System Starter Motor Components Torque Ref. No. Qty. Description lb‑in. lb‑ft Starter motor assembly Through bolt 12.5 Solenoid kit Gear kit Nut (M8) (stainless steel) Lockwasher (0.312) Nut (M5) (stainless steel) Lockwasher (M5) Screw and lockwasher (0.250‑20 x 0.625) (stainless steel) Cable assembly (6.0 in.) (black) Rubber stop Starter motor collar...
-
Page 119: Wire Color Code Abbreviations
Charging and Starting System Wire Color Code Abbreviations Wire Color Abbreviations Black Blue Brown Gray Green ORN or ORG Orange Pink PPL or PUR Purple White Yellow LT or LIT Light DK or DRK Dark Battery Battery Cable Test This test is used to determine if there is excessive resistance in the battery's positive or negative cables, or if the cable is sized properly to carry the necessary current needed to crank the engine at the proper RPM. -
Page 120: Replacement Parts
Replacement Parts WARNING Avoid fire or explosion hazard. Electrical, ignition, and fuel system components on Mercury Marine products comply with federal and international standards to minimize risk of fire or explosion. Do not use replacement electrical or fuel system components that do not comply with these standards. -
Page 121: Battery Precautions
Charging and Starting System Battery Precautions WARNING An operating or charging battery produces gas that can ignite and explode, spraying out sulfuric acid, which can cause severe burns. Ventilate the area around the battery and wear protective equipment when handling or servicing batteries. When charging batteries, an explosive gas mixture forms in each cell. -
Page 122: Flywheel Removal And Installation
Charging and Starting System Repeat preceding charging procedure every 30–45 days, as long as the battery is in storage, for best possible maintenance during inactive periods to ensure a good serviceable battery in spring. When ready to place the battery back in service, remove excess grease from the terminals (a small amount is desirable on terminals at all times), recharge again, as necessary, and reinstall the battery. -
Page 123: Installation
Charging and Starting System Flywheel Puller 91‑849154T 1 Remove the flywheel and inspect the flywheel for cracks or damage. Installation IMPORTANT: Clean the flywheel/crankshaft taper with a mild solvent and assemble dry. Align the flywheel with the master crankshaft spline and install the flywheel. Install the washer and nut. -
Page 124: Diagnosis Of Alternator System On The Engine
Charging and Starting System Diagnosis of Alternator System on the Engine If the battery is undercharged, verify the condition is not caused by excessive accessory current draw or by accessories which have been accidentally left on. Check the physical condition and the state of the battery charge. The battery must be 75% (1.230 specific gravity) or greater to obtain valid results in the following tests. -
Page 125: Alternator System Circuitry Test
Charging and Starting System Inspect the 100 amp fusible link located on the starboard side of the engine. If the fusible link is blown, check the battery leads for reversed polarity connection before replacing the fusible link. 100 amp fusible link 32034 Alternator System Circuitry Test Check the belt condition and tension. - Page 126 Charging and Starting System If the reading is above 15 volts at the battery without a battery isolator installed, the alternator is overcharging and must be replaced. Alternator output stud Alternator ground 32042 Sensing Circuit Unplug the red and purple excitation/sensing wire connector from the alternator. Connect the positive (+) DMT lead to the red pin and the negative (–) DMT lead to the alternator ground.
-
Page 127: Current Output
Charging and Starting System Turn the ignition key to the "ON" position. The DMT should indicate battery voltage. If battery voltage is not present, check the purple lead for a loose or dirty connection, damaged wiring, or a malfunctioning main power relay. Excitation circuit purple lead Alternator ground 32045... -
Page 128: Alternator Removal And Installation
Charging and Starting System Alternator Current Output at 21 °C (70 °F) Engine Speed Current Output - Amps (± 3) 1000 2000 3000 4000 5000 Current Output Troubleshooting Battery cables are loose or corroded Current output is low Defective battery (open circuit) Defective alternator Accessories turned on Current output is high... - Page 129 Charging and Starting System Use a breaker bar to relieve the tension on the alternator belt and remove the alternator belt. Belt tensioner assembly Breaker bar 32050 Remove the M10 x 55 bolt and nut securing the alternator ground wire and alternator to the cylinder block. Remove the M10 x 100 bolt securing the alternator to the cylinder block.
- Page 130 Charging and Starting System Installation Install the isolation brackets onto the alternator. Verify there are washers between the isolation bracket grommets and the alternator. Secure the isolation brackets to the alternator with large washers and a M10 x 120 bolt and nut. Do not tighten the bolt and nut at this time.
- Page 131 Charging and Starting System Tighten the M10 x 120 bolt and nut to the specified torque. Bolt (M10 x 100) Bolt (M10 x 55) and nut Bolt (M10 x 120) and nut 32059 Description lb‑in. lb‑ft Bolt (M10 x 100) Bolt (M10 x 55) and nut Bolt (M10 x 120) and nut Connect the excitation/sensing wire connector to the alternator.
-
Page 132: Belt Tensioner Removal And Installation
Charging and Starting System 10. Use a breaker bar to move the belt tensioner and install the alternator belt. Install the belt with the lettering facing up. Belt Breaker bar tensioner slot Alternator 39261 Belt Tensioner Removal and Installation NOTE: The following procedure shows the alternator removed from the powerhead for installation clarity. It is not necessary to remove the alternator to remove and install the belt tensioner. - Page 133 Charging and Starting System Remove the screw securing the pulley to the belt tensioner. Bushing Screw securing the pulley Grease fitting 32079 Installation Install the pulley to the belt tensioner and secure with a M10 x 35 screw. Tighten the screw to the specified torque. Lubricate the belt tensioner bushing with 2‑4‑C with Teflon.
-
Page 134: Starter System
Charging and Starting System Tube Ref No. Description Where Used Part No. 2-4-C with Teflon Belt tensioner 92-802859A 1 Install the belt tensioner assembly onto the stud and spring. Retain the belt tensioner assembly with a washer and nut. Use a breaker bar to compress the belt tensioner spring. Verify the belt tensioner assembly stop is clear of the cylinder block stop. - Page 135 Charging and Starting System Remove the starter mounting bolts and remove the starter from the engine. Upper mounting bolts (0.312‑18 x 1.50) Bracket Starter motor Cover Lower mounting bolts (0.312‑18 x 2.00) Ground cable Positive cable (black cable with yellow sleeve, M8 nut) Yellow/red wire Starter solenoid Starter ground cable...
-
Page 136: Starter Circuit Troubleshooting
Charging and Starting System Attach the black cable with the yellow sleeve to the starter solenoid with a M8 nut. Tighten the nut to the specified torque. Cover the nut with the red boot. Upper mounting bolts (0.312‑18 x 1.50) Bracket Starter motor Cover... - Page 137 Charging and Starting System Starter Circuit Troubleshooting Page 2B-26 90-8M0050731 MAY 2011...
- Page 138 Charging and Starting System Power stud Start solenoid Starter solenoid 15 amp harness fuse Neutral start switch (tiller handle or remote control) Key switch Battery Starter Motor Does Not Turn Test Number Procedure Test Results Battery voltage should be 12.6 volts or higher. Battery Set the meter to read voltage, auto range.
- Page 139 Charging and Starting System Starter Motor Does Not Turn Test Number Procedure Test Results No continuity ‑ There is an open circuit between the battery negative post and the powerhead. Set the meter to read ohms, auto range. Connect the •...
-
Page 140: Start Solenoid Test
Charging and Starting System Start Solenoid Test IMPORTANT: Before testing the solenoid: • Ensure all battery cable connections are free of corrosion and secured to a fully charged battery. • Ensure all connections to the solenoid are secure and free of corrosion. Measure the voltage at the positive (+) copper terminal. -
Page 141: Starter Disassembly (Solenoid Driven Bendix)
Charging and Starting System Example Description Reading Connect a meter lead on the negative (–) silver terminal and the other lead to Continuity engine ground. 7722 If all previous tests pass, remove all push‑on terminal connectors from the start solenoid and use an ohmmeter to measure the resistance across the silver terminals. -
Page 142: Starter Assembly (Solenoid Driven Bendix)
Charging and Starting System Remove the three screws securing the solenoid to the starter. Remove the solenoid from the starter. Screws 32116 Pinion Gear Removal Remove and discard the snap ring securing the pinion gear to the starter shaft. Remove the pinion gear from the starter shaft. NOTE: The removal of the pinion gear may require the use of a small gear puller. - Page 143 Charging and Starting System Install the pinion gear with the taper side towards the starter assembly. Pinion gear taper Starter shaft splines 32117 Lightly tap the pinion gear onto the starter shaft splines and secure with a new snap ring. IMPORTANT: Always install a new snap ring to retain the pinion gear.
- Page 144 Charging and Starting System Insert the solenoid actuating plunger end into the fork of the solenoid arm. Fork of the solenoid arm Solenoid actuating plunger 23485 Tube Ref No. Description Where Used Part No. 2-4-C with Teflon Solenoid actuating plunger 92-802859A 1 Align the solenoid so the two solder joints are closest to starter assembly.
-
Page 145: Key Switch Test
Charging and Starting System Install the two collars and the rubber stops. Secure the starter ground wire with a 0.250‑20 x 0.625 stainless steel screw and washer. Tighten the screw to the specified torque. Apply Liquid Neoprene to the connection to prevent corrosion. Rubber stops (2) Collars (2) Screw securing ground wire... -
Page 146: Four Position Key Switch
Charging and Starting System Meter Test Leads Key Position Reading (Ω) Black Pin B Pin E Continuity Pin A Pin F Continuity Pin A Pin C, D Pin A Pin F Continuity Pin F Pin C, D Start Continuity Pin A Pin C, D Continuity Four Position Key Switch... - Page 147 Charging and Starting System Notes: Page 2B-36 90-8M0050731 MAY 2011...
- Page 148 Timing, Synchronizing, and Adjusting Electrical Section 2C - Timing, Synchronizing, and Adjusting Table of Contents Throttle Cam Adjustment...........2C-2 Crankshaft Position Sensor Air Gap........2C-4 Maximum Throttle............2C-2 Throttle Position Sensor (TPS) Adjustment.......2C-4 Throttle Plate Stop Screw...........2C-4 Idle Speed Adjustment (All Models)........2C-5 90-8M0050731 MAY 2011 Page 2C-1...
-
Page 149: Throttle Cam Adjustment
Timing, Synchronizing, and Adjusting Special Tools Computer Diagnostic System (CDS) Order through SPX Monitors all electrical systems for proper function, diagnostics, and calibration purposes. For additional information, pricing, or to order the Computer Diagnostic System contact: SPX Corporation 28635 Mound Rd. Warren, MI 48092 or call: USA ‑... - Page 150 Timing, Synchronizing, and Adjusting Tighten the jam nut on the throttle stop screw. Verify the roller can be lifted off the cam at full throttle to prevent the linkage from binding. Adjust the throttle stop screw, if necessary. 45433 Throttle shaft arm 0.508 mm (0.020 in.) clearance Stop on attenuator box Roller...
-
Page 151: Throttle Plate Stop Screw
Timing, Synchronizing, and Adjusting Throttle Plate Stop Screw IMPORTANT: Do not adjust the throttle plate stop screw from the factory setting. However, should the throttle plate require adjustment, use the throttle plate stop screw to set the throttle plate clearance to 0.7937 mm (0.031 in.) with a #68 drill bit. Throttle plate stop screw Throttle plate clearance 45434... -
Page 152: Idle Speed Adjustment (All Models)
Timing, Synchronizing, and Adjusting Idle Speed Adjustment (All Models) Engine idle speed is not adjustable. The parameters affecting idle speed can be checked and monitored with the computer diagnostic system (CDS). Computer Diagnostic System (CDS) Order through SPX 90-8M0050731 MAY 2011 Page 2C-5... - Page 153 Timing, Synchronizing, and Adjusting Notes: Page 2C-6 90-8M0050731 MAY 2011...
- Page 154 Fuel Pump Fuel System Section 3A - Fuel Pump Table of Contents Fuel Specifications.............3A-2 Vacuum Test...............3A-7 Fuel Lift Pump Specifications..........3A-2 Pressure Test.............3A-7 Fuel Pump System Components........3A-4 Fuel Lift Pump Removal/Inspection/Installation....3A-8 Anti‑Siphon Valves.............3A-6 Removal..............3A-8 Fuel Lift Pump Description/Operation........3A-6 Filter Replacement............3A-9 Testing the Fuel Lift Pump Vacuum........3A-6 Fuel Lift Pump Installation..........3A-9 Fuel Lift Pump/System Troubleshooting......3A-7 90-8M0050731 MAY 2011...
-
Page 155: Fuel Specifications
Fuel Pump Fuel Specifications Fuel Specifications Fuel Gasoline with oil injection Recommended gasoline Unleaded 87 octane minimum Direct fuel injected (DFI) 2‑cycle Outboard Oil or Recommended oil Premium Plus 2‑cycle TC‑W3 Outboard Oil Gasoline/oil ratio At idle 300–400:1 At wide‑open throttle 40:1 Fuel Lift Pump Specifications Fuel Lift Pump Specifications... - Page 156 Fuel Pump Notes: 90-8M0050731 MAY 2011 Page 3A-3...
-
Page 157: Fuel Pump System Components
Fuel Pump Fuel Pump System Components 46118 Page 3A-4 90-8M0050731 MAY 2011... - Page 158 Fuel Pump Fuel Pump System Components Torque Ref. No. Qty. Description lb‑in. lb‑ft Bushing Grommet Screw (M6 x 16) 11.5 Screw (M6 x 35) 11.5 Hose Hose Hose clamp (18.3 mm) Lift pump and filter Bracket Wire assembly Bracket kit Grommet Low‑pressure fuel pump (boost pump) 90°...
-
Page 159: Anti-Siphon Valves
Fuel Pump Anti‑Siphon Valves While anti‑siphon valves may be helpful from a safety standpoint, they clog with debris, they may be too small, or they may have too heavy a spring. The pressure drop across these valves can, and often does, create operational problems and/or powerhead damage by restricting fuel to the fuel lift pump and, subsequently, the high‑pressure fuel pump. -
Page 160: Fuel Lift Pump/System Troubleshooting
Fuel Pump NOTE: Before proceeding with the system vacuum test, confirm that the lift pump is capable of delivering the required vacuum. To do this: Pinch off (restrict) the fuel supply hose between the vacuum gauge and the fuel tank. The vacuum gauge reading should exceed 2.5 in. -
Page 161: Fuel Lift Pump Removal/Inspection/Installation
Clean or replace pickup. Fuel hose internal diameter too small. Use 5/16 I.D. fuel hose. Excessive fuel lift required. Fuel lift exceeds 2.5 in. of vacuum (mercury). Problem: No fuel flow Blown fuse. Check the 3 amp fuse. Low or no voltage at harness connection. -
Page 162: Filter Replacement
Fuel Pump Loosen the screw securing the pump retaining clamp and remove the pump. 45447 Fuel lift pump clamp Filter Hose clamp Harness connector Screw (M6 x 35) Hose to VST Hose clamp (18.3 mm) Filter Replacement There are no serviceable parts within the electric fuel pump. However, there is a replaceable fuel filter on the pump which should be replaced every 100 hours or once a season. - Page 163 Fuel Pump Connect the vapor separator fuel hose to the fuel pump. Secure the hose with an 18.3 mm hose clamp. 45447 Fuel lift pump clamp Filter Hose clamp Harness connector Screw (M6 x 35) Hose to VST Hose clamp (18.3 mm) Hose Clamp Tool Kit 91‑803146A04 Run the engine and check for leaks.
- Page 164 Oil................3B-22 Air Pressure Regulator Removal (S/N 0T178500 and Electrical..............3B-22 Above)..............3B-64 Operation..............3B-23 Tracker Valve Removal..........3B-64 200 OptiMax Jet Drive Air/Fuel Schematic....3B-24 Fuel Rail Cleaning............3B-65 Electric Fuel Pump Pressure Tests........3B-25 Fuel Injector Installation ...........3B-65 Low‑Pressure Boost Pump Test.......3B-25 Tracker Valve Installation.........3B-66 High‑Pressure Fuel Pump........3B-25 Air Pressure Regulator Installation (S/N 0T178500 and Air Compressor Pressure Test.........3B-26...
-
Page 165: Air Compressor Specifications
Direct Fuel Injection Air Compressor Specifications Air Compressor Specifications Reciprocating piston Air compressor type Single cylinder, oil lubricated, water‑cooled Air compressor output 655 ± 14 kPa (95 ± 2 psi) Displacement 116 cc (7.07 cid) Cylinder bore 65.0 mm (2.559 in.) Cylinder bore taper (maximum) 0.025 mm (0.001 in.) Cylinder bore out of round (maximum) -
Page 166: Fuel Rail Specifications
Direct Fuel Injection Fuel Rail Specifications Fuel System Specifications Fuel pressure 751.5 ± 14 kPa (109 ± 2 psi) Air pressure 655 ± 14 kPa (95 ± 2 psi) Tracker valve spring pressure 103.5 kPa (15 psi) Fuel injector ohm resistance 1.8 ±... - Page 167 Direct Fuel Injection Dual Fuel/Air Pressure Gauge Kit 91‑881834A 1 Tests fuel and air pressure; the dual gauges allow the viewing of both pressures simultaneously 5822 Fuel Pressure Gauge Kit 91‑881833A03 Tests the fuel pump pressure; can be used to relieve fuel pressure 2807 Hose Clamp Tool Kit 91‑803146A04...
- Page 168 Direct Fuel Injection Pintle Test Fixture 91‑899883A08 Used with a dial indicator to test the operating movement of a direct injector pintle. 35783 Dial Indicator 91‑ 58222A 1 Used to obtain a variety of measurements including gear backlash, pinion gear location, and TDC.
-
Page 169: Vapor Separator Components
Direct Fuel Injection Vapor Separator Components 4260 Page 3B-6 90-8M0050731 MAY 2011... - Page 170 Direct Fuel Injection Vapor Separator Components Torque Ref. No. Qty. Description lb‑in. lb‑ft Cover kit Straight fitting 90° elbow fitting Seal Pump outlet fitting kit O‑ring Screw and washer (8‑32 x 0.750 in.) Gasket Float kit Needle valve Screw (8‑32 x 0.187 in.) Pump kit Sleeve Bowl kit...
-
Page 171: Air Handler And Flywheel Cover
Direct Fuel Injection Air Handler and Flywheel Cover 12 13 30053 Page 3B-8 90-8M0050731 MAY 2011... - Page 172 Direct Fuel Injection Air Handler and Flywheel Cover Torque Ref. No. Qty. Description lb‑in. lb‑ft Cover assembly Grommet Air filter Cover Grommet Plug Grommet Start in gear decal Crankshaft position sensor Screw (M5 x 16) Special pin J‑clamp Screw (1/4‑20 x 1‑1/2 in.) J‑clamp 90-8M0050731 MAY 2011 Page 3B-9...
-
Page 173: Air Handler Components
Direct Fuel Injection Air Handler Components 8338 Page 3B-10 90-8M0050731 MAY 2011... - Page 174 Direct Fuel Injection Air Handler Components Torque Ref. No. Qty. Description lb‑in. lb‑ft Adapter plate Gasket Gasket Reed block assembly Screw (1/4‑20 x 7/8 in.) 11.5 Oil pump Bushing Grommet Screw (M8 x 35) Washer (0.344 x 1.00 x 0.063 in.) Air plenum kit Screw (M8 x 30) Manifold air temperature (MAT) sensor...
-
Page 175: Fuel Rail Components (S/N 0T178500 And Above)
Direct Fuel Injection Fuel Rail Components (S/N 0T178500 and Above) 7 5 6 8335 Page 3B-12 90-8M0050731 MAY 2011... - Page 176 Direct Fuel Injection Fuel Rail Components (S/N 0T178500 and Above) Torque Ref. No. Qty. Description lb‑in. lb‑ft Port fuel rail Starboard fuel rail Clamp Screw (M5 x 10) Schrader valve assembly O‑ring kit Brass cap Port plug Clamp Clamp Fuel injector O‑ring kit O‑ring kit Clamp...
-
Page 177: Fuel Hose Components
Direct Fuel Injection Fuel Hose Components 4256 Page 3B-14 90-8M0050731 MAY 2011... - Page 178 Direct Fuel Injection Fuel Hose Components Torque Ref. No. Qty. Description lb‑in. lb‑ft Hose (21.6 cm [8.5 in.]) Fuel return hose assembly Fuel supply hose assembly O‑ring kit Hose Hose Sleeve Hose clamp (18.3 mm) 90-8M0050731 MAY 2011 Page 3B-15...
-
Page 179: Air Hose Components
Direct Fuel Injection Air Hose Components 4257 Page 3B-16 90-8M0050731 MAY 2011... - Page 180 Direct Fuel Injection Air Hose Components Torque Ref. No. Qty. Description lb‑in. lb‑ft Hose clamp (18.3 mm) Air supply hose Insulation sleeve Air balance hose assembly Air bypass hose assembly Cable tie Worm gear clamp Fitting (1/8‑27) 90° elbow fitting 90-8M0050731 MAY 2011 Page 3B-17...
-
Page 181: Air Compressor Components
Direct Fuel Injection Air Compressor Components 26 27 29987 Page 3B-18 90-8M0050731 MAY 2011... - Page 182 Direct Fuel Injection Air Compressor Components Torque Ref. No. Qty. Description lb‑in. lb‑ft Air compressor kit Body End cap assembly Retaining ring O‑ring O‑ring Carbon steel screw (M6 x 20) Stainless steel screw (M6 x 20) 11.5 Connecting rod assembly Bearing Bearing Piston assembly...
- Page 183 Direct Fuel Injection Torque Ref. No. Qty. Description lb‑in. lb‑ft Special washer Nut (0.312‑24) Pulley Clamp Washer Tube Ref No. Description Where Used Part No. Loctite 271 Threadlocker Air compressor end cap screws 92-809819 Page 3B-20 90-8M0050731 MAY 2011...
- Page 184 Direct Fuel Injection Air Compressor Components 26 27 29987 90-8M0050731 MAY 2011 Page 3B-21...
-
Page 185: Dfi Operation
This performance characteristic can be greatly reduced through regular fuel system maintenance. To minimize fuel system and carbon deposit buildup in the engine, it is strongly recommended to add Mercury/Quicksilver Quickleen Engine Treatment (or equivalent) to your engine's fuel at each tank fill throughout the boating season. Use additive as directed on the container. -
Page 186: Operation
Direct Fuel Injection Operation The operation of the system happens in milliseconds (ms); exact timing is critical for engine performance. As the crankshaft rotates, air is drawn into the crankcase through the throttle shutter, into the plenum, and through the reed valves. As the piston nears bottom‑dead‑center, air from the crankcase is forced through the transfer system into the cylinder. -
Page 187: 200 Optimax Jet Drive Air/Fuel Schematic
Direct Fuel Injection 200 OptiMax Jet Drive Air/Fuel Schematic 46219 Air intake Air compressor Fuel system test valve Starboard fuel rail Tracker valve Fuel injector (6) Direct injector Water into fuel rail Port fuel rail Air pressure regulator Fuel pressure regulator Low‑pressure boost pump... -
Page 188: Electric Fuel Pump Pressure Tests
Direct Fuel Injection Electric Fuel Pump Pressure Tests Low‑Pressure Boost Pump Test Remove the fuel outlet hose from the low‑pressure boost pump and install a short piece of hose (obtain locally) onto the fuel pump outlet fitting. Install a Schrader valve T‑fitting between the hose removed from the pump and the fuel hose installed on the pump. Secure the hose connections with cable ties. -
Page 189: Air Compressor Pressure Test
Direct Fuel Injection IMPORTANT: The air pressure within the fuel rail must reach the air pressure specification to display the high‑pressure fuel accurately. Fuel/air pressure gauge Fuel pressure test valve 1 0 0 1 0 0 1 2 0 1 2 0 1 4 0 1 4 0 1 6 0... -
Page 190: Fuel Or Air Pressure Not To Specifications - Sportjet Models
Direct Fuel Injection NOTE: After 15 seconds of cranking engine with starter motor, air pressure gauge should indicate 655.0 ± 14 kPa (95 ± 2 psi) and fuel pressure gauge should indicate 751.5 ± 14 kPa (109 ± 2 psi). Air pressure gauge Fuel pressure gauge Fuel pressure test valve... - Page 191 Direct Fuel Injection Component or Problem Possible Causes Corrective Action Fuel pressure and air pressure are Air compressor Provide 80 psi of shop air to the air rail test (Schrader) valve. both low Inspect the air compressor for leaks. Leaking air through the compressor indicated bad reeds.
- Page 192 Direct Fuel Injection Component or Problem Possible Causes Corrective Action Fuel pressure is low or fuel Electric fuel pumps, VST, Ensure that the lanyard switch is in the correct position. pressure drops while running or filters Air pressure remains normal Turn the ignition switch to the "RUN"...
-
Page 193: Fuel Management Assembly Removal
Direct Fuel Injection Component or Problem Possible Causes Corrective Action Air and fuel pressure differential Tracker valve Remove/inspect the tracker valve diaphragm for cuts, tears, or out of range abrasions. Normal differential is103.5 kPa Check the diaphragm seat and rail for damage. Replace (15 psi) components as necessary. - Page 194 Direct Fuel Injection Release the pressure in the fuel system. Fuel should be captured in an appropriate container. Port fuel rail Fuel pressure test valve Air pressure test valve 47713 Place a suitable container underneath the vapor separator drain plug and remove the plug. Disconnect the water separator sensor lead.
- Page 195 Direct Fuel Injection Remove the three mounting bolts and remove the separator. 45786 Fuel inlet hose to fuel lift pump Vapor separator vent hose Fuel outlet hose Fuel return hose Fuel inlet hose Mounting bolts (3) Ground lead 10. Disconnect the throttle cam link rod and the throttle position sensor (TPS) link rod. 11.
-
Page 196: Reed Block Assembly Removal
Direct Fuel Injection 15. Remove the twelve bolts securing the air management assembly to the crankcase and remove the assembly. 45787 Oil outlet hoses (6) Oil inlet hose (1) Air management Bolts (1/4‑20 x 1‑1/2, flange) (12) Reed Block Assembly Removal Remove the two screws securing the air plenum to the reed plate assembly. -
Page 197: Air Management Assembly And Installation
Direct Fuel Injection Remove the four screws securing the throttle body assembly to the air plenum. Remove the throttle body assembly. Screw (4) Throttle body assembly 16046 Air Management Assembly and Installation Remove the old gasket material from the mating surfaces of the reed blocks, reed block plate, and air plenum. Install a new gasket onto the reed block plate. - Page 198 Direct Fuel Injection Install the MAT sensor onto the air plenum assembly. Tighten the MAT sensor to the specified torque. Screw (M6 x 40) (4) MAP sensor Bracket Screw (M6 x 16) MAT sensor 33396 Description lb‑in. lb‑ft Throttle body screw (M6 x 40) MAP sensor bracket screw (M6 x 16) MAT sensor Install the air plenum assembly onto the crankcase cover.
- Page 199 Direct Fuel Injection 10. Install the oil pump onto the air plenum assembly. Secure the pump with three M8 x 30 screws. Tighten the screws to the specified torque. Air plenum Grommet, bushing, and screw (3 each) Oil pump 33398 Description lb‑in.
- Page 200 Direct Fuel Injection 15. Connect the engine harness to the MAP and MAT sensor connectors. MAP sensor 16039 16. Connect the throttle cam link rod and the throttle position sensor link rod. Throttle link rod Throttle position sensor link rod 16036 17.
-
Page 201: Vapor Separator Tank
Direct Fuel Injection 21. Install the fuel inlet hose to the fuel lift pump. 46083 Fuel inlet hose to fuel lift pump Vapor separator vent hose High‑pressure fuel outlet hose Fuel return hose Fuel inlet hose Mounting bolts (3) Electrical fuel pump connectors Ground lead Water sensor connector Vapor Separator Tank... - Page 202 Direct Fuel Injection Install the fuel/air pressure gauge kit to the fuel pressure test valve and release the fuel pressure into an appropriate container. Port fuel rail Fuel pressure test valve Air pressure test valve 47713 Fuel Pressure Gauge Kit 91‑881833A03 Disconnect the high‑pressure fuel pump from the engine harness.
-
Page 203: Vst Disassembly
Direct Fuel Injection Cut the cable tie securing the low‑pressure fuel pump harness connectors, the lift pump connectors, the high‑pressure fuel pump wire harness, and the water sensor wire harness to the low‑pressure fuel pump bracket. Lift pump connector Low‑pressure fuel pump connector Fuse holder Cable tie 45817... - Page 204 Direct Fuel Injection Remove the two metal hose clamps securing the low‑pressure electric fuel pump outlet hose to the fittings. Remove the hose from the fittings. Lift pump to water separating filter fuel hose Cable tie Low‑pressure electric fuel pump outlet hose 45836 Remove the four screws securing the low‑pressure electric fuel pump and lift pump brackets to the VST.
- Page 205 Direct Fuel Injection Remove the metal hose clamp securing the pulse pump fuel hose to the fitting. Cable tie Metal hose clamp 32668 Remove the seven screws securing the VST cover to the VST tank. Remove the cover. Screw (7) 16050 Loosen the screw securing the float pin.
-
Page 206: Vst Assembly
Direct Fuel Injection 10. Remove and discard the fuel pump body seal and the fuel pump outlet seal. Fuel pump body seal Fuel pump outlet seal 32687 IMPORTANT: Do not remove the electric fuel pump harness from the VST cover. If the electric fuel pump harness inside the VST cover is damaged, the VST cover must be replaced. - Page 207 Direct Fuel Injection Align the fuel pump outlet with the fuel pump outlet seal. Push the fuel pump into the seals. Fuel pump electrical harness connector Fuel pump outlet seal Fuel pump outlet 32694 Install the needle onto the float. Install the float with the needle onto the VST cover.
- Page 208 Direct Fuel Injection Install the VST cover onto the VST tank and secure with seven screws. Tighten the screws to the specified torque. Screw (7) 16050 Description lb‑in. lb‑ft Screw (8‑32 x 0.750) (7) Install the vent hose and secure the hose with a cable tie. 10.
- Page 209 Direct Fuel Injection 12. Lubricate the water separator fuel filter seal with Special Lubricant 101. Install the water separator fuel filter. Tighten the water separator fuel filter securely. Water separator fuel filter 32666 Tube Ref No. Description Where Used Part No. Special Lubricant 101 Water separator fuel filter seal 92-802865Q02...
-
Page 210: Vst Installation
Direct Fuel Injection 17. Install two 18.3 mm hose clamps onto the low‑pressure electric fuel pump outlet fuel hose. 18. Install the fuel hose onto the fittings. Crimp the 18.3 mm hose clamps with the hose clamp tool. 19. Install two 18.3 hose clamps onto the lift pump to water separating filter fuel hose. 20. - Page 211 Direct Fuel Injection Secure the fuse holder, low‑pressure fuel boost pump, and the lift pump connectors fuel pump with a cable tie. Secure the low‑pressure fuel pump connector and the fuse holder to the boost pump with a cable tie. Lift pump connector Low‑pressure fuel boost pump connector Fuse holder...
-
Page 212: Fuel Rail
Direct Fuel Injection Hose Clamp Tool Kit 91‑803146A04 Fuel Rail Fuel Pressure Regulator 16101 The fuel regulator is located on the port fuel rail. The fuel pump can deliver pressure in excess of 689.5 kPa (100 psi). Fuel pressure inside the fuel rail must be at a specific higher pressure over the air pressure or the PCM calibrations will be incorrect. -
Page 213: Fuel Pressure Regulator Cutaway
Direct Fuel Injection Fuel Pressure Regulator Cutaway 10200 Regulator Closed Regulator Open Top cover Expansion plug O‑ring Spring retainer Spring O‑ring Diaphragm seat Air rail Air passage from air compressor 10 - Fuel return passage to vapor separator 11 - Fuel inlet passage from electric fuel pump 12 - Diaphragm assembly... -
Page 214: Air Pressure Regulator
Direct Fuel Injection Air Pressure Regulator 16108 The air pressure regulator is located on the port fuel rail. The air regulator uses a spring to control the air pressure. This spring holds the diaphragm against the diaphragm seat. The air must reach a pressure that is equal to or greater than the spring pressure holding the diaphragm closed. - Page 215 Direct Fuel Injection A tracker diaphragm is used to maintain a constant pressure difference between the fuel pressure and air pressure inside the fuel rails at all times. The tracker diaphragm minimizes the pressure changes caused by the air compressor pulses and fuel injectors at lower engine RPM.
-
Page 216: Fuel Injectors
Direct Fuel Injection Fuel Injectors A fuel injector is an electromagnetic device. The precision mechanical components are controlled by a solenoid in the injector. The solenoid is energized by a driver in the PCM that controls the on time of the solenoid by providing a ground. Six fuel injectors are used to provide fuel from the fuel rail to the direct injectors. - Page 217 Direct Fuel Injection Install the fuel/air pressure gauge kit. Relieve the fuel pressure into an appropriate container. Fuel/air pressure gauge kit Fuel pressure test valve 1 0 0 1 0 0 1 2 0 1 2 0 1 4 0 1 4 0 1 6 0 1 6 0...
- Page 218 Direct Fuel Injection Remove the six nuts securing the expansion chamber and lay the chamber off to one side. Coolant hose Nut (6) 46082 Remove the fuel injector harness from each fuel injector by compressing the spring clip with a flat tip screwdriver and pulling on the connector.
- Page 219 Direct Fuel Injection Remove the screws securing the retainers for the fuel hose and air hose at the top of the fuel rails. 16087 Water inlet hose to compressor Fuel hose retainer Screw (2) Air hose Air hose retainer Screw (2) Remove the screws securing the retainers for the fuel hose and air hose at the bottom of the fuel rails.
-
Page 220: Fuel Injector Removal
Direct Fuel Injection Remove the two nuts and two coil plate spacers securing the fuel rail to the cylinder head. Coil plate spacer 45574 10. As the fuel rail is removed, use a flat tip screwdriver to ensure the direct injectors remain in the cylinder head. NOTE: The direct injectors should remain in the cylinder head. - Page 221 Direct Fuel Injection Use a cotter pin extractor tool to gently pry up on the fuel injector to loosen the O‑ring adhesion to the fuel rail and remove the fuel injector. Screws Pry holes 8355 Use the DMT 2004 digital multimeter to check the resistance between the fuel injector pins and the fuel injector steel body. Replace the fuel injector if it is not within the specifications.
-
Page 222: Direct Injector Removal
Direct Fuel Injection Direct Injector Removal Remove the direct injector from the cylinder head using a direct injector removal tool. Direct injector Direct injector removal tool 10252 Direct Injector Removal Tool 91‑883521 Inspect the cupped washer on the cylinder head for damage. If the cylinder head is to be replaced, ensure the new cylinder head supplies the cupped washers. -
Page 223: Direct Injector Tests
Direct Fuel Injection NOTE: Checking resistance on a direct injector while still installed in the engine can be difficult. An easy and fast way to make resistance checks on direct injectors is to use service harness P/N 84‑879346A49. This harness is normally used as a service replacement part for the direct injector connector if it becomes damaged, but also works well to test the injector when it is in place between the cylinder head/block and fuel rail. - Page 224 Direct Fuel Injection Connect the meter leads to the two direct injector pins. Replace the direct injector if the resistance is out of specification. 10264 Winding resistance test Meter Test Leads Meter Scale Reading (Ω) Black Injector pin Injector pin Ω...
- Page 225 Direct Fuel Injection Direct Injector Pintel Movement Test Place the direct injector into the test fixture housing. Install the base plate over the direct injector. Secure the base plate with three screws. Tighten the screws to the specified torque. Test fixture housing Direct injector Screw (M6 x 40) Base plate...
-
Page 226: Fuel Pressure Regulator Removal
Direct Fuel Injection 12. Note the dial indicator reading when the direct injector is actuated. The dial indicator measures the direct injector tip movement. The dial indicator measurement should be within specification. 29088 Dial indicator Screw Harness Button 9 V battery installed Dial indicator set at zero Pintle Test Fixture 91‑899883A08... -
Page 227: Air Pressure Regulator Removal (S/N 0T178500 And Above)
Direct Fuel Injection Inspect the fuel pressure regulator housing O‑ring for damage. 16104 Screw (4) Fuel regulator Diaphragm Spring O‑ring Air Pressure Regulator Removal (S/N 0T178500 and Above) Remove the two screws securing the air pressure regulator to the fuel rail. Inspect the air pressure regulator O‑rings for damage. -
Page 228: Fuel Rail Cleaning
Direct Fuel Injection Inspect the tracker cover O‑ring for damage. 16145 Screws Diaphragm Spring O‑ring Fuel Rail Cleaning After all components have been removed, flush the fuel rails with a solvent. Use compressed air to remove any remaining solvent. IMPORTANT: If a mechanical failure has occurred with the air compressor or direct injector assemblies, the fuel rail must be disassembled and flushed with a solvent to remove debris. -
Page 229: Tracker Valve Installation
Direct Fuel Injection Tube Ref No. Description Where Used Part No. 2-4-C with Teflon Fuel injector O-rings and screw threads 92-802859A 1 Description lb‑in. lb‑ft Screw Tracker Valve Installation Lubricate the tracker diaphragm and O‑ring with 2‑4‑C with Teflon. Lubricate the screw threads with 2‑4‑C with Teflon. Install the tracker diaphragm, spring, and O‑ring onto the fuel rail. -
Page 230: Fuel Pressure Regulator Installation
Direct Fuel Injection Install the air pressure regulator into the fuel rail and secure with the retainer and screws. Tighten the screws to the specified torque. Screw (2) Retainer Air pressure regulator 16130 Tube Ref No. Description Where Used Part No. 2-cycle Premium Air pressure regulator O-rings 92-858021K01... -
Page 231: Fuel Rail Installation
Direct Fuel Injection Use the two screws from the air regulator installation tool and thread the screw at opposite corners to align the cover. Air regulator installation tool screw (2) 32730 Tube Ref No. Description Where Used Part No. 2-4-C with Teflon Fuel pressure regulator screw threads 92-802859A 1 Push the cover against the fuel rail. - Page 232 Direct Fuel Injection Use the seal/Teflon ring installation tool to slide the new seal onto the injector. Use the Teflon ring sizing tool to compress the Teflon seal. O‑rings Seal/Teflon ring installation tool Teflon seal Seal/Teflon ring sizing tool 27190 Seal/Teflon Ring Installation Tool 91‑851980‑‑3 Seal/Teflon Ring Sizing Tool...
- Page 233 Direct Fuel Injection Tube Ref No. Description Where Used Part No. 2-cycle Premium Air hose and fuel hose fitting O-rings 92-858021K01 Outboard Oil Description lb‑in. lb‑ft Screws 10. Install new O‑rings onto the fuel rail air hose and fuel hose fittings. 11.
-
Page 234: Air Compressor
Direct Fuel Injection Air Compressor Air Compressor Flow Diagram 46132 Air inlet Air filter Compressor oil inlet Oil to upper main bearing Oil to lower crankshaft bearing Compressor inlet Compressor water inlet Fuel pressure test valve Port fuel rail Excess fuel return to VST Air pressure test valve Excess air return to exhaust adapter plate Water inlet to fuel rail... -
Page 235: Air Compressor Removal
Direct Fuel Injection Fuel injector (6) Water outlet to expansion chamber outlets Tracker valve Starboard fuel rail Compressor outlet of 655 ± 14 kPa (95 ± 2 psi) Low‑pressure air High‑pressure air Air Compressor Removal WARNING Performing service or maintenance without first disconnecting the battery can cause product damage, personal injury, or death due to fire, explosion, electrical shock, or unexpected engine starting. - Page 236 Direct Fuel Injection NOTE: Do not remove the air compressor hose from the fitting on the fuel rail. Removing the hose from the fitting on the fuel rail will damage the air compressor hose. Retainer Screw (2) Air compressor hose with fitting 45927 Remove the cable ties securing the water hose and air hose to the compressor.
-
Page 237: Air Compressor Disassembly
Direct Fuel Injection 12. Remove the two screws securing the air compressor to the top of the cylinder block. Screw (M8 x 25, flange) (2) 45928 Air Compressor Disassembly Use a strap wrench to hold the air compresser pulley and remove the six screws securing the pulley to the air compressor crankshaft. -
Page 238: Air Compressor Assembly
Direct Fuel Injection Remove the reed plate assembly and O‑rings. Reed plate O‑rings 36990 Remove the check valves and fittings. Remove the bolt and nut securing the two J‑clamps. NOTE: Later models will not use a bolt and nut to secure the J‑clamps. The J‑clamps will be replaced by a plastic clip or cable ties. - Page 239 Direct Fuel Injection Install a ring compressor onto the piston. Install the piston into the air compressor cylinder bore. Ring compressor Threaded holes on the air compressor 26767 Tube Ref No. Description Where Used Part No. 2-cycle Premium Air compressor cylinder bore 92-858021K01 Outboard Oil Ensure the connecting rod end is correctly positioned.
- Page 240 Direct Fuel Injection Tube Ref No. Description Where Used Part No. Loctite 271 Threadlocker Air compressor end cap screw threads 92-809819 Description lb‑in. lb‑ft Screw (carbon steel) (M6 x 20) Screw (stainless steel) (M6 x 20) 11.5 10. Install the two check valves onto the air compressor. 11.
-
Page 241: Air Compressor Installation
Direct Fuel Injection 16. Install the temperature sensor ground wire onto the M8 x 14 screw. Secure the temperature sensor with a retainer and the screw. Air compressor temperature sensor Screw (M8 x 35) Screws securing the air compressor cylinder head (4) 32814 Description lb‑in. - Page 242 Direct Fuel Injection Install the oil line coming from the oil pump onto the fitting under the air compressor pulley and secure with a cable tie. Cable tie securing the oil line coming from #5 reed block Cable tie securing the oil line coming from the top main bearing Cable tie securing the oil delivery line coming from the oil pump...
- Page 243 Direct Fuel Injection Description lb‑in. lb‑ft Nut securing air compressor Tighten the two top screws (M10 x 25) securing the air compressor assembly to the cylinder block to the specified torque. Description lb‑in. lb‑ft First Screw (M10 x 25) (2) Final 41.3 Secure the air compressor hose to the air compressor with a J‑clamp and cable tie.
- Page 244 Direct Fuel Injection 13. Connect the air compressor temperature sensor bullet connectors to the wire harness connector. Water inlet hose Bullet connectors 45934 14. Use a 3/8 in. square drive on the belt tension arm and install the belt to the air compressor pulley. Belt tensioner 3/8 in.
- Page 245 Direct Fuel Injection Notes: Page 3B-82 90-8M0050731 MAY 2011...
- Page 246 Oil Injection Fuel System Section 3C - Oil Injection Table of Contents Oil Injection Components...........3C-4 Purging Air from the System........3C-11 Oil System Operation............3C-6 Method 1 ‑ Computer Diagnostic System Break‑in Oil Pump Output............3C-6 Clock Reset............3C-12 Oil System Hose Installation (S/N 0T178500 and Above) Method 2 ‑...
- Page 247 Oil Injection Special Tools Leakage Tester Kit FT8950 Used for pressure testing of closed systems (gearcase, fuel lines, cooling). 29497 Page 3C-2 90-8M0050731 MAY 2011...
- Page 248 Oil Injection Notes: 90-8M0050731 MAY 2011 Page 3C-3...
-
Page 249: Oil Injection Components
Oil Injection Oil Injection Components 24424 Page 3C-4 90-8M0050731 MAY 2011... - Page 250 Oil Injection Oil Injection Components Torque Ref. No. Qty. Description lb‑in. lb‑ft Tubing (61 cm [24 in.]) Tubing (47 cm [18.5 in.]) Tubing (42 cm [16.5 in.]) Tubing (62.2 cm [24.5 in.]) Tubing (68.6 cm [27 in.]) Check valve Cable tie (14 cm [5.5 in.]) Cable tie (20.3 cm [8 in.]) Cable tie (10 cm [4 in.]) Hose (61 cm [24 in.])
-
Page 251: Oil System Operation
Oil Injection Oil System Operation Oil is stored in an engine‑mounted reservoir and in a remote oil tank on the boat. Crankcase pressure forces oil from the remote oil tank into the engine‑mounted oil reservoir. The engine oil reservoir feeds oil to the oil pump. The oil pump is actuated by the PCM and distributes oil to the crankcase and air compressor. -
Page 252: Oil System Hose Installation (S/N 0T178500 And Above)
Oil Injection Oil System Hose Installation (S/N 0T178500 and Above) 16410 Remote oil tank Engine‑mounted oil reservoir Filter Oil hose to the oil pump Oil hose to lower main bearing Oil pump Oil hoses to the cylinders Check valve Oil hose to upper main bearing Oil hose to the air compressor Air compressor Fitting... -
Page 253: Oil Pump Removal And Installation (S/N 1B490866 And Above)
Oil Injection Oil Pump Removal and Installation (S/N 1B490866 and Above) Oil Pump Removal Disconnect the wiring harness from the pump. Cut the cable ties securing the oil hoses to the oil pump and remove the oil hoses. Remove the three screws securing the oil pump to the air plenum assembly and remove the pump. 14 pin connector Oil pump Cable ties securing oil hoses... - Page 254 Oil Injection Remove the three screws securing the oil reservoir to the powerhead and remove the tank. 35005 Low oil switch harness Screw (0.164‑18 x 0.375) Washer (0.203 x 0.562 x 0.060) Low oil switch Reservoir decal Oil reservoir Bushing (3) Grommet (3) Clamp 10 -...
-
Page 255: Installation
Oil Injection Installation Install the rubber grommets and bushings onto the oil reservoir. Grommet (3) Bushing (3) Vent cap Oil reservoir Reservoir oil outlet fitting to oil pump Oil reservoir low oil vent Low oil switch bullet connectors Oil reservoir oil inlet fitting 39153 Install the oil reservoir onto the cylinder block and secure with two 0.312‑18 x 1.250 inch screws and washers. -
Page 256: Priming The Oil Injection Pump
Oil Injection IMPORTANT: If the oil reservoir contains no oil prior to installation, it is recommended that the oil vent cap not be removed to fill the oil reservoir. Removal of the vent cap may damage the threads in the oil reservoir. Damage to the threads may result in future oil leakage. -
Page 257: Method 1 - Computer Diagnostic System Break-In Clock Reset
Oil Injection There are two methods for priming the oil injection pump. Each method is unique to the condition that requires the priming of the oil injection system. Conditions Requiring Priming the Oil Pump Condition Priming Procedure New engine Use Method 1 Rebuilt powerhead Use Method 1 New powerhead... -
Page 258: Filling The Oil Tanks
Oil Injection Connect the remote oil tank pressure hose without the blue stripe to the crankcase fitting. Secure the hose to the fitting with a cable tie. Oil hose without the blue stripe 16435 Filling the Oil Tanks Remove the remote oil tank cap and fill the remote oil tank with the recommended oil. Install the cap and tighten securely. The engine‑mounted oil reservoir may be filled by loosening the vent cap and using a squirt oil can to inject oil through the vent cap finger retainer slot or, while the engine is idling, allowing crankcase pressure to fill the reservoir with oil from the boat‑mounted oil reservoir. -
Page 259: Warning Horn Signals
Oil Injection Warning Horn Signals When the key switch is turned to the "ON" position, the horn will be audible for a moment as a test to show the horn is working. The warning horn will emit either a continuous beep or intermittent short beeps. This will alert the operator and help identify the following listed situations. -
Page 260: Oil System Troubleshooting
Oil Injection Oil System Troubleshooting Low Oil Warning System is Activated Component or Problem Possible Causes Corrective Action Purge air from the engine‑mounted oil reservoir by operating the engine with Air was not purged from the the cap removed. engine‑mounted oil reservoir Fill the engine‑mounted oil reservoir tank with oil. - Page 261 Oil Injection Notes: Page 3C-16 90-8M0050731 MAY 2011...
- Page 262 Emissions Fuel System Section 3D - Emissions Table of Contents Exhaust Emission Standards..........3D-2 Manufacturer's Responsibility........3D-3 What Are Emissions?..........3D-2 Dealer Responsibility..........3D-3 Hydrocarbons – HC............3D-2 Owner Responsibility..........3D-3 Carbon Monoxide – CO..........3D-2 EPA Emission Regulations.........3D-3 Oxides of Nitrogen – NOx...........3D-2 Service Replacement EPA Decal........3D-3 Controlling Emissions..........3D-2 Removal..............3D-3 Stoichiometric (14.7:1) Air/Fuel Ratio......3D-2...
-
Page 263: Exhaust Emission Standards
CO, as well as lowering fuel economy. So the solution to controlling NOx ‑ as well as HC and CO ‑ is to keep the air/fuel ratio as close to 14.7:1 as possible. Emissions Information Models Affected Models Covered Serial Number or Year Mercury/Mariner/Force/Sport Jet 2.5–250 HP 1998 and Newer Page 3D-2 90-8M0050731 MAY 2011... -
Page 264: Manufacturer's Responsibility
Service Replacement EPA Decal IMPORTANT: By federal law, it is required that all 1998 and newer Mercury Marine outboards have a visible and legible emission certification decal. If this decal is missing or damaged, contact Mercury Marine Warranty Registration for a replacement. -
Page 265: Emission Certification Label
Emissions Emission Certification Label The new label will be sent with data based on the engine serial number. EMISSION CONTROL Idle speed INFORMATION THIS ENGINE CONFORMS TO CALIFORNIA AND U.S. EPA Engine horsepower EMISSION REGULATIONS FOR SPARK IGNITION MARINE ENGINES REFER TO OWNERS MANUAL FOR REQUIRED MAINTENANCE, Piston displacement SPECIFICATIONS, AND ADJUSTMENTS... - Page 266 Powerhead Powerhead Section 4A - Powerhead Table of Contents Powerhead Specifications..........4A-2 Powerhead Assembly............4A-46 Cylinder Block and End Caps..........4A-6 Powerhead Preassembly Cleaning Recommendations Exhaust Manifold and Exhaust Plate.......4A-10 ................4A-46 Cylinder Head..............4A-12 Crankshaft Bearings Installation.......4A-46 Crankshaft, Pistons, and Connecting Rods.....4A-14 Crankshaft Installation..........4A-49 Expansion Chamber and Adapter Plate Components..4A-16 Piston and Connecting Rod Assembly.....4A-50 Powerhead Removal from the Pump Unit......4A-20...
-
Page 267: Powerhead Specifications
Powerhead Powerhead Specifications Powerhead Specifications Number of cylinders Displacement 2.5 liter (153 in³) Stroke 67.3 mm (2.65 in.) Standard cylinder bore diameter 88.925 mm (3.501 in.) Cylinder bore maximum taper (service) 0.076 mm (0.003 in.) Cylinder bore maximum out of round (service) 0.076 mm (0.003 in.) Oversize cylinder bore diameter ‑... - Page 268 Powerhead Tube Ref No. Description Where Used Part No. Upper and lower end cap seal lips and O-rings Thrust washers, piston pin needle bearings, connecting rod caged bearings, center main bearings, and lower crankshaft seal lips Oil seal lips 2-4-C with Teflon 92-802859A 1 Oil seal and O-ring surfaces as shown Needle bearings...
- Page 269 Powerhead Piston Pin Tool 91‑76159A1 Aids in the removal and installation of the piston pins 20637 Piston Pin Tool 91‑ 92973A 1 Aids in the removal and installation of the piston pins. 11564 Torch Lamp 91‑ 63209 Heats surfaces to aid in the removal and installation of interference fit engine components 8776 Powerhead Stand...
- Page 270 Powerhead Lifting Eye 91‑ 90455 1 Threads into the flywheel to remove the powerhead assembly from the driveshaft housing, or to lift entire engine for removal/installation. 2756 90-8M0050731 MAY 2011 Page 4A-5...
-
Page 271: Cylinder Block And End Caps
Powerhead Cylinder Block and End Caps 29743 Page 4A-6 90-8M0050731 MAY 2011... - Page 272 Powerhead Cylinder Block and End Caps Torque Ref. No. Qty. Description lb‑in. lb‑ft. Cylinder block assembly Stud (1.75 in.) Stud (0.375‑16/0.375‑24 x 5.62 in.) Stud (0.375‑16/0.375‑24 x 6.87 in.) Dowel pin (without hole) (0.375 x 0.62 in.) Bearing race pin Starter motor top cover Screw (0.312‑18 x 1.50 in.) Starter motor bottom cover...
- Page 273 Powerhead Torque Ref. No. Qty. Description lb‑in. lb‑ft. Screw and lockwasher (0.25‑20 x 0.625 in.) Hose (1‑1/4 in.) Hose (1‑1/2 in.) Plug (0.50‑14 in.) Tube Ref No. Description Where Used Part No. Loctite Master Gasket Kit Crankcase cover and cylinder block mating surface 92-12564 2 2-cycle Premium Outboard Upper end cap bearing and end cap O-ring surface...
- Page 274 Powerhead Cylinder Block and End Caps 29743 90-8M0050731 MAY 2011 Page 4A-9...
-
Page 275: Exhaust Manifold And Exhaust Plate
Powerhead Exhaust Manifold and Exhaust Plate 44904 Page 4A-10 90-8M0050731 MAY 2011... - Page 276 Powerhead Exhaust Manifold and Exhaust Plate Torque Ref. No. Qty. Description lb‑in. lb‑ft Gasket Exhaust divider plate assembly Seal (12.5 in.) Screw and washer (0.312‑18 x 1.50 in.) Screw (0.312‑18 x 1.00 in.) Relief valve cover Screw (0.312‑18 x 1.375 in.) Gasket Screw (0.312‑18 x 1.75 in.) Plug (0.50‑14 in.)
-
Page 277: Cylinder Head
Powerhead Cylinder Head 44903 Page 4A-12 90-8M0050731 MAY 2011... - Page 278 Powerhead Cylinder Head Torque Ref. No. Qty. Description lb‑in. lb‑ft Cylinder head assembly (port) Cylinder head assembly (starboard) First 40.5 Screw (0.375‑16 x 2.75 in.) Final Turn an additional 90° Dowel pin (0.25 x 0.625 in.) Gasket Cover Seal Screw (M6 x 25 mm) 13.5 Temperature sensor assembly O‑ring (1.78 mm x 0.08 mm)
-
Page 279: Crankshaft, Pistons, And Connecting Rods
Powerhead Crankshaft, Pistons, and Connecting Rods 2305 Page 4A-14 90-8M0050731 MAY 2011... - Page 280 Powerhead Crankshaft, Pistons, and Connecting Rods Torque Ref. No. Qty. Description lb‑in. lb‑ft Crankshaft assembly Wear sleeve Lower ball bearing Ring Carrier assembly Seal Sealing ring Main bearing Bearing race Starboard piston assembly (standard) Port piston assembly (standard) Starboard piston assembly (0.015 in. oversize) Port piston assembly (0.015 in.
-
Page 281: Expansion Chamber And Adapter Plate Components
Powerhead Expansion Chamber and Adapter Plate Components 44905 Page 4A-16 90-8M0050731 MAY 2011... - Page 282 Powerhead Expansion Chamber and Adapter Plate Components Torque Ref. No. Qty. Description lb‑in. lb‑ft Expansion chamber kit Gasket (expansion chamber to adapter plate) Gasket (block to exhaust expansion chamber) Nut (M8) Stud (M8 x 50) 90° elbow fitting 90° elbow fitting Dowel pin without hole Engine adapter Washer...
- Page 283 Powerhead Torque Ref. No. Qty. Description lb‑in. lb‑ft Hose Worm gear clamp Page 4A-18 90-8M0050731 MAY 2011...
- Page 284 Powerhead Expansion Chamber and Adapter Plate Components 44905 90-8M0050731 MAY 2011 Page 4A-19...
-
Page 285: Powerhead Removal From The Pump Unit
Powerhead Powerhead Removal from the Pump Unit WARNING Performing service or maintenance without first disconnecting the battery can cause product damage, personal injury, or death due to fire, explosion, electrical shock, or unexpected engine starting. Always disconnect the battery cables from the battery before maintaining, servicing, installing, or removing engine or drive components. -
Page 286: Removing Powerhead Components
Powerhead Remove eleven nuts (five nuts on opposite side) securing the powerhead to the housing cover. M10 nuts (11) 45536 10. Remove the plastic cap from the center of the flywheel and install the lifting eye into the flywheel at least five full turns. Lift the powerhead assembly from the pump unit. -
Page 287: Vapor Separator Tank Removal
Powerhead • Electronic control module • Ignition coils Refer to Section 2B - Charging and Starting System to remove the following components: • Flywheel • Alternator • Starter motor • Starter solenoid Refer to Section 3A - Fuel Pump to remove the following components: •... - Page 288 Powerhead Disconnect the lift pump harness connectors. 45541 Drain plug Sensor lead Lift pump harness connector NOTE: The upper fuel hose is excess fuel return from the fuel rails; the lower fuel hose is the fuel inlet from the electric circulating pump beside the fuel/water separator.
-
Page 289: Electrical Plate And Harness Removal
Powerhead 10. Remove three mounting bolts and remove the separator. 45542 Fuel lift pump inlet hose VST vent hose Mounting bolts (M8 x 35) (3) (hidden) Ground lead High‑pressure fuel outlet hose Low‑pressure fuel return hose VST fuel inlet hose Electrical Plate and Harness Removal Remove the electrical plate cover. - Page 290 Powerhead Remove two nuts securing the aft portion of the electrical plate. Disconnect the water pressure sensor harness and sensor retainer. Disconnect the crankshaft position sensor connector. Crankshaft position sensor connector Water pressure sensor Nut (M8) 45544 10. Disconnect the air temperature sensor connector. 11.
-
Page 291: Fuel Rail Removal
Powerhead 15. Remove the nut and screw securing the electrical plate. Nut and washer Screw Oil pump connector 45918 16. Remove the output lead from the alternator. 17. Disconnect the TPS harness connection. 18. Remove the sense lead from the alternator. 19. - Page 292 Powerhead CAUTION Failure to release pressure from the fuel system will result in fuel spraying out, which can cause a fire or explosion. Allow the engine to cool completely and release all fuel pressure before servicing any part of the fuel system. Always protect eyes and skin from pressurized fuel and vapors.
- Page 293 Powerhead Remove the incoming coolant hose from the port fuel rail. Air compressor coolant hose Incoming coolant hose 45572 Remove two screws securing the compressor air hose and remove the hose from the starboard fuel rail. Air hose Screw (2) 45573 Remove two nuts and coil plate spacers securing the fuel rails.
-
Page 294: Air Compressor Removal
Powerhead Air Compressor Removal WARNING Performing service or maintenance without first disconnecting the battery can cause product damage, personal injury, or death due to fire, explosion, electrical shock, or unexpected engine starting. Always disconnect the battery cables from the battery before maintaining, servicing, installing, or removing engine or drive components. - Page 295 Powerhead NOTE: Do not remove the air compressor hose from the fitting on the fuel rail. Removing the hose from the fitting on the fuel rail will damage the air compressor hose. Retainer Screw (2) Air compressor hose with fitting 45927 Remove the cable ties securing the water hose and air hose to the compressor.
-
Page 296: Oil Hoses And Reservoir Removal
Powerhead 12. Remove the two screws securing the air compressor to the top of the cylinder block. Screw (M8 x 25, flange) (2) 45928 Oil Hoses and Reservoir Removal Remove the three screws securing the 14 pin connector mounting bracket and the oil pump to the plenum. Cut the cable ties securing the oil hoses to the oil pump and remove the oil hoses. -
Page 297: Throttle Body And Air Plenum Removal
Powerhead Throttle Body and Air Plenum Removal Remove the four screws securing the throttle body to the plenum. Screw (4) 33719 Remove the 12 screws securing the air plenum to the cylinder block assembly. Clamp (3) Screw (12) 33720 Remove the two screws securing the air plenum to the reed plate assembly. Remove the 12 screws securing the reed blocks to the reed plate assembly. -
Page 298: Powerhead Disassembly
Powerhead Powerhead Disassembly Place the powerhead in a repair stand or on a bench. Remove the screws securing the cylinder heads. Remove the cylinder heads. Cylinder head O‑rings Engine block 46719 Remove the screws securing the exhaust manifold. Remove the exhaust manifold. Exhaust manifold Seal Gasket... - Page 299 Powerhead Remove the four screws securing the lower end cap. Do not remove the end cap at this time. Screws (4) 17017 Remove the screws that secure the crankcase cover to the cylinder block. Pry the crankcase cover off the cylinder block with pry bars at the locations shown. Pry locations Crankcase cover 17018...
- Page 300 Powerhead 10. Remove the roller bearings and bearing cage from the connecting rod. Connecting rod cap screws 8628 11. Push the piston out of the cylinder block and reassemble the connecting rod. NOTICE Connecting rods and end caps are matched sets. Mismatching the original pairs will result in catastrophic engine damage. Install all connecting rods with their matched end caps.
- Page 301 Powerhead 14. Use the lockring removal tool to remove the piston lockring. 17029 Location of the identification number Lockring Lockring Removal Tool 91‑52952T 1 15. Use a heat gun or torch lamp to heat the piston to remove the piston pin. 16.
- Page 302 Powerhead 19. Remove the oil seals from the end caps with a hammer and an appropriate tool. O‑ring Seal 8635 20. Install the crankshaft onto a powerhead stand and inspect the sealing rings. IMPORTANT: Do not remove the crankshaft sealing rings unless the sealing ring is broken. Powerhead Stand 91‑...
-
Page 303: Lower Crankshaft Ball Bearing Removal
Powerhead 22. Remove the bearing race and the roller bearings. Bearing race Roller bearings 31436 23. Inspect the lower crankshaft ball bearing for damage. IMPORTANT: Do not remove the lower crankshaft ball bearing unless replacement is required. Lower Crankshaft Ball Bearing Removal Remove the crankshaft ball bearing retaining ring with a snap ring pliers. -
Page 304: Cleaning And Inspection
Powerhead Universal Puller Plate 91‑37241 Powerhead Stand 91‑ 30591T 1 Cleaning and Inspection Cylinder Block and Crankcase Cover IMPORTANT: The crankcase cover and cylinder block are a matched, line‑bored assembly and must never mate with a different crankcase cover or cylinder block. 8650 IMPORTANT: To prevent damage to components, remove all hoses, check valves, and other oil system components before submerging the cylinder block in cleaning solution. -
Page 305: Pistons And Piston Rings
Powerhead Localize the stroking in the smallest diameter until the drill speed is constant throughout the length of the bore. Expand the stones, as necessary, to compensate for stock removal and stone wear. Stroke at a rate of 30 complete cycles per minute to produce the best cross‑hatch pattern. -
Page 306: Cylinder Heads And Exhaust Divider Plate
Powerhead A tool can be made for cleaning the inner diameter of the tapered ring grooves. The tool can be made from a broken tapered piston ring with the side taper removed to enable the inside edge of the ring to reach the inner diameter of the groove. Carefully scrape carbon from the inner diameter of the ring grooves. -
Page 307: Crankshaft And End Cap Bearings
Powerhead Clean the crankshaft surfaces with crocus cloth. Crankshaft journals Crocus cloth 8683 Thoroughly clean the crankshaft with a mild solvent and dry with compressed air. Replace the crankshaft if the bearing surfaces are damaged and cannot be properly cleaned up. Lubricate the surfaces of the crankshaft with light oil to prevent rust. -
Page 308: Connecting Rods
Powerhead Thoroughly inspect the center main roller bearing. Replace the bearings if they are rusted, fractured, worn, galled, or badly discolored. Center main roller bearing 8685 Clean and dry the crankshaft roller bearing that is installed in the upper end cap. Lubricate the bearing with 2‑Cycle Premium Outboard Oil. - Page 309 Powerhead Check for water marks. When bearing surfaces are subjected to water contamination, a bearing surface etching occurs. This etching resembles the size of the bearing. Water marks 8690 Check for spalling. Spalling is the loss of bearing surface, resembling flaking or chipping. Spalling is most evident on the thrust portion of the connecting rod in line with the "I"...
-
Page 310: Reed Block Assembly
Powerhead If necessary, clean the connecting rod bearing surfaces, as follows: Ensure that etched marks on the connecting rod (crankshaft end) are perfectly aligned with etched marks on the connecting rod cap. Tighten the connecting rod cap attaching bolts securely. Clean the crankshaft end of the connecting rod by using crocus cloth placed in a slotted, 9.5 mm (3/8 in.) diameter shaft, as shown. -
Page 311: Powerhead Assembly
Powerhead Powerhead Assembly Powerhead Preassembly Cleaning Recommendations IMPORTANT: Any threaded hole or bolt with threadlocking compound that is contaminated with oil, must be thoroughly cleaned with a solvent to remove all traces of oil contamination. Failure to remove oil contamination will result in poor threadlocking compound adhesion. - Page 312 Powerhead Piston Ring Expander 91‑24697 Lubricate the center main crankshaft roller bearings and races with 2‑Cycle Premium Outboard Oil. Tube Ref No. Description Where Used Part No. 2-cycle Premium Center main crankshaft roller bearings and races 92-858021K01 Outboard Oil Install the center main crankshaft roller bearing so that the hole is toward the driveshaft end of the crankshaft. Verify that the retaining ring bridges the separating lines of the bearing race.
- Page 313 Powerhead Use a suitable mandrel to press one oil seal (lip facing down) into the lower end cap until firmly seated. Remove any excess Loctite. Press the second oil seal (lip facing down) until firmly seated on the first oil seal. Remove any excess Loctite. Lubricate the oil seal lips with 2‑4‑C with Teflon.
-
Page 314: Crankshaft Installation
Powerhead Tube Ref No. Description Where Used Part No. 2-4-C with Teflon Oil seal and O-ring surfaces as shown 92-802859A 1 2-cycle Premium Roller bearing 92-858021K01 Outboard Oil Crankshaft Installation Before Installing a New Crankshaft Check the crankshaft sealing ring mating surfaces in the cylinder block and crankcase cover for wear grooves caused by the crankshaft sealing rings from the previous crankshaft. -
Page 315: Piston And Connecting Rod Assembly
Powerhead Gently push the crankshaft down into position and verify that the center pins are lined up with the holes in the center main bearings and that the crankshaft seal rings are in place. Crankshaft 9365 Lubricate the lower crankshaft end (oil seal area) with 2‑Cycle Premium Outboard Oil, then install the lower end cap. Tube Ref No. - Page 316 Powerhead Carefully position the piston over the end of the rod. Ensure the locating washers are in place. Sleeve Locating washers 8713 Piston Pin Tool 91‑ 74607A 3 Piston Pin Tool 91‑ 92973A 1 Insert piston pin tool 91‑74607A3 for S/N 0T178499 and below, and 91‑92973A1 for S/N 0T178500 and above, and push the sleeve out of the piston.
-
Page 317: Piston And Piston Ring Combinations
Powerhead Verify the lockrings are properly seated in the piston grooves. 8717 Lockring Lockring installation tool Lockring Installation Tool 91‑77109A3 Lockring Installation Tool 91‑93004A 2 Piston and Piston Ring Combinations 8719 Half keystone piston ring (1.4 mm [0.056 in.]) Enlarged view of piston ring grooves Piston Installation Before installing the new piston rings, check the ring gap by placing each ring in its respective cylinder and pushing the ring 12.7 mm (1/2 in.) into the cylinder using the piston. - Page 318 Powerhead IMPORTANT: The piston ring side with a dot or letter must be facing up. 17260 Piston ring Dots Feeler gauge Ring end gap Dot or letter Piston ring Piston ring end gap Standard bore 0.25 mm–0.45 mm (0.010 in.–0.018 in.) Oversize bore Use a piston ring expander and install the piston rings with the dot side up onto the piston.
- Page 319 Powerhead Remove the screws and connecting rod cap from the piston rod assembly. Install the pistons with the letter "P" into the port side of engine with the word "UP" facing toward the flywheel. 10. Install the pistons with the letter "S" into the starboard side of engine with the word "UP" facing toward the flywheel. 11.
-
Page 320: Crankcase Cover Installation
Powerhead 14. Check each connecting rod cap for correct alignment. If it is not aligned, a ridge can be seen or felt at the separating line as shown below. Correct any misalignment. 37568 Side view correct Side view incorrect ‑ cap on backwards End view correct End view incorrect ‑... - Page 321 Powerhead NOTE: S/N 0T178500 and above do not use gasket strips on the crankcase cover. Gasket strips Edge of cover 17314 Apply Loctite Master Gasket onto the mating surface of the cylinder block. 17315 Tube Ref No. Description Where Used Part No.
-
Page 322: Reed Block Assembly
Powerhead 10. Tighten the perimeter screws to the specified torque. Upper end cap screws (4) Lower end cap screw (4) Center main screw (8) Perimeter screw (6) 17379 Tube Ref No. Description Where Used Part No. 2-cycle Premium Center main screw and perimeter screw threads and face 92-858021K01 Outboard Oil Description... -
Page 323: Reed Block Adapter Plate Assembly
Powerhead NOTE: Allowable reed opening is 0.51 mm (0.020 in.) or less. Replace reeds if either reed is standing open more than 0.51 mm (0.20 in.). Reed Block Adapter Plate Assembly Install a gasket onto the reed block adapter plate. Secure the reed block to the reed block adapter plate with two screws. -
Page 324: Cylinder Head Installation
Powerhead Tighten the screws in sequence to the specified torque. 16552 Description lb‑in. lb‑ft Screws (19) Cylinder Head Installation Install the cylinder head combustion chamber seal with the grooved side towards the cylinder block. Install the cylinder head seal. Install the cylinder head with the thermostat towards the flywheel. Apply 2‑Cycle Premium Outboard Oil to the new cylinder head screw threads and face. - Page 325 Powerhead Install the cylinder heads onto the cylinder block. Tighten the cylinder head screws in two stages, in sequence, to the specified torque. 47168 Cylinder head screw (12) Cylinder head Dowel pin Seal Seal Retainer Screw (M8 x 12) Temperature sensor (S/N 0T178499 and below) Temperature sensor (S/N 0T178500 and above) O‑ring Gasket...
-
Page 326: Starboard Side Oil Hose Routing
Powerhead Starboard Side Oil Hose Routing 45579 90-8M0050731 MAY 2011 Page 4A-61... -
Page 327: Port Side Oil Hose Routing
Powerhead Port Side Oil Hose Routing 45580 Page 4A-62 90-8M0050731 MAY 2011... -
Page 328: Water Bypass Hose Routing
Powerhead Water Bypass Hose Routing Water bypass hose to through‑the‑hull fitting 45581 Installing Powerhead Components Installing Individual Engine Components NOTE: Engine components can be installed individually or in some cases as an assembly. If installing components individually, refer to the following sections. Refer to Section 2A - Ignition to install the following components: •... -
Page 329: Oil Hoses And Reservoir Installation
Powerhead Oil Hoses and Reservoir Installation Install the oil reservoir onto the cylinder block. Secure the reservoir with three 0.312‑18 x 1.25 in. screws, washers, and two clamps. Tighten the screws to the specified torque. Screw and washer securing oil reservoir Screw and washer securing clamp and oil reservoir 33954 Description... -
Page 330: Air Compressor Installation
Powerhead Air Compressor Installation Install the oil line coming from the #5 reed block onto the bottom check valve and secure with a cable tie. Install the oil line coming from the top main bearing onto the side check valve and secure with a cable tie. Install the oil line coming from the oil pump onto the fitting under the air compressor pulley and secure with a cable tie. - Page 331 Powerhead Install a washer and nut onto each stud and tighten the nut to the specified torque. Water hose to expansion chamber Nut and washer (M8) Air compressor oil inlet hose Oil hose to top main bearing Oil hose to #5 reed block 45931 Description lb‑in.
- Page 332 Powerhead 11. Install the fitting into the fuel rail and secure with a retainer and two screws. Tighten the screws to the specified torque. Retainer Screw (2) Air compressor hose 32810 Tube Ref No. Description Where Used Part No. 2-cycle Premium O-rings on the fuel rail air compressor hose fitting 92-858021K01 Outboard Oil...
-
Page 333: Electrical Plate And Harness Installation
Powerhead 14. Use a 3/8 in. square drive on the belt tension arm and install the belt to the air compressor pulley. Belt tensioner 3/8 in. square drive 45924 Electrical Plate and Harness Installation Install the electrical harness assembly onto the engine. Connect the low oil sensor bullet connectors. - Page 334 Powerhead Connect the oil pump connector. Nut and washer Screw Oil pump connector 45918 Connect the harness ground lead below the starter motor. Connect the red and yellow/red leads to the starter solenoid. 10. Connect the MAP sensor connector. 11. Connect the air temperature sensor connector. MAP sensor connector Air temperature sensor connector Yellow/red wire...
-
Page 335: Powerhead Installation On The Pump Unit
Powerhead 15. Install the screw securing the electrical plate cover. Crankshaft position sensor connector Water pressure sensor Nut (M8) 45544 16. Connect the wiring harness retainers. 17. Connect the direct injector connectors on the starboard fuel rail. 18. Connect the fuel injector connectors. 19. - Page 336 Powerhead Lower powerhead onto pump unit. It may be necessary to turn flywheel (aligning crankshaft splines with driveshaft splines) so that powerhead will be fully installed. 45537 Lifting Eye 91‑ 90455 1 Tube Ref No. Description Where Used Part No. Special Lubricant 101 Driveshaft splines 92-802865Q02...
-
Page 337: Engine Break-In Procedure After Powerhead Assembly. 4A-72
Powerhead 11. Connect the remote control harness to the powerhead harness connector. Positive battery cable Negative battery cable Remote oil tank hose (hidden) Remote control harness connection 45534 12. Install the throttle cable. Secure with a washer and locknut. Tighten the locknut and then back off 1/4 turn. 13. -
Page 338: Recommended Break-In Procedure
Powerhead Engine Break-in Procedure Step 1: First 40 minutes - Keep the boat on the trailer. Place the boat and trailer in water that is deep enough to submerge the water intake grate. Keep the bow attached and tight to the trailer, but remove or loosen the rear straps to allow the boat to float at the rear. - Page 339 Powerhead Notes: Page 4A-74 90-8M0050731 MAY 2011...
- Page 340 Cooling Powerhead Section 4B - Cooling Table of Contents Cooling System Specifications...........4B-2 Water Pressure Check............4B-5 Temperature Sensor Location and Function......4B-2 Problem Diagnosis............4B-6 Temperature Sensors............4B-3 Model 200 Water Flow............4B-6 4 and 2 Wire Temperature Sensor......4B-3 Description..............4B-6 2 Pin Connector Cylinder Head Temperature Sensor Water Flow Diagram...........4B-8 ................4B-4 90-8M0050731 MAY 2011...
-
Page 341: Cooling System Specifications
Cooling Cooling System Specifications Cooling System Specifications Water pressure At 900–1000 RPM 1.4–41 kPa (0.2–0.6 psi) Temperature sensor Between black and each tan/black wire Refer to Temperature Sensors Refer to Temperature Sensors Between each lead and ground Special Tools DMT 2004 Digital Multimeter 91‑892647A01 Measures RPM on spark ignition (SI) engines, ohms, amperes, AC and DC voltages;... -
Page 342: Temperature Sensors
Cooling Temperature Sensors NOTE: The computer diagnostic system (CDS) can be used to monitor temperature readings from both temperature sensors. Three temperature sensors are used to provide temperature information to the PCM. One sensor is mounted in each cylinder head (2 pin connector) and one sensor is mounted in the air compressor cylinder head (4 wire sensor). The cylinder head sensors are threaded into the cylinder head. -
Page 343: Pin Connector Cylinder Head Temperature Sensor
Cooling Analog Gauge Sender °C °F Ohms ± 10% 1218 1544 1974 2544 ‑5 3319 ‑10 4362 ‑15 5778 2 Pin Connector Cylinder Head Temperature Sensor S/N 0T801000 and above (model year 2004 and newer) - Threaded brass housing. M10‑1.5 thread Brass housing 2 pin connector 40459... -
Page 344: Water Pressure Check
Cooling Brass Housing Sender °C °F Ohms ± 10% 1070 1256 1480 1751 2082 2487 2985 3601 4367 5325 6530 8056 10000 12493 15713 19902 25391 32640 ‑5 42292 ‑10 55253 ‑15 72809 Water Pressure Check Water pressure may be checked by using a computer diagnostic system (CDS) or if the boat is so equipped, with SmartCraft gauges. -
Page 345: Problem Diagnosis
Cooling Problem Diagnosis Condition Recommended Range Possible Cause • Severe internal leak Pressure below specification at idle 1.4–4 kPa (0.2–0.6 psi) • Inlet restriction • Plugged tell‑tale Pressure above 34 kPa (5 psi) at idle 1.4–4 kPa (0.2–0.6 psi) • Inlet restriction Pressure is below minimum specification 69 kPa (10 psi) - Page 346 Cooling Notes: 90-8M0050731 MAY 2011 Page 4B-7...
-
Page 347: Water Flow Diagram
Cooling Water Flow Diagram 45587 Page 4B-8 90-8M0050731 MAY 2011... - Page 348 Cooling Powerhead and Exhaust Cooling Circuit Inlet cooling water from jet pump Water inlet from flushing connection Water flow from adapter to powerhead Water fills center of powerhead, flows over exhaust runners, then to cylinder jackets Water pressure sensor Cooling water fills cylinder jackets, then flows to cylinder head Majority of water flows down cylinder head.
- Page 349 Cooling Notes: Page 4B-10 90-8M0050731 MAY 2011...
- Page 350 Pump Unit Pump Unit Section 5A - Pump Unit Table of Contents Wear Ring/Impeller Specifications........5A-2 Servicing the Stator, Impeller, and Wear Ring....5A-21 XR2 Sport Jet Special Tool Kit 91‑809957A1....5A-5 Disassembly.............5A-21 Components Contained in Kit........5A-5 Inspecting the Wear Ring and Impeller......5A-24 Pinion and Impeller Shaft Components......5A-6 Wear Ring..............5A-24 Nozzle and Rudder Components........5A-8...
-
Page 351: Wear Ring/Impeller Specifications
Pump Unit Wear Ring/Impeller Specifications Wear Ring/Impeller Specifications Wear ring bore diameter 184.73–184.98 mm (7.273–7.283 in.) Impeller outside diameter 183.52–183.77 mm (7.225–7.235 in.) Clearance between wear ring and impeller 0.96–1.47 mm (0.038–0.058 in.) Lubricants, Sealants, Adhesives Tube Ref No. Description Where Used Part No. - Page 352 Pump Unit Impeller Shaft Wrench 91‑832093A 1 Secures the impeller shaft when removing or installing the impeller nut. 25462 Bearing Puller Assembly 91‑ 83165T Removes bearings, races and bearing carriers 3610 Oil Seal Installation Tool 91‑850830 Installs the stator seal. 46803 Slide Hammer 91‑34569A 1...
- Page 353 Pump Unit Bearing Installer 91‑832017 Installs a ball bearing into the drive housing. 25446 Seal Installer 91‑832019T Installs the pinion shaft seals into the drive housing. 25449 Pinion Gear Height Location Tool 91‑831897 Aids in determining the exact pinion gear height location for the 1.25:1 gear ratio jet drive.
-
Page 354: Xr2 Sport Jet Special Tool Kit 91-809957A1
Pump Unit XR2 Sport Jet Special Tool Kit 91‑809957A1 Components Contained in Kit Description Part Number Impeller shaft preload kit 91‑824871A2 Pinion gear height location tool 91‑831897 Pinion shaft bearing installer 91‑832016T Impeller shaft bearing installer 91‑832017 Bearing cup installer 91‑832018 Impeller shaft seal installer 91‑832019T... -
Page 355: Pinion And Impeller Shaft Components
Pump Unit Pinion and Impeller Shaft Components 47166 Page 5A-6 90-8M0050731 MAY 2011... - Page 356 Pump Unit Pinion and Impeller Shaft Components Torque Ref. No. Qty. Description lb‑in. lb‑ft Rubber ring Screw (M8 x 20) 20.5 Pinion shaft housing assembly Seal Ball bearing Bearing set O‑ring Shim (0.002–0.010 in.) Pinion shaft assembly Impeller shaft Gear Washer Shim (0.002–0.010 in.) Cover...
-
Page 357: Nozzle And Rudder Components
Pump Unit Nozzle and Rudder Components 13 25 45329 Page 5A-8 90-8M0050731 MAY 2011... - Page 358 Gate kit Lockwasher Anode Screw (M6 x 20) Pivot bushing Trilobe pin Clevis pin Washer Cotter pin Reverse gate decal (Power by Mercury) Special pivot bolt Rudder kit Pivot bushing Lockwasher Anode Screw (M6 x 20) Swivel end kit Washer Screw and nut kit Nut (1/4‑20)
- Page 359 Pump Unit Torque Ref. No. Qty. Description lb‑in. lb‑ft Wear ring kit Brass fitting (3/4‑14) Stud (M6 x 36) Nut (M6) O‑ring O‑ring Shift cable retainer latch Retainer Barrel retainer cup Impeller shaft nut (1‑1/4‑12) Four blade impeller Special pivot bolt Tube Ref No.
- Page 360 Pump Unit Nozzle and Rudder Components 13 25 45329 90-8M0050731 MAY 2011 Page 5A-11...
-
Page 361: Jet Drive Housing Components
Pump Unit Jet Drive Housing Components 47167 Page 5A-12 90-8M0050731 MAY 2011... - Page 362 Pump Unit Jet Drive Housing Components Torque Ref. No. Qty. Description lb‑in. lb‑ft Housing Siphon drain fitting (1/8‑27) Stud (M10 x 55) Oil seal Ball bearing Snap ring Drain screw (3/8‑16 x 1/4) Sealing washer Gasket (jet drive housing to top cover) Pump mount grommet Brass nut (M10) 47.5...
- Page 363 Pump Unit Tube Ref No. Description Where Used Part No. Loctite 598 RTV Sealant Ride plate and inlet grate screws Obtain Locally Page 5A-14 90-8M0050731 MAY 2011...
- Page 364 Pump Unit Jet Drive Housing Components 47167 90-8M0050731 MAY 2011 Page 5A-15...
-
Page 365: Expansion Chamber And Adapter Plate Components
Pump Unit Expansion Chamber and Adapter Plate Components 44905 Page 5A-16 90-8M0050731 MAY 2011... - Page 366 Pump Unit Expansion Chamber and Adapter Plate Components Torque Ref. No. Qty. Description lb‑in. lb‑ft Expansion chamber kit Gasket (expansion chamber to adapter plate) Gasket (block to exhaust expansion chamber) Nut (M8) Stud (M8 x 50) 90° elbow fitting 90° elbow fitting Dowel pin without hole Engine adapter Washer...
- Page 367 Pump Unit Torque Ref. No. Qty. Description lb‑in. lb‑ft Hose Worm gear clamp Page 5A-18 90-8M0050731 MAY 2011...
- Page 368 Pump Unit Expansion Chamber and Adapter Plate Components 44905 90-8M0050731 MAY 2011 Page 5A-19...
-
Page 369: General Service Recommendations
Pump Unit General Service Recommendations There may be more than one way to disassemble or reassemble a particular part. It is recommended that the entire procedure be read prior to repair. IMPORTANT: Read the following before attempting any repairs. Disassembly of a subassembly may not be necessary until cleaning and inspection reveals that disassembly is required for replacement of one or more components. -
Page 370: Servicing The Stator, Impeller, And Wear Ring
Pump Unit The jet pump operates by drawing water into a housing forward of the impeller. The water is pressurized within the specially designed housing and then directed to the rear to provide thrust and motion. Forward motion Water thrust Reverse gate ‑... - Page 371 Pump Unit Disconnect shift and steering cables at reverse gate and rudder. Shift cable Steering cable 45256 IMPORTANT: This procedure lists the disassembly of external pump components. If servicing a specific component, follow the procedure in that section. Remove four screws securing nozzle to stator. Remove the reverse gate/rudder/nozzle assembly. Screw (M10 x 35, flange) (2) Screw (M10 x 45, flange) (2) Anode...
- Page 372 Pump Unit Remove the stator assembly. Screw (M10 x 150) Vent plug Fill/drain plug 45658 Drain the stator by tilting stator forward and allowing the oil to drain over the impeller shaft seals. Complete oil draining by removing stator fill/drain plug and pour the remaining oil out the drain plug hole. If removed, install the wear ring to support the impeller and shaft during impeller removal.
-
Page 373: Inspecting The Wear Ring And Impeller
Pump Unit Impeller Nut Socket 91‑850297 Impeller Shaft Wrench 91‑832093A 1 Inspecting the Wear Ring and Impeller Wear Ring Inspect the wear ring for excessive scoring and/or grooves. Replace the wear ring if deep grooves are present or if severe scoring has taken place. -
Page 374: Impeller
Pump Unit Replace the stator seal if required. Use the bearing puller tool to remove the seal. Use the oil seal installation tool to install the new stator seal. Puller 91‑83165M Stator seal 45261 Bearing Puller Assembly 91‑ 83165T Oil Seal Installation Tool 91‑850830 Impeller Place the impeller in the wear ring bore and push to one side. - Page 375 Pump Unit Lubricate the wear ring O‑rings with Special Lubricant 101. Install the O‑ring into the counterbore. Install the O‑ring onto the wear ring. Tube Ref No. Description Where Used Part No. Special Lubricant 101 Impeller shaft splines and wear ring O-rings 92-802865Q02 Install the wear ring onto the jet drive housing.
- Page 376 Pump Unit Tube Ref No. Description Where Used Part No. Loctite 271 Threadlocker Stator/wear ring mounting screws 92-809819 Description lb‑in. lb‑ft Stator/wear ring mounting screws (M10 x 150) (4) Remove the stator fill/drain and vent plugs. Apply Loctite 567 PST Pipe Sealant to the plug threads. Fill the stator with High Performance Gear Lubricant until oil flows out the vent hole.
-
Page 377: Removing Jet Drive From Boat
Pump Unit Tube Ref No. Description Where Used Part No. Loctite 242 Threadlocker Trim plate screws 92-809821 Description lb‑in. lb‑ft Trim plate screws 10. Install the nozzle assembly and anode. Apply Loctite 271 Threadlocker to the threads of the screws. Tighten the screws to the specified torque. -
Page 378: Drive Housing Disassembly And Assembly
Pump Unit Support the pump. 45263 Remove the remaining four nuts from the drive housing cover. Remove the drive housing cover and gasket. Nut (4) Gasket 45264 Lower the drive housing while sliding the cables out. Place on a bench or suitable workstand for disassembly/repair. Drive Housing Disassembly and Assembly Draining and Inspecting Drive Housing Lubricant Position a clean drain pan under the gear housing. -
Page 379: Pinion Shaft Removal
Pump Unit Gear Housing Pressure Without gear lubricant for five minutes without leakage 69–83 kPa (10–12 psi) NOTE: When draining the gearcase for the first time, the lubricant may appear cream colored due to the mixing of assembly lubricant and gear lubricant. This is not an indication of water intrusion. If, during the subsequent draining of the gearcase, the lubricant appears cream colored or milky, water may be present. - Page 380 Pump Unit Remove the rubber ring, O‑ring, and shims. Rubber ring Shims O‑ring 45266 Press the pinion shaft out of the pinion shaft housing. 45267 Remove the pinion shaft ball bearing and two seals using the bearing puller assembly. 45268 Bearing Puller Assembly 91‑...
- Page 381 Pump Unit Remove the pinion shaft outer race from the pinion shaft housing using a slide hammer. 45269 Slide Hammer 91‑34569A 1 Press a new outer race into the pinion shaft housing using the mandrel. 45271 Bearing Cup Installer 91‑832018 Remove the tapered roller bearing from the pinion shaft using the universal puller plate.
-
Page 382: Impeller Shaft Removal
Pump Unit Press a new ball bearing into the pinion shaft housing using the bearing installer. 45273 Bearing Installer 91‑832016T 10. Press the pinion shaft into the pinion housing. 45274 11. Press new seals into the pinion shaft housing, one at a time, using the seal installer. Inner seal faces in, outer seal faces out. Fill between the seals with Special Lubricant 101. - Page 383 Pump Unit Remove the stator fill screw; drain oil into a suitable container. Remove the ride plate. Remove the four screws securing the impeller shaft cover to the drive housing. Remove the cover. Screw Cover Shim O‑ring 45276 NOTE: Take care not to damage or misplace the shims. 45277 Remove the nut and washer from the end of the impeller shaft.
- Page 384 Pump Unit Pull the impeller shaft from the drive housing. 45280 Remove the bearing retaining ring from the drive housing. 45281 Remove the bearing using the bearing puller. 45282 Bearing Puller Assembly 91‑ 83165T Remove the impeller shaft seals using the slide hammer and puller jaws. Slide Hammer 91‑34569A 1 90-8M0050731 MAY 2011...
- Page 385 Pump Unit 10. Install new seals using the seal installer tool. 45283 11. Install a new bearing using the bearing installer tool. 45284 Bearing Installer 91‑832017 Seal Installer 91‑832019T 12. Install the retaining ring in the drive housing after the bearing is installed. 13.
-
Page 386: Shimming Procedures And Assembly
Pump Unit 14. Press a new bearing onto the gear using an appropriate size mandrel. Bearing Mandrel 29850 15. If replacing the bearing, remove the outer race from the front cover using a slide hammer and puller jaws. Press the new outer race into the cover using a suitable mandrel. - Page 387 Pump Unit Install the rubber ring onto the pinion shaft until it lightly touches the shaft seal. Pinion assembly O‑ring Shims Screw (M8 x 25) (4) Rubber ring 45287 Tube Ref No. Description Where Used Part No. 2-4-C with Teflon Pinion shaft housing O-ring 92-802859A 1 Loctite 271 Threadlocker...
- Page 388 Pump Unit NOTE: Once the thickness is determined, the difference between the feeler gauge thickness and 0.64 mm (0.025 in.) (the required clearance) must be either added or subtracted from the total thickness of shims between the pinion shaft housing and drive housing.
- Page 389 Pump Unit Install the original shims onto the impeller shaft cover. Install the O‑ring on the impeller shaft cover. NOTE: If the original shims are not available, start with 0.76 mm (0.030 in.) shims. • Lubricate the O‑ring and bore with 2‑4‑C with Teflon. •...
- Page 390 Pump Unit • Position the rod from the dial indicator on the center mark "II" of the backlash indicator rod. 45290 Backlash Indicator Rod 91‑ 53459 Dial Indicator 91‑ 58222A 1 Thread Extending Kit 91‑824869A 1 12. Rotate the pinion shaft back and forth lightly to contact the gear teeth in each direction.– NOTE: Average total amount of reading of indicator backlash specification is 0.18–0.23 mm (0.007–0.009 in.).
- Page 391 Ride plate bolts (M6 x 20) (16) Nozzle bolts (M10 x 35) (2) Anode bolts (M10 x 45) (2) Install the drive housing, shift, and steering cables. Refer to Section 1D - Mercury Jet Installation. Page 5A-42 90-8M0050731 MAY 2011...