Eastwood TIG 200 Assembly And Operating Instructions Manual
Hide thumbs
Also See for TIG 200:
- User manual ,
- Assembly & operating instructions (25 pages) ,
- Instructions manual (17 pages)
Table of Contents
Advertisement
Quick Links
Advertisement
Table of Contents

Related Manuals for Eastwood TIG 200


Summary of Contents for Eastwood TIG 200
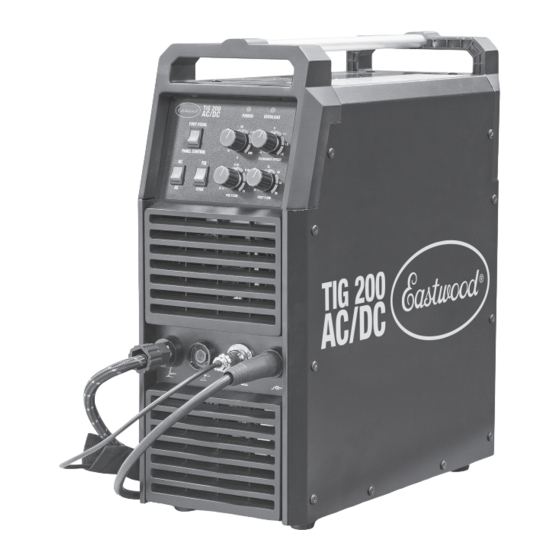
- Page 1 Item #33920 TIG 200 AC/DC WELDER ASSEMBLY AND OPERATING INSTRUCTIONS...
-
Page 2: Statement Of Limited Warranty
Eastwood. WARRANTY REPAIR: If Eastwood confirms the existence of a defect covered under this warranty plan, Eastwood will determine whether repair or replacement is the most suitable option to rectify the defect. At Eastwood’s request, the purchaser must return, to Eastwood, any products claimed defective under Eastwood’s warranty. - Page 3 (1) Hammer Brush [M] (1) Spare #8 Gas Lens [N] (1) 1/16” Collet [P] (1) 3/32” x 6” Tungsten, Green [Q] (1) 3/32” x 6” Tungsten, Red [R] (1) Collet Body, with Diffuser [S] To order parts and supplies: 800.343.9353 >> eastwood.com...
-
Page 4: Specifications
If the Duty Cycle is exceeded, and the built-in Breaker is tripped, allow the unit to cool for a minimum of 15 minutes. When a safe temperature has been reached, the Welder can be switched back on. To increase the duty cycle, turn down the Voltage Output control. Going above 190 Amps will yield a lower Duty Cycle. Eastwood Technical Assistance: 800.343.9353 >> tech@eastwood.com... -
Page 5: Safety Information
IMPORTANT NOTE: These instructions are intended only to provide the user with some familiarity of the Eastwood TIG 200 AC/DC. Electric Welding is a highly complex procedure with many variables. If you have no prior experience with Electric Welding, it is extremely important to seek the advice of someone experienced in Electric Welding for instruction, enroll in a local technical school welding course or study a comprehensive how-to DVD and obtain a good quality reference book on Electric Welding as there is a moderate learning curve necessary before achieving proficiency in Welding different metals such as steel, stainless steel and aluminum. -
Page 6: Cylinders Can Explode If Damaged
• Keep protective cap in place over valve except when cylinder is in use. • Use proper equipment, procedures and have adequate help when moving or lifting cylinders. Eastwood Technical Assistance: 800.343.9353 >> tech@eastwood.com... -
Page 7: First Aid
NEMA 6-50R receptacle. As an alternative, by using the included Adapter Cord, the TIG 200 AC/DC can be used with a 120 VAC, 20 AMP, 60HZ grounded NEMA 5-15R outlet protected by a circuit breaker. - Page 8 Electrode Holder Connection c. TIG Trigger and Foot Pedal Connection d. Ground Connection FIG. 3 FIG. 3 REAR PANEL (FIG 3) e. 240 VAC Power Cord f. Shielding Gas Connection g. ON/OFF Switch Eastwood Technical Assistance: 800.343.9353 >> tech@eastwood.com...
- Page 9 FIG. 4 FIG. 4 The Eastwood TIG 200 AC/DC is factory set-up for TIG Welding use with a 3/32” Tungsten (Included) and 100% Argon Shielding Gas (Not Included). The procedure for configuring to Stick welding use is covered further on in this Manual.
-
Page 10: Buildup Of Gas Can Injure Or Kill
• Use proper equipment, procedures and have adequate help when moving or lifting cylinders. A Shielding Gas Bottle is NOT INCLUDED with the Eastwood TIG 200 AC/DC but is necessary to weld using the TIG torch. It can be bought at most local Welding Supply Stores. -
Page 11: Torch Assembly
2-1/2 times the Tungsten rod diameter (FIG 12). • Replace the Tungsten in the Collet with the tip extending 1/8”-1/4” beyond the Gas Nozzle, then re-tighten the Back Cap. FIG. 12 FIG. 12 To order parts and supplies: 800.343.9353 >> eastwood.com... -
Page 12: Setting Selection
OVERLOAD PROTECTION The Eastwood TIG 200 AC/DC Welder is equipped with an overload protection. This device will protect the Welder if the duty cycle is exceeded. If the output is exceeded, the breaker will trip, the AMBER Overload Indicator will illuminate and cut off the power supply to the TIG Torch although the fan will still run to cool the unit. - Page 13 • Electric welding heats metal and tools to temperatures that will cause severe burns! • Use protective, heat resistant gloves and clothing when using Eastwood or any other welding equipment. Never touch welded work surface, TIG Torch or nozzle until they have completely cooled.
-
Page 14: Stick Welding
• When done, shut off the Power Switch and close the Shielding Gas Tank valve completely. STICK WELDING With the optional #20517 Electrode Holder, the TIG 200 AC/DC can be used as a stick welding machine. • Connect the electrode holder and configure the TIG/Stick switch down for stick welding (Fig 14). -
Page 15: Torch Maintenance
TORCH MAINTENANCE The Eastwood TIG 200 AC/DC has several consumable parts that will need to be replaced over time. If wear or slag build up is noticed on any of the torch components, replace them immediately to avoid damage to the torch. Worn components will also contribute to poor performance. See the torch components (FIG 9) exploded view for a reference of all of the components and the assembly order. -
Page 16: Troubleshooting
Shift more negative clearance on the Clearance Effect knob so less heat is going Melting Incorrect Clearance Effect (AC) into the tungsten. Tungsten Wrong Size Tungsten Increase tungsten diameter. Refer to chart for proper sizing. Incorrect Shielding Gas Only use 100% Argon when TIG Welding. Eastwood Technical Assistance: 800.343.9353 >> tech@eastwood.com... - Page 17 To reduce heat, it is best to spread the welding out around the area. This can be Too Much Heat in Material done by using stitch welding techniques, alternating sides, and/or taking your time and allowing the pieces to cool between passes. To order parts and supplies: 800.343.9353 >> eastwood.com...
- Page 18 NOTES Eastwood Technical Assistance: 800.343.9353 >> tech@eastwood.com...
- Page 19 NOTES To order parts and supplies: 800.343.9353 >> eastwood.com...
-
Page 20: Torch Replacement Parts
If you have any questions about the use of this product, please contact The Eastwood Technical Assistance Service Department: 800.343.9353 >> email: tech@eastwood.com PDF version of this manual is available at eastwood.com The Eastwood Company 263 Shoemaker Road, Pottstown, PA 19464, USA 800.343.9353 eastwood.com © Copyright 2020 Eastwood Automotive Group LLC 11/20...