Table of Contents
Advertisement
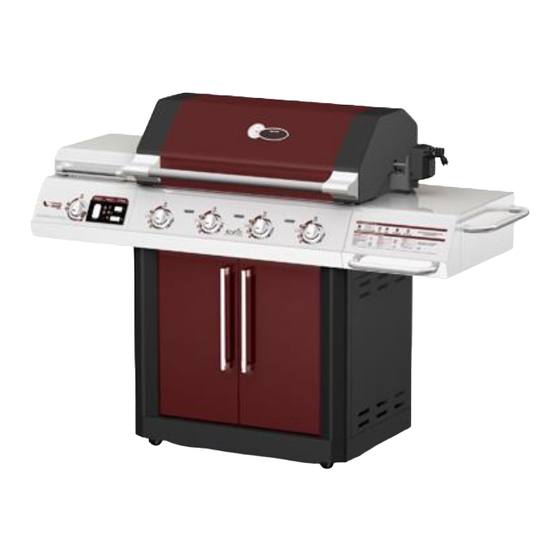
MODEL 463250308 • PRODUCT GUIDE
THIS GRILL IS FOR OUTDOOR USE ONLY.
CAUTION:
Read and follow all safety statements, assembly
instructions, and use and care directions before
attempting to assemble and cook.
INSTALLER/ASSEMBLER:
Leave this manual with consumer.
CONSUMER:
Keep this manual for future reference.
If you have questions or need assistance during assembly, please call
To insure your satisfaction and for follow-up service, register your grill online at www.grillregistration.com
WARNING:
Failure to follow all manufacturer's instructions could
result in serious personal injury and/or property
damage.
CAUTION:
Some parts may contain sharp edges – especially as
noted in the manual! Wear protective gloves if
necessary.
1-888-430-7870
.
463250308 • 80015527 • 05-18-08
Advertisement
Table of Contents
Troubleshooting

Related Manuals for Char-Broil RED 463250308


Summary of Contents for Char-Broil RED 463250308
- Page 1 MODEL 463250308 • PRODUCT GUIDE THIS GRILL IS FOR OUTDOOR USE ONLY. CAUTION: Read and follow all safety statements, assembly instructions, and use and care directions before attempting to assemble and cook. INSTALLER/ASSEMBLER: Leave this manual with consumer. CONSUMER: Keep this manual for future reference. If you have questions or need assistance during assembly, please call To insure your satisfaction and for follow-up service, register your grill online at www.grillregistration.com WARNING:...
- Page 2 DANGER If you smell gas: 1. Shut off gas to the appliance. 2. Extinguish any open flame. 3. Open lid. 4. If odor continues, keep away from the appliance and immediately call your gas supplier or your fire department. WARNING 1.
-
Page 3: Table Of Contents
TABLE OF CONTENTS For Your Safety...2 To insure your satisfaction Grill Service Center...2 and for follow-up service, Product Record Information...2 register your grill Installation Safety Precautions...2 online at: Safety Symbols...2 www.grillregistration.com Use and Care ...4-12 Parts List...13 Parts Diagram...14 Assembly...15-24 Troubleshooting...25-27 Warranty...28 Registration Card...29... - Page 4 USE AND CARE DANGER • NEVER store a spare LP cylinder under or near the appliance or in an enclosed area. • Never fill a cylinder beyond 80% full. • An over filled or improperly stored cylinder is a hazard due to possible gas release from the safety relief valve.
-
Page 5: For Your Safety
LP Cylinder Exchange •Many retailers that sell grills offer you the option of replacing your empty LP cylinder through an exchange service. Use only those reputable exchange companies that inspect, precision fill, test and certify their cylinders. Exchange your cylinder only for an OPD safety feature-equipped cylinder as described in the "LP Cylinder"... -
Page 6: Grill Service Center
Hold coupling nut and regulator as shown for proper connection to LP cylinder valve. 6.Turn the coupling nut clockwise and tighten to a full stop. The regulator will seal on the back-check feature in the LP cylinder valve, resulting in some resistance. An additional one-half to three-quarters turn is required to complete the connection. - Page 7 WARNING For Safe Use of Your Grill and to Avoid Serious Injury: • Do not let children operate or play near grill. • Keep grill area clear and free from materials that burn. • Do not block holes in sides or back of grill. •...
- Page 8 WARNING Turn controls and gas source or tank OFF when not in use. CAUTION If ignition does NOT occur in 5 seconds, turn the burner controls OFF, wait 5 minutes and repeat the lighting procedure. If the burner does not ignite with the valve open, gas will continue to flow out of the burner and could accidently ignite with risk of injury.
-
Page 9: Spider Alert
CAUTION SPIDER ALERT! SPIDER AND WEBS INSIDE BURNER TUBE If you notice that your grill is getting hard to light or that the flame isn’t as strong as it should be, take the time to check and clean the venturi’s. CONTROL PANEL VALVE In some areas of the country, spiders or small insects have been... - Page 10 Food Safety Food safety is a very important part of enjoying the outdoor cooking experience. To keep food safe from harmful bacteria, follow these four basic steps: Clean: Wash hands, utensils, and surfaces with hot soapy water before and after handling raw meat and poultry.
- Page 11 463250308 • 11...
- Page 12 The methods below are suggestions for cleaning stainless steel surfaces. Choose a cleaning method appropriate for your needs. It is recommended that you use a Char-Broil® grill cover to help prolong the life and prevent discoloration of your grill.
-
Page 13: Parts List
PARTS LIST – Model No. 463250308 Key Qty Description Bottom Shelf...80016693 Locking Caster...80000268 Fixed Caster...80004093 Downside Panel, Left...80016143 Downside Panel, Right...80016144 Electronic Ignitor Module...80007900 Battery Cap ...80007380 Heat Shield, F/Firebox...80016196 Front Brace, Left, F/Cart...80016147 Front Brace, Right, F/Cart...80016148 Rear Panel, Down...80016163 Top Lid Assy...80016155 Top End Weldment, Left...80016114 Top End Weldment, Right...80016115... -
Page 14: Parts Diagram
PARTS DIAGRAM – Model No. 463250308 14 • 463250308... -
Page 15: Assembly
ASSEMBLY – Model 463250308 Right Shelf Handle and Drawer handle Assembly Draw the Drawer out of the right side shelf, make sure using your two hands and push the lock in right directions shown A B and C. Attach towel bar to right side shelf using two 1/4-20x3/4” screws, 1/4”... - Page 16 Right and Left Shelf Assembly Insert right side shelf over screws and washers through bracket shown A, make sure insert tabs into cut-outs and holes into bulges properly. Attach right side shelf onto right side panel using one 1/4-20x1- 1/2” screw, three 1/4-20x1/2” screw, four 1/4” flat washers and four 1/4"...
- Page 17 Tank Gauge Assembly First, secure temperature probe the clamp on the left side panel show A. Make the gauge wire go through the hole on the left side shelf and insert to the tank gauge show B and C. Temperature Probe Clamp Gauge Wire Gauge Wire...
- Page 18 Side Burner Assembly Insert the side burner valve into the side burner and secture it to the bracket using two #5-40x1/5” screws shown A. Make sure burner tube aligns correctly onto side burner valve underneath left shelf shown B. Insert back of side burner through left shelf cut-out shown C, reverse 180°...
- Page 19 side burner Control Knob Assembly Position side burner valve bracket beneath side burner shelf fascia so that valve stem comes through larger center hole in fascia shown A. Attach side burner bezel to fascia using two #8-32x3/8” screws and #8 lock washers shown A. Press side burner control knob onto valve stem shown A.
- Page 20 Side burner Wind Diverter, Side burner Cap and Clip, side burner Grate, Griddle Place side burner wind diverter over side burner aligning cut- Place burner cap onto side burner and attach side burner cap clip shown B. Place sideb urner cooking grate onto side burner shelf, aligning grate legs with holes in shelf shown A.
- Page 21 Trough Install First, place Trough Middle onto Firebox show A. Second, place two Trough Assy onto Firebox. Make sure this is put in the right direction as show in B. Trough Middle Trough Assy Trough Middle 463250308 • 21...
- Page 22 Cooking Grate and Swing away Place cooking grates onto the firebox as shown. Place the Swing away onto the the firebox.Make sure insert the Swing away ends into the holes properly shown as below. Swing away Cooking Grate 22 • 463250308...
- Page 23 LP Tank LP TANK IS SOLD SEPARATELY. Fill and leak check the tank before attaching to grill and regulator (see Use & Care section). Once tank has been filled and leak checked, place cylinder into the tank tray in bottom shelf. Make sure tank valve is facing front of grill.
- Page 24 Electronic Ignition Unscrew electronic ignition cap on left side panel. Insert AA battery into ignitor, negative (—) end first. Replace button. Battery Cap Battery Positive(+) side up towards Cap 24 • 463250308...
-
Page 25: Troubleshooting
EMERGENCIES: If a gas leak cannot be stopped, or a fire occurs due to gas leakage, call the fire department. Emergencies Possible Cause Gas leaking from •Damaged hose. cracked/cut/burned hose. Gas leaking from LP •Mechanical failure due to rusting or cylinder. - Page 26 Problem Possible Cause Burner(s) will not light ELECTRONIC IGNITION: using ignitor. •No spark, no ignition noise. (See Electronic Ignition Troubleshooting also) •No spark, some ignition noise. •Sparks, but not at electrode or at full strength. Burner(s) will not •See “GAS ISSUES:” on previous page. match light.
-
Page 27: Troubleshooting
Troubleshooting - Electronic Ignition Problem (Ignition) Possible Cause SECTION I No sparks appear at •Battery not installed any electrodes when properly. control knob turned ; no noise can be heard from spark module. •Dead battery. •Faulty spark module. SECTION II No sparks appear at •Output lead any electrodes when... -
Page 28: Warranty
Consumer returns will not be accepted unless a valid Return Authorization is first acquired by calling 1-888-430-7870 and then clearly marked on the outside of the package and the package is shipped freight/postage pre-paid to the address above. 28 • 463250308 Char-Broil Consumer Relations P. O. Box 1240 Columbus, GA 31902-1240... -
Page 29: Registration Card
¿Qué producto está registrando? Quel produit enregistrez-vous? Gas Grill/Parrilla a gas/Gril au gaz Electric Grill/Parrilla eléctrica/Gril électrique Smoker/Ahumador/Fumoir Charcoal Grill/Parrilla a carbón/Barbecue au charbon Charcoal Smoker/Ahumador a carbón/Fumoir au charbon Outdoor Fireplace/Chimenea para exteriores/Foyer extérieur Cooker/Fryer / Cocina/freidora / Cuiseur/Friteuse Other/Otro/Autre Thank you for completing this questionnaire. - Page 30 This Page Intentionally Blank 30 • 463250308...
- Page 31 This Page Intentionally Blank 463250308 • 31...
- Page 32 Always ensure control knobs are in OFF position and regulator is attached to tank BEFORE opening tank valve to avoid low flames. Perform leak test regularly. Thank You for Your Purchase! Char-Broil, LLC • Columbus, GA 31902 • Printed in China...