
Related Manuals for Konica Minolta JM-103


Summary of Contents for Konica Minolta JM-103
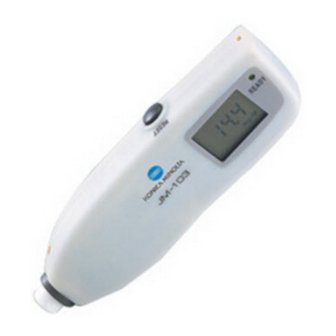
- Page 1 JM-103 Jaundice Meter Instruction Manual Incorrect use of the instrument may result in accidents, so follow the instruction manual to ensure correct and safe operation.
- Page 2 Safety Symbols The following symbols are used in this manual and on the instru- ment to prevent accidents that may occur as a result of incorrect use of the instrument. Denotes a sentence regarding a safety warning or note. Read the sentence carefully to ensure safe and correct use. Denotes a prohibited operation.
- Page 3 • Every effort has been made in the preparation of this manual to ensure the accuracy of its contents. However, should you have any questions or find any errors, please contact a KONICA MINOLTA SENSING authorized service facility. • KONICA MINOLTA SENSING will not accept any responsibility for consequences arising from the use of the instrument.
-
Page 4: Safety Precautions
SAFETY PRECAUTIONS To ensure correct use of this instrument, read the following points carefully and adhere to them. After reading this manual, keep it in a safe place where it can be referred to anytime a question arises. WARNING Failure to adhere to the following points may result in death or serious injury. - Page 5 Doing so may result in a fire. In such situations, turn the power OFF immediately, disconnect the AC adapter from the AC outlet, and contact the nearest KONICA MINOLTA SENSING authorized service facility. Failure to adhere to the following points...
-
Page 6: Table Of Contents
Notes on Use ………………………………………………………………… 7 Notes on Storage …………………………………………………………… 9 Disposal Method …………………………………………………………… 9 Names of Parts …………………………………………………… 10 1) JM-103 main body ………………………………………………………10 2) Charger unit JM-A30 ……………………………………………………11 3) AC adapter JM-A31 ………………………………………………………11 Reading the Display …………………………………………………………12 Preparation ………………………………………………………… 13 1) Charging ……………………………………………………………………13... -
Page 7: Foreword
Foreword Safety Notes This instrument is designed for estimating total serum bilirubin concentration, that is necessary for the screening of jaundice in newborn infants. It must be used for newborn infants only. Never press the measuring probe when it is directed to the eyes. Doing so may cause eye damage. - Page 8 Hemolytic jaundice Normally, in the case of hemolytic jaundice that appears before the age of three days, measurement of total serum bilirubin concentration must also be taken. (The correlation between the measured value taken by the instrument and total serum bilirubin concentration drops substantially due to physiologic factors.) Precocious jaundice If there is a possibility that the newborn infant is suffering from...
-
Page 9: Contents Of The Package
Contents of the package Before using the instrument, check to ensure that the following items are included in the package. 1) Jaundice Merer JM-103 × 1 2) Charger Unit JM-A30 × 1 3) AC Adapter JM-A31 × 1 4) Strap ×... - Page 10 ● The Charger unit (JM-A30) and AC adapter (JM-A31) are solely de- signed for use with the JM-103, so they must never be used with any other instrument. ● This instrument emits intense light to take measurements. Measure- ments should only be taken of the forehead or sternum, and the in- strument should never be allowed to emit light directly into the eyes.
-
Page 11: Notes On Storage
● The instrument has a built-in Ni-MH battery. Do not disassemble the instrument or remove the battery. To dispose of or replace the battery, contact the nearest KONICA MINOLTA SENSING authorized service facility. ● When disposing of the instrument or its accessories, local laws and... -
Page 12: Names Of Parts
Names of Parts 1) JM-103 main body POWER switch • Slide this switch to turn the power ON/ OFF. • Using this switch in combination with READY lamp the RESET button allows you to switch Lights up to indi- to check mode and change the unit of cate that the in- measurement. -
Page 13: Charger Unit Jm-A30
2) Charger unit JM-A30 Standard checker values Checker cover The reference values for check To check the instrument, mode are given. open this cover. Charger jack Used to connect the main body. Checker Checks whether the instru- ment is operating correctly by taking measurement in check mode. -
Page 14: Reading The Display
Reading the Display The following items are displayed on the instrument display. In the following drawing, all the items are lit for explanatory purposes. ❋ In actual operation, there are no cases where all of them are lit at the same time. -
Page 15: Preparation
● Ensure that the batteries have been charged when using it for the first time. ● Ensure that JM-103 should be always placed in the charger unit to charge the battery when not using the instrument for measurement. ● The battery display will blink when the battery power is low. - Page 16 Connect Power cord’s plug into an AC out- let. Set the POWER switch on the main body to OFF, and then place the instrument on the charger unit. ◆ Make sure that the display faces to- ward you. When the instrument is set on the Charger unit properly, the CHARGER lamp will light up.
-
Page 17: Inspecting
2) Inspecting ● The instrument can be easily checked to ascertain that it is perform- ing measurement correctly, by using the checker supplied with the Charger unit. ● It is recommended that the instrument be checked once or more each day it is used. - Page 18 Check to confirm that “CHE” is displayed and that the READY lamp is illuminated. Open the checker cover. Reference values Place the measuring probe perpendicular to the check- er, and push it gently until a click is heard. ◆ If the measuring probe is contacted aslant with the checker, place it per- pendicularly and take measurement again.
- Page 19 ◆ The values are acceptable if both the L value and S value are within ±1.0 of the reference values indicated on the checker cover. (The L and S values indicate the hardware characteris- tics.) If the measured value exceeds ±1.0 of the reference value, clean both the S value (measured value of checker and probe, then take mea-...
-
Page 20: Attaching The Strap
3) Attaching the Strap Strap Strap string Pass the strap string through the strap hook. Strap hook Pass the strap through the loop of the string and then pull it to secure as shown. -
Page 21: Selecting The Unit Of Measurement
4) Selecting the Unit of Measurement ● The unit of measurement can be switched by pressing the POWER switch and RESET button together. Set the POWER switch to ON while holding down the RESET button. “CHE” will appear on the display, but leave the RE- SET button held down. - Page 22 Check that the unit of mea- surement has been switched. ◆ “CHE” will disappear and the unit of The unit for the previous measurement measurement is displayed. When switching the unit of measurement, the one for the previous measurement will not be displayed. The newly selected unit of measurement is displayed.
-
Page 23: Measurement
Measurement This instrument allows “single measurement”, that handles the result taken from each measurement as the measured val- ue, and “average measurement” that handles the average of the results taken from two to five measurements as the measured value. The number of measurements to be taken must be set according to the measuring point and measurement state. - Page 24 Release the RESET button while the desired number of average times is displayed. This will record the dis- played number of average times. ◆ n-1: Single measurement Displays the result taken from a single measurement as the measured val- ◆ n-2 to n-5: Average measurement Displays the average of the results taken from two to five measurements as the measured value.
-
Page 25: Measuring Procedure
Measuring Procedure Removing from Charger Remove the main body from the charger. Clean the measuring probe with medicinal alcohol. Set the POWER switch to ◆ The READY lamp will light up after a few seconds, indicating that the in- strument is ready for measurement. ◆... -
Page 26: Single Measurement
Single Measurement Make sure that single measurement is selected. (For the method of setting the number of measurements to be taken, re- fer to “Setting the Number of Average Measurements” on page 21.) While “n-1” is displayed, make sure that the READY lamp is lit. -
Page 27: Average Measurement (Example Using Five Times As The Average)
surement accuracy range or the dis- play range, refer to the column of page 27 on this manual.) ◆ To exit measurement, proceed to step 7. To take another measure- ment, press the RESET button and continue from step 4. Average Measurement (example using five times as the average) Make sure that average measurement is selected. - Page 28 -2 While making sure that the READY lamp is lit, re- peat the remaining number of measurements. ◆ When the remaining number of mea- surements is completed, the average of the measured values will be dis- played. ◆ If the instrument is left without per- forming the remaining measurements, no measured value will be displayed, the instrument will no longer be ready...
- Page 29 Regarding the measurement accuracy • If the measured value is outside the measurement range (25.1 to 30.0 mg/dL, 426 to 510 μ mol/L), it will blink. This means that the value is outside the guaranteed measurement accuracy range. Regarding outside the display range •...
-
Page 30: Storing The Instrument
Storing the Instrument Set the POWER switch to OFF. Clean the measuring probe with medicinal alcohol. Place the instrument on the Charger unit. ◆ When the instrument is not in use, keep it placed on the Charger unit. -
Page 31: Trouble Shootings
Trouble Shootings Error Messages The following warnings may be displayed on the display win- dow. Error Message Cause Solution T h e m e a s u r e d Place the measuring probe per- value is abnormal. pendicular to the recommended I n t h e c a s e o f point (forehead or sternum) and average measure-... - Page 32 Battery Indication Indicate Cause Solution Battery power is getting Although approximately low. 50 measurements can still be taken continuously af- ter this warning appears, it is recommended that Battery mark is the battery be charged as blinking. soon as possible. Battery has run out.
-
Page 33: Check Points Before Repairing
If the abnormality still reappears, set the POWER switch to OFF, wait 10 seconds or more, and then set it to ON again. If the abnormality continues to reappear, contact the nearest KONICA MINOLTA SENSING authorized service facility. Ref. Problem Check point... -
Page 34: Maintenance And Inspections
Maintenance and Inspections ● Before using the instrument, make sure that there is no dam-age to the instrument, no damage or wire-breakage in the power cord and the instrument operates correctly and safely. (For the method of checking operation of the instrument, refer to “In- specting”... -
Page 35: Specifications
Specifications ■ Model name Jaundice Meter JM-103 ■ Measuring method Determines yellowness of subcutane- ous tissue by using two optical paths to measure optical density difference at two wavelengths ■ Measurement range 0.0 to 25.0 mg/dL or 0 to 425 μ mol/L ■... - Page 36 ■ Standard accessories Charger unit (with a built-in reading checker) JM-A30, Strap, Soft Case JM-A61, AC adapter JM-A31 ■ Usable life 5 years [Verified by KONICA MINOLTA SENSING, INC. (based on own data)] ■ Components that touch the body Measuring probe: Polyacetal, stainless pipe, optical fiber (multi-component glass)
-
Page 37: Appendix
Appendix EMC Guidance (electromagnetic emissions) -
Page 38: Emc Guidance (Electromagnetic Immunity)
EMC Guidance (electromagnetic immunity) -
Page 40: Measuring Principle
Measuring Principle The Jaundice Meter JM-103 determines the yellowness of the subcuta- neous tissue of a newborn infant by measuring the difference in optical densities for light in the blue (450 nm) and green (550 nm) wavelength regions. The measuring probe has two optical paths (see Fig. 1). The use of this method allows measurement of yellowness of the skin and subcutaneous of a newborn infant with the influences of melanin pig-... - Page 41 tissue passes through the outer core (long optical path), and then they reach their corresponding photodiode. Short optical path Long optical path Short optical path Epidermis Long optical path Dermis Subcutaneous tissue Mature baby Premature baby Fig. 2 By calculating the difference in optical densities, the parts that are com- mon to the epidermis and dermis will be deducted, and as a result the difference in optical densities between the two wavelength regions can be obtained for the subcutaneous tissue only.
-
Page 42: Clinical Test Result Report
Clinical Test Result Report To verify serviceability of the JM-103 Jaundice Meter, the correlation between values measured by the instrument and the serum bilirubin was measured at three domestic hospital facilities. The standard deviation ( σ ) from the regression line obtained at that time was ±1.24. - Page 44 Manufacturer 3-91, Daisen-nishimachi, Sakai-ku, Sakai-shi, Osaka 590-8551, Japan ©2002-2006 KONICA MINOLTA SENSING, INC. 9222-1712-12 AGGBKX(2) Printed in Japan...