Table of Contents
Advertisement
Advertisement
Table of Contents

Related Manuals for Stihl RMI 522 C


Summary of Contents for Stihl RMI 522 C
- Page 1 STIHL RMI 522 C Instruction manual RMI 522.0 C...
- Page 2 0478 131 8365 C. K21. TIM-14270-001 © 2021 STIHL Tirol GmbH...
- Page 3 0478 131 8365 C...
- Page 4 0478 131 8365 C...
-
Page 5: Table Of Contents
Dear Customer, Disposal Thank you for choosing STIHL. We Description of symbols 1. Table of contents develop and manufacture our quality Standard equipment products to meet our customers' Initial installation Notes on the instruction manual requirements. The products are designed... -
Page 6: Notes On The Instruction Manual
Maintenance Planning routing of the perimeter the sense of EC Directive 2006/42/EC. wire Maintenance schedule STIHL is continually striving to further Making a sketch of the mowing Cleaning the machine develop its range of products; we therefore area Checking the mowing blade wear... - Page 7 All symbols which are affixed to the The control pad (1) serves for navigation in Caution machine are explained in this instruction the menus. Settings are confirmed and Minor injuries or material damage manual. menus opened using the OK button (2). can be prevented by a certain type Menus can be exited again using the Back of behaviour.
-
Page 8: Machine Overview
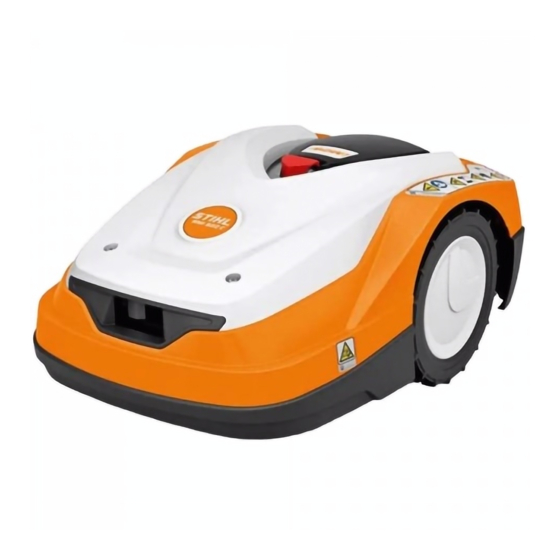
3. Machine overview 3.1 Robotic mower Rear carrying handle (integrated in Movably mounted hood ( 5.4), the movable hood) ( 21.1) 5.5) Rain sensor ( 11.10) Impact protector Rotary handle for cutting height Charging contacts: adjustment ( 9.5) Connecting contacts to the docking station Identification plate with machine number... -
Page 9: Docking Station
3.2 Docking station Floor plate Cable guides for retaining the perim- eter wire ( 9.10) Power supply unit Removable cover ( 9.2) Charging contacts: Connecting contacts to the robotic mower Control panel with button and LED ( 13.1) Button LED display 0478 131 8365 C - EN... -
Page 10: Display
3.3 Display Graphical display Control pad: Navigating in menus ( 11.1) OK button: Navigating in menus ( 11.1) Back button: Navigating in menus 0478 131 8365 C - EN... -
Page 11: How The Robotic Mower Works
4. How the robotic mower works 4.1 Operating principle The robotic mower (1) is designed for the the robotic mower is not to enter and charges throughout the entire active time. automatic mowing of lawns. It mows the obstacles that need to be avoided must be If the mow plan type "Dynamic"... -
Page 12: Safety Devices
The STIHL robotic mower If the response is No, the robotic mower ● Unlock the robotic mower using can be operated reliably remains stationary in the mowing area and the illustrated button and without interference automatic mowing is switched off. ( 15.4) -
Page 13: Lifting Protection
11.16) Residual risks persist even if you operate The term "use" covers all work on the STIHL recommends that one of the this machine according to the instructions. robotic mower, the docking station and the safety levels "Low", "Medium" or perimeter wire. -
Page 14: Clothing And Equipment
Suitable safety glasses must be – for clearing paths (vacuuming, approved accessories and attachments worn when driving in the fixing blowing), can be obtained from your STIHL pins and the docking station – for levelling earth mounds, e.g. mole specialist dealer. pegs. -
Page 15: Warning - Dangers Caused By Electrical Current
The battery is intended exclusively for once it has been disconnected from the Do not insert any objects in the ventilation fixed installation in a STIHL robotic mower. mains. slots of the battery. There, it is optimally protected and is... -
Page 16: Transporting The Machine
Your If possible, install the docking station out of 21.) STIHL specialist has a supply of the reach of pests such as ants or slugs – replacement stickers and all the other When transporting the machine, always... -
Page 17: Programming
Affected people must therefore be Carry out any necessary work or consult a before coming to a standstill. notified in advance about possible activity specialist dealer. STIHL recommends of the robotic mower. STIHL specialist dealers. Press the STOP button ( 5.1) -
Page 18: Maintenance And Repairs
In particular, requirements. Genuine STIHL spare parts mowing blade. the date and time must be set. can be recognised by the STIHL spare If you do not have the appropriate Cleaning: parts number, by the STIHL lettering and,... -
Page 19: Storage For Prolonged Periods Without Operation
Consult your recycling centre or your ensure that the machine is always in a safe specialist dealer for information on the operating condition. proper disposal of waste products. STIHL recommends STIHL specialist dealers. Components or guards that are removed for maintenance operations must be... -
Page 20: Standard Equipment
8. Standard equipment 9. Initial installation iMOW® quick guide A separate quick guide on installing the docking station and routing the perimeter wire is enclosed with the robotic mower to assist you. More detailed information can be found in the respective chapters of this instruction manual. - Page 21 iMOW® quick guide Reduced view of page 1: 0478 131 8365 C - EN...
- Page 22 iMOW® quick guide Reduced view of pages 2 and 3: 0478 131 8365 C - EN...
- Page 23 iMOW® quick guide Reduced view of page 4: 0478 131 8365 C - EN...
-
Page 24: Notes On The Docking Station
– Level and flat. Uneven ground has a significant influence on the robotic mower's docking. It must be ensured that the 9.1 Notes on the docking station ground underneath the docking station Requirements for the docking station floor plate is level and flat. Level or location: flatten the ground if necessary. - Page 25 Internal docking station: In conjunction with an external docking station, guide loops must be installed for offset drive home. 12.12) Space requirement for external docking station: The docking station (1) is installed within the mowing area (A), right at the edge. Route the perimeter wire (2) in front of and behind the docking station (1) for 0.6 m in a straight line and at right angles to the...
-
Page 26: Docking Station Connections
Installing the docking station on a wall: Opening the panel: 9.2 Docking station connections Removing the cover: Fold the panel (1) forwards. Hold the panel in the opened position as the hinge springs will close it automatically. If the docking station is installed on a wall, a recess (1) must be made on the left or right of the floor plate using a pliers to make space for the power cable (2). -
Page 27: Connecting The Power Cable To The Docking Station
Closing the panel: Fit the cover (1) onto the docking station and allow it to engage – do not pinch any cables. 9.3 Connecting the power cable to the docking station Note: The plug and connection socket must be clean. ●... -
Page 28: Installation Material
● The robotic mower must be activated by upwards from the adjustment The installation kits contain perimeter wire a STIHL specialist dealer and assigned element. This design serves a on a reel (1) as well as fixing pins (2) and to the owner's e-mail address. -
Page 29: Setting The Language, Date And Time
9.7 Setting the language, date and time ● Pressing any button on the display activates the machine and thus the installation assistant. Set the current date using the ● Connect the power cable to the docking control pad and confirm with the OK station. -
Page 30: Routing The Perimeter Wire
For smaller mowing areas with a wire Correct operation of the power length of less than 80 m, the AKM 100 supply unit is only ensured at an supplied must be installed together with ambient temperature between the perimeter wire. If the wire lengths are 0°... - Page 31 Only use genuine fixing pins and genuine perimeter wire. Installation kits with the necessary installation material are available as an accessory from the STIHL specialist dealer. ( 18.) Route the perimeter wire starting at the docking station. A distinction must be Draw the wire routing in the garden sketch.
- Page 32 Provide a free wire end (1) with a length of Wire routing in the mowing area: If offset drive home (passage) is approx. 2 m. used, the perimeter wire must be routed at least 1.5 m in front of and behind the docking station in a straight line and at right angles to the floor plate.
-
Page 33: Connecting The Perimeter Wire
Avoid routing at acute angles (less than Last fixing pin with internal docking Completing wire routing: 90°). In acutely angled lawn corners, station: ● Check the fastening of the perimeter fasten the perimeter wire (1) to the ground wire to the ground. One fixing pin per with fixing pins (2) as illustrated.( 12.6) metre is sufficient as a rough guide. - Page 34 Perimeter wire with internal docking station: Remove the cover. ( 9.2) Press the OK button. Place the robotic mower (1) within the mowing area, behind the docking station (2) as illustrated, then press the OK button. Insert the perimeter wire (1) into the cable guides in the floor plate and guide it through the socket (2).
- Page 35 Perimeter wire with external docking Shorten the left wire end (1) and right wire station: end (2) to the same length. Length from the wire outlet to the wire end: 40 cm Strip the left wire end (1) to the specified length X using a suitable tool and twist the wire strands.
- Page 36 Thread a grommet (1) onto each of the two wire ends (2). Strip the right wire end (1) to the specified Fit the grommets over the terminal blocks. length X using a suitable tool and twist the Check the seating of the wire ends in the wire strands.
-
Page 37: Linking The Robotic Mower And Docking Station
When the perimeter wire is correctly If the battery is discharged, a installed and the docking station is plug symbol appears instead connected to the mains power supply, the of the battery symbol at the LED (1) illuminates. top right corner of the display after docking and the battery is charged Note the "Docking station controls"... -
Page 38: Checking Installation
Normal reception – Perimeter wire has been connected – For smaller mowing areas with a wire incorrectly (reversed polarity) length of less than 80 m, the AKM 100 supplied must be installed together with – Docking station is switched off or not the perimeter wire ( 9.9) connected to mains supply... - Page 39 Continuation following interruption: After an interruption, continue edge following with OK. It is recommended by STIHL not to interrupt edge following. Possible As the robotic mower follows the edge, problems when following the edge walk behind it and ensure of the mowing area or when –...
-
Page 40: Programming The Robotic Mower
The displayed active times can be changed. For this purpose, select 9.13 Programming the robotic mower the required time interval using the control pad and open with OK. ( 14.3) If additional active times are required, select the menu item New active time and open with OK. -
Page 41: Completing Initial Installation
To be able to use all the functions of the Further information is available on 9.14 Completing initial installation robotic mower, the iMOW® app must be the web.imow.stihl.com/systems/ installed on a smartphone or tablet with an homepage. Remove all foreign bodies Internet connection and GPS receiver, and (e.g. -
Page 42: Menu
recipient is defined as the administrator Changing the mowing plan, starting and primary user; this person has full a mowing operation, switching access to all functions. automatic mowing on and off, sending the robotic mower home Keep the e-mail address and and changing the date and time can password safe so that the result in activities that will not be... -
Page 43: Status Screen
Selection window: 11.2 Status screen The "Settings" and "Information" submenus are shown as tabs. Settings can be changed by pressing the The tabs can be selected by pressing the control pad. The current value is The status screen appears control pad to the left or right, submenus highlighted in black. -
Page 44: Information Area
The name of the robotic mower Edge mowing: 10.) and the text "iMOW® ready While the robotic mower mows the 11.3 Information area for op." are displayed in the bottom edges of the mowing area, the text area of the screen together with the "Mowing edge"... -
Page 45: Main Menu
3. Time: 2. Drive home ( 11.6) The current time is indicated in 24 hour 11.6 Drive home 3. Mowing plan ( 11.7) format. The robotic mower travels back Automatic mowing 4. Mobile radio signal: to the docking station and Mowing duration The signal strength of the charges the battery. - Page 46 mowing area. ( 14.4) Follow the instructions in the "Adapting the programming" section. ( 15.3) The mowing duration can also be set using the app. ( 10.) Active times Mowing is permitted during ticked The selected active time for active times; these times are automatic mowing can be disabled marked in black in the mowing plan.
-
Page 47: More
1. iMOW®: 4 Time: Adapt machine settings Set the current time. 11.8 More 11.10) The set time must correspond to the actual time in order to prevent inadvertent 2. Installation: mowing by the robotic mower. Adapt and test the installation 11.13) The time can also be set using the app. -
Page 48: Setting The Rain Sensor
Rem. time: If no mapping for the direct drive The remaining mowing duration 11.11 Setting the rain sensor home ( 11.15) is stored, the during the current week in hours and robotic mower's drive home will be In order to set the 5-stage minutes. -
Page 49: Setting Starting Points
point first. Once it has mown this partial 7. New installation: ● If the learning run has been interrupted area, it continues mowing in the remaining The installation assistant is started automatically, correct the position of the area. again, the existing mowing plan is perimeter wire and remove any deleted. -
Page 50: Direct Drive Home
Setting starting point 1 to 4 If the mowing area is successfully An internal map of the mowing area manually: mapped: is created during the teach-in run. Determine the distance of the The edge following run must be ● The teach-in process is automatically starting points from the docking executed without interruption for terminated when the robotic mower... -
Page 51: Safety
Entry of a PIN code is always required. The "Change PIN code" menu item 3. GPS protect. is only displayed in the safety levels STIHL recommends that one of the 4. Change PIN code "Low", "Medium" or "High". safety levels "Low", "Medium" or "High"... -
Page 52: Service
7. Keylock: ● After pressing the OK button, When the keylock is switched on, enter the PIN code. The robotic 11.18 Information the buttons on the display can mower will then search for the only be operated if the Back wire signal and save it automatically. -
Page 53: Perimeter Wire
Total distance covered in metres shown (max. "++++"), the better the Should you require support, your – Ser.-No.: connection. STIHL specialist dealer will be Serial number of the robotic mower. pleased to assist you with – Network: This can also be found on the... -
Page 54: Planning Routing Of The Perimeter Wire
The wire clearances specified in For small mowing areas with a wire this instruction manual are adapted length of less than 80 m, the to the routing of the perimeter wire AKM 100 supplied must be on the lawn area. installed together with the perimeter wire. -
Page 55: Routing The Perimeter Wire
Only use genuine fixing pins and genuine perimeter wire. Installation kits with the necessary installation material are available as an accessory from the STIHL specialist dealer. ( 18.) The perimeter wire (1) is routed above ground and attached with additional fixing... -
Page 56: Acute Corners
12.6 Acute corners The robotic mower must run completely When routing the perimeter wire (1) at an within the mowing area and must not touch internal corner at a high obstacle, measure the obstacle. the wire clearance with the iMOW® Ruler (2). Through the clearance of 28 cm, the Wire clearance: 28 cm robotic mower travels along the perimeter... -
Page 57: Installing Linking Sections
– around obstacles that are too low. STIHL recommends laying linking Minimum height: 8 cm sections together with the relevant no-go areas or secondary areas STIHL recommends during wire routing. ● blocking off obstacles by means of no- In the case of retrospective... -
Page 58: Secondary Areas
Route the perimeter wire (1) from the edge to the obstacle with the correct clearance No-go areas must have a minimum around the obstacle (2) and attach it to the diameter of 56 cm. ground with a sufficient number of fixing The clearance to the edge loop (X) must pins (3). - Page 59 Installing the start and end of the In corridors, the lawn is only mown corridor: along the path of the perimeter wire. If necessary, activate automatic edge mowing or mow the corridor area manually on a regular basis. ( 11.13) If corridors are to be installed, switch off offset drive home (passage) (...
-
Page 60: Guide Loops For Offset Drive Home
– between paths/obstacles that can be Function: travelled on (less than 1 cm in height – When the robotic mower follows the e.g. paths): perimeter wire offset at a distance, it 22 cm. crosses one of these guide loops during the drive home. -
Page 61: Accurate Mowing Along Edges
To the right and left of the corridor access, two guide loops (1) have to be installed at an angle of 90° to the perimeter wire. These must always be located in the part of the mowing area that can only be accessed via a corridor. -
Page 62: Installing Reserve Wire
Slope with an incline of 5° - 15°: 12.15 Installing reserve wire Reserve wire installed at regular intervals makes it easier to make any necessary corrections such as subsequently changing the position of the docking station or the routing of the perimeter wire. In particular, reserve wire should be installed near difficult passages. -
Page 63: Docking Station
LED flashes rapidly: – Perimeter wire is interrupted – wire 13. Docking station 14. Notes on mowing break or wire is not correctly connected to the docking station.( 16.6) LED illuminates for 3 seconds, followed 13.1 Docking station controls 14.1 General by 1 second pause: The robotic mower is designed for the –... -
Page 64: Active Times
14.3 Active times 14.4 Mowing duration 15. Operating the machine In the mow plan type "Standard", the The mowing duration specifies how many robotic mower mows throughout the entire hours per week the lawn is to be mown. It active time, only interrupted by charging can be extended or reduced. -
Page 65: Adapting The Programming
Opening the flap: The mowing plan is calculated based on – There are areas which are not mown the size of the mowing area during sufficiently, e.g. because the mowing For safety reasons, the Stop button installation or during the creation of a new area has many corners. -
Page 66: Mowing Independently Of Active Times
● Ending mowing operation: ● Ending mowing manually: If the battery runs flat before the When the battery is discharged, the A running mowing operation can be selected end time, the mowing robotic mower automatically travels ended at any time using the STOP operation is shortened accordingly. -
Page 67: Charging The Battery
● If necessary, end standby mode of the If the battery charge is too low, the robotic mower by pressing a button. corresponding battery symbol appears. Charging starts automatically. In this case, place the robotic mower in the docking station to recharge. Charging: During charging, the text "Charging battery"... -
Page 68: Cleaning The Machine
If you use the machine on sandy ground or use it ● STIHL recommends an annual frequently under dry conditions, the inspection by a STIHL specialist dealer mowing blade will be subjected to during the winter months. greater loads and will wear more... -
Page 69: Removing And Installing The Mowing Blade
Removing the blade: Push in both tabs (1) on the carrier plate with one hand and hold. Remove the fastening nut (2) with your other hand. Fit the mowing blade (1) and fastening Remove the mowing blade together with nut (2) on the carrier plate (3) as the fastening nut. -
Page 70: Sharpening The Mowing Blade
"Service" menu. ( 11.17) 16.5 Sharpening the mowing blade Never re-sharpen blades. STIHL recommends always replacing a blunt blade with a new one. Only new mowing blades are balanced with the necessary precision and guarantee proper functioning of the machine as well as low noise emissions. -
Page 71: Storage And Winter Break
● Bridge the break with the aid of a wire connector ( 12.16). If necessary, re- route the perimeter wire in the area of the break. ● Reconnect the left wire end. ( 9.10) ● Once the wire break has been correctly rectified, the red LED illuminates. -
Page 72: Removing The Docking Station
● Store the robotic mower on its wheels in ● Remove obstacles and foreign bodies 1 Fold open the right clamping lever (1). a dry, closed and dust-free room. Make in the edge area. 2 Remove the right wire end (2) from the sure that the machine is kept out of Start edge following and check whether terminal block. -
Page 73: Standard Spare Parts
3. Maintenance operations damage or excessive wear to your STIHL All operations listed in the section – STIHL Kit S for mowing areas up to machine: "Maintenance" must be performed 500 m 1. Wearing parts regularly. -
Page 74: Environmental Protection
– damage to the machine through the use of inferior-quality spare parts, – damage due to untimely or inadequate maintenance or damage due to maintenance or repair work not performed in the workshops of specialist dealers. 20. Environmental protection The machine, its packaging and accessories are all produced from recyclable materials and must be disposed of accordingly. -
Page 75: Transport
Risk of injury! 21.1 Lifting or carrying the machine Do not cut cables at the battery. Risk of short circuit! Always disconnect the cables and remove together with the battery. Remove cable (1) and cable (2) from the cable guides and remove the battery (3). Risk of injury! Lift and carry the robotic mower at the front Prevent damage to the battery. -
Page 76: Securing The Machine (Lashing)
Supported fre- E-GSM-900 and Secure any other machine components quency bands DCS-1800 The user may carry STIHL batteries to the being transported (e.g. docking station, place of use of the machine without further small components) against slipping. Radiated maximum transmitting restrictions during road transport. -
Page 77: Messages
Messages provide information on Errors that can only be rectified by Possible cause: active errors, faults and a STIHL specialist dealer are not – Temperature inside robotic mower too recommendations. They are listed in the following. Should an displayed in a dialog window and can be... - Page 78 – Mowing motor overloaded Message: Message: Remedy: 0186 – Temperature low 0402 – Drive motor fault – Clean mowing blade and mowing deck Battery Temperature range exceeded 16.2) Clean carrier plate ( 16.6) Possible cause: Possible cause: – Set higher cutting height ( 9.5) –...
- Page 79 – No action required, confirm message Teach-in failed with OK if necessary Message: Remove obstacle – Contact your STIHL specialist dealer if 1105 – Flap open the problem persists Possible cause: Operation aborted – Obstacle in the area of the perimeter...
- Page 80 Message: Message: Message: 1130 – Stuck 1170 – No signal 1190 – Docking error Free iMOW® Switch on docking station Docking station occupied then press OK Possible cause: Possible cause: Possible cause: – Docking station is switched off – Docking station occupied by a second –...
- Page 81 – Docking station has been located, Possible cause: Remedy: automatic docking not possible – Temperature in battery when starting – Have the battery replaced by a STIHL mowing operation too low or too high Remedy: specialist dealer – Check docking, if necessary dock...
- Page 82 11.14) – No action required, firmware will be – Repeat edge following ( 11.13) automatically updated if necessary – Contact a STIHL specialist dealer for a – Contact your STIHL specialist dealer if Message: detailed diagnosis the problem persists 2075 – GPS signal...
- Page 83 – No action required, firmware will be position ( 9.1) automatically updated if necessary Possible cause: – Contact your STIHL specialist dealer if – Error in the programme sequence the problem persists – Wire routing incorrect Message: – Obstacles in the area of the perimeter 4008 –...
-
Page 84: Troubleshooting
– Contact your STIHL specialist dealer if Contact options and further information – Switch on automatic mowing ( 11.7) the problem persists can be found at https://support.stihl.com or – Release active time ( 11.7) https://www.stihl.com. – Set rain sensor ( 11.11) - Page 85 – Close flap ( 15.2) – Long periods of rain – Rectify displayed fault and confirm Fault: Remedy: message with OK ( 23.) Mowing operations are significantly – Adjust cutting height ( 9.5) – End Homecall or repeat command shorter than usual –...
- Page 86 11.13) – Starting points in use station ( 9.9) – Contact your STIHL specialist dealer – Battery is charged very frequently – Cut perimeter wire as described and towards the end of its service life route it without excess length – do not –...
- Page 87 Remedy: display ( ), ( 23.) – Find wire break ( 16.7), then repair – Have radio module checked by a STIHL – Switch on offset drive home (passage) perimeter wire using wire connectors specialist dealer ( ) 11.13) 12.16) –...
-
Page 88: Service Schedule
25. Service schedule 25.1 Handover confirmation 25.2 Service confirmation Please hand this instruction manual to your STIHL specialist dealer in the case of maintenance operations. He will confirm the service operations performed in the pre-printed boxes. Service performed on Next service date... -
Page 89: Installation Examples
26. Installation examples Rectangular mowing area with one tree Wire clearances: ( 12.5) and swimming pool Clearance to the edge: 28 cm Clearance to adjoining area that can be Docking station: travelled on (e.g. footpath) with a stepped Location (1) directly next to the house A area height of less than +/- 1 cm: 0 cm No-go area: Clearance around the tree: 28 cm... - Page 90 U-shaped mowing area with several free- Programming: standing trees No further adaptation is necessary following definition of the size of the Docking station: mowing area. Location (1) directly next to the house A Points to note: No-go areas: Tree in the corner of the mowing area – Installation around the free-standing trees, mow the area behind the blocked-off tree based on linking sections installed at right...
- Page 91 Divided mowing area with a pond and a area height of less than +/- 1 cm: 0 cm Points to note: free-standing tree Around the tree: 28 cm Unmown areas, e.g. around the pond must Clearance to the pond: 100 cm be mown manually on a regular basis or Docking station: cut using a suitable lawn trimmer.
- Page 92 Divided mowing area – the robotic mower Secondary area: cannot travel independently from one Installation of a secondary area C, linking mowing area to the other. section (3) on the patio accommodated in a cable duct. Docking station: Location (1) directly next to the houses A Programming: Define the size of the mowing area No-go areas:...
-
Page 93: Open Source Software
Mowing area with external docking Programming: station (1) Define the size of the mowing area and 27. Open source software program at least one starting point outside Docking station: the corridor to the docking Location (1) next to the garage B and This product contains proprietary open station.( 11.14) - Page 94 You can obtain the complete corresponding source code from us by sending an e-mail to oss@stihl.de. If you would like to receive the complete corresponding source code on a physical medium (e.g.
- Page 95 0478 131 8365 C - EN...
- Page 96 STIHL RMI 522 C 0478 131 8365 C...