Daikin R32 Split Series Installation Manual
Hide thumbs
Also See for R32 Split Series:
- Installer's reference manual (120 pages) ,
- Operation manual (116 pages) ,
- User reference manual (52 pages)

Related Manuals for Daikin R32 Split Series


Summary of Contents for Daikin R32 Split Series
- Page 1 DAIKIN ROOM AIR CONDITIONER INSTALLATION MANUAL R32 Split Series Installation manual Manuel d’installation Manual de instalación MODELS FTXM09VVJU FTXM12VVJU FTXM18VVJU FTXM24VVJU...
-
Page 2: Table Of Contents
Contents Safety Considerations ........1 Refrigerant Piping Work ........9 Accessories ............3 1. Flaring the pipe end ............. 9 2. Refrigerant piping............9 Choosing an Installation Site ......3 Installation Tips ..........10 1. Indoor unit ..............3 1. Removing and installing the front panel..... 10 2. - Page 3 Daikin are used, fire or explosion may occur. (b) Where corrosive gas, such as sulfurous acid gas, is • When installing or relocating the air conditioner, do not let produced.
-
Page 4: Accessories
Accessories Mounting plate Mounting plate Titanium apatite deodorizing fixing screw filter M4 × 1” (M4 × 25mm) Wireless remote Remote controller Remote controller controller holder holder fixing screw M3 × 13/16” (M3 × 20mm) Dry battery AAA. Indoor unit fixing Screw cover LR03 (alkaline) screw... -
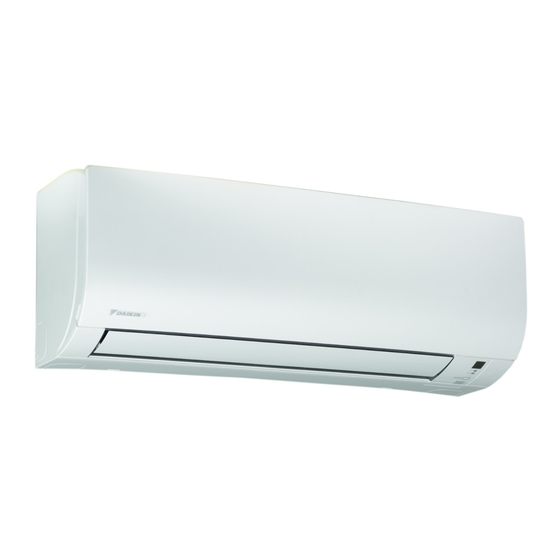
Page 5: Indoor Unit Installation Diagram
Indoor Unit Installation Diagram CAUTION • Do not hit or violently push the INTELLIGENT EYE sensor. This can lead to damage and malfunction. • Do not place large objects near the INTELLIGENT EYE sensor. Also keep heating units or humidifiers outside the sensor’s detection area. -
Page 6: Indoor Unit Installation
Indoor Unit Installation Installing the mounting plate The mounting plate should be installed on a wall which can support the weight of the indoor unit. 1)Temporarily secure the mounting plate to the wall, make sure that the plate is completely level, and mark the drilling points on the wall. -
Page 7: Drilling A Wall Hole And Installing Wall Embedded Pipe
Drilling a wall hole and installing wall embedded pipe WARNING For metal frame or metal board walls, be sure to use a wall embedded pipe and wall hole cover in the feed-through hole to prevent possible heat, electric shock, or fire. •... -
Page 8: Wiring
Indoor Unit Installation 3-2. Left-side, left-back, or left-bottom piping How to switch around the drain plug and drain hose 1) Remove the fixing screw and 3) Switch around the drain hose and drain plug. Insert drain hose securely pull out the drain hose. and fix in place with fixing screw. -
Page 9: Drain Piping
CAUTION • When connecting the connection wire to the terminal block using a single core wire, be sure to perform curling. Problems with the installation may cause heat and fire. Good Wrong 1) Remove the front grille. (Refer to “2. Removing and installing Terminal block Strip wire ends the front grille”... -
Page 10: Refrigerant Piping Work
Refrigerant Piping Work WARNING • Do not apply mineral oil on flared part. • Prevent mineral oil from getting into the system as this would reduce the service life of the units. • Never use piping which has been used for previous installations. Only use parts which are delivered with this unit. •... -
Page 11: Installation Tips
Installation Tips Removing and installing the front panel • Removal method 1) Place your fingers in the indentations on the main unit (one each on the left and right sides), and open the front panel until it stops. 2) While pushing the left side front panel shaft outward, push up the front panel and remove it. -
Page 12: When Connecting To An Ha System
Installation Tips When connecting to an HA system For this procedure, accessories which are sold separately are needed. (wired remote controller, central remote controller, etc.) • In case there is a work space on the right side of the indoor unit, the procedure can be done while fixing the electrical wiring box. -
Page 13: Trial Operation And Testing
Trial Operation and Testing Trial operation and testing • Trial operation should be carried out in either COOL or HEAT operation. 1-1. Measure the supply voltage and make sure that it is within the specified range. 1-2. In COOL operation, select the lowest programmable temperature; in HEAT operation, select the highest programmable temperature. - Page 14 The two-dimensional bar code is a manufacturing code. 3P628775-1 M20B072 (2102) HT...