
Related Manuals for Nokia RM-497


Summary of Contents for Nokia RM-497
- Page 1 Nokia Customer Care Service Manual RM-497 (Nokia 7020) Mobile Terminal Part No: (Issue 1) COMPANY CONFIDENTIAL Copyright © 2010 Nokia. All rights reserved.
- Page 2 RM-497 Amendment Record Sheet Amendment Record Sheet Amendment No Date Inserted By Comments Original issue 10/2010 Jeff Zhao Page ii COMPANY CONFIDENTIAL Issue 1 Copyright © 2010 Nokia. All rights reserved.
- Page 3 Nokia operates a policy of continuous development. Nokia reserves the right to make changes and improvements to any of the products described in this document without prior notice. Under no circumstances shall Nokia be responsible for any loss of data or income or any special, incidental, consequential or indirect damages howsoever caused.
- Page 4 WCDMA networks and cause problems to 3G cellular phone communication in a wide area. • During testing never activate the GSM or WCDMA transmitter without a proper antenna load, otherwise GSM or WCDMA PA may be damaged. Page iv COMPANY CONFIDENTIAL Issue 1 Copyright © 2010 Nokia. All rights reserved.
- Page 5 Use only approved accessories and batteries. Do not connect incompatible products. CONNECTING TO OTHER DEVICES When connecting to any other device, read its user’s guide for detailed safety instructions. Do not connect incompatible products. Issue 1 COMPANY CONFIDENTIAL Page v Copyright © 2010 Nokia. All rights reserved.
- Page 6 All of the above suggestions apply equally to the product, battery, charger or any accessory. Page vi COMPANY CONFIDENTIAL Issue 1 Copyright © 2010 Nokia. All rights reserved.
- Page 7 RM-497 ESD protection ESD protection Nokia requires that service points have sufficient ESD protection (against static electricity) when servicing the phone. Any product of which the covers are removed must be handled with ESD protection. The SIM card can be replaced without ESD protection if the product is otherwise ready for use.
- Page 8 Batteries' performance is particularly limited in temperatures well below freezing. Do not dispose of batteries in a fire! Dispose of batteries according to local regulations (e.g. recycling). Do not dispose as household waste. Page viii COMPANY CONFIDENTIAL Issue 1 Copyright © 2010 Nokia. All rights reserved.
- Page 9 Our policy is of continuous development; details of all technical modifications will be included with service bulletins. While every endeavour has been made to ensure the accuracy of this document, some errors may exist. If any errors are found by the reader, NOKIA MOBILE PHONES Business Group should be notified in writing/e- mail. Please state: •...
- Page 10 RM-497 Company policy (This page left intentionally blank.) Page x COMPANY CONFIDENTIAL Issue 1 Copyright © 2010 Nokia. All rights reserved.
- Page 11 Nokia 7020 Service Manual Structure 1 General information 2 Service Devices and Service Concepts 3 BB Troubleshooting and Manual Tuning Guide 4 RF troubleshooting 5 System Module 6 BTHFMTXRDS3.0b Glossary Issue 1 COMPANY CONFIDENTIAL Page xi Copyright © 2010 Nokia. All rights reserved.
- Page 12 RM-497 Nokia 7020 Service Manual Structure (This page left intentionally blank.) Page xii COMPANY CONFIDENTIAL Issue 1 Copyright © 2010 Nokia. All rights reserved.
- Page 13 Nokia Customer Care 1 — General information Issue 1 COMPANY CONFIDENTIAL Page 1 – 1 Copyright © 2010 Nokia. All rights reserved.
- Page 14 RM-497 General information (This page left intentionally blank.) Page 1 – 2 COMPANY CONFIDENTIAL Issue 1 Copyright © 2010 Nokia. All rights reserved.
-
Page 15: Table Of Contents
Accessories ................................1–6 Technical specifications ............................1–6 General specifications............................1–6 Battery Endurance............................1–6 List of Figures Figure 1 RM-497 (Nokia 7020) product picture ....................1–5 Issue 1 COMPANY CONFIDENTIAL Page 1 – 3 Copyright © 2010 Nokia. All rights reserved. - Page 16 RM-497 General information (This page left intentionally blank.) Page 1 – 4 COMPANY CONFIDENTIAL Issue 1 Copyright © 2010 Nokia. All rights reserved.
-
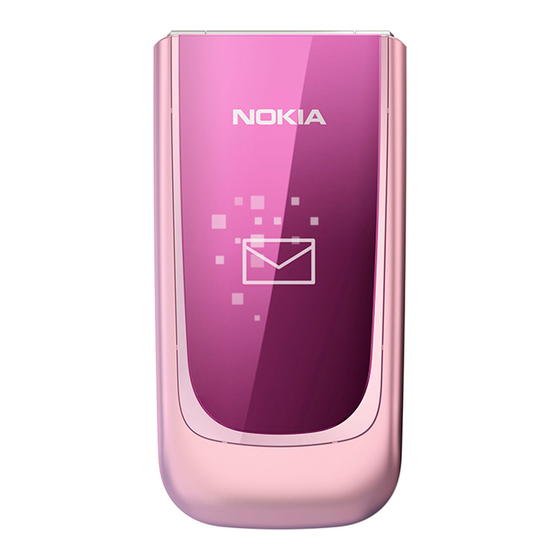
Page 17: Product Selection
RM-497 General information Product selection RM-497 (Nokia 7020) is a GSM Quad-band phone, supporting EGSM 850/900/1800/1900 bands. Figure 1 RM-497 (Nokia 7020) product picture Phone features Key features • S40, 6th Edition • Secondary display • Supporting quad-band GSM 850/900/1800/1900 •... -
Page 18: Accessories
Variation in operation time will occur depending on SIM card, network settings and usage. Talk time is increased by up to 30% if half rate is active and reduced by 5% if enhanced full rate is active. Page 1 – 6 COMPANY CONFIDENTIAL Issue 1 Copyright © 2010 Nokia. All rights reserved. - Page 19 Nokia Customer Care 2 — Service Devices and Service Concepts Issue 1 COMPANY CONFIDENTIAL Page 2 – 1 Copyright © 2010 Nokia. All rights reserved.
- Page 20 RM-497 Service Devices and Service Concepts (This page left intentionally blank.) Page 2 – 2 COMPANY CONFIDENTIAL Issue 1 Copyright © 2010 Nokia. All rights reserved.
-
Page 21: Table Of Contents
Figure 6 Basic BB tune concept (EM calibration) ..................... 2–14 Figure 7 Basic RF&BB tune concept with FPS-21 (A) ..................2–15 Figure 8 Basic RF&BB tune concept with FPS-21 (B) ..................2–16 Issue 1 COMPANY CONFIDENTIAL Page 2 – 3 Copyright © 2010 Nokia. All rights reserved. - Page 22 RM-497 Service Devices and Service Concepts (This page left intentionally blank.) Page 2 – 4 COMPANY CONFIDENTIAL Issue 1 Copyright © 2010 Nokia. All rights reserved.
-
Page 23: Service Devices
The table below gives a short overview of service devices that can be used for testing, error analysis, and repair of product RM-497. For the correct use of the service devices, and the best effort of workbench setup, please refer to various concepts. - Page 24 4 Connect an FBUS cable (if necessary). 5 Start Phoenix service software. Note: Phoenix enables CU-4 regulators via USB when it is started. Reconnecting the power supply requires a Phoenix restart. Page 2 – 6 COMPANY CONFIDENTIAL Issue 1 Copyright © 2010 Nokia. All rights reserved.
-
Page 25: Fps-21
In order to access the SD memory card slots inside FPS-21, the prommer needs to be opened by removing the front panel, rear panel and heatsink from the prommer body. Issue 1 COMPANY CONFIDENTIAL Page 2 – 7 Copyright © 2010 Nokia. All rights reserved. - Page 26 RJ-230 is a jig used for soldering and as a rework jig for the engine module. SRT-6 Opening tool SRT-6 is used to open phone covers. Note: The SRT-6 is included in the Nokia Standard Toolkit. SS-34 Flex opening tool SS-93 Blue stick tool SS-93 is used for general disassembly and assembly tasks.
-
Page 27: Cables
The table below gives a short overview of service devices that can be used for testing, error analysis, and repair of product RM-497. For the correct use of the service devices, and the best effort of workbench setup, please refer to various concepts. -
Page 28: Service Concepts
SMA to N-Connector approximately 610 mm. Attenuation for: • GSM850/900: 0.3+-0.1 dB • GSM1800/1900: 0.5+-0.1 dB Service concepts POS (Point of Sale) flash concept Figure 2 POS flash concept Page 2 – 10 COMPANY CONFIDENTIAL Issue 1 Copyright © 2010 Nokia. All rights reserved. -
Page 29: Basic Flash Concept L3
RM-497 Service Devices and Service Concepts Basic flash concept L3 Figure 3 Basic flash concept L3 Issue 1 COMPANY CONFIDENTIAL Page 2 – 11 Copyright © 2010 Nokia. All rights reserved. -
Page 30: Flash Concept With Fps-21
RM-497 Service Devices and Service Concepts Flash concept with FPS-21 Figure 4 Flash concept with FPS-21 (A) Page 2 – 12 COMPANY CONFIDENTIAL Issue 1 Copyright © 2010 Nokia. All rights reserved. - Page 31 RM-497 Service Devices and Service Concepts Figure 5 Flash concept with FPS-21 (B) Issue 1 COMPANY CONFIDENTIAL Page 2 – 13 Copyright © 2010 Nokia. All rights reserved.
-
Page 32: Basic Bb Tune Concept (Em Calibration)
RM-497 Service Devices and Service Concepts Basic BB tune concept (EM calibration) Figure 6 Basic BB tune concept (EM calibration) Page 2 – 14 COMPANY CONFIDENTIAL Issue 1 Copyright © 2010 Nokia. All rights reserved. -
Page 33: Basic Rf&Bb Tune Concept With Fps-21
RM-497 Service Devices and Service Concepts Basic RF&BB tune concept with FPS-21 Figure 7 Basic RF&BB tune concept with FPS-21 (A) Issue 1 COMPANY CONFIDENTIAL Page 2 – 15 Copyright © 2010 Nokia. All rights reserved. - Page 34 RM-497 Service Devices and Service Concepts Figure 8 Basic RF&BB tune concept with FPS-21 (B) Page 2 – 16 COMPANY CONFIDENTIAL Issue 1 Copyright © 2010 Nokia. All rights reserved.
- Page 35 Nokia Customer Care 3 — BB Troubleshooting and Manual Tuning Guide Issue 1 COMPANY CONFIDENTIAL Page 3 – 1 Copyright © 2010 Nokia. All rights reserved.
- Page 36 RM-497 BB Troubleshooting and Manual Tuning Guide (This page left intentionally blank.) Page 3 – 2 COMPANY CONFIDENTIAL Issue 1 Copyright © 2010 Nokia. All rights reserved.
- Page 37 Figure 18 IHF troubleshooting probe placement diagram ................3–43 Figure 19 External earpiece troubleshooting probe placement diagram ............ 3–44 Figure 20 External microphone troubleshooting placement diagram ............3–46 Issue 1 COMPANY CONFIDENTIAL Page 3 – 3 Copyright © 2010 Nokia. All rights reserved.
- Page 38 RM-497 BB Troubleshooting and Manual Tuning Guide Figure 21 Accelerometer troubleshooting probe placement diagram ............3–49 Page 3 – 4 COMPANY CONFIDENTIAL Issue 1 Copyright © 2010 Nokia. All rights reserved.
-
Page 39: Introduction To Bb Troubleshooting
If the phone is dead and you cannot perform the self-test, please go to Troubleshooting. Note: The phone must be powered-down and in the PWR_OFF state when replacing components. Issue 1 COMPANY CONFIDENTIAL Page 3 – 5 Copyright © 2010 Nokia. All rights reserved. - Page 40 RM-497 BB Troubleshooting and Manual Tuning Guide Troubleshooting flow Page 3 – 6 COMPANY CONFIDENTIAL Issue 1 Copyright © 2010 Nokia. All rights reserved.
-
Page 41: Power And Charging Troubleshooting
RM-497 BB Troubleshooting and Manual Tuning Guide Power and charging troubleshooting Dead or jammed device troubleshooting Troubleshooting flow Issue 1 COMPANY CONFIDENTIAL Page 3 – 7 Copyright © 2010 Nokia. All rights reserved. - Page 42 RM-497 BB Troubleshooting and Manual Tuning Guide Troubleshooting flow Page 3 – 8 COMPANY CONFIDENTIAL Issue 1 Copyright © 2010 Nokia. All rights reserved.
-
Page 43: General Power Checking
C2208 for MainPLL, analog supply for AppsPLL, analog supply for USB, analog supply for USB, CSI-2/ CCP2 I/O, DSI I/ O, analog supply for dual Issue 1 COMPANY CONFIDENTIAL Page 3 – 9 Copyright © 2010 Nokia. All rights reserved. - Page 44 C2207, C2217 for DDAC left outputs, analog supply for DDAC right and left outputs, Vibra VCORE will be trimmed to approximately 1.0V in the Sleep mode. Page 3 – 10 COMPANY CONFIDENTIAL Issue 1 Copyright © 2010 Nokia. All rights reserved.
- Page 45 RM-497 BB Troubleshooting and Manual Tuning Guide Issue 1 COMPANY CONFIDENTIAL Page 3 – 11 Copyright © 2010 Nokia. All rights reserved.
-
Page 46: Charging Troubleshooting
RM-497 BB Troubleshooting and Manual Tuning Guide Charging troubleshooting Wall Charger Troubleshooting Page 3 – 12 COMPANY CONFIDENTIAL Issue 1 Copyright © 2010 Nokia. All rights reserved. -
Page 47: Clocking Troubleshooting
BB Troubleshooting and Manual Tuning Guide Component Placement Clocking troubleshooting Context The D2800 Juno BB ASIC requires two clocks for proper operation. Both are provided by on-board crystals. Issue 1 COMPANY CONFIDENTIAL Page 3 – 13 Copyright © 2010 Nokia. All rights reserved. - Page 48 • The RF_XON output clock can be tested by probing C6094 near the BT/FM module. Note: This step will require the RF_XON output clock for BT/FM module to be enabled through Phoenix SW. Page 3 – 14 COMPANY CONFIDENTIAL Issue 1 Copyright © 2010 Nokia. All rights reserved.
- Page 49 RM-497 BB Troubleshooting and Manual Tuning Guide Troubleshooting flow Issue 1 COMPANY CONFIDENTIAL Page 3 – 15 Copyright © 2010 Nokia. All rights reserved.
- Page 50 RM-497 BB Troubleshooting and Manual Tuning Guide Troubleshooting flow Figure 9 Troubleshooting Component Location Page 3 – 16 COMPANY CONFIDENTIAL Issue 1 Copyright © 2010 Nokia. All rights reserved.
-
Page 51: Power On Key Troubleshooting
RM-497 BB Troubleshooting and Manual Tuning Guide Power On key troubleshooting Troubleshooting flow Issue 1 COMPANY CONFIDENTIAL Page 3 – 17 Copyright © 2010 Nokia. All rights reserved. - Page 52 RM-497 BB Troubleshooting and Manual Tuning Guide Page 3 – 18 COMPANY CONFIDENTIAL Issue 1 Copyright © 2010 Nokia. All rights reserved.
-
Page 53: Interface Troubleshooting
RM-497 BB Troubleshooting and Manual Tuning Guide Interface troubleshooting Flash Programming Troubleshooting Troubleshooting flow Issue 1 COMPANY CONFIDENTIAL Page 3 – 19 Copyright © 2010 Nokia. All rights reserved. - Page 54 RM-497 BB Troubleshooting and Manual Tuning Guide Figure 10 Probe placement Page 3 – 20 COMPANY CONFIDENTIAL Issue 1 Copyright © 2010 Nokia. All rights reserved.
-
Page 55: Memory Troubleshooting
RM-497 BB Troubleshooting and Manual Tuning Guide Memory Troubleshooting Troubleshooting flow Issue 1 COMPANY CONFIDENTIAL Page 3 – 21 Copyright © 2010 Nokia. All rights reserved. - Page 56 RM-497 BB Troubleshooting and Manual Tuning Guide Figure 11 Probe placement diagram Page 3 – 22 COMPANY CONFIDENTIAL Issue 1 Copyright © 2010 Nokia. All rights reserved.
-
Page 57: Memory Card Troubleshooting
RM-497 BB Troubleshooting and Manual Tuning Guide Memory Card Troubleshooting Troubleshooting flow Issue 1 COMPANY CONFIDENTIAL Page 3 – 23 Copyright © 2010 Nokia. All rights reserved. -
Page 58: Sim Card Troubleshooting
SIM Card Troubleshooting Context Note: Battery must be inserted in order to power-up the phone, which will block access to the SIM and surrounding components for probing. Page 3 – 24 COMPANY CONFIDENTIAL Issue 1 Copyright © 2010 Nokia. All rights reserved. - Page 59 RM-497 BB Troubleshooting and Manual Tuning Guide Troubleshooting flow Issue 1 COMPANY CONFIDENTIAL Page 3 – 25 Copyright © 2010 Nokia. All rights reserved.
- Page 60 RM-497 BB Troubleshooting and Manual Tuning Guide Figure 13 Probe placement diagram Page 3 – 26 COMPANY CONFIDENTIAL Issue 1 Copyright © 2010 Nokia. All rights reserved.
-
Page 61: Usb Interface Troubleshooting
RM-497 BB Troubleshooting and Manual Tuning Guide USB Interface Troubleshooting Troubleshooting flow Issue 1 COMPANY CONFIDENTIAL Page 3 – 27 Copyright © 2010 Nokia. All rights reserved. - Page 62 RM-497 BB Troubleshooting and Manual Tuning Guide Figure 14 Probe placement diagram Page 3 – 28 COMPANY CONFIDENTIAL Issue 1 Copyright © 2010 Nokia. All rights reserved.
-
Page 63: User Interface Troubleshooting
RM-497 BB Troubleshooting and Manual Tuning Guide User interface troubleshooting Backlight and Illumination Troubleshooting Troubleshooting flow Issue 1 COMPANY CONFIDENTIAL Page 3 – 29 Copyright © 2010 Nokia. All rights reserved. - Page 64 RM-497 BB Troubleshooting and Manual Tuning Guide Page 3 – 30 COMPANY CONFIDENTIAL Issue 1 Copyright © 2010 Nokia. All rights reserved.
- Page 65 RM-497 BB Troubleshooting and Manual Tuning Guide Figure 15 Probe placement diagram Issue 1 COMPANY CONFIDENTIAL Page 3 – 31 Copyright © 2010 Nokia. All rights reserved.
-
Page 66: Display Interface Troubleshooting
RM-497 BB Troubleshooting and Manual Tuning Guide Display Interface Troubleshooting Troubleshooting flow Page 3 – 32 COMPANY CONFIDENTIAL Issue 1 Copyright © 2010 Nokia. All rights reserved. - Page 67 RM-497 BB Troubleshooting and Manual Tuning Guide Figure 16 Probe placement diagram Issue 1 COMPANY CONFIDENTIAL Page 3 – 33 Copyright © 2010 Nokia. All rights reserved.
-
Page 68: Camera Troubleshooting
RM-497 BB Troubleshooting and Manual Tuning Guide Camera troubleshooting Camera HW Troubleshooting Troubleshooting flow Page 3 – 34 COMPANY CONFIDENTIAL Issue 1 Copyright © 2010 Nokia. All rights reserved. -
Page 69: Bad Camera Image Quality Troubleshooting
RM-497 BB Troubleshooting and Manual Tuning Guide Bad Camera Image Quality Troubleshooting Troubleshooting flow Issue 1 COMPANY CONFIDENTIAL Page 3 – 35 Copyright © 2010 Nokia. All rights reserved. -
Page 70: Audio Troubleshooting
Earpiece, internal microphone and speaker are in place during measurement. Applying a headset accessory during measurement causes a significant drop in measured quantities. The gain values presented in the table apply for a different output vs. single-ended/different input. Page 3 – 36 COMPANY CONFIDENTIAL Issue 1 Copyright © 2010 Nokia. All rights reserved. - Page 71 Exter MIC2P HFSPP [E3420] 1000 25mA (C2829 (calc.) HFSPN [E3421] Mic to ) and Inter MIC2N HFSPP [E3420] hand (C2830 HFSPN [E3421] sfree ) and Issue 1 COMPANY CONFIDENTIAL Page 3 – 37 Copyright © 2010 Nokia. All rights reserved.
- Page 72 [mA] [mVp-p] Inter MIC1P HS_EAR_L 1000 (C2107 [E3485] and Mic to Exter HS_EAR_R [E3484] and Earpi MIC1N HS_EAR_L (C2108 [E3485] and HS_EAR_R [E3484] and Page 3 – 38 COMPANY CONFIDENTIAL Issue 1 Copyright © 2010 Nokia. All rights reserved.
- Page 73 RM-497 BB Troubleshooting and Manual Tuning Guide Placement Diagram Issue 1 COMPANY CONFIDENTIAL Page 3 – 39 Copyright © 2010 Nokia. All rights reserved.
-
Page 74: Internal Microphone Troubleshooting
RM-497 BB Troubleshooting and Manual Tuning Guide Internal microphone troubleshooting Troubleshooting flow Page 3 – 40 COMPANY CONFIDENTIAL Issue 1 Copyright © 2010 Nokia. All rights reserved. - Page 75 RM-497 BB Troubleshooting and Manual Tuning Guide Figure 17 Internal microphone troubleshooting probe placement diagram Issue 1 COMPANY CONFIDENTIAL Page 3 – 41 Copyright © 2010 Nokia. All rights reserved.
-
Page 76: Internal Handsfree (Ihf) Speaker Troubleshooting
RM-497 BB Troubleshooting and Manual Tuning Guide Internal Handsfree (IHF) Speaker Troubleshooting Troubleshooting flow Page 3 – 42 COMPANY CONFIDENTIAL Issue 1 Copyright © 2010 Nokia. All rights reserved. - Page 77 RM-497 BB Troubleshooting and Manual Tuning Guide Figure 18 IHF troubleshooting probe placement diagram Issue 1 COMPANY CONFIDENTIAL Page 3 – 43 Copyright © 2010 Nokia. All rights reserved.
-
Page 78: External Earpiece Troubleshooting
RM-497 BB Troubleshooting and Manual Tuning Guide External earpiece troubleshooting Troubleshooting flow Page 3 – 44 COMPANY CONFIDENTIAL Issue 1 Copyright © 2010 Nokia. All rights reserved. - Page 79 RM-497 BB Troubleshooting and Manual Tuning Guide Figure 19 External earpiece troubleshooting probe placement diagram Issue 1 COMPANY CONFIDENTIAL Page 3 – 45 Copyright © 2010 Nokia. All rights reserved.
-
Page 80: External Microphone Troubleshooting
RM-497 BB Troubleshooting and Manual Tuning Guide External microphone troubleshooting Troubleshooting flow Page 3 – 46 COMPANY CONFIDENTIAL Issue 1 Copyright © 2010 Nokia. All rights reserved. -
Page 81: Accelerometer Sensor Troubleshooting
Accelerometer Troubleshooting Context Accelerometer self-test: (ST_ACCELEROMETER_TEST) verifies the digital parts and the sensor elements inside the component. Self-test is available in LOCAL and TEST modes. Issue 1 COMPANY CONFIDENTIAL Page 3 – 47 Copyright © 2010 Nokia. All rights reserved. - Page 82 The device needs to be stable when running the self-test to get correct results. If changes in acceleration are detected by the component during the test, it may cause the self-test to fail. Troubleshooting flow Page 3 – 48 COMPANY CONFIDENTIAL Issue 1 Copyright © 2010 Nokia. All rights reserved.
-
Page 83: Baseband Manual Tuning Guide
If the COMBO memory of a phone is replaced, the ENO SW must be flashed first before performing the "normal" firmware flashing. • Execute the certificate restore process in Phoenix. Issue 1 COMPANY CONFIDENTIAL Page 3 – 49 Copyright © 2010 Nokia. All rights reserved. -
Page 84: Energy Management Calibration
Choose Tuning → Energy Management Calibration. To show the current values in the phone memory, click Read, and check that communication between the phone and CU-4 works. Page 3 – 50 COMPANY CONFIDENTIAL Issue 1 Copyright © 2010 Nokia. All rights reserved. -
Page 85: Table 1 Calibration Value Limits
Write and/or repeat the procedure again. Energy Management Calibration window. 13. end the procedure, close the Issue 1 COMPANY CONFIDENTIAL Page 3 – 51 Copyright © 2010 Nokia. All rights reserved. - Page 86 RM-497 BB Troubleshooting and Manual Tuning Guide (This page left intentionally blank.) Page 3 – 52 COMPANY CONFIDENTIAL Issue 1 Copyright © 2010 Nokia. All rights reserved.
- Page 87 Nokia Customer Care 4 — RF troubleshooting Issue 1 COMPANY CONFIDENTIAL Page 4 – 1 Copyright © 2010 Nokia. All rights reserved.
- Page 88 RM-497 RF troubleshooting (This page left intentionally blank.) Page 4 – 2 COMPANY CONFIDENTIAL Issue 1 Copyright © 2010 Nokia. All rights reserved.
-
Page 89: Table Of Contents
Figure 28 Analyzer setting..........................4–25 Figure 29 Phase error............................4–26 Figure 30 Modulation/Switching spectrum ..................... 4–26 Figure 31 Power/Burst............................4–27 Figure 32 Edge ..............................4–27 Issue 1 COMPANY CONFIDENTIAL Page 4 – 3 Copyright © 2010 Nokia. All rights reserved. - Page 90 RM-497 RF troubleshooting (This page left intentionally blank.) Page 4 – 4 COMPANY CONFIDENTIAL Issue 1 Copyright © 2010 Nokia. All rights reserved.
-
Page 91: General Rf Troubleshooting
Please refer to the list of Non-replaceable RF components. Note: After the RF shielding can is removed (for measurement or repair), it must be replaced with a new one and cannot be reused. Issue 1 COMPANY CONFIDENTIAL Page 4 – 5 Copyright © 2010 Nokia. All rights reserved. -
Page 92: Rf Key Components
• Cables: XRF-1 (RF cable), USB cable, GBIP cable and DAU-9S • Signal analyser (TX), signal generator (RX) and RF-splitter or one device including all. Page 4 – 6 COMPANY CONFIDENTIAL Issue 1 Copyright © 2010 Nokia. All rights reserved. -
Page 93: General Rf Voltage Checking
TXPLL) C2868 VCORE (VCORE_DSP) C2822 1.2V (Digital Supply for DSP) (L2819) VRF2 C2810 or 2.7V (analog supply for RX & PA Driver C2866 & LDO) Issue 1 COMPANY CONFIDENTIAL Page 4 – 7 Copyright © 2010 Nokia. All rights reserved. -
Page 94: Fem Control Signal
TX_EN, BS1, BS1, MODE, and TX_SW_EN. Figure xxx shows the timing diagram that one expects when probing these signals. Table 4 FEM Control Logics Operational TX_EN MODE TX_SW_EN Notes State Sleep/ standby Page 4 – 8 COMPANY CONFIDENTIAL Issue 1 Copyright © 2010 Nokia. All rights reserved. - Page 95 Normal GMSK GMSK mode, switch enabled, saturation correction disabled. VRAMP signal controls output power. Low band High GMSK isolation mode before ramp saturation correction enabled. Issue 1 COMPANY CONFIDENTIAL Page 4 – 9 Copyright © 2010 Nokia. All rights reserved.
- Page 96 High GMSK isolation mode before ramp saturation correction disabled High band Normal GMSK GMSK mode, switch enabled, saturation correction disabled. VRAMP signal controls output power. Page 4 – 10 COMPANY CONFIDENTIAL Issue 1 Copyright © 2010 Nokia. All rights reserved.
- Page 97 RX3 Path May be used Enabled for high or low band receive RX4 Path May be used Enabled for high or low band receive Issue 1 COMPANY CONFIDENTIAL Page 4 – 11 Copyright © 2010 Nokia. All rights reserved.
-
Page 98: Receiver Troubleshooting
RX can be tested by making a phone call or in local mode. For the local mode testing, use Phoenix service software. The main RX troubleshooting measurement is the GSM RSSI reading. This test measures the signal strength of the receive signal. Page 4 – 12 COMPANY CONFIDENTIAL Issue 1 Copyright © 2010 Nokia. All rights reserved. -
Page 99: Rf Test Points In Rx Troubleshooting
-60dBm at -60dBm Steps 1. Set the phone to local mode. 2. Activate RSSI reading in Phoenix ( Testing → GSM → RSSI reading ) Issue 1 COMPANY CONFIDENTIAL Page 4 – 13 Copyright © 2010 Nokia. All rights reserved. - Page 100 The reading should reflect the level of the signal generator (-losses) +/- 5 dB. When varying the level in the range -30 to -102 dBm the reading should then follow within +/-5 dB. Page 4 – 14 COMPANY CONFIDENTIAL Issue 1 Copyright © 2010 Nokia. All rights reserved.
-
Page 101: Rx Troubleshooting For Gsm850
RM-497 RF troubleshooting RX troubleshooting for GSM850 Troubleshooting flow Issue 1 COMPANY CONFIDENTIAL Page 4 – 15 Copyright © 2010 Nokia. All rights reserved. -
Page 102: Rx Troubleshooting For Gsm900
RM-497 RF troubleshooting RX troubleshooting for GSM900 Troubleshooting flow Page 4 – 16 COMPANY CONFIDENTIAL Issue 1 Copyright © 2010 Nokia. All rights reserved. -
Page 103: Rx Troubleshooting For Gsm1800
RM-497 RF troubleshooting RX troubleshooting for GSM1800 Troubleshooting flow Issue 1 COMPANY CONFIDENTIAL Page 4 – 17 Copyright © 2010 Nokia. All rights reserved. -
Page 104: Rx Troubleshooting For Gsm1900
Introduction to transmitter (TX) troubleshooting Please note the following before performing transmitter tests: • TX troubleshooting requires TX operation. • Do not transmit on frequencies that are in use! Page 4 – 18 COMPANY CONFIDENTIAL Issue 1 Copyright © 2010 Nokia. All rights reserved. -
Page 105: Rf Test Points In Tx Troubleshooting
Table 5 Signals Coverage in RFPA Self-test Option RFPA Signal Name Pin Description Self-Test Coverage TX_EN Power Amp Enable VRAMP Analog PA Bias/Output Power Control TR_SW_EN Transmit/Receive Switch Issue 1 COMPANY CONFIDENTIAL Page 4 – 19 Copyright © 2010 Nokia. All rights reserved. - Page 106 2. The Self Tests window will pop up as shown below. To run RF Self Test only, check ST_CHIPSET_API_RFPA_TEST and uncheck all other Test Name. Page 4 – 20 COMPANY CONFIDENTIAL Issue 1 Copyright © 2010 Nokia. All rights reserved.
- Page 107 If the Results column shows “Pass”, it means all paths from BB/RF IC chips to Front-end module are continuity without any unconnected path. If the Results column shows “Fail”, follow the Troubleshooting flowchart. Issue 1 COMPANY CONFIDENTIAL Page 4 – 21 Copyright © 2010 Nokia. All rights reserved.
- Page 108 RM-497 RF troubleshooting Page 4 – 22 COMPANY CONFIDENTIAL Issue 1 Copyright © 2010 Nokia. All rights reserved.
-
Page 109: Tx Troubleshooting For Gsm850/900
RM-497 RF troubleshooting TX troubleshooting for GSM850/900 Troubleshooting flow Issue 1 COMPANY CONFIDENTIAL Page 4 – 23 Copyright © 2010 Nokia. All rights reserved. -
Page 110: Tx Troubleshooting For Dcs1800/Pcs1800
1. Set the phone to local mode. 2. Activate RF controls in Phoenix ( Testing → GSM → Rf Controls ). Make settings as shown in the picture: Page 4 – 24 COMPANY CONFIDENTIAL Issue 1 Copyright © 2010 Nokia. All rights reserved. - Page 111 3. Check the basic TX parameters (i.e. power, phase error, modulation and switching spectrum), using a communication analyser (for example CMU200). Figure 28 Analyzer setting Issue 1 COMPANY CONFIDENTIAL Page 4 – 25 Copyright © 2010 Nokia. All rights reserved.
- Page 112 RM-497 RF troubleshooting Figure 29 Phase error Figure 30 Modulation/Switching spectrum Page 4 – 26 COMPANY CONFIDENTIAL Issue 1 Copyright © 2010 Nokia. All rights reserved.
- Page 113 4. Change power level (RF controls) and make sure the power reading follows accordingly. Next actions If you want to troubleshoot the other bands, change band with RF controls and set the communication analyzer accordingly. Issue 1 COMPANY CONFIDENTIAL Page 4 – 27 Copyright © 2010 Nokia. All rights reserved.
- Page 114 RM-497 RF troubleshooting (This page left intentionally blank.) Page 4 – 28 COMPANY CONFIDENTIAL Issue 1 Copyright © 2010 Nokia. All rights reserved.
- Page 115 Nokia Customer Care 5 — System Module Issue 1 COMPANY CONFIDENTIAL Page 5 – 1 Copyright © 2010 Nokia. All rights reserved.
- Page 116 RM-497 System Module (This page left intentionally blank.) Page 5 – 2 COMPANY CONFIDENTIAL Issue 1 Copyright © 2010 Nokia. All rights reserved.
-
Page 117: List Of Tables
Figure 36 Electrical interface between charger and PMU and baseband ............. 5–18 Figure 37 Wall charger............................5–19 Figure 38 Wall charger protection........................5–19 Figure 39 USB charger............................5–20 Issue 1 COMPANY CONFIDENTIAL Page 5 – 3 Copyright © 2010 Nokia. All rights reserved. - Page 118 5–38 Figure 52 Electrical interface between baseband and audio components ..........5–40 Figure 53 RF receiver module..........................5–42 Figure 54 RF transmitter module........................5–43 Page 5 – 4 COMPANY CONFIDENTIAL Issue 1 Copyright © 2010 Nokia. All rights reserved.
-
Page 119: Introduction
The D2800 “Juno” has extensive integrated multimedia functionality for camera, LCD, and audio. • Serial SMIA camera interface with integrated Image Signal Processor (ISP). • Dual MIPI LCD panels (DBI-B/Messi and DBI-C/Lossi) with up to 16M colors. Issue 1 COMPANY CONFIDENTIAL Page 5 – 5 Copyright © 2010 Nokia. All rights reserved. - Page 120 GSM/EDGE Front-end module (Amplifier + switch) N7500 Dual GSM RX SAW filter for GSM850 and GSM900 Z7500 Dual GSM RX SAW filter for GSM1800 and GSM1900 Z7501 Page 5 – 6 COMPANY CONFIDENTIAL Issue 1 Copyright © 2010 Nokia. All rights reserved.
- Page 121 Camera Module H1400 Battery Battery Connector X3500 Charger Plug X3460 SIM Card Holder X2700 3.5mm AV Connector X2001 uSD Card Holder X4800 Micro USB Connector X3300 Issue 1 COMPANY CONFIDENTIAL Page 5 – 7 Copyright © 2010 Nokia. All rights reserved.
- Page 122 RM-497 System Module Key component placement Figure 33 Key component placement (top side) Page 5 – 8 COMPANY CONFIDENTIAL Issue 1 Copyright © 2010 Nokia. All rights reserved.
- Page 123 RM-497 System Module Figure 34 Key component placement (bottom side) Issue 1 COMPANY CONFIDENTIAL Page 5 – 9 Copyright © 2010 Nokia. All rights reserved.
- Page 124 RM-497 System Module System module block diagram Board and module connections Page 5 – 10 COMPANY CONFIDENTIAL Issue 1 Copyright © 2010 Nokia. All rights reserved.
-
Page 125: Energy Management
The thermal resistor R2303 is used to monitor temperature. The N2201 will be shut down if the temperature is too high or too low. Issue 1 COMPANY CONFIDENTIAL Page 5 – 11 Copyright © 2010 Nokia. All rights reserved. - Page 126 RM-497 System Module Figure 35 Electrical interface between battery and PMU and baseband Page 5 – 12 COMPANY CONFIDENTIAL Issue 1 Copyright © 2010 Nokia. All rights reserved.
- Page 127 D1P2 DADC CCP2_AV Camera DD1P2 USBAVDD MPLL_AV Modem DD1P2 APLL_AV Applicat DD1P2 ion PLL Battery ALDO2 VANA2 ADCAVDD IN ADC (1-4) IHFAVDD High Fedelity Driver Issue 1 COMPANY CONFIDENTIAL Page 5 – 13 Copyright © 2010 Nokia. All rights reserved.
- Page 128 Crystal Oscillato Battery IOSR VMEM VDDO_EM Flash & Memori VDDP_EM External Memory interfac VDDO_FA volatile SRAM Battery RFLDO2 VOUT USBAVDD Analog ACI_AVDD Accesso Control Interfac Page 5 – 14 COMPANY CONFIDENTIAL Issue 1 Copyright © 2010 Nokia. All rights reserved.
- Page 129 RF_VDD_T Transmi tter Local Oscillato Battery RFLDO1 VRF2 RF_VDD_P Power Amplifie interfac RF_VDD_R Analog X2P7 Receiver Battery MSLDO2 VUSB2 USBAVDD 3.3 VUSB Analog NVM_VDD NV_RAM Issue 1 COMPANY CONFIDENTIAL Page 5 – 15 Copyright © 2010 Nokia. All rights reserved.
- Page 130 RM-497 System Module Page 5 – 16 COMPANY CONFIDENTIAL Issue 1 Copyright © 2010 Nokia. All rights reserved.
-
Page 131: Electrical Interface Between Baseband And Charger
The main battery charger of the LOVIISA PMU (N2201) features an autonomous, yet, fully customizable pulse- mode charger and switch-mode charger for a single-cell Li-ion polymer battery. The LOVIISA PMU supports trickle and rapid charge via wall or USB chargers. Issue 1 COMPANY CONFIDENTIAL Page 5 – 17 Copyright © 2010 Nokia. All rights reserved. - Page 132 The Wall charger will start in trickle mode with 90 mA charging current when the battery voltage is less than 2.9V. When the battery voltage is equal to or high than 2.9V, it will allow up to 1.0 A of charging current. Page 5 – 18 COMPANY CONFIDENTIAL Issue 1 Copyright © 2010 Nokia. All rights reserved.
- Page 133 Charger will stop charging when the temperature is too hot or to cold. Figure 37 Wall charger Figure 38 Wall charger protection Issue 1 COMPANY CONFIDENTIAL Page 5 – 19 Copyright © 2010 Nokia. All rights reserved.
- Page 134 The USB will configure the JUNO baseband as an A-device or B-device by checking the ID_OUT signal from the PMU. The DISCHRG signal controls the VBUS discharger. Figure 39 USB charger Page 5 – 20 COMPANY CONFIDENTIAL Issue 1 Copyright © 2010 Nokia. All rights reserved.
- Page 135 AC20 SHDN\ Down OTG Status1 OTGCTRL3 STAT1 OTG Status2 OTGCTRL4 AB19 STAT2 Discharge OTGCTRL5 DISCHRG VBUS OTG ID ID_IN DATA+ USB DP DATA- USB DM Issue 1 COMPANY CONFIDENTIAL Page 5 – 21 Copyright © 2010 Nokia. All rights reserved.
- Page 136 Voltage No charging Range Wall 4.37 4.64 Adapter Presence Detection Trickle Battery Charging voltage is Current lower than 3.3V Constant Battery Charging present Current Page 5 – 22 COMPANY CONFIDENTIAL Issue 1 Copyright © 2010 Nokia. All rights reserved.
- Page 137 η ICHARGE = Charging 80mA, Efficiency inductor DCR = 100mΩ ICHARGE = 450mA, inductor DCR = 100mΩ USB Charger Rising 3.686 3.914 Insertion Threshold Detection Issue 1 COMPANY CONFIDENTIAL Page 5 – 23 Copyright © 2010 Nokia. All rights reserved.
- Page 138 RM-497 System Module Figure 42 top side Page 5 – 24 COMPANY CONFIDENTIAL Issue 1 Copyright © 2010 Nokia. All rights reserved.
- Page 139 RM-497 System Module Figure 43 bottom side Issue 1 COMPANY CONFIDENTIAL Page 5 – 25 Copyright © 2010 Nokia. All rights reserved.
-
Page 140: Normal And Extreme Voltages
[Comment: The phone may turn on into the NORMAL (PWR_ON) mode momentarily and then go into a power saving mode (SLEEP). This will be determined by Nokia firmware.] RESET Reset mode is a synonym for the startup sequence. -
Page 141: Power Distribution
FLASHING Flashing mode is for SW downloading. Note: The actual modes and operation in these modes will be determined by Nokia firmware. Power Distribution The following figure shows a top-level view of the power distribution on the Voyager platform. Issue 1 COMPANY CONFIDENTIAL Page 5 –... - Page 142 21351 Type reset Function AUXLDO1 LCD Analog VAMP1 HCLDO1 Analog : Vibra, DDAC L&R VAMP2 HCLDO2 Digital SDIO VANA1 LVLDO1 Analog:USB, Dual DAC, DSI, M&APLL Page 5 – 28 COMPANY CONFIDENTIAL Issue 1 Copyright © 2010 Nokia. All rights reserved.
-
Page 143: Sim, Μsd
The signals on the SIM interface can support 1.8V or 3.0V CMOS signaling levels. The VSIMLDO supply from the N2201 LOVIISA PMU determines the signaling levels. SIM Interface Pin Name Type Description SIMCLK CMOS SIM clock SIMRST CMOS SIM reset signal Issue 1 COMPANY CONFIDENTIAL Page 5 – 29 Copyright © 2010 Nokia. All rights reserved. -
Page 144: Electrical Interface Between Baseband And Memory Card
N2201 LOVIISA PMU determines the signaling levels. Table 14 D2800 Baseband ASIC (BCM21351) Memory Card Interface Pins SDIO #1 Pin Name Type Description SD1CK CMOS SDIO Clock SD1CMD CMOS SDIO Command Page 5 – 30 COMPANY CONFIDENTIAL Issue 1 Copyright © 2010 Nokia. All rights reserved. -
Page 145: User Interface
LCD Panel chip select LCDCD CMOS LCD command/data select LCDWE CMOS LCD write enable LCDRE CMOS LCD read enable LCDD0 CMOS LCD 8-bit data bus Issue 1 COMPANY CONFIDENTIAL Page 5 – 31 Copyright © 2010 Nokia. All rights reserved. -
Page 146: Electrical Interface Between Baseband And Keypad
0 through 3. The keypad is on a seperate PWB connected to the mainboard by connector X2420. The GPIO I/O buffers on the D2800 JUNO are protected by the Z2400 EMI filter. All GPIOs use 1.8V CMOS signaling levels. Page 5 – 32 COMPANY CONFIDENTIAL Issue 1 Copyright © 2010 Nokia. All rights reserved. - Page 147 Row 2 GPIO3 CMOS Row 3 GPIO4 CMOS Row 4 GPIO5 CMOS Row 5 GPIO8 CMOS Column GPIO9 CMOS Column GPIO10 CMOS Column GPIO11 CMOS Column Issue 1 COMPANY CONFIDENTIAL Page 5 – 33 Copyright © 2010 Nokia. All rights reserved.
-
Page 148: Electrical Interface Between Baseband And Backlight And Illumination
The D2800 JUNO (BCM21351) BB ASIC uses its’ GPIO and GPEN pins to control the backlight and illumination. GPIO17 is used to enable the N2301 LED driver and GPEN9 is used to enable the keypad light. Page 5 – 34 COMPANY CONFIDENTIAL Issue 1 Copyright © 2010 Nokia. All rights reserved. -
Page 149: Electrical Interface Between Baseband And Camera
The D2800 JUNO (BCM21351) BB ASIC has an integrated Compact Camera Port 2 (CCP-2) serial camera interface. The BB ASIC provides a CMOS reference clock and shut-down signal. The camera is controlled by the Broadcom Serial Control (BSC) #2 interface. Issue 1 COMPANY CONFIDENTIAL Page 5 – 35 Copyright © 2010 Nokia. All rights reserved. - Page 150 CMOS Shutdown BSCCLK Open- BSC #2 (I2C-compatible) Drain clock BSCDAT Open- BSC #2 (I2C-compatible) Drain data Figure 49 D2800 baseband ASIC (BCM21351) camera interface pins Page 5 – 36 COMPANY CONFIDENTIAL Issue 1 Copyright © 2010 Nokia. All rights reserved.
-
Page 151: Electrical Interface Between Baseband And Vibra
• 1 Earpiece • 1 IHF (Internal Hands Free) speaker The platform supports the following audio applications: • Voice Telephony • Voice Recording • FM Radio Reception Issue 1 COMPANY CONFIDENTIAL Page 5 – 37 Copyright © 2010 Nokia. All rights reserved. - Page 152 IHF: IHFAMP left channel. The differential pair goes through the 100nH inductors and then to the audio connector AUDIOCONN. Vibra: VBRAMP right channel. The differential pair go to the audio connector AUDIOCONN directly. Figure 51 Audio block diagram Page 5 – 38 COMPANY CONFIDENTIAL Issue 1 Copyright © 2010 Nokia. All rights reserved.
-
Page 153: Audio
External Headset Right RN100A Driver - DDACAMP Analog Earpiece Driver + LP100B DDACAMP Analog Earpiece Driver - LN100B IHFAMPRP AB21 Analog Internal Hands-free driver LINOUT Issue 1 COMPANY CONFIDENTIAL Page 5 – 39 Copyright © 2010 Nokia. All rights reserved. -
Page 154: Rf Description
The platform is based on the capabilities of the D2800 Juno Baseband ASIC (BCM21351) – a 65-nm quad-band EDGE/GPRS/GSM multimedia baseband processor with an embedded RF transceiver. Page 5 – 40 COMPANY CONFIDENTIAL Issue 1 Copyright © 2010 Nokia. All rights reserved. -
Page 155: Gsm Receiver
The D2800 Juno BB/RF ASIC contains four low noise amplifiers (LNA), one for each band. The receiver uses a low-IF architecture, meaning the incoming RF signal to the mixer is quadrature-down-converted to the IF frequency. Issue 1 COMPANY CONFIDENTIAL Page 5 – 41 Copyright © 2010 Nokia. All rights reserved. -
Page 156: Gsm Transmitter
2 dual packages where one is used for low bands (GSM850/GSM900) and the other for high bands (GSM1800/GSM1900). GSM Transmitter The transmit chain consists of the transmitter section of the D2800 Juno’s integrated RF and a dual-mode quad-band FEM. Page 5 – 42 COMPANY CONFIDENTIAL Issue 1 Copyright © 2010 Nokia. All rights reserved. - Page 157 • GMSK mode: Power Class 4 for GSM850 and GSM900 bands (up to 33 dBm), Power Class 1 for DCS1800 and PCS 1900 bands (up to 30 dBm) • EDGE/8PSK mode: Power Class E2 (27 dBm LB, 26 dBm HB). Issue 1 COMPANY CONFIDENTIAL Page 5 – 43 Copyright © 2010 Nokia. All rights reserved.
-
Page 158: Technical Specifications
No storage. An attempt to operate <-40 C and >+85 storage may cause permanent damage Charging allowed C ... +60 Long term storage C ... +85 conditions Page 5 – 44 COMPANY CONFIDENTIAL Issue 1 Copyright © 2010 Nokia. All rights reserved. - Page 159 Condensed or dripping water may cause intermittent malfunctions. Protection against dripping water has to be implemented in (enclosure) mechanics. Continuous dampness will cause permanent damage to the module. Issue 1 COMPANY CONFIDENTIAL Page 5 – 45 Copyright © 2010 Nokia. All rights reserved.
- Page 160 RM-497 System Module (This page left intentionally blank.) Page 5 – 46 COMPANY CONFIDENTIAL Issue 1 Copyright © 2010 Nokia. All rights reserved.
- Page 161 Nokia Customer Care 6 — BTHFMTXRDS3.0b Issue 1 COMPANY CONFIDENTIAL Page 6 – 1 Copyright © 2010 Nokia. All rights reserved.
- Page 162 RM-497 BTHFMTXRDS3.0b (This page left intentionally blank.) Page 6 – 2 COMPANY CONFIDENTIAL Issue 1 Copyright © 2010 Nokia. All rights reserved.
- Page 163 6–9 Bluetooth Troubleshooting........................6–10 FM Receiver Troubleshooting........................6–10 List of Figures Figure 55 Test points in Bluetooth-FM ASIC circuit – BTHFMTXRDS3.0b (TI BL6450) ........6–5 Issue 1 COMPANY CONFIDENTIAL Page 6 – 3 Copyright © 2010 Nokia. All rights reserved.
- Page 164 RM-497 BTHFMTXRDS3.0b (This page left intentionally blank.) Page 6 – 4 COMPANY CONFIDENTIAL Issue 1 Copyright © 2010 Nokia. All rights reserved.
-
Page 165: Troubleshooting Guide
Unable to switch on Bluetooth on Open circuit solder joints or Replacement of Bluetooth/FM phone user interface component failure of BTH/FM ASIC/module ASIC/module BB ASICs or SMD components. Issue 1 COMPANY CONFIDENTIAL Page 6 – 5 Copyright © 2010 Nokia. All rights reserved. -
Page 166: Test Coverage
As Bluetooth and FM receiver and transmitter share the same ASIC, all of these functions should be re-tested after repair to the Bluetooth-FM circuit (if supported by the phone). Page 6 – 6 COMPANY CONFIDENTIAL Issue 1 Copyright © 2010 Nokia. All rights reserved. -
Page 167: Test Procedure--Phoenix Service Software Set Up
Self Tests window check the following Bluetooth tests: 6. In the • ST_LPRF_IF_TEST • ST_LPRF_AUDIO_LINES_TEST • ST_BT_WAKEUP_TEST Start . 7. To run the test, click Issue 1 COMPANY CONFIDENTIAL Page 6 – 7 Copyright © 2010 Nokia. All rights reserved. -
Page 168: Fm Receiver Self Tests
5. Locate the BT-box serial number (12 digits) found in the type label on the back of the SB-6 Bluetooth test box. Bluetooth Locals window, write the 12-digit serial number on the Counterpart BT Device Address 6. In the line. Page 6 – 8 COMPANY CONFIDENTIAL Issue 1 Copyright © 2010 Nokia. All rights reserved. -
Page 169: Troubleshooting
7. Place the BT-box near (within 10 cm) of the phone and click Troubleshooting General Description The specific troubleshooting fault repair chart only needs to be followed if there is a fault with a particular function. Issue 1 COMPANY CONFIDENTIAL Page 6 – 9 Copyright © 2010 Nokia. All rights reserved. -
Page 170: Bluetooth Troubleshooting
RM-497 BTHFMTXRDS3.0b Bluetooth Troubleshooting Troubleshooting flow Page 6 – 10 COMPANY CONFIDENTIAL Issue 1 Copyright © 2010 Nokia. All rights reserved. -
Page 171: Fm Receiver Troubleshooting
RM-497 BTHFMTXRDS3.0b FM Receiver Troubleshooting Troubleshooting flow Issue 1 COMPANY CONFIDENTIAL Page 6 – 11 Copyright © 2010 Nokia. All rights reserved. - Page 172 RM-497 BTHFMTXRDS3.0b (This page left intentionally blank.) Page 6 – 12 COMPANY CONFIDENTIAL Issue 1 Copyright © 2010 Nokia. All rights reserved.
- Page 173 Nokia Customer Care Glossary Issue 1 COMPANY CONFIDENTIAL Page Glossary– 1 Copyright © 2010 Nokia. All rights reserved.
- Page 174 RM-497 Glossary (This page left intentionally blank.) Page Glossary– 2 COMPANY CONFIDENTIAL Issue 1 Copyright © 2010 Nokia. All rights reserved.
- Page 175 Clock Timing Sleep and interrupt block of Tiku Continuous wave D/A-converter Digital-to-analogue converter Digital-to-analogue converter Digital Battery Interface DBus DSP controlled serial bus connected between UPP_WD2 and Helgo Issue 1 COMPANY CONFIDENTIAL Page Glossary– 3 Copyright © 2010 Nokia. All rights reserved.
- Page 176 High speed circuit switched data (data transmission connection faster than GSM) Hardware Input/Output IBAT Battery current Integrated circuit ICHAR Charger current Interface Integrated hands free IMEI International Mobile Equipment Identity Page Glossary– 4 COMPANY CONFIDENTIAL Issue 1 Copyright © 2010 Nokia. All rights reserved.
- Page 177 Software tool of DCT4.x and BB5 Personal Information Management Phase locked loop (Phone) Permanent memory General Purpose IO (PIO), USARTS and Pulse Width Modulators PURX Power-up reset Printed Wiring Board Issue 1 COMPANY CONFIDENTIAL Page Glossary– 5 Copyright © 2010 Nokia. All rights reserved.
- Page 178 Universal Energy Management chip (Enhanced version) UEMEK See UEME User Interface UPnP Universal Plug and Play Universal Phone Processor UPP_WD2 Communicator version of DCT4 system ASIC Page Glossary– 6 COMPANY CONFIDENTIAL Issue 1 Copyright © 2010 Nokia. All rights reserved.
- Page 179 Wideband code division multiple access Watchdog WLAN Wireless local area network XHTML Extensible hypertext markup language Zocus Current sensor (used to monitor the current flow to and from the battery) Issue 1 COMPANY CONFIDENTIAL Page Glossary– 7 Copyright © 2010 Nokia. All rights reserved.
- Page 180 RM-497 Glossary (This page left intentionally blank.) Page Glossary– 8 COMPANY CONFIDENTIAL Issue 1 Copyright © 2010 Nokia. All rights reserved.