Table of Contents
Advertisement
Available languages
Available languages
Quick Links
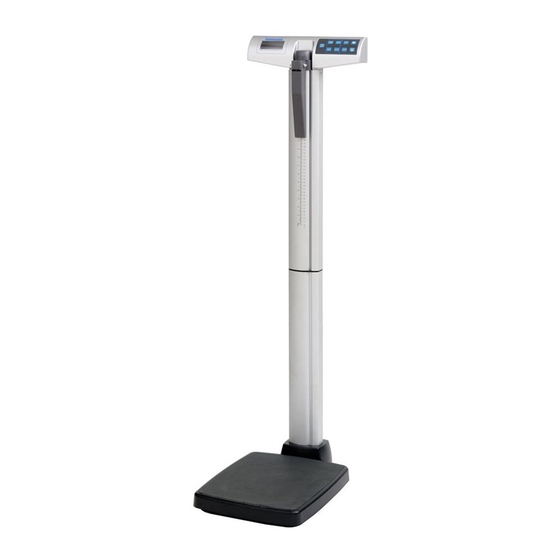
Model 501KL / 501KG
Eye Level Digital Beam Scale
Equipped with
®
Everlock
E112697
UL 60601-1
CSA C22.2 No. 601.1-M90
User Instructions
PELSTAR, LLC
9500 West 55th St. McCook, IL 60525-7110 USA
www.homscales.com
®
Health o meter
Professional 501KL
®
Health o meter
Professional 501KG
© Pelstar, LLC 2020
P/N UM501KL_501KG_REV20201201_web
Advertisement
Chapters
Table of Contents

Related Manuals for Health O Meter 501KL


Summary of Contents for Health O Meter 501KL
- Page 1 Model 501KL / 501KG Eye Level Digital Beam Scale Equipped with ® Everlock E112697 UL 60601-1 CSA C22.2 No. 601.1-M90 User Instructions PELSTAR, LLC 9500 West 55th St. McCook, IL 60525-7110 USA www.homscales.com ® Health o meter Professional 501KL ®...
-
Page 2: Table Of Contents
® Professional 501KL Health o meter Professional 501KG ® Thank you for purchasing this Health o meter ® Professional product. Please read this manual carefully, and keep it for easy reference or training. TABLE OF CONTENTS Cautions and Warnings ..................... 3 Specifications / Definition of Symbols................ -
Page 3: Cautions And Warnings
CAUTIONS AND WARNINGS Intended Use This Health o meter ® Professional platform scale is intended to be used in a professional medical environment by trained medical staff. This product was designed to weigh patients who are safely positioned and standing on the platform. The intended use of the built-in height rod is to measure patient height. -
Page 4: Specifications / Definition Of Symbols
SPECIFICATIONS General The model 501KL/501KG eye-level digital beam scale uses highly sophisticated microprocessor technology. This precision scale is designed to provide accurate, reliable and repeatable weight measurements. In addition, each scale is designed to provide the user with features that make the weighing process simple, fast, and convenient. -
Page 5: Certifications / Connectivity / Disposal
This connectivity helps minimize a source of potential medical errors caused by incorrectly copying and then recording patient data. For more information regarding how to connect the scale to other electronic devices, please contact Health o meter ®... -
Page 6: Assembly Instructions
ASSEMBLY INSTRUCTIONS Before Assembly Each 501KL/501KG eye-level digital beam scale is shipped disassembled in one carton. Carefully inspect the carton for shipping damage before unpacking. If damage is found, contact your shipper or a Health o meter ® Professional representative immediately at 1-800-815-6615. - Page 7 ASSEMBLY INSTRUCTIONS (CONTINUED) Assembling the Scale 1. Carefully remove the contents of the carton and place each part on a flat, level, and dry surface. P/N UM501KL_501KG_REV20201201_web...
- Page 8 ASSEMBLY INSTRUCTIONS (CONTINUED) 2. Remove the 4 column mounting screws and washers from the bottom of column B Screws and washers and set aside for assembly step 8. Column B 3. Remove the black bracket from scale platform C. Read the “Attention”...
- Page 9 ASSEMBLY INSTRUCTIONS (CONTINUED) 4. Locate the load cell connector cable inside column A. While Column B Column A holding column B, slide the (top) (bottom) cable through the center opening at the top of column B. Push the cable all the way through Column B until the plug reaches the bottom of the column.
- Page 10 ASSEMBLY INSTRUCTIONS (CONTINUED) 6. Place scale platform C on its side and place Column B on its side, perpendicular to the platform. The front of the display head on Column A should be facing forward and above scale platform C. 7.
- Page 11 ASSEMBLY INSTRUCTIONS (CONTINUED) 8. Position and secure the connected columns A and B to scale platform C. Locate the 4 column mounting screws previously removed in step 2. Ensure that washers are located between the screw heads and the scale platform C screw holes.
- Page 12 ASSEMBLY INSTRUCTIONS (CONTINUED) 10. Position the bottom of the fully assembled height rod into the height rod opening G at the top of column A. Press locking tab F inward to insert the height rod into the height rod opening G. The scale is now assembled and ready to use.
-
Page 13: Powering The Scale
Optional AC Adapter 1. Connect the AC adapter (not included) into the adapter jack on the scale platform C. Warning: To avoid a safety hazard, use only a Health o meter ® Professional AC adapter. -
Page 14: Set Up Instructions
SET UP INSTRUCTIONS To enter the Options mode, push and hold the ENTER button while pressing and releasing the button Auto Off Function When powering the scale via the AC adapter, the display can be set to power off after a period of inactivity. - Page 15 SET UP INSTRUCTIONS (CONTINUED) Locking Unit of Measure (LB or KG) (501KL only, this feature is not available on 501KG) The weight measuring unit (pounds / LB or kilograms / KG) can be locked to display weight only in the selected unit of measure. The unit of measure lock default setting is “unlocked”. Follow this procedure to lock the UNIT button.
- Page 16 ZERO level it found on start-up. Health o meter® Professional recommends keeping this setting as Enable. Choose the setting you prefer and press CLEAR/REWEIGH to save your selection and exit the Options mode.
-
Page 17: Operating Instructions
Will recall the previously locked weight if pressed when RECALL nothing is on the scale. 501KL Only: Toggles between pounds (LB) and kilograms (KG). If weight measurement unit is locked, press and hold UNIT button to UNIT display other weight measurement unit. Note: Weight measurement will not toggle on KG models or if Everlock ®... - Page 18 OPERATING INSTRUCTIONS (CONTINUED) Screen Icons Icon Description Indicates scale is being powered by batteries. Also indicates level of battery power remaining. Indicates scale is being powered by AC adapter. ZERO Displays along with dashes when scale is zeroing. Flashes during weighing process. Stays displayed while weight LOCK measurement is locked.
- Page 19 OPERATING INSTRUCTIONS (CONTINUED) Weighing a Patient Note: When this scale is turned on, it will always default to the settings and units last used (LB or KG). 1. With all weight off the scale, press the button to turn on the scale. 2.
- Page 20 OPERATING INSTRUCTIONS (CONTINUED) Weighing a Patient and Taring a Known Weight (Pre-Tare): Pre-Tare can be performed for items between 0.2 lb and 200 lb (0.1 kg and 91 kg). 1. With all weight off the scale, press the button to turn on the scale. 2.
-
Page 21: Height Measurement Instructions
HEIGHT MEASUREMENT INSTRUCTIONS CAUTION: Use caution when sliding height rod up and down. The rod should move smoothly; do not move the rod in a jerking motion. Fold headpiece down when not in use. Note: Patients must be a minimum of 23-5/8” (60 cm) tall for the height to be accurately measured. -
Page 22: Maintenance And Cleaning
4. Do not pour or spray fluids directly on the scale. Replacement Parts Parts are available if a piece of the scale needs to be replaced. Contact Health o meter ® Professional Scales Customer Service at 1-800-815-6615 to inquire about the availability of these replacement parts. -
Page 23: Calibration
CALIBRATION This scale has been factory calibrated, and does not require calibration prior to use. There are no requirements for calibration in the field; users should adhere to their institution’s calibration policies. If required, the scale can be calibrated. Calibration of your scale is performed using 80 kilograms (KG) or 200 pounds (LB), according to the units of measure used upon entering into the calibration path. -
Page 24: Troubleshooting
TROUBLESHOOTING Troubleshooting Before contacting service personnel, refer to the following instructions to check and to correct any failures. If display shows other error messages than displayed below, contact Health o meter ® Professional Scales Technical Support at 1-800-638-3722. Symptom Possible Cause... -
Page 25: Warranty
Health o meter ® is a registered trademark of Sunbeam Products, Inc. used under license. Health o meter ® Professional products are manufactured, designed, and owned by Pelstar, LLC. We reserve the right to improve, enhance, or modify Health o meter ®... - Page 27 Modelo 501KL/501KG Báscula Digital de Columna a Nivel de los Ojos Equipped with ® Everlock E112697 UL 60601-1 CSA C22.2 No. 601.1-M90 Instrucciones del Usuario ® PELSTAR , LLC 9500 West 55th St. McCook, IL 60525-7110 USA www.homscales.com ® Health o meter...
- Page 28 Professional 501KL ® Health o meter Professional 501KG ® Gracias por su compra de este producto Health o meter Professional. Lea por favor este manual cuidadosamente, y consérvelo para pronta referencia o capacitación. TABLA DE CONTENIDOS Precauciones y Advertencias ..................3 Especificaciones / Definición de los Símbolos ............
-
Page 29: Precauciones Y Advertencias
PRECAUCIONES Y ADVERTENCIAS Uso Previsto Esta báscula de plataforma Health o meter ® Professional se prevé que sea usada en un entorno médico profesional por personal médico capacitado. Este producto fue diseñado para pesar a pacientes colocados con seguridad y de pie sobre la plataforma. El uso previsto del tallímetro integrado es medir la estatura de los pacientes. - Page 30 En el 501KL, el peso se puede mostrar en libras (lb) o en kilogramos (kg). En el peso de 500 kg se muestra en kilogramos solamente. Esta báscula se puede alimentar usando un adaptador AC, modelo ADPT30 (no incluido), o 6 baterías AA (incluidas).
-
Page 31: Certificaciones / Conectividad / Disposición
Cumple con ANSI/AAMI ES60601-1 (2005) + AMD 1 (2012, CAN/CSA-C22.2 No. 60601-1 (2014) E112697 UL 60601-1 CSA C22.2 No. 601.1-M90 Todas las básculas de Health o meter ® Professional se fabrican en fábricas registradas ante la FDA. Información de conectividad de la báscula Para garantizar una transmisión confiable de los datos de peso, altura e índice de masa... - Page 32 INSTRUCCIONES DE ENSAMBLADO Antes de Ensamblar Cada báscula digital de columna a nivel de los ojos 501KL/501KG es enviada sin ensamblar en un embalaje. Examine cuidadosamente la caja de cartón en busca de daño en el envío antes de desempacar. Si se detecta daño, contacte a su compañía de envíos o representante Health o meter ®...
-
Page 33: Instrucciones De Ensamblaje
INSTRUCCIONES DE ENSAMBLAJE (CONTINUACIÓN) Ensamblado de la Báscula 1. Remueva cuidadosamente los contenidos del empaque y coloque cada pieza sobre una superficie plana, nivelada y seca. ABERTURA DEL TALLÍMETRO G COLUMNA A PARTE SUPERIOR DEL TALLÍMETRO D PRECAUCIÓN PARTE INFERIOR DEL TALLÍMETRO E TENGA CUIDADO CON LOS PUNTOS COLUMNA B... - Page 34 INSTRUCCIONES DE ENSAMBLAJE (CONT.) 2. Retire tornillos arandelas de ensamblado de la base de la columna B y retire Tornillos y arandelas para su ensamblado en el paso 8. Columna B 3. Retire el soporte negro de la plataforma C. Lea la etiqueta de “Atención”...
- Page 35 INSTRUCCIONES DE ENSAMBLAJE (CONTINUACIÓN) 4. Localice el cable conector de Columna B Columna A la celda de carga dentro de la (parte (parte columna A. Mientras sostiene superior) inferior) la columna B, deslice el cable a través de la apertura central en la parte superior de la columna Introduzca...
- Page 36 INSTRUCCIONES DE ENSAMBLAJE (CONTINUACIÓN) 6. Coloque la plataforma C de la báscula acostada y también la Columna B, perpendicular a la plataforma. La parte frontal del cabezal de la pantalla en la Columna A debe estar mirando hacia el frente y por encima de la plataforma C.
- Page 37 INSTRUCCIONES DE ENSAMBLAJE (CONTINUACIÓN) 8. Posicione asegure columnas A y B ya conectadas a la plataforma de la báscula C. Obtenga los 4 tornillos de montaje columna previamente retirados en el paso 2. Asegúrese de que las arandelas estén colocadas entre las cabezas de los tornillos y los orificios para tornillo de la plataforma C.
- Page 38 INSTRUCCIONES DE ENSAMBLAJE (CONTINUACIÓN) 10. Coloque la parte inferior del tallímetro ensamblado completo en la apertura G para tallímetro parte superior de la columna A. Presione pestaña sujeción F para insertar el tallímetro en la apertura G. La báscula está ahora ensamblada lista...
-
Page 39: Encendido De La Báscula
Pestaña de sujeción Unidad de Cubierta de las Baterías visualización 2. Substituya o instale 6 baterías nuevas AA. Health o meter ® Professional recomienda usar baterías alcalinas o de litio, con especificación para operar a 130°F (54°C). No utilice baterías de cinc-carbón. - Page 40 INSTRUCCIONES DE INSTALACIÓN Para ingresar al modo Opciones, presione y sostenga ENTER mientras presiona y libera el botón Función Auto-Apagado Nota: El botón de Unidad está deshabilitado en modelos KG o KL activada o con la configuración “Unit View” deshabilitada. con la función Everlock ®...
- Page 41 INSTRUCCIONES DE INSTALACIÓN (CONTINUACIÓN) Bloqueo de la Unidad de Medición (LB o KG) (501KL solamente, esta característica no está disponible en el modelo 501KG) La unidad de medición de peso (libras / LB o kilogramos / KG) puede bloquearse para mostrar el peso en la unidad de medición seleccionada únicamente.
- Page 42 Habilitar esta función significa que la báscula se pondrá a cero sola cuando se encienda. Después de cada uso, la báscula borrará el peso del paciente y se pondrá a su nivel inicial de CERO al arranque. Health o meter ®...
- Page 43 Recordará el peso previamente retenido si está RECALL presionado cuando no hay peso alguno sobre la báscula. 501KL Solamente: Cambia entre libras (LB) y kilogramos (KG). Si la unidad de la medición del peso está bloqueada, presione y sostenga el LB/KG botón de LB/KG para mostrar la otra unidad de medición de peso.
- Page 44 INSTRUCCIONES DE FUNCIONAMIENTO (CONT.) Íconos en la Pantalla Icon Description Indica que la báscula está funcionando con baterías. También indica el nivel de batería restante. Indica que la báscula está funcionando con el adaptador AC. ZERO Exhibe junto con guiones cuando la báscula está poniéndose a cero. Destella durante el proceso de pesaje.
- Page 45 INSTRUCCIONES DE FUNCIONAMIENTO (CONT.) Pesaje de un Paciente Nota: Cuando se enciende, la báscula siempre usará por defecto todos los ajustes y las unidades usadas por última vez (LB o KG). 1. Con la báscula libre de peso, presione el botón para encender la báscula.
- Page 46 OPERATING INSTRUCTIONS (CONTINUED) Pesaje de un Paciente y Tara de un Peso Conocido (Pre-Tara) La Pre-Tara puede realizarse para objetos entre 0.2 lb y 200 lb (0.1 kg y 91 kg). 1. Con la báscula libre de peso, presione el botón para encender la báscula.
-
Page 47: Instrucciones Para La Medición De Estatura
INSTRUCCIONES DE MEDICIÓN DE LA ESTATURA PRECAUCIÓN: Tenga cuidado al deslizar el tallímetro hacia arriba y hacia abajo. La barra debería moverse suavemente; evite moverla dando tirones. Doble el tope del tallímetro cuando no lo use. Nota: Los pacientes deben tener un mínimo de 23-5/8” (60 cm) de estatura para que la altura sea medida con exactitud. -
Page 48: Mantenimiento Y Limpieza
4. No vierta ni atomice líquidos directamente sobre la báscula. Piezas de Recambio Existen refacciones disponibles si alguna pieza de la báscula debe ser reemplazada. Contacte a Servicio a Clientes de Health o meter ® Professional Scales al 1-800-815-6615 para consultar la disponibilidad de estas piezas de recambio. -
Page 49: Calibración
CALIBRACIÓN Esta báscula ha sido calibrada de fábrica y no requiere calibración previo a su uso. No hay requerimientos para la calibración en campo; los usuarios deben ajustarse a las políticas de calibración de su organización. Si es necesario, la báscula puede ser calibrada. La calibración de su báscula se realiza usando 80 kilogramos (KG) o 200 libras (LB), según las unidades de medición usadas al ingresar a la ruta de calibración. -
Page 50: Resolución De Problemas
Antes de entrar en contacto con el personal de servicio, consulte las instrucciones siguientes para comprobar y corregir cualquier falla. Si la pantalla muestra mensajes de error distintos a los mostrados abajo, contacte a: Soporte Técnico de Health o meter ®... -
Page 51: Garantía
® Professional son fabricados, diseñados, y de propiedad de Pelstar ® , LLC. Nos reservamos el derecho de mejorar, realzar, o modificar las características o especificaciones de los productos Health o meter ® Professional sin previo aviso. ® © Pelstar...