
Related Manuals for Health O Meter 500HB


Summary of Contents for Health O Meter 500HB
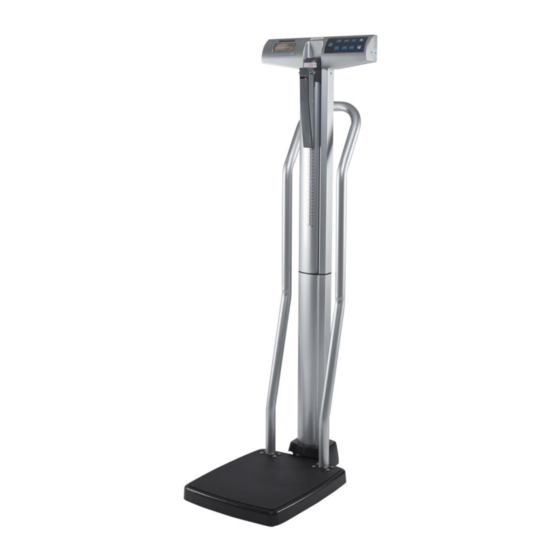
- Page 1 500HB Installation Instructions PELSTAR, LLC 9500 West 55 St. McCook, IL 60525-7110 USA www.homscales.com © Pelstar, LLC 2020 P/N 82-00009 REV A 500HB Installation Instructions REV20200402_web...
- Page 2 Alcohol Wipe Allen Wrench 1/4-20 X 1/2 500HB Mount Button Head 1/4-20 X 2 1/4 Bracket, 2 Each Screws, 4 Each Button Head Screws, 8 Each 500HB Base 500HB SPACER 500HB Handlebar P/N 82-00009 REV A 500HB Installation Instructions REV20200402_web...
- Page 3 Forward Screws (closest to the scale base). Loosen Screws approximately ¾”. Note, the Load Cell Cable does not Loosen Screws need to be removed. 4. Loosen Screws approximately ¾”. Loosen Screws ¾” P/N 82-00009 REV A 500HB Installation Instructions REV20200402_web...
- Page 4 Mount Holes on bottom of Base.Then tighten all 4 Screws securely. Note: If assembling a new scale, refer back to the scale’s user manual to complete the scale assembly before proceeding with mounting the handlebars. P/N 82-00009 REV A 500HB Installation Instructions REV20200402_web...
- Page 5 12. With drill guide properly positioned on bottom of scale platform, use a power drill and the provided ¼” drill bit to drill 4 holes through the bottom of the scale platform. P/N 82-00009 REV A 500HB Installation Instructions REV20200402_web...
- Page 6 16. Use a utility knife or similar tool to remove plastic burrs from the top of the scale platform. 17. Using the provided alcohol wipe, clean the entire top surface of the scale platform. P/N 82-00009 REV A 500HB Installation Instructions REV20200402_web...
- Page 7 21. Slightly tilt the base up to allow for the removal of the tape backing strip. Peel off the backing strip under the plate. Lower the plate/handlebars onto the scale platform and apply light pressure for 30 seconds. P/N 82-00009 REV A 500HB Installation Instructions REV20200402_web...
- Page 8 Then tighten all 8 screws completely. 26. Note: When mounting the brackets underneath the platform, ensure that the silver brackets are not touching the black stabilizer bar. If necessary, loosen the screws to adjust, then retighten. Stabilizer P/N 82-00009 REV A 500HB Installation Instructions REV20200402_web...
- Page 9 Insert the remaining two ¼-20 x ½” Button Head Screws into the back of the other side of the handlebar and into the channel. Fully tighten to secure. Assembly is complete. P/N 82-00009 REV A 500HB Installation Instructions REV20200402_web...
-
Page 10: Warranty
Sunbeam Products, Inc. used under license. Health o meter Professional products are ® manufactured, designed, and owned by Pelstar, LLC. We reserve the right to improve, enhance, or modify Health o meter Professional product features or specifications without notice. - Page 11 Instrucciones de instalación de la 500HB PELSTAR, LLC 9500 West 55 St. McCook, IL 60525-7110 USA www.homscales.com © Pelstar, LLC 2020 P/N 82-00009 REV A 500HB Installation Instructions REV20200402_web...
- Page 12 Gracias por comprar este producto de Health o meter® Professional. Para evitar lesiones en el paciente/cuidador o daños a su báscula, siga detenidamente las instrucciones de este manual del usuario. • Los barandales están diseñados para ser usados únicamente por el paciente. No use los barandales para transportar la báscula o la use como carretilla para transportar artículos.
- Page 13 Afloje los tornillos aproximadamente ¾”. Tenga en cuenta Afloje los que no es necesario retirar el cable de tornillos la celda de carga. 4. Afloje los tornillos aproximadamente ¾". Afloje los tornillos ¾” P/N 82-00009 REV A 500HB Installation Instructions REV20200402_web...
- Page 14 4 tornillos. Nota: Si está armando una nueva báscula, consulte el manual de usuario de la báscula para terminar el armado de la báscula antes de proceder con el montaje de los barandales. P/N 82-00009 REV A 500HB Installation Instructions REV20200402_web...
- Page 15 ¼" incluida para perforar 4 agujeros a través de la parte inferior de la plataforma de la báscula. P/N 82-00009 REV A 500HB Installation Instructions REV20200402_web...
- Page 16 17. Usando la toallita con alcohol incluida, limpie toda la superficie superior de la plataforma de la báscula. P/N 82-00009 REV A 500HB Installation Instructions REV20200402_web...
- Page 17 Despegue el respaldo de la parte inferior de la placa. Baje la placa/barandales hacia la plataforma de la báscula y presione ligeramente durante 30 segundos. P/N 82-00009 REV A 500HB Installation Instructions REV20200402_web...
- Page 18 26. Nota: Al montar los soportes debajo de la plataforma, asegúrese de que los soportes plateados no toquen la barra estabilizadora negra. Si es necesario, afloje los tornillos para ajustarlos, y luego vuelvalos a apretar. Barra estabilizadora P/N 82-00009 REV A 500HB Installation Instructions REV20200402_web...
- Page 19 30. Inserte los dos tornillos de cabeza de botón de ¼- 20 x ½ "restantes en la parte posterior del otro lado del manillar y hacia adentro del canal. Ajústelos completamente para asegurar. Se ha terminado el armado. P/N 82-00009 REV A 500HB Installation Instructions REV20200402_web...
- Page 20 Health o meter® es una marca registrada de Sunbeam Products, Inc. usado bajo licencia. Los productos de Health o meter® Professional son fabricados, diseñados y propiedad de Pelstar, LLC. Nos reservamos el derecho de mejorar, aumentar o modificar las características o especificaciones del producto Health o meter®...