Fortinet FortiGate FortiGate-100A Install Manual
Fortigate-60 series fortios 3.0 mr4
Hide thumbs
Also See for FortiGate FortiGate-100A:
- Administration manual (388 pages) ,
- Install manual (54 pages) ,
- Quick start manual (2 pages)

Related Manuals for Fortinet FortiGate FortiGate-100A


Summary of Contents for Fortinet FortiGate FortiGate-100A
- Page 1 I N S T A L L G U I D E FortiGate-60 series and FortiGate-100A FortiOS 3.0 MR4 www.fortinet.com...
- Page 2 FortiOS 3.0 MR4 31 August 2007 01-30004-0266-20070831 © Copyright 2007 Fortinet, Inc. All rights reserved. No part of this publication including text, examples, diagrams or illustrations may be reproduced, transmitted, or translated in any form or by any means, electronic, mechanical, manual, optical or otherwise, for any purpose, without prior written permission of Fortinet, Inc.
-
Page 3: Table Of Contents
FortiManager ... 11 About this document... 11 Document conventions... 12 Fortinet documentation ... 13 Fortinet Tools and Documentation CD ... 14 Fortinet Knowledge Center ... 14 Comments on Fortinet technical documentation ... 14 Customer service and technical support ... 14 Installing the FortiGate unit ... - Page 4 Factory defaults ... 23 Configuring the FortiGate unit... 29 Installing a PCMCIA card ... 22 Factory default DHCP server configuration... 24 Factory default NAT/Route mode network configuration... 24 Factory default Transparent mode network configuration... 25 Factory default firewall configuration ... 26 Factory default protection profiles ...
- Page 5 Configuring the modem interface ... 49 Configuring the ADSL interface ... 59 Using a wireless network ... 67 Scheduling antivirus and IPS updates... 46 Adding an override server ... 47 Selecting a modem mode ... 49 Redundant mode configuration... 49 Stand alone mode configuration ...
- Page 6 FortiGate Firmware ... 75 Index... 89 Setting up the FortiWiFi-60 as an Access Point ... 73 Set the DHCP settings ... 73 Set the security options... 74 Configure the firewall policies ... 74 Upgrading to a new firmware version ... 75 Upgrading the firmware using the web-based manager ...
-
Page 7: Introduction
Introduction Introduction Welcome and thank you for selecting Fortinet products for your real-time network protection. The FortiGate™ Unified Threat Management System improves network security, reduces network misuse and abuse, and helps you use communications resources more efficiently without compromising the performance of your network. -
Page 8: Fortigate-60/60M/Adsl
About the FortiGate unit FortiGate-60/60M/ADSL FortiGate-60B FortiWiFi-60/60M The FortiGate-60 unit is designed for telecommuters remote offices, and retail stores. The FortiGate-60 unit includes a USB port for an external modem that can be used as a backup or stand alone connection to the Internet. -
Page 9: Fortiwifi-60B
RIP and OSPF routing protocols. Fortinet Family Products Fortinet offers a family of products that includes both software and hardware appliances, for a complete network security solution including mail, logging, reporting, network management, and security along with FortiGate Unified Threat Management Systems. -
Page 10: Forticlient
FortiMail unit has reliable, high performance features for detecting and blocking malicious attachments such as Distributed Checksum Clearinghouse (DCC) scanning and Bayesian scanning. Built on Fortinet’s award winning FortiOS and FortiASIC technology, FortiMail antivirus technology extends full content inspection capabilities to detect the most advanced email threats. -
Page 11: Fortibridge
Introduction FortiBridge FortiBridge™ products are designed to provide enterprise organizations with continuous network traffic flow in the event of a power outage or a FortiGate system failure. The FortiBridge unit bypasses the FortiGate unit to make sure that the network can continue processing traffic. FortiBridge products are easy to use and deploy, and you can customize the actions a FortiBridge unit takes when a power failure or a FortiGate system failure occurs. -
Page 12: Document Conventions
About this document Document conventions The following document conventions are used in this guide: • In the examples, private IP addresses are used for both private and public IP addresses. • Notes and Cautions are used to provide important information: Note: Highlights useful additional information. -
Page 13: Fortinet Documentation
Introduction Fortinet documentation The most up-to-date publications and previous releases of Fortinet product documentation are available from the Fortinet Technical Documentation web site at http://docs.forticare.com. The following • FortiGate QuickStart Guide Provides basic information about connecting and installing a FortiGate unit. -
Page 14: Fortinet Tools And Documentation Cd
Transparent mode. Includes detailed examples. All Fortinet documentation is available from the Fortinet Tools and Documentation CD shipped with your Fortinet product. The documents on this CD are current at shipping time. For up-to-date versions of Fortinet documentation see the Fortinet Technical Documentation web site at http://docs.forticare.com. -
Page 15: Installing The Fortigate Unit
Installing the FortiGate unit Installing the FortiGate unit This section provides information on installing and setting up the FortiGate unit on your network. This section includes the following topics: • Mounting • Powering on the FortiGate unit • Connecting to the FortiGate unit Mounting Adhere the rubber feet included in the package to the underside of the FortiGate unit, near the corners of the device. -
Page 16: Warnings
Powering on the FortiGate unit Warnings Powering on the FortiGate unit This device complies with part 15 of the FCC Rules. Operation is subject to the following two conditions: (1) This device may not cause harmful interference, and (2) This device must accept any interference received, including interference that may cause undesired operation. -
Page 17: Powering Off The Fortigate Unit
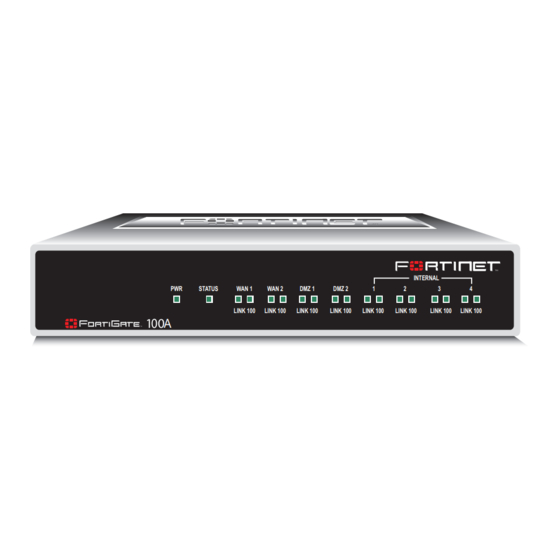
Installing the FortiGate unit Power Status Link (Internal DMZ 1 DMZ 2 WAN 1 WAN 2) DMZ 1 DMZ 2 WAN 1 WAN 2 Alarm Powering off the FortiGate unit Always shut down the FortiGate operating system properly before unplugging the power to avoid potential hardware problems. -
Page 18: Command Line Interface
Connecting to the FortiGate unit Command line interface Connecting to the web-based manager Series You can access the FortiGate command line interface (CLI) by connecting a management computer serial port to the FortiGate serial console connector. You can also use Telnet or a secure SSH connection to connect to the CLI from any network that is connected to the FortiGate unit, including the Internet. -
Page 19: System Dashboard
Installing the FortiGate unit Figure 2: FortiGate login Type admin in the Name field and select Login. System Dashboard After logging into the web-based manager, the web browser displays the system dashboard. The dashboard provides you with all system status information in one location. - Page 20 Connecting to the FortiGate unit To connect to the CLI Connect the RJ-45 to DB-9 serial cable/console port. Start HyperTerminal, enter a name for the connection and select OK. Configure HyperTerminal to connect directly to the communications port on your computer and select OK.
-
Page 21: Quick Installation Using Factory Defaults
Internal interface Configure Manual IP, DHCP, 192.168.1.99 or PPPoE addressing DHCP server and DNS server for the Internal network Router FortiGate-60M unit Quick installation using factory defaults Internal network Hub or switch Obtain IP address and DNS server IP address automatically “Factory default... -
Page 22: Installing A Pcmcia Card
Use the following DNS server addresses: select and enter the DNS server addresses given to you by the ISP, select Apply Go to Router > Static, edit route #1 and change Gateway to the default gateway IP address from the ISP and select OK. -
Page 23: Factory Defaults
Factory defaults Factory defaults The FortiGate unit ships with a factory default configuration. The default configuration enables you to connect to and use the FortiGate web-based manager to configure the FortiGate unit onto the network. To configure the FortiGate unit onto the network you add an administrator password, change network interface IP addresses, add DNS server IP addresses, and, if required, configure basic routing. -
Page 24: Factory Default Dhcp Server Configuration
Factory default DHCP server configuration Factory default DHCP server configuration Factory default NAT/Route mode network configuration Using the factory default DHCP server settings, you can quickly configure the internal network and the FortiGate unit. See defaults” on page Table 2: Factory default DHCP server configuration Name internal_dhcp_server Interface... -
Page 25: Factory Default Transparent Mode Network Configuration
Factory defaults Table 3: Factory default NAT/Route mode network configuration (Continued) Modem interface ADSL Modem interface WLAN Network Settings Factory default Transparent mode network configuration In Transparent mode, the FortiGate unit has the default network configuration listed in Table 4: Factory default Transparent mode network configuration Administrator account Management IP... -
Page 26: Factory Default Firewall Configuration
Factory default firewall configuration Factory default firewall configuration Factory default protection profiles FortiGate firewall policies control how all traffic is processed by the FortiGate unit. Until firewall policies are added, no traffic can be accepted by or pass through the FortiGate unit. -
Page 27: Restoring The Default Settings
Factory defaults The FortiGate unit comes preconfigured with four protection profiles. Strict Scan Unfiltered Restoring the default settings You can revert to factory default settings and start over again if you mistakenly change a network setting and are unable to recover from it. Caution: This procedure deletes all changes you have made to the FortiGate configuration and reverses the system to its original configuration, including resetting interface addresses. - Page 28 Restoring the default settings Factory defaults FortiGate-60 series and FortiGate-100A FortiOS 3.0 MR4 Install Guide 01-30004-0266-20070831...
-
Page 29: Configuring The Fortigate Unit
You can also configure the FortiGate unit and the network it protects using the default settings. NAT/Route mode In NAT/Route mode, the FortiGate unit is visible to the network. Like a router, all its interfaces are on different subnets. The following interfaces are available in NAT/Route mode:... -
Page 30: Nat/Route Mode With Multiple External Network Connections
Figure 4: FortiGate-60 NAT/Route mode network configuration 192.168.1.99 WAN1 204.23.1.5 Internet Router NAT mode policies controlling In NAT/Route mode, you can configure the FortiGate unit with multiple redundant connections to the external network (usually the Internet). For example, you could create the following configuration: •... -
Page 31: Transparent Mode
IP address is also used for antivirus and attack definition updates. You typically use the FortiGate unit in Transparent mode on a private network behind an existing firewall or behind a router. The FortiGate unit performs firewall functions, IPSec VPN, virus scanning, IPS web content filtering, and Spam filtering. -
Page 32: Preventing The Public Fortigate Interface From Responding To Ping Requests
Figure 6: FortiGate-100A in Transparent mode WAN1 Internet Router The factory default configuration of your FortiGate unit allows the default public interface to respond to ping requests. The default public interface is also called the default external interface, and is the interface of the FortiGate unit that is usually connected to the Internet. -
Page 33: Nat/Route Mode Installation
Configuring the FortiGate unit To disable ping administrative access from the FortiGate CLI Log into the FortiGate CLI. Disable administrative access to the external interface. Enter: config system interface NAT/Route mode installation This section describes how to install the FortiGate unit in NAT/Route mode. This section includes the following topics: •... -
Page 34: Dhcp Or Pppoe Configuration
NAT/Route mode installation DHCP or PPPoE configuration Using the web-based manager DMZ2 (FortiGate-100A) Netmask: ADSL (FortiGate- Netmask: 60ADSL) WLAN Netmask: Default Gateway: (Interface connected to external network) A default route consists of a default gateway and the name of the Network settings interface connected to the external network (usually the Internet). -
Page 35: Adding A Default Route
DHCP or PPPoE. To add a default route Go to Router > Static. If the Static Route table contains a default route (IP and Mask set to 0.0.0.0), select the Delete icon to delete this route. -
Page 36: Verifying The Web-Based Manager Configuration
Verify the connection To verify your connection, try the following: • browse to www.fortinet.com • retrieve or send email from your email account If you cannot browse to the web site or retrieve/send email from your account, review the previous steps to ensure all information was entered correctly and try again. - Page 37 Configuring the FortiGate unit Example config system interface Set the IP address and netmask of the external (WAN1) interface to the external IP address and netmask you recorded in config system interface Example config system interface To set the WAN1 interface to use DHCP, enter: config system interface To set the WAN1 interface to use PPPoE, enter: config system interface...
-
Page 38: Adding A Default Route
DHCP or PPPoE. To add a default route Set the default route to the Default Gateway IP address. Enter: config router static edit <seq_num> set dst <class_ip&net_netmask> set gateway <gateway_IP>... -
Page 39: Connecting The Fortigate Unit To The Network(S)
Connect the External interface to the Internet. Connect to the public switch or router provided by your Internet Service Provider. If you are a DSL or cable subscriber, connect the WAN1 interface to the internal or LAN connection of your DSL or cable modem. -
Page 40: Configuring The Networks
Transparent mode installation Configuring the networks Transparent mode installation Preparing to configure Transparent mode If you are running the FortiGate unit in NAT/Route mode, your networks must be configured to route all Internet traffic to the IP address of the interface where the networks are connected. -
Page 41: Using The Web-Based Manager
The management IP address and netmask must be valid for the network from which you will manage the FortiGate unit. Add a default gateway if the FortiGate unit must connect to a router to reach the management computer. Primary DNS Server:... - Page 42 Transparent mode installation To change to Transparent mode using the CLI Make sure you are logged into the CLI. Switch to Transparent mode. Enter: config system settings set opmode transparent set manageip <address_ip> <netmask> set gateway <address_gateway> After a few seconds, the following prompt appears: Changing to TP mode When the login prompt appears, enter the following: get system settings...
-
Page 43: Connecting The Fortigate Unit To Your Network
IP address. Browse to https:// followed by the new IP address. If you connect to the management interface through a router, make sure you have added a default gateway for that route to the management IP default gateway field. -
Page 44: Next Steps
Next Steps Set the date and time Figure 8: FortiGate-60 Transparent mode connections WAN1 Internet Router (or public switch) You can use the following information to configure FortiGate system time, and to configure antivirus and attack definition updates. Refer to the FortiGate Administration Guide configuring, monitoring, and maintaining your FortiGate unit. -
Page 45: Updating Antivirus And Ips Signatures
You can update your antivirus and IPS signatures using the web-based manager or the CLI. Before you can begin receiving updates, you must register your FortiGate unit from the Fortinet web page. Note: Update AV and IPS signatures on a regular basis. If you do not update AV and IPS signatures regularly, the FortiGate unit can become vulnerable to new viruses. -
Page 46: Updating The Ips Signatures From The Cli
Next Steps To update antivirus definitions and IPS signatures Go to System > Maintenance > FortiGuard Center. Select the blue arrow for AntiVirus and IPS Downloads to expand the options. Select Update Now to update the antivirus definitions. If the connection to the FDN is successful, the web-based manager displays a message similar to the following: Your update request has been sent. -
Page 47: Adding An Override Server
Configuring the FortiGate unit Daily Weekly Select Apply. The FortiGate unit starts the next scheduled update according to the new update schedule. Whenever the FortiGate unit runs a scheduled update, the event is recorded in the FortiGate event log. To enable schedule updates from the CLI Log into the CLI. - Page 48 Next Steps To add an override server using the CLI Log into the CLI. Enter the following command: config system autoupdate override set address set status FortiGate-60 series and FortiGate-100A FortiOS 3.0 MR4 Install Guide Configuring the FortiGate unit 01-30004-0266-20070831...
-
Page 49: Configuring The Modem Interface
Configuring the modem interface Configuring the modem interface The modem interface is available on the FortiGate-60 series only excluding the FortiGate-60ADSL. Series The following section will cover how to configure the FortiGate-60M using the web-based manager. To configure the FortiGate-60 and FortiWiFi-60 modem, use the CLI. -
Page 50: Stand Alone Mode Configuration
Selecting a modem mode Stand alone mode configuration For the FortiGate unit to switch from an Ethernet interface to the modem, you must select the name of the interface in the modem configuration and configure a ping server for that interface. You must also configure firewall policies for connections between the modem interface and other FortiGate interfaces. -
Page 51: Configuring Modem Settings
Configuring the modem interface To operate in stand alone mode for the FortiGate-60M Go to System > Network > Modem. Configure other modem settings as required. “Configuring modem settings” on page Make sure there is correct information in one or more Dial-up Accounts. Configure firewall policies for connections to the modem interface. - Page 52 Configuring modem settings Figure 9: Modem settings (Stand alone and Redundant) Enable Modem Select to enable the FortiGate modem. Modem status The modem status shows one of the following: “not active”, “connecting”, “connected”, “disconnecting” or “hung up” (Stand alone mode only). Dial Now/Hang Up (Stand alone mode only) Select Dial Now to manually connect to a dial-up account.
-
Page 53: Connecting And Disconnecting The Modem In Stand Alone Mode
Configuring the modem interface You can configure and use the modem in NAT/Route mode only. To configure modem settings Go to System > Network > Modem. Select Enable Modem. Change any of the dial-up connection settings. Enter the settings for Dial-up Account 1 settings. If you have multiple dial-up accounts, enter Phone Number, User Name, and Password for Dial-up Account 2 and Dial-up Account 3. -
Page 54: Configuring The Modem For The Fortigate-60 And Fortiwifi-60
Configuring the modem for the FortiGate-60 and FortiWiFi-60 Configuring the modem for the FortiGate-60 and FortiWiFi-60 Configure the modem settings for the FortiGate-60 and FortiWiFi-60 through the CLI. The following table of CLI commands are specifically for the FortiGate-60 and FortiWiFi-60 modem configuration. - Page 55 Configuring the modem interface Table 11: CLI commands for the FortiGate-60 and FortiWiFi-60 continued peer_modem1 {actiontec | ascendTNT | generic} peer_modem2 {actiontec | ascendTNT | generic} peer_modem2 {actiontec | ascendTNT | generic} phone1 <phone-number> phone2 <phone-number> phone3 <phone-number> redial <tries_interger> status {disable | enable} username1...
-
Page 56: Adding A Ping Server
To add a ping server to an interface Go to System > Network > Interface. Choose an interface and select Edit. Set Ping Server to the IP address of the next hop router on the network connected to the interface. Select the Enable check box. -
Page 57: Adding Firewall Policies For Modem Connections
Configuring the modem interface Adding firewall policies for modem connections The modem interface requires firewall addresses and policies. You can add one or more addresses to the modem interface. For information about adding addresses, see the modem interface appears on the policy grid. You can configure firewall policies to control the flow of packets between the modem interface and the other interfaces on the FortiGate unit. - Page 58 Adding firewall policies for modem connections Configuring the modem interface FortiGate-60 series and FortiGate-100A FortiOS 3.0 MR4 Install Guide 01-30004-0266-20070831...
-
Page 59: Configuring The Adsl Interface
Configuring the ADSL interface Configuring the ADSL interface The ADSL modem interface is available on the FortiGate-60ADSL unit only. Series This section describes how to configure the ADSL interface on a FortiGate-60ADSL. It describes the differences between ADSL and other FortiGate interface configuration procedures. -
Page 60: Configuring Dhcp On The Adsl Interface
Configuring the ADSL interface using the web-based manager Configuring DHCP on the ADSL interface IPOA IP over ATM. Enter the IP address and netmask that your ISP provides. Ethernet over ATM, also known as Bridged mode. Enter the IP address and netmask that your ISP provides. -
Page 61: Configuring Pppoe Or Pppoa On The Adsl Interface
Configuring the ADSL interface Override internal DNS Enable Override internal DNS to use the DNS addresses retrieved Connect to server Configuring PPPoE or PPPoA on the ADSL interface If you configure the interface to use PPPoE, the FortiGate unit automatically broadcasts a PPPoE request. -
Page 62: Configuring The Adsl Interface Using The Cli
Configuring the ADSL interface using the CLI Configuring the ADSL interface using the CLI Distance Enter the administrative distance for the default gateway retrieved from the PPPoE or PPPoA server. The administrative distance, an integer from 1-255, specifies the relative priority of a route when there are multiple routes to the same destination. - Page 63 Configuring the ADSL interface General keywords and variables applicable to the ADSL interface You might need to configure these settings to communicate with your ISP. Keywords and variables auth-type <ppp_auth_method> connection {enable | disable} defaultgw {enable | disable} disc-retry-timeout <pppoe_retry_seconds> dns-server-override {enable | disable} edit...
- Page 64 Configuring the ADSL interface using the CLI General keywords and variables applicable to the ADSL interface You might need to configure these settings to communicate with your ISP. Keywords and variables Description Enter the interface IP address and ip <interface_ipv4mask> netmask.
-
Page 65: Example - Ipoa Or Eoa
Configuring the ADSL interface General keywords and variables applicable to the ADSL interface You might need to configure these settings to communicate with your ISP. Keywords and variables padt-retry-timeout <padt_retry_seconds> password <pppoe_password> status {down | up} username <pppoe_username> Example - IPOA or EOA This example shows the settings required to use an IP address of 10.10.10.1 and a netmask of 255.255.255.0 with IPOA using PPPoE and custom VPI and VCI settings. -
Page 66: Example - Dhcp
Adding firewall policies for ADSL connections Adding firewall policies for ADSL connections Example - DHCP This example shows the settings required to connect to an ISP using DHCP with default VCI and VPI settings. config system interface edit adsl set mode dhcp set mux-type llc-encaps set connection enable Example - PPPoE or PPPoA... -
Page 67: Using A Wireless Network
Using a wireless network Using a wireless network This chapter is specifically for the FortiWiFi-60/60M and FortiWiFi-60B units. In all cases, where FortiWiFi-60 is mentioned, it applies to all FortiWiFi units. WiFi60 In a wired network, computers are connected through a series of cables that transfer information. -
Page 68: Positioning An Access Point
Setting up a wireless network Positioning an Access Point Radio Frequency interface Figure 12: FortiWiFi-60 as an Access Point Internal Router WAN1 Internet WAN2 MODEM / DSL / Cable When placing the FortiWiFi-60 AP, your main concern is providing a strong signal to all users. -
Page 69: Using Multiple Access Points
Using a wireless network • Consider more FortiWiFi-60 APs to help strengthen the signal. The weaker the signal, the slower the transmission will be as it tries to compete against other wireless devices. • Set a channel that users and FortiWiFi-60 APs will specifically use can improve signal quality. -
Page 70: Wireless Security
Wireless Security Wireless Security Wireless Equivalent Privacy (WEP) Wi-Fi Protected Access (WPA) Radio waves transmitted between a wireless device and access points provide the weakest link between the wireless device and network servers. Wireless networking can be risky because information travels on radio waves, which is a public medium. -
Page 71: Additional Security Measures
Wireless users should configure their computers to connect to the network that broadcasts this network name. For security reasons, do not leave the default name of “fortinet” as the network name. Broadcasting enables wireless users to find a network. The FortiWiFi-60 models includes an option not to broadcast the SSID. -
Page 72: Client Mode
Wireless operation modes Using a wireless network Figure 14: FortiWiFi in Access Point mode Internal Router WAN1 Internet WAN2 MODEM / DSL / Cable Client mode When using the FortiWiFi-60 in Client mode, the device is set to receive transmissions from another access point. This enables you to connect remote users to an existing network using wireless protocols from a location that does not have a wired infrastructure. -
Page 73: Changing The Operating Mode
For example, 10.10.80.1 to 10.10.80.20. Enter the network mask you created in Table 8 on page Enter domain name, for example, www.fortinet.com. The expiry date of an IP address. This feature specifies either an unlimited or limited timeframe of an IP address. -
Page 74: Set The Security Options
Setting up the FortiWiFi-60 as an Access Point Set the security options Configure the firewall policies To ensure proper security and protection of your network and its information, set the security options for the FortiWiFi-60 unit. To set the data security Go to System >... -
Page 75: Fortigate Firmware
FortiGate Firmware FortiGate Firmware Fortinet periodically updates the FortiGate firmware to include enhancements and address issues. After you have registered your FortiGate unit, FortiGate firmware is available for download at http://support.fortinet.com. Only the FortiGate administrators (whose access profiles contain system configuration read and write privileges) and the FortiGate admin user can change the FortiGate firmware. -
Page 76: Upgrading The Firmware Using The Cli
Upgrading to a new firmware version Upgrading the firmware using the CLI. Select OK. The FortiGate unit uploads the firmware image file, upgrades to the new firmware version, restarts, and displays the FortiGate login. This process takes a few minutes. Log into the web-based manager. -
Page 77: Reverting To A Previous Firmware Version
FortiGate Firmware Reverting to a previous firmware version Use the web-based manager or CLI procedure to revert to a previous firmware version. This procedure reverts the FortiGate unit to its factory default configuration. Reverting to a previous firmware version using the web-based manager Downgrading the firmware to a previous version will revert the FortiGate unit to its factory default configuration and deletes IPS custom signatures, web content lists, email filtering lists, and changes to replacement messages. -
Page 78: Reverting To A Previous Firmware Version Using The Cli
Reverting to a previous firmware version Reverting to a previous firmware version using the CLI Downgrading the firmware to a previous version will revert the FortiGate unit to its factory default configuration and deletes IPS custom signatures, web content lists, email filtering lists, and changes to the replacement messages. -
Page 79: Installing Firmware Images From A System Reboot Using The Cli
FortiGate Firmware Type y. The FortiGate unit uploads the firmware image file. After the file uploads, a message similar to the following is displayed: Get image from tftp server OK. Check image OK. This operation will downgrade the current firmware version! Do you want to continue? (y/n) Type y. - Page 80 Installing firmware images from a system reboot using the CLI If you are reverting to a previous FortiOS version (for example, reverting from FortiOS v3.0 to FortiOS v2.80), you might not be able to restore your previous configuration from the backup configuration file. Note: Installing firmware replaces the current antivirus and attack definitions, along with the definitions included with the firmware release you are installing.
- Page 81 FortiGate Firmware If you successfully interrupt the startup process, one of the following messages appears: • FortiGate unit running v2.x BIOS Enter TFTP Server Address [192.168.1.168]: Go to step 9. • FortiGate unit running v3.x BIOS [G]: [F]: [Q]: firmware. [H]: Enter G,F,Q,or H: Type G to get the new firmware image from the TFTP server.
-
Page 82: Restoring The Previous Configuration
Note: The FortiUSB key is purchased separately. The FortiGate unit only supports the FortiUSB key available from Fortinet. Use the FortiUSB key to either backup a configuration file or restore a configuration file. You should always make sure the FortiUSB key is properly install before proceeding since the FortiGate unit must recognize that the key is installed in its USB port. -
Page 83: Using The Usb Auto-Install Feature
FortiGate Firmware To restore configuration web-based manager Go to System > Maintenance > Backup and Restore. Select USB Disk from the restore configuration from list. Select a backup configuration file from the list. Select Restore. To backup configuration using the CLI Log into the CLI. -
Page 84: Additional Cli Commands For The Fortiusb Key
Testing a new firmware image before installing it Additional CLI Commands for the FortiUSB key Testing a new firmware image before installing it Select the following: • On system restart, automatically update FortiGate configuration file if default file name is available on the USB disk. •... - Page 85 FortiGate Firmware For this procedure, you connect to the CLI using the RJ-45 to DB-9 serial cable/console port. This procedure temporarily installs a new firmware image using your current configuration. For this procedure you install a TFTP server that you can connect to from the FortiGate internal interface.
- Page 86 Testing a new firmware image before installing it 100A Type G to get the new firmware image from the TFTP server. The following message appears: Enter TFTP server address [192.168.1.168]: Type the address of the TFTP server and press Enter. The following message appears: Enter Local Address [192.168.1.188]: Type an IP address that can be used by the FortiGate unit to connect to the TFTP...
-
Page 87: Installing And Using A Backup Firmware Image
FortiGate Firmware Installing and using a backup firmware image The following procedures are specific to the FortiGate-100A only. 100A If the FortiGate unit is running BIOS version v3.x, you can install a backup firmware image. Once the backup firmware image is installed, you can switch to this backup image when required. - Page 88 Installing and using a backup firmware image Type the address of the TFTP server and press Enter. The following message appears: Enter Local Address [192.168.1.188]: Type an IP address that can be used by the FortiGate unit to connect to the FTP server.
-
Page 89: Index
75 upgrading using the CLI 76, 78 upgrading using the web-base manager 75, 77 FortiGate documentation commenting on 14 Fortinet customer service 14 Fortinet documentation 13 Fortinet Family Products 9 FortiBridge 11 FortiClient 10 FortiGuard 9... - Page 90 FortiGate interface re- sponding to ping requests 32 ping server 56 PPPoA 61 PPPoE 61 PPPoE configuration 34 products, Fortinet family 9 protection profiles, default 26 reconnecting to the web-based manager 43 redial limit 52 redundant mode configuring 49...
- Page 91 www.fortinet.com...
- Page 92 www.fortinet.com...