Fortinet FortiGate 60M Installation Manual
Fortinet network installation guide
Hide thumbs
Also See for FortiGate 60M:
- Quick start manual (28 pages) ,
- User manual (26 pages) ,
- Installation manual (64 pages)
Table of Contents
Advertisement
Quick Links
Download this manual
See also:
User Manual
Advertisement
Table of Contents

Related Manuals for Fortinet FortiGate 60M


Summary of Contents for Fortinet FortiGate 60M
- Page 1 FortiGate-60/60M/ADSL, FortiWiFi-60, FortiGate-100A V3.0 MR1 设备安装手册 www.fortinet.com...
- Page 2 本手册中所包含的任何文字、例子、图表和插图,未经美国飞塔 有限公司的许可,不得因任何用途以电子、机械、人工、光学或 其它任何手段翻印、传播或发布。 注册商标 动态威胁防御系统(DTPS), APSecure, FortiASIC, FortiBIOS, FortiBridge, FortiClient, FortiGate,FortiGate 统一威胁管理系统, FortiGuard, FortiGuard-Antispam, FortiGuard-Intrusion, FortiGuard-Web, FortiLog, FortiManager, Fortinet, FortiOS, FortiPartner, FortiResponse, FortiShield, FortiVoIP 和 FortiWiFi 均是飞塔有限公 司的注册商标(包括在美国和在其他国家的飞塔有限公司) 。 本手册中提及的公司和产品由他们各自的所有者拥有其商标或注 册商标。 服从规范 FCC Class A Part 15 CSA/CUS 注意:如果您安装的电池型号有误,可能会导致爆炸。请根 设备安装手册...
-
Page 3: Table Of Contents
简介... 6 Fortinet 产品家族 ... 6 FortiGuard服务订制... 6 FortiClient ... 7 FortiMail ... 7 FortiAnalyzer ... 7 FortiReporter... 7 FortiBridge... 7 FortiManager... 7 关于FortiGate设备 ... 8 FortiGate-60/60M/ADSL... 8 FortiWiFi-60 ... 8 FortiGate-100A ... 8 关于本手册 ... 8 该手册中的注释... 9 排版说明... 9 FortiGate技术文档... - Page 4 使用基于web的管理器恢复默认的出厂设置... 24 使用CLI恢复默认的出厂设置 ... 25 在网络中配置FortiGate设备 ... 26 规划FortiGate配置 ... 26 NAT/路由模式安装 ... 26 设置公共FortiGate接口对Ping命令请求不作出响应 ... 29 NAT/路由模式安装 ... 30 配置FortiGate设备的NAT/路由模式准备 ... 30 配置使用DHCP或PPPoE... 31 使用基于web的管理器... 31 使用命令行接口(CLI) ... 33 将FortiGate设备连接到网络中 ... 35 配置网络... 36 透明模式安装 ... 36 配置透明模式的准备... 37 使用基于web的管理器...
- Page 5 无线安全 ... 61 无线等效协议(WEP) ... 61 WPA ... 61 其它的无线网络安全方式... 62 MAC地址过滤 ... 62 服务设置标识符(SSID)... 62 FortiWiFi-60 设备操作模式... 62 访问点(AP)模式 ... 62 用户模式... 63 在网络中配置FortiWiFi-60 设备作为访问点(AP)... 64 配置DHCP设置... 64 设置安全选项... 64 配置防火墙策略... 65 FortiGate固件 ... 66 升级为新的固件版本 ... 66 恢复为旧的固件版本 ... 67 使用CLI在系统重启过程中安装固件镜像...
-
Page 6: 简介
·应用层服务,例如病毒防护和内容过滤, ·网络层服务,例如防火墙、入侵检测、VPN以及流量控制等。 FortiGate 统 一 威 胁 管 理 系 统 采 用 了 先 进 的 行 为 加 速 ( Accelerated Behavior)和内容分析系统技术(ABACASTM),具有芯片设计、网 络通信、安全防御及内容分析等方面诸多技术优势。独特的基于ASIC 上的网络安全构架能实时进行网络内容和状态分析,并及时启动部署 在网络边界的防护关键应用程序,随时对您的网络进行最有效的安全 保护。 Fortinet 产品家族 Fortinet 的产品家族涵盖了完备的网络安全解决方案包括邮件,日志, 报告,网络管理,安全性管理以及FortiGate 统一安全性威胁管理系统 的既有软件也有硬件设备的产品。 更多Fortinet产品信息,详见 FortiGuard服务订制 FortiGuard 服务定制是全球Fortinet安全专家团队建立,更新并管理的 安全服务。Fortinet安全专家们确保最新的攻击在对您的资源损害或感... -
Page 7: Forticlient
描 与 报 告 功 能 。 FortiMail 单 元 在 检 测 与 屏 蔽 恶 意 附 件 例 如 DCC (Distributed Checksum Clearinghouse)与Bayesian扫描方面具有可靠 的 高 性 能 。 在 Fortinet 卓 越 的 FortiOS 与 FortiASIC 技 术 的 支 持 下 , FortiMail反病毒技术深入扩展到全部的内容检测功能,能够检测到最... -
Page 8: 关于Fortigate设备
需要。拥有该系统,您可以配置多个FortiGate并监控其状态。您还能 够查看FortiGate设备的实时与历史日志,包括管理FortiGate更新的固 件镜像。FortiManager 系统注重操作的简便性包括与其他第三方系统 简易的整合。 关于FortiGate设备 FortiGate-60系列以及FortiGate-100A设备是应用于小型企业级别的 (包 括远程工作用户),集基于网络的反病毒、内容过滤、防火墙、VPN 以 及 基 于 网 络 的 入 侵 检 测 与 防 护 为 一 体 的 FortiGate 系 统 模 块 。 FortiGate-60系列以及FortiGate-100A设备支持高可靠性(HA)性能。 FortiGate-60/60M/ADSL FortiGate-60设 备 设 计 应用于远程工作用户 以及零售店操作用户。... -
Page 9: 该手册中的注释
与升级固件进行了说明。 该手册包含以下章节: FortiWiFi-60以及FortiGate-100A。其中大部分的内容适用于所有的 设备,针对对具体某个模块所做的说明与描述内容,将使用以下的 图标作为描述提示。 该手册中的注释 以下是该手册中的注释: • 在所举的例子中,私人IP地址既可以用做私人也可以是公共IP地址。 • 注意与警告标识中的提示较为重要的信息。 注意:突出另外其它的有用信息。 警告:对可能造成意外的不良的结果包括数据丢失或者设备损害等 命令或程序发出警告提示。 排版说明 以下是该安装手册中使用的排版说明: 排版说明 键盘输入 命令举例 CLI命令句法模 式 安装FortiGate设备- 安装并启动FortiGate设备。 出厂默认设置 - FortiGate设备出厂默认设置信息。 在网络中配置FortiGate设备 - FortiGate设备的操作模式说明 以及如何将FortiGate设备集成到网络中。 配置Modem接口 - 如何配置以及使用FortiGate-60系列设备 的Modem。 使用无线网络 - 无线网络的使用注意事项以及使用步骤,使 无线网络的使用更为高效。 - 描述了如何安装, 升级, 恢复与测试FortiGate FortiGate固件... -
Page 10: Fortigate技术文档
有关如何配置FortiGate设备的基本信息,包括如何定义FortiGate病毒 防护与防火墙策略;如何应用入侵保护,病毒防护,网页内容过滤以 及垃圾邮件过滤服务与配置VPN。 ·FortiGate 在线帮助是对FortiGate管理员手册的HTML格式上下文有关的检索与 查询。您可以通过基于web的管理其访问在线帮助。 ·FortiGate CLI 有关如何使用FortiGate CLI(命令行接口)以及所以FortiGateCLI命令 的参考。 日志信息参考手册 • 访问Fortinet公司网站的Fortinet知识库板块,FortiGate 日志信息参考 对FortiGate日志信息的结构与FortiGate设备所生成的日志信息有关内 容做了描述。 • FortiGate HA 深入介绍了FortiGate 高可用性的性能与FortiGate群集协议的信息。 • FortiGate IPS 对如何配置FortiGate设备的入侵检测功能以及IPS是如何处理普通的 攻击做出了描述。 • FortiGate IPSec VPN 对使用基于web的管理器如何配置IPSec VPN进行了逐步详细的说明。 • FortiGateSSL VPN 对FortiGate IPSec VPN与FortiGate SSL VPN 技术进行比较,并对通过... -
Page 11: Fortinet 知识库
入CA根权威证书与证书撤销名单, 以及备份与存储安装的证书信息与 私人密钥。 • FortiGate VLAN and VDOM 在NAT/路由与透明模式下如何配置VLAN与VDOM。 Fortinet 知识库 其 它 有 关 Fortinet 技 术 手 册 信 息 都 可 以 从 Fortinet 公 司 网 站 (www.fortinet.com)中的知识库板块获得。知识库涵盖涉及fortinet产 品故障排除与解释说明性的文章,FAQ,技术说明等。 Fortinet 技术文档的建议与意见 如果您在本文档或任何Fortinet 技术文档中发现了错误或疏漏之处, 欢迎您将有关信息发送到 techdoc@fortinet.com 。... -
Page 12: Fortigate设备安装
FortiGate设备安装 本章节就如何安装以及在网络中配置FortiGate设备进行了详细说明。 具体包括: •设备包装 •空气流通 •机械性负荷 •启动FortiGate设备 •连接FortiGate设备 设备包装 请检查FortiGate设备包装盒所有部件。 FortiGate-60/60M/ADSL FortiGate-60/60M/ADSL设备包装盒中部件: • FortiGate防火墙设备 • 一根橙色以太网交叉线缆(Fortinet 部件号:CC300248) • 一根灰色以太网普通线缆(Fortinet 部件号:CC300249) • 一根RJ-45到DB-9串连线缆(Fortinet 部件号:CC300247) • 一根RJ-11电话线 (FortiGate -60M专用) • 一根电源线以及一个AC适配器 • FortiGate-60快速启动指南册页、FortiGate-60M设备快速启动指南册 页或FortiGate-60ADSL设备快速启动指南册页 • Fortinet技术手册CD一张 图1:FortiGate-60/60M设备部件 表1:技术参数 尺寸 重量 工作需求 8.63×6.13×1.38英尺 (21.9×15.6×3.5厘米)... -
Page 13: Fortiwifi-60
工作环境 FortiWiFi-60 FortiWiFi-60设备包装盒中部件: • FortiWiFi-60防火墙设备 • 一根橙色以太网交叉线缆(Fortinet 部件号:CC300248) • 一根灰色以太网普通线缆(Fortinet 部件号:CC300249) • 一根RJ-45到DB-9串连线缆(Fortinet 部件号:CC300247) • 一根电源线以及一个AC适配器 • FortiWiFi-60快速启动指南册页 • Fortinet技术手册CD一张 图2:FortiWiFi-60设备部件 表2:技术参数 尺寸 重量 工作需求 无线连接 工作环境 FortiGate-100A FortiGate-100A设备包装盒中部件: • FortiGate-100A防火墙设备 • 一根橙色以太网交叉线缆(Fortinet 部件号:CC300248) 工作温度:32至104华氏度(0至40度摄氏度) 放置温度:-13至158华氏度 (-25至70摄氏度) 湿度:5至95% (非冷凝) 8.63×6.13×1.38英尺 (21.9×15.6×3.5厘米)... -
Page 14: 启动Fortigate设备
• 一根灰色以太网普通线缆(Fortinet 部件号:CC300249) • 一根RJ-45到DB-9串连线缆(Fortinet 部件号:CC300302) • 一根电源线以及一个AC适配器 • FortiGate-100A快速启动指南册页 • Fortinet技术手册CD一张 图3:FortiGate-100A设备部件 表3:技术参数 尺寸 重量 工作需求 工作环境 安装 FortiGate设备可以安装在任何稳固且水平的表面。请保持设备安装相 隔至少1.5英寸(3.75厘米)的距离,便于通风与冷却。 启动FortiGate设备 FortiGate设备中没有ON/OFF开关。 启动FortiGate设备 1. 将AC适配器与设备背后的电源接口连接。 2. 将AC适配器与电源线连接。 3. 将电源线连接到电源插座。 FortiGate设备启动, 电源与LED状态显示灯亮起。 FortiGate设备启动过 程中LED状态指示灯闪烁并在设备启动后保持亮着状态。 表4:LED显示 10.25×6.13×17.5英尺 (26×15.6×34.5厘米) 1.5磅 (0.68千克) DC输入电压:12V DC输入电流:5A... -
Page 15: 连接Fortigate设备
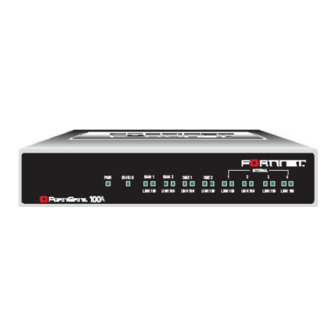
Power 状态 链接 (内部(Internal), DMZ1 DMZ2 WAN1 WAN2) DMZ1 DMZ2 WAN1 WAN2 关闭FortiGate设备 请在闭合电源开关之前,关掉FortiGate操作系统,以免造成硬件损伤。 关闭FortiGate设备 1. 访问基于web的管理器,进入系统> 状态> 系统状态, 选择关闭系统, 然后点击“确认”关闭系统;或者在命令行接口(CLI)中,输入 execute shutdown 关闭电源开关。 连接FortiGate设备 有二种方法连接并配置基本FortiGate设置: • 基于web的管理器 • 命令行接口(CLI) 基于web的管理器 您可以通过任何运行微软Internet Explorer 6.0或其他最近版本的浏览 器的计算机, 使用HTTP或一个安全的HTTPS连接配置并管理FortiGate 设备。基于web的管理器支持多种语言。 您可以使用基于web管理器配置大多数FortiGate设置并监控FortiGate 设备的状态。 命令行接口(CLI) 您可以通过连接到一个管理计算机串行端口进入FortiGate串行Console 连接器,访问FortiGate命令行接口。您也可以从任何连接FortiGate设... -
Page 16: 连接到基于Web的管理器
连接到基于web的管理器 根据以下操作步骤建立与基于web管理器的初次链接。在基于web的管 理器中所做的配置修改,无需重新设置防火墙或中断运行便可生效。 连接到基于web的管理器,您需要: ·一台能够连接以太网的计算机 ·微软6.0版本的浏览器或以上的版本,或任何现行的web浏览器 ·一根交叉的以太网网线或一个以太网网络集线器(hub)与两根以太 网网线。 注意:启动IE之前(或其他现行版本的的网页浏览器),ping FortiGate 设备,检测计算机与FortiGate设备之间是否连接正常。 连接到基于web的管理器 1. 设置计算机与以太网连接的IP地址为静态IP地址192.168.1.2,掩码 为255.255.255.0。 您可以配置管理计算机使用DHCP自动获取IP地址。FortiGate DHCP 服务器将对管理计算机分配范围为192.168.1.1到192.168.1.254之间的 IP地址。 2. 使用交叉线或以太网集线器 (hub) 与线缆将FortiGate设备的内部接 口与您的光纤网络接口连接。 3. 启动IE浏览器,浏览地址为 https://192.168.1.99 的页面(请注意是 https://)。 为了支持安全的HTTPS识别程序,FortiGate设备引入一个自签订的安 全认证,每当远程用户对FortiGate设备发起一个HTTPS连接时,该安 全认证便会弹出。当您进行连接时,FortiGate设备在浏览器中显示两 个安全警告。 第一个警告信息提示您接受并安装FortiGate设备的自签安全证书。如 您不接收认证,FortiGate设备将拒绝连接。如您接收认证,将转入 FortiGate登录页面。输入用户名与密码验证信息登录。如您选择永久 接受认证,警告信息不再弹出。 在FortiGate登录页面显示之前,第二个警告信息告知您FortiGate认证 与原始请求的区别。该信息弹出是因为FortiGate设备试图进行再次连 接。是一条报告性信息。点击“OK”键确认,继续登录页。 V. - Page 17 图4:FortiGate登录页面 4. 输入名称字段输入admin登录。 系统操作面板 登录到基于web的管理器后,页面显示系统操作面板。面板显示所有 的系统状态信息。 图5:FortiGate-60M系统面板 面板中包括以下信息: · 端 口 状 态 - 面 板 中 显 示 有 FortiGate 设 备 的 正 面 镜 像 图 。 包 括 FortiAnalyzer连接状态-X表示没有连接, 当检测标志中没有标注X时, 说明存在连接。滑动鼠标到每个端口,可以查看端口信息,如 IP地址 与掩码,速率,以及接收或发送的数据包信息。当端口使用中时,其 状态显示呈绿色。 ·系统信息-操作系统信息的显示包括设备串行数量与固件版本。在该 区域,可以进行固件升级,设置系统时间或更改操作模式。 V.
-
Page 18: 连接到Cli(命令行接口
·系统资源-显示系统资源使用情况。 ·许可证信息-显示FortiGate设备中当前的病毒防护与安全性升级的情 况。 ·报警信息Console-显示最近FortiGate设备发出的警告日志信息。 ·统计表 - 提供FortiGate设备的实时流量与攻击信息。 连接到CLI(命令行接口) 将管理计算机的串口与FortiGate设备的控制台连接器连接并可以访问 FortiGate设备命令行接口。您也可以在任何网络(包括互联网)中使 用Telnet或一个安全的SSH连接访问FortiGate设备也可以连接到CLI。 CLI (命令行接口) 支持与基于web的管理器相同的配置与功能。 另外, 您还可以使用CLI配置一些web管理器不能配置的更高级的选项。本手 册中包含一些基本的以及某些高级的CLI命令信息。有关连接到 FortiGate设备使用CLI的详细信息,参见FortiGate 册 。 连接到CLI 除了使用基于web的管理器,您也可以使用CLI安装与配置FortiGate设 备。 无需重新设置防火墙或中断设备运行, CLI所进行的配置更改便可 以生效。 连接到CLI,您需要: ·一台有通信端口的计算机 ·FortiGate设备包装中带有的RJ-45到DB-9的串口线缆。 ·终端模拟软件,如Microsoft Windows的HyperTerminal。 连接到CLI 1. 使 用 RJ-45 到 DB-9 的 串 口 线 将 您 计 算 机 的 通 信 端 口 与 FortiGate console端口连接。... -
Page 19: 使用出厂默认设置快速启动Fortigate设备
键入?列出可用的命令。 有关如何使用CLI ( 命令行接口) 的详细信息, 参见 FortiGate 使用出厂默认设置快速启动FortiGate设备 使用基于web的管理器与出厂默认的FortiGate设备配置, 您可以快速在 soho情况下配置启用FortiGate-60系列设备。您所要做的只是配置您网 络中的计算机使用DHCP自动获取IP地址以及DNS服务器IP地址, 并访 问基于web的管理器对WAN1接口配置所需的设置。如需要,您也可 以配置FortiGate DNS服务器并添加默认的路由。 FortiGate内部接口可以配置作为一个DHCP服务器在内部网络中自动 对计算机设备(最多可达100台)自动分配地址范围为192.168.1.110到 192.168.1.210之间的IP地址。 图6:适用默认设置快速配置设备 FortiGate DHCP服务器也可以对内部网络中的每台计算机分配DNS服 务器IP地址为192.168.1.99。那么,FortiGate设备内部接口将作为内部 网络中的一个DNS服务器。使用DNS转发,FortiGate设备将从内部网 络获取的DNS请求转发到DNS服务器IP地址添加在FortiGate设备配置 中并将查询结果返回到内部网络中。 有关DHCP服务器的详细信息,参见“出厂默认DHCP服务器配置”。 以下操作是有关如何配置您的内部网络与FortiGate设备使用FortiGate 设备默认的设置: 1. 将FortiGate设备连接在内部网络与互联网之间,并启动设备。 2. 设置网络计算机的TCP/IP属性使用DHCP自动获取IP地址与DNS 服务器IP地址。 3. 使用管理计算机,浏览:https://192.168.1.99。 登录到FortiGate设备基于web管理器页面。 4. 进入系统>网络>接口,点击外部接口的“编辑”图标。 5. 选择以下一种寻址模式: 设备... - Page 20 6. 进入系统>网络>选项。 7. 选择以下一种DNS设置: 自动获取DNS服务器地址: 设置从ISP自动获取DNS地址, 点击“应 用”。 使用以下DNS服务器地址:输入ISP给的DNS地址并点击“OK”。 8. 进入路由>静态,编辑路由#1并将网关更改为默认的网关IP地址并 点击OK。 9. 如果ISP支持服务器或代理内部DNS选项, 点击获取默认的网关并点 击OK确认后继续执行“下一步”。 如果您没有设置这些选项,进入步骤6。 PPPoE模式:点击选择PPPoE,从ISP获取IP地址,并进入步 骤9。 V. 3.0 MR1 FortiGate-60系列以及 FortiGate-100A设备安装手册 01-30001-0266-20060410...
-
Page 21: 出厂默认设置
出厂默认设置 FortiGate设备有出厂默认设置。该默认设置允许您连接到FortiGate设 备并能够使用FortiGate基于web的管理器在网络中配置FortiGate设备。 在网络中配置FortiGate,您需要添加管理员密码,更改网络接口IP地 址与DNS服务器的IP地址,如有必要,可以配置基本的路由。 如果您打算以透明模式运行FortiGate设备,可以从出厂默认配置中切 换 到 透 明 模 式 , 并 根 据 您 的 网 络 结 构 与 情 况 配 置 透 明 模 式 下 的 FortiGate设备。 完成网络配置后,您还可以进行其他的配置操作,如设置系统时间, 配置病毒及攻击的定义更新,注册FortiGate设备等。 出厂时默认的防火墙配置包括单一网络地址转换(NAT)策略,该策 略允许您内部网络的用户连接到外部网络,同时阻止外部网络中的用 户连接到内部网络。您可以添加更多其它的策略,对通过FortiGate 设 备的流量进行更多的控制。... - Page 22 FortiGate设备首次启动时,它运行于NAT/路由模式,表6所列是该工 作模式下的基本网络配置。该配置允许您连接到FortiGate设备的基于 web的管理器,并建立FortiGate设备连接到网络所需的配置。表6中, HTTPS管理访问表示您可以通过该接口的HTTPS协议连接到基于web 的管理器。Ping管理访问表示该接口对ping这一命令可以做出响应。 表6:出厂默认的NAT/路由模式的网络配置 管理员账号 内部接口(internal接 口) WAN1接口 WAN2接口 DMZ接口 DMZ1 (FortiGate-100A) DMZ2接口 (FortiGate-100A) Modem接口 ADSL Modem接口 WLAN 网络设置 用户名: Admin (无) 密码: 192.168.1.99 IP: 255.255.255.0 子网掩码: Ping HTTP,HTTPS 管理访问: 192.168.100.99 IP: 子网掩码: 255.255.255.0 Ping 管理访问: 192.168.100.99 IP: 255.255.255.0.
-
Page 23: 出厂默认的透明模式的网络配置
出厂默认的透明模式的网络配置 表7是透明模式下,FortiGate设备默认的网络配置。 表7:出厂默认的透明模式网络配置 管理员帐户 管理IP 管理访问 出厂默认防火墙设置 FortiGate防火墙策略是有关FortiGate设备对所有通讯流量的控制。除 非添加了防火墙策略,否则没有流量通讯能够被FortiGate设备接收或 经 过 FortiGate 设 备 。 您 可 以 添 加 防 火 墙 策 略 允 许 网 络 流 量 通 过 FortiGate设备。有关添加防火墙策略,参见FortiGate 手册。 以下是默认的防火墙配置中的策略配置设置: 表8:出厂默认防火墙配置 配置设置 防火墙地址 预先定义的服务 循环任务时间表... -
Page 24: 恢复出厂默认设置
·给HTTP,FTP,IMAP,POP3与SMTP防火墙策略配置防病毒保护。 ·给HTTP防火墙策略配置网页过滤。 ·给HTTP策略配置网页类别过滤。 ·给IMAP,POP3与SMTP防火墙策略配置垃圾邮件过滤。 ·对所有的服务启动入侵防护系统(IPS)。 ·对HTTP,FTP,IMAP,POP3与SMTP防火墙策略启动内容日志 通过内容保护列表,您可以构建适用与不同类型防火墙策略的保护配 置。并允许您针对不同防火墙策略定制不同类型与级别的防护。 例如,内部与外部地址之间的流量可能需要比较严格的防护,而内部 地址之间的流量可能需要中等一般的防护。您可以针对不同的流量使 用相同或不同的保护设置配置防火墙策略。 NAT/路由模式与透明模式的防火墙策略也可以添加保护设置。 FortiGate设备可以预先配置四种保护设置。 Strict(严格型) 适用于对HTTP,FTP, IMAP,POP3与SMTP流量 应用最大限度的保护。一般情况下,不必使用Strict(严格型)的保护 设置,发现病毒攻击,需要扫描检测时,可以启用Strict(严格型)保 护。 Scan (扫描型) 针对HTTP,FTP,IMAP,POP3,与SMTP内容流量 采用病毒扫描与文件隔离。 Web (网页内容控制型) 针对HTTP内容流量采取病毒扫描与网页 内容屏蔽。您可以在防火墙策略中添加该保护设置来控制HTTP流量。 Unfiltered (无过滤型) 如果对于内容流量不愿意采用内容防护,您 可以使用无过滤型保护。您可以在不需要内容保护的高可信与安全性 较高的网络连接区域,在防火墙的策略中添加该保护设置。 恢复出厂默认设置 如果您误更改了网络设置,并无法恢复,您可以先恢复到出厂默认设 置然后重新启动。 警告:该操作将删除您对FortiGate做的所有配置更改,并将系统退回 至原始配置包括重新设置接口地址。 使用基于web的管理器恢复默认的出厂设置 恢复默认的设置 V. 3.0 MR1 FortiGate-60系列以及 FortiGate-100A设备安装手册... -
Page 25: 使用Cli恢复默认的出厂设置
1.进入系统>状态>系统操作。 2.点击“恢复为出厂默认设置”。 3.点击“确认”。 使用CLI恢复默认的出厂设置 键入如下命令恢复为出厂默认设置: execute factoryreset V. 3.0 MR1 FortiGate-60系列以及 FortiGate-100A设备安装手册 01-30001-0266-20060410... -
Page 26: 在网络中配置Fortigate设备
在网络中配置FortiGate设备 本章是FortiGate设备的操作模式说明。开始配置FortiGate设备之前, 先要考虑怎样将FortiGate设备集成到网络中。 针对不同的操作模式, NAT/路由模式或透明模式,进行对应的配置。 该章节包括以下内容: • 规划FortiGate配置 • 设置公共FortiGate接口对Ping命令请求不作出响应 • NAT/路由模式安装 • 透明模式安装 • 下一步 规划FortiGate配置 配置FortiGate设备之前,先要考虑怎样把FortiGate设备集成在网络中。 至于其它问题,如还需要决定FortiGate设备是否在网络中可见,需要 配置哪些防火墙功能,与怎样控制接口间的流量。 您所选择的FortiGate设备的操作模式是配置的依据。FortiGate设备 有两个模式,分别为:NAT/路由模式(出厂默认)与透明模式。 您也可以在出厂默认的操作模式设置即NAT/路由模式下, 在网络中配 置FortiGate设备。 NAT/路由模式安装 NA/路由模式下, FortiGate设备在网络中是可见的类似一个路由器, 设 备的所有接口在不同的子网中。在NA/路由模式下,以下接口是可用 的。 表9:NAT/路由模式下接口 FortiGate设备 FortiGate-60 FortiGate-60M FortiWiFi-60 FortiGate-60ADSL 内部接口(Internal) FortiGate-100A 您可以添加防火墙策略控制NAT/路由模式下的FortiGate设备是否有 通信流量通过。防火墙策略根据源地址、目标地址与每个数据包的服... - Page 27 务来控制数据流量。 NAT模式下,FortiGate设备发送数据包到目标网 络之前,先执行网络地址转换。路由模式操作没有地址转换。 NAT/路由模式下的FortiGate设备的典型的应用是作为私网与公网之 间的网关。该配置中,您可以建立NAT模式防火墙策略控制内部网、 私网与外部网,公网(通常指互联网)之间的数据流量。 注意:如果是多重内部网络连接,例如内部网之外的DMZ网络、私网; 您可以建立路由模式下的防火墙策略控制这些多重网络之间的流量。 图7:FortiGate-60设备NAT/路由模式下的网络配置举例 具有多个外部网络连接的NAT/路由模式 NAT/路由模式下,您可以配置FortiGate设备具有多个冗余连接,连接 到外部网络(通常指互联网)。 例如,您可以创建以下配置: ·WAN1是连接到外部网络(通常指互联网)的默认接口。 ·Modem是FortiGate-60系列设备连接到外部网络的冗余接口。 ·DMZ是FortiGate-100A设备中连接到外部网络的冗余接口。 ·Internal是连接到内部网络的接口。 您必须配置路由支持冗余的网络连接。如果到外部网络的连接失败, 路由可以从接口自动重新定向改连接。 另外,安全策略配置类似于单项互联网连接下的NAT/路由模式配置。 您可以创建NAT模式防火墙策略控制内网、死亡以及外网、公共网络 V. 3.0 MR1 FortiGate-60系列以及 FortiGate-100A设备安装手册 01-30001-0266-20060410...
- Page 28 (通常指互联网)之间的流量。 图8:FortiGate-100A设备NAT/路由模式下多重internet(互联网)连 接配置举例 透明模式 透明模式下,FortiGate设备在网络中是透明的。类似于网络桥梁,所 有的FortiGate接口都在同一个子网中。您只需配置一个管理IP地址便 可以进行配置更改。 管理IP地址也可用来配置病毒及攻击的定义更新。 透明模式下的FortiGate设备的典型应用位于当前的防火墙或路由器之 后。FortiGate设备具有防火墙、IPsecVPN、病毒扫描、IPS、网页过滤 与垃圾邮件过滤功能。 根据不同型号的FortiGate设备,您最多可以将4个网段连接到FortiGate 设备上,以控制这些网段之间的数据流量。 表10:透明模式下的网络分段 FortiGate设备 FortiGate-60 FortiGate-60M FortiWiFi-60 FortiGate-60ADSL Internal FortiGate-100A 内部接口 外部接口 Internal ( 1,2, WAN1 3,4) Internal WAN1 WAN2 Internal WLAN WAN1 Internal WAN1 V. 3.0 MR1 FortiGate-60系列以及 FortiGate-100A设备安装手册...
-
Page 29: 设置公共Fortigate接口对Ping命令请求不作出响应
注意:透明模式下,FortiGate-60M中modem接口不可用。 图9:FortiGate-100A设备透明模式下的网络配置举例 设置公共FortiGate接口对Ping命令请求不作出响应 出厂默认的FortiGate设备允许默认的公共接口对ping请求作出响应。 默认的工作接口也称为默认的外部接口,该接口是通常用于连接到互 联网的接口。 出于安全操作着想,您应该更改外部接口的配置,对外部的ping请求 不作出响应。 配置对外部的ping请求不作出响应增强了网络的安全性, 增加网络中可能的攻击对FortiGate设备的探测。 根据FortiGate设备不同的型号,默认的公共接口可以是external接口或 WLAN1接口。 如果对接口启动了ping管理访问设置, 那么FortiGate设备将对ping请求 作出响应。您可以使用以下操作步骤撤消对FortiGate设备外部接口的 ping访问。同样的操作适用于任何操作模式下的设备接口。 使用基于web的管理器撤消ping管理访问 1. 登录基于web的管理器。 2. 进入系统>网络>接口。 3. 选择外部接口并点击对应的“编辑”。 DMZ1 DMZ2 V. 3.0 MR1 FortiGate-60系列以及 FortiGate-100A设备安装手册 01-30001-0266-20060410... -
Page 30: Nat/路由模式安装
4. 撤消Ping 管理访问功能。 5. 点击OK保存该配置更改。 使用CLI撤消ping管理访问 1. 登录FortiGate CLI。 2. 输入以下命令,撤消对外部接口的管理访问: config system interface edit external unset allowaccess NAT/路由模式安装 以下内容是有关如何在NAT/路由模式下安装Fortigate设备。包括以下 内容: ·配置FortiGate设备的NAT/路由模式准备 ·配置DHCP或PPPoE ·使用基于web的管理器 ·使用命令行接口(CLI) ·将FortiGate设备配置到网络中 ·配置网络 配置FortiGate设备的NAT/路由模式准备 参考表11中的信息,您可以定制NAT/路由模式设置。 您可以使用以下几种方法配置FortiGate设备: ·通过基于web的管理器的用户界面可以配置设备的大部分设置。参见 “使用基于web的管理器”。 ·使用命令行接口(CLI)可以配置设备的全部设置。参见“使用命令行 接口(CLI)”。 根据配置,访问与设备组合的复杂性与您惯用的接口类型选择合适的 配置方法。 表11:NAT/路由模式设置 管理员密码 Internal (内部) WAN1 WAN2 DMZ1... -
Page 31: 配置使用Dhcp或Pppoe
(Fortigate-100A) DMZ2 (Fortigate-100A) ADSL (Fortigate-60ADSL) 网络设置 配置使用DHCP或PPPoE 您可以配置任何FortiGate接口从DHCP或PPPoE服务器获得IP地址。您 的互联网服务提供商 (ISP) 便是使用这其中的一项协议提供IP地址的。 使用FortiGate DHCP服务器, 您需要配置该服务器的IP地址范围与默认 的路由。将接口配置为使用DHCP便不需要做更多的配置了。 配置使用PPPoE需要设置用户名与密码。 另外, PPPoE未编号配置要求 固定一个IP地址。参考表12记录的信息配置PPPoE。 表12:PPPoE设置 用户名 密码 使用基于web的管理器 您可以使用基于web的管理器进行FortiGate设备的初始配置以及所有 FortiGate设备的设置。 有关连接到基于web的管理器信息,参见“连接到基于web的管理器”。 配置基本设置 连接到基于web的管理器后, 您可以使用以下操作完成FortiGate设备的 基本配置。 添加或更改管理员密码 1.进入系统> 管理员配置> 管理员。 子网掩码: IP: 子网掩码: IP: 子网掩码 IP: 子网掩码: 默认网关:... - Page 32 2.点击“更改密码”图标更改管理员密码。 3.输入新密码,再输入一次确认。 4.点击OK确认。 配置接口 1. 进入系统> 管理员配置> 管理员。 2.点击接口的“编辑”图标。 3.设置接口的地址模式。 从菜单中选择DHCP或PPPoE. 4.完成地址配置。 ·对于手动的地址,输入接口的IP地址与掩码 ·对于DHCP地址,点击DHCP并进行任何需要的设置 ·对于PPPoE地址,点击PPPoE后输入用户名与密码 有关接口设置的配置,参见FortiGate在线帮助或FortiGate 使用手册。 6. 点击“OK”确认 重复以上步骤,对每个接口进行配置。 注意:如果您想更改连接接口的IP地址,您必须使用新的地址通过网 页浏览器重新连接。浏览http://后跟接口新的IP地址。如果接口新的 IP地址是不同的子网,您还需将计算机IP地址更改为与该子网相同的 IP地址。 配置DNS服务器设置 1.进入系统>网络>选项。 2.输入一级DNS服务器的IP地址。 3.输入二级DNS服务器的IP地址。 4.点击“应用”。 添加默认路由 FortiGate设备发送数据包到外部网络(通常指互联网)时,需要配置 添加默认的路由。添加默认的路由也需要定义哪个接口连接到外部网 络。如果与外部网络连接的接口配置使用了DHCP或PPPoE,则不需要 添加默认的路由。 添加默认路由 1.进入路由>静态路由。 2.如果静态路由表格中有默认的路由设置(IP与掩码设置为0.0.0.0.), 点击“删除”图标删除该路由。 3.点击“新建”。 4.设置目标IP地址为0.0.0.0. 5.设置掩码为0.0.0.0.
-
Page 33: 使用命令行接口(Cli
6.设置网关为默认的网关IP地址 7.设置连接到外部网络接口的驱动。 8.点击OK确认。 校验基于web管理器配置 校验访问设置,进入所校验的接口并点击编辑图标。管理访问字段有 检验标识可以确认是否执行了校验。 校验连接 使用以下步骤校验连接: ·访问www.fortinet.com ·从您的邮件帐户收发电子邮件 如果您不能浏览fortinet网站或收发电子邮件,请检查以上步骤确保所 输入的信息正确,再试一次。 使用命令行接口(CLI) 您可以使用命令行接口(CLI)对FortiGate设备进行配置。有关连接到 CLI的详细信息,参见“连接到CLI”。 配置FortiGate设备运行于NAT/路由模式 参考表11中所采集的信息完成以下步骤。 添加或更改管理员命令 1.登录到CLI(命令行接口) 2.更改管理员密码。输入: config system admin edit admin set password <psswrd> 配置接口 1.登录到CLI(命令行接口) 2.设置内部接口的IP地址与掩码为表11中所记录的内部IP地址与掩码。 输入: config system interface edit internal 举例 config system interface... - Page 34 3. 设置外部接口的IP地址与掩码为表11中所记录的外部IP地址与掩 码。输入: config system external edit wan1 举例 config system external edit wan1 设置外部接口使用DHCP config system interface edit wan1 set mode dhcp 设置外部接口使用PPPoE config system interface edit wan1 set mode pppoe set connection enable set username <name_str> set password <psswrd> 4.根据需要使用命令句法模式配置每个接口的IP地址。...
-
Page 35: 将Fortigate设备连接到网络中
默认的路由。 添加默认的路由 设置默认网关IP地址的路由。输入: config router static edit 1 举例 如果默认的网关IP地址是204.23.1.2,该网关连接到端口1: config router static edit 1 校验连接 使用以下步骤校验连接: ·Ping FortiGate设备。 ·浏览基于web管理器的用户界面。 ·从您的邮件帐户收发电子邮件 如果您不能浏览fortinet网站或从您的帐户收发电子邮件,请检查以上 步骤确保所输入的信息正确,再试一次。 至此,FortiGate设备的初始化配置完成。 将FortiGate设备连接到网络中 当您完成Fortigate设备的初始化配置后, 便可以在您的内部网与互联网 之间连接FortiGate设备了。 以下是FortiGate设备中可用的网络连接: 连接Internal接口,可以连接到内部网络。 WAN1接口可以连接到互联网。 WAN是FortiWiFi设备中的无线接口。 DMZ是连接到DMZ网络的接口。 与FortiGate设备建立连接: 1.通过将内部接口连接到hub或交换机,接入内部网络。 2.将外部接口(External)与互联网连接。连接到ISP服务商提供的公共 交换机或路由器。如果您是DSL或有线网络用户,将WAN1接口与内 部网络或您DSL的LAN连接或有线调制解调器连接。 3.DMZ接口是连接DMZ网络的可选接口。 通过DMZ网络,无需在您的内部网络安装服务器,便可以进行从互联... -
Page 36: 配置网络
图10:FortiWiFi-60 NAT/路由模式连接 配置网络 如果FortiGate设备运行于NAT/路由模式,您需要给网络配置路由,使 所有的网络流量都能够流向与网络连接的接口。 对于内部网络,更改与内部网络直接连接的所有计算机与路由器 默认的网关地址为FortiGate内部接口的IP地址。 对于DMZ网络, 更改与您的DMZ网络直接连接的所有计算机与路 由器默认的网关地址为FortiGate设备DMZ接口的IP地址。 对于WAN网络,更改与您的WAN网络直接连接的所有计算机与 路由器默认的网关地址为FortiGate设备WAN接口的IP地址。 对于处于WLAN网络中的FortiWiFi-60/60M设备,更改与您的 WAN网络直接连接的所有计算机与路由器默认的网关地址为 FortiGate设备WAN接口的IP地址。 如果您将FortiGate设备作为内部网络中的DHCP服务器使用, 需要配置 内部网络的计算机使用DHCP。 通过内部网络的计算机连接到互联网,确定连接的FortiGate设备工作 正常。您应该可以连接到任何互联网地址。 透明模式安装 本章介绍了如何安装透明模式下安装FortiGate设备。包括以下内容: ·配置透明模式的准备 ·使用基于web管理程序 ·使用命令行接口(CLI) ·将FortiGate设备连接到网络中 注意:ADSL接口只有在使用FortiGate-60ADSL设备运行于NAT/路由 模式时才有效。将模式切换为透明模式后改接口不生效。 V. 3.0 MR1 FortiGate-60系列以及 FortiGate-100A设备安装手册 01-30001-0266-20060410... -
Page 37: 配置透明模式的准备
配置透明模式的准备 参考表13的信息定制透明模式设置。 以下三种方法均可配置透明模式: ·基于web管理程序的GUI ·命令行接口(CLI) 根据配置,访问与设备的复杂性与您惯用的接口类型选择配置透明模 式的方法。 表13:透明模式设置 管理员密码: 管理IP DNS设置 使用基于web的管理器 您可以使用基于web的管理器完成FortiGate设备初始化配置以及设置 功能选项。 有关连接到基于web的管理器信息,参见“连接到基于web的管理器”。 初次连接到FortiGate设备时,默认操作模式是NAT/路由模式。 使用基于 web 的管理器切换到透明模式 1.进入系统>状态。 2.点击“操作模式”选项旁边的的“更改”。 3.在操作模式列表中选择透明(Transparent)模式。 4. 输入表13中收集的管理IP/掩码地址与默认网关地址。 5.点击应用。 无需与基于web的管理器重建建立连接。点击应用后,配置更改即可 生效,您可以进入系统面板对更改为透明模式下的FortiGate设备进行 校验。 配置DNS服务器设置 1.进入系统>网络>选项。 2.输入一级DNS服务器的IP地址 · IP: · 掩码: · 默认网关: 管理IP地址与掩码对于您所管理的FortiGate设备来讲 必须是有效的网络地址。如果FortiGate设备需要连接 到路由器后才能到达管理计算机,那么需要添加默认 的网关。... -
Page 38: 使用命令行接口(Cli
3.输入二级DNS服务器的IP地址 4.点击应用。 使用命令行接口(CLI) 除了使用基于web的管理器,您也可以使用命令行接口(CLI)对 FortiGate设备进行初始化配置, 表13中的收集的信息,可以协助完成以下操作。 使用CLI更改为透明模式 1.登录到CLI 2.切换到透明模式。输入: config system settings set opmode transparent set manageip <address_ip> <netmask> set gateway <address_gateway> 几秒后,显示以下信息: Changing to TP mode 3.登录页弹出时,输入以下命令: get system settings CLI显示FortiGate设备的状态包括管理IP地址与掩码: opmode : transparent manageip : <address_ip><netmask> 您需要校验DNS服务器设置的正确性。DNS设置是沿用NAT/路由模式 的,对于透明模式可能并不正确。使用表13信息配置DNS服务器设置。 校验DNS服务器设置... -
Page 39: 将Fortigate设备连接到网络
到基于web的管理器。键入HTTP://加新的IP地址。如果您通过一个 路由器连接到管理接口,请确认是否在管理IP默认的网关字段添加了 路由连接的网关。 将FortiGate设备连接到网络 完成设备初始化配置,便可以将FortiGate连接到您的内部网络与互联 网之间,或是通过DMZ接口连接到其它网络中。 运 行 于 透 明 模 式 下 FortiGate-60M 以 及 FortiGate-60ADSL 设 备 的 Modem 连接不可用。 与透明模式运行下的FortiGate设备连接 1.将内部端口与连接到内部网络的网络集线器(hub)或交换机连接。 2.将外部端口与连接到您外部网络的网络集线器 (hub) 或交换机连接。 连接到ISP服务商的公共交换机或路由器。 3.根据需要,将DMZ接口连接到hub或交换机。 校验连接 使用以下操作校验连接: ·Ping FortiGate设备 ·登录到基于web的管理器 ·从您的邮件帐户收发电子邮件 如果您不能够正常浏览网站或收发电子邮件,检查以上步骤确定输入 的信息正确,然后再试一次。 图11:FortiGate-60透明模式连接 V. 3.0 MR1 FortiGate-60系列以及 FortiGate-100A设备安装手册... -
Page 40: 下一步
服务器同步自动校准时间。 设置日期与时间 1.进入系统>状态。 2.系统信息>系统时间菜单选项下,点击“更改”。 3.点击“刷新”显示当前的FortiGate系统日期与时间。 4.从时区(Time Zone)列表中选择时区。 5.可选择“自动”选项自动调整夏令时。 6.点击“设置时间”,设置FortiGate系统日期与时间。 7.设置时,分,秒,月,日,年。 8.点击OK确认。 注意:如果您选择了根据夏令时自动调整时间,系统的时间必须在夏 令时结束后手动重新调整。 使用NTP设置FortiGate设备的日期与时间 1.进入系统管理>状态。 2.系统信息> 系统时间选项下,点击更改。 3.选择“与NTP服务器保持同步”,配置FortiGate使用NTP自动设置系统 时间与日期。 4.输入NTP服务器的IP地址与域名, 便于FortiGate设备自动设置时间与 日期。 5.注明FortiGate设备与NTP服务保持时间日期同步校准的频率。 6.点击OK确认。 FortiGate设备注册 FortiGate设备安装完成后,访问http://support.fortinet.com并点击“产品 注册”进行设备注册。 输入您的联系方式与所购买的FortiGate设备序列号进行注册。您可以 在注册栏中对所购买的全部设备进行同时注册,而无需重复输入联系 信息。 通过FortiGate设备注册,您将接收到Fortinet公司发布的病毒与入侵检 测等的更新并确保您能够访问Fortinet技术支持。 管理员使用手册 有关FortiGate设备的配置,监控与维护 V. 3.0 MR1 FortiGate-60系列以及 FortiGate-100A设备安装手册 01-30001-0266-20060410... -
Page 41: 更新病毒防护与Ips特征
更新病毒防护与IPS特征 您可以配置FortiGate设备连接到FortiGuard Distribution Network进行病 毒防护升级,反垃圾邮件与IPS攻击的定义更新。 FDN是遍及全世界范围的FDS服务器网络。 当FortiGate设备连接到 FDN,根据就近原则,所有的FortiGate设备根据设备配置中的时区中 相隔位于最近时区的FDN进行划分。 通过基于web的管理器或CLI,您可以更新病毒保护与IPS特征。设备 在接收更新之前,需要先登录Fortinet网站进行注册。有关FortiGate设 备注册的详细信息,参见“FortiGate设备注册”。 FortiGate设备注册后,校验是否能够与FDN连接: ·检查FortiGate设备的系统时间是否正确。 ·登录基于web管理程序,在FortiGuard Center选项中点击“刷新”。 如果您不能连接到FDN,检查注册FortiGate设备步骤是否正确后,再 试一次连接;或参见“添加替代的FDN服务器”。 使用基于web的管理器更新病毒防护与IPS特征 FortiGate设备注册完成后, 您可以使用基于web的管理器更新病毒防护 与IPS特征。FortiGuard 中心将发送推进式更新,您需要设置接收更新 的IP地址,以及指定更新的时间频率如每日、每周或隔小时。 更新病毒防护定义与IPS特征 1.进入系统管理>维护> FortiGuard中心. 2.点击“立即更新”,进行病毒防护更新。 如果与FDN连接良好,基于web的管理器显示类似以下的信息: Your update request has been sent. Your database will be updated in a few minutes. Please check your update page for the status of the update. - Page 42 注意:您也可以从基于web管理器更新病毒定义。 使用CLI接口更新IPS特征。使用以下步骤更新IPS特征: 使用CLI更新IPS特征 1.登录到CLI 2.键入以下CLI命令: configure system autoupdate ips set accept-recommended-settings enable 制定病毒防护与IPS更新时间 使用基于web的管理器或CLI制定定期、自动更新病毒防护与IPS特征。 使用基于web的管理器制定更新时间 1.进入系统管理>维护> FortiGuard 中心。 2.点击“制定更新”的功能框。 3.选择以下的更新时间之一并下载更新 Every (每天)24小时之间。选择每次更新间隔的时间。 Daily(每天)您可以指定每天检查更新的时间。 Weekly (每周)您可以指定每周检查更新的时间。 4.点击应用。 FortiGate设备将根据新指定的更新时间执行接下来的更新。 只要FortiGate设备执行所制定时间进行更新,更新事件均将被记录都 事件日志中。 使用CLI制定更新时间 1.登录CLI。 2.键入以下命令: config system autoupdate schedule 举例 config system autoupdate schedule 添加替代的FDN服务器...
- Page 43 1.进入系统管理>维护> FortiGuard中心。 2.选中“使用替代FDN服务器地址”的功能框。 3.键入有效的FortiGuard 服务器域名或IP地址 4.点击应用。 FortiGate设备检测与代理FDN服务器的连接。 如果FDN设置更改为“连接”状态,说明FortiGate设备与替代FDN服务 器建立了连接。 如果FDN保持“无法连接”状态,说明FortiGate设备不能与替代FDN建 立连接。请检查是否是FortiGate配置或网络配置设置阻碍了FortiGate 设备与替代FDN服务器的连接。 使用CLI添加替代FDN服务器 1.登录CLI。 2.键入以下命令: config system autoupdate override set address set status V. 3.0 MR1 FortiGate-60系列以及 FortiGate-100A设备安装手册 01-30001-0266-20060410...
-
Page 44: 配置Modem接口
配置modem接口 除了FortiGate-60ADSL设备其余FortiGate-60系列设备中的modem接口 都是可用的。 以下是基于web管理器,如何配置FortiGate-60M设备的modem接口, 以及通过CLI配置FortiGate-60以及FortiWiFi-60 modem接口。 FortiGate-60系列设备在NAT/路由模式下支持冗余或单机modem接口。 冗余模式下,当Ethernet接口不可用的情况下,modem接口自动从 所选的Ethernet接口承接连接。 单机模式下,modem接口是FortiGate设备到互联网之间的连接。 以上两种配置模式下连接ISP时, modem接口可以自动对三个帐户进行 拨号直到其中一个连接到ISP。 本章包括以下内容: 设置modem接口模式 配置modem设置 单机模式下,连接与断开与modem的连接 配置FortiGate-60以及FortiWiFi-60的modem设置 添加ping服务器 对modem连接添加防护墙策略 设置modem接口模式 Modem接口可以运行于两种模式: 冗余模式 单机模式 冗余模式配置 冗余modem接口作为Ethernet接口的备用接口,如果Ethernet接口断开 与网络的连接,modem接口将自动拨号配置的帐户。当modem与一个 拨号帐户连接时,FortiGate设备自动将发送到Ethernet接口的IP数据包 发送到modem接口。Modem接口代连接的过程中,设备将不断对 Ethernet接口发出ping的命令查看Ethernet接口恢复使用的时间。 当Ethernet接口重新连接到网络中时,FortiGate设备将断开与modem接 口的连接,切换回Ethernet接口的连接。 配置FortiGate-60M设备的冗余modem连接 1. 进入系统>网络>modem。 2. 点击启动modem。 3. 选择冗余模式。 4. 在冗余接口列表,选择将Modem作为Ethernet接口的备用接口。 5. -
Page 45: 单机模式配置
通过CLI配置FortiGate-60与FortiWiFi设备 1. 登录CLI。 2. 输入以下命令配置冗余modem: config system modem set status enable set status mode redundant 单机模式配置 单机模式下,您可以手动设置modem连接到拨号帐户。Modern接口将 作为与互联网的首选连接。FortiGate设备通过modem接口路由数据包, 该接口将成为与拨号帐户的永久连接。 如果到拨号帐户的连接失败,FortiGate设备modem将自动重拨号码。 重拨次数可以在配置中设置,或直至连接到该帐户。 单机模式下,modem接口将代替外部Ethernet接口。您必须也需要对 modem接口以及其它FortiGate接口之间的连接配置防火墙策略。 注意:不要对代替Ethernet接口的modem接口添加任何路由。 注意:不要对代替Ethernet接口的modem接口与其它接口之间的连接 添加防火墙策略。 运行于单机模式的FortiGate-60M设备 1. 进入系统>网络>Modem。 2. 根据需要配置其它modem设置。 查看拨号帐户的信息是否正确。 3. 对通过modem接口的连接配置防火墙策略。 4. 点击“拨号连接”。 FortiGate设备依次对每个拨号发起连接直至modem连接到ISP。 使用CLI操作运行于单机模式 1. 登录CLI。 2. - Page 46 配置modem设置 配置modem设置,以便FortiGate设备modem连接到ISP拨号帐户。您可 以配置modem最多连接三个拨号帐户。您也可以启动或撤消FortiGate 设备modem支持,配置modem拨号帐户并选择modem作为设备哪个接 口的冗余。 图12:modem设置(单机与冗余模式) 启动Modem Modem状态 拨号连接/挂断 模式 自动拨号 冗余 请求时拨号 闲置超时 等待时间 重拨次数 选中启动功能框,启动FortiGate设备modem设置。 Modem的状态显示:“未激活”,“连接中”,“已连接”, “断开连接”或“挂断”。(只适用于单机模式) 点击拨号连接,自动连接到一个拨号帐户。如果与 modem建立了连接, 点击“挂断”断开与modem的连接。 选择独立或冗余模式。独立模式下,modem是一个独 立的接口。冗余模式下,modem作为在选择以太网接 口后的备用设备。 (只适用于独立模式)如果失去连接或FortiGate重新 启动,选择自动拨号modem。 “请求时拨号”与“自动 拨号”不能同时选择。 (只适用于独立模式)点击以太网接口,modem作为 备用。 (只适用于独立模式)当数据包路由到modem接口 时,点击拨号modem。闲置超时后,断开与modem的 连接。“请求时拨号”与“自动拨号”不能同时选择。 (只适用于独立模式)输入闲置超时的间隔时间。如 果保持在设定的间隔时间内没有连接活动,将断开与 modem的连接。 (只适用于冗余模式)主接口恢复之后,modem接口 将转为主接口, FortiGate设备等待的时间 (1到60秒) 。 缺省的等待时间是1秒。如果发现SecPath F1800-AW 设备在主接口与modem接口之间重复装换,设置较高...
-
Page 47: 对Fortigate-60与Fortiwifi-60设备配置Modem
拨号帐户 电话号码 用户名 密码 Modem设置只有在NAT/路由模式配置使用使用。 配置modem设置 1. 进入系统>网络>Modem。 2. 选中“启动modem”功能框。 3. 更改拨号连接的设置。 4. 输入拨号帐户1的设置。 5. 如果有多个拨号帐户,输入电话号码、用户名以及帐户2与帐户3 的密码。 6. 点击“应用”。 单机模式下,建立以及断开与modem的连接 连接到拨号帐户 1. 进入系统>网络>modem。 2. 选中“启动modem”功能框。 3. 确认拨号帐户中的信息输入正确。 4. 如果更改了设置,点击“应用”。 5. 点击“立即拨号”。 FortiGate设备依次发起对每个帐户的连接,直至与ISP建立连接。 未激活 激活 检验框呈绿色显示表示激活状态下的拨号帐户。 分配到modem接口的IP地址与掩码。进入系统>网络>接口,校验IP地 址与掩码。 断开modem连接 使用以下步骤断开modem与拨号帐户的连接。 1. 进入系统>网络>modem. 2. - Page 48 表12:CLI命令 altmode {enable|disable} auto-dial {enable|disable} connect_timeout <seconds> dial-on-demand {enable|disable} holddown-timer <seconds> idle-timer <minutes> interface <name> mode <mode> passwd1 <password_srt> passwd2 <password_srt> passwd3 <password_srt> peer_modem1 {actiontec|ascendTNT|generic} 关键字与命令 启动PPP设置。 如果连接断开, 或FortiGate设备重 启时启动modem自动拨号。 必须将dial-on-demand mode 设置为standalone。 设置连接超时(30到255秒)。 当数据包路由到modem接口时启 动modem拨号。 在idle-timer设定的 时间之后, 断开modem连接。 必须 disable standalone。...
- Page 49 peer_modem2 {actiontec|ascendTNT|generic} peer_modem3 {actiontec|ascendTNT|generic} phone1 <phone-number> phone2 <phone-number> phone3 <phone-number> redial <tries_interger> status {enable|disable} username1 <name_str> username2 <name_str> username3 <name_str> 举例说明: config system modem set action dial set status enable set holddown-time 5 set interface wan1 set password1 acct1passwd set phone1 1234567891 set redial 10 及FortiWiFi-60M设备。...
-
Page 50: 对Modem连接添加防火墙策略
set username1 acct1user 添加 Ping 服务器 Modem在冗余模式下发生路由故障时,需要添加ping服务器。用来确 定到Ethernet接口的连接性。 对接口添加ping服务器 1. 进入系统>网络>接口。 2. 选择接口并点击“编辑”。 3. 对与接口连接的网络中的下一个中继路由的IP地址添加ping服务 器。 4. 选中“启动”功能框。 5. 点击OK保存设置更改。 失效网关检测 FortiGate设备使用失效网关检测功能发送ping命令到Ping服务器的IP 地址查看FortiGate设备是否能够连接到该IP地址。 更改失效网关检测的配置可以控制FortiGate设备是如何确认与添加到 接口的ping服务器连接性。 有关在接口添加ping服务器的详细信息, 参 见上文。 修改失效网关检测设置 1. 进入系统>网络>选项。 2. 在“检测间隔”字段,输入FortiGate设备检测与ping目标连接性的频 率。 3. 在“失效检测”字段, 输入在FortiGate设备认为网关已经不再起作用 之前连接检测失效的次数。 4. 点击“应用”。 对Modem连接添加防火墙策略... -
Page 51: 配置Adsl接口
配置ADSL接口 只有FortiGate-60ADS设备设置有ADSL modem接口。 本章是有关配置FortiGate-60ADSL设备ADSL接口的内容,尤其是 ADSL接口与其它接口之间不同的配置步骤。 详细信息, 参见FortiGate 设备管理员使用手册 FortiGate-60ADSL设备包含一个非对称数字用户线(ADSL)接口。该 接口能够提供比标准电话线modem更高的通信速度。 注意:ADSL接口只有在FortiGate设备运行于NAT/路由模式下生 效。更改为透明模式将撤消ADSL接口的功能。 使用web管理器配置ADSL接口 以下描述是有关配置ADSL接口与ISP服务商连接的步骤。您需要获得 您ADSL ISP的有关信息。 配置基本ADSL设置 ADSL接口与任何其它FortiGate设备物理接口配置类似。根据ISP要求 使用的寻址模式提供配置信息。 如果设置使用IPOA或EOA的静态寻址 模式, 需要输入IP地址与掩码。 如果使用动态寻址模式, 您需要根据“在 ADSL接口配置使用DHCP”或“配置ADSL接口使用PPPoE或PPPOA”的 配置步骤填写配置信息。 进入系统>网络>接口,点击“新建”或点击现有接口的编辑图标。在寻 址模式,点击IPoA或EoA。 寻址模式 网关 。 点击ISP指定的寻址模式。 基于ATM的IP,输入ISP提供的IP地址与掩码。 IPOA 基于ATM的Ethernet,通常也称为桥模式。输入ISP提 供的IP地址与掩码。 参见“配置ADSL接口使用DHCP”。 DHCP 参见“配置ADSL接口使用PPPoE”。 PPPoE 参见“配置ADSL接口使用PPPoA”。... -
Page 52: 配置Adsl接口使用Dhcp
连接到服务器 虚电路标识 MUX类型 配置ADSL接口使用DHCP 如果您配置接口使用DHCP,FortiGate设备将自动发送一个DHCP请 求。 进入系统>网络>接口,点击“新建”或点击现有接口的编辑图标。在寻 址模式下,选择“DHCP”。 图13:ADSL接口 DHCP设置 管理距离 从服务器获取 默认网关 代理内部DNS 连接到服务器 配置接口使用PPPoE或PPPoA 如果您配置接口使用PPPoE,FortiGate设备将自动发送一个PPPoE请 求。如果您配置FortiGate设备处于离线状态或FortiGate设备不发送 PPPoE请求,您可以撤消“连接到服务器”功能框选项。 FortiGate设备支持许多PPPoE RFC功能(RFC 2516)包括未编号IP、 初始发现超时以及PPPoE有效发现终止(PDAT)。 进入系统>网络>接口,点击“新建”或点击现有接口的编辑图标。在寻 址模式下,选择“PPPoE或PPPoA”。 图14:ADSL接口 PPPoE或PPPoA设置 启动“连接到服务器”,那么接口可以自动建立连接。 如果您配置接口处于离线状态,可以撤消该选项。 输入ISP提供的VPI与VCI值。 选择MUX类型:LLC Encap或VC Encap。ISP需要提 供该信息。 输入从DHCP服务器获取默认网关的管理距离。管理距离可以设 置为1到255之间的任何整数,表示在有多个路由同时到达同一目 的时,相对具有优先性的路由。 启动“从服务器自动获取默认”,从DHCP服务器自动获取默认的 网关IP地址。默认的网关将被添加到静态路由表中。 启动“代理内部DNS”,从DHCP服务器获取DNS地址,而不是从 DNS页面获取DNS服务器的IP地址。进入系统>网络>选项,您应... - Page 53 输入以下信息,并点击“确认”。 用户名 密码 未编号IP 初始发现超时 初始PADT超时时间 验证 管理距离 从服务器获取默认 网关 代理内部DNS 连接到服务器 状态 输入ISP服务商提供的PPPoE或PPPoA帐户用户名。 输入ISP服务商提供的PPPoE或PPPoA帐户密码。 指定接口的IP地址。 如果您的ISP服务商分配给您一批IP 地址,使用其中的一个。否则,该IP地址可能与其它接 口的IP地址相同或作为任何其它IP地址。 重新开始一个PPPoE有效发现之前的等待时间。设置初 始发现的时间为0将在任何时间下都不会终止会话。 如果闲置的时间超出了设置的时间,PPPoE将被关闭。 PADT功能需要ISP服务商的支持。设置初始PADT的时 间为0将在任何时间下都不会终止会话。 选择ISP使用的验证方法: PAP,CHAP,MACHAPv1,MSCHAPv2或 Auto。 输入默认从PPPoE服务器获取默认网关的管理距离参 数。管理距离可以设置未1到255之间的整数,指定在多 个路由到相同目的地的情况下选择一条当对较为优先 的路由。管理距离越小表示其路由资源越值得信赖。默 认网关的管理距离设置为1。 启动“获取默认网关”从PPPoE服务器获取默认的网关的 IP地址。默认的网关将被添加到静态路由表中。 启动“代理内部服务器”(Override internal DNS)使用从 DHCP获取的DNS地址代替DNS页面中DNS服务器的IP 地址。 启动“连接到服务器”(Override internal DNS)那么接口 将自动试图与DHCP服务器建立连接。如果您配置接口...
-
Page 54: 使用Cli配置Adsl接口
使用CLI配置ADSL接口 ADSL接口与任何其它FortiGate设备物理接口配置类似。根据ISP要求 使用的寻址模式提供配置信息。 本节所示设置,是配置ADSL接口所特有的,在其它FortiGate技术文件 中没有描述。 许多适用于一般接口的设置也适用于ADSL接口。 这里只 对您需要配置与ISP建立通信的设置信息进行了说明。 有关接口设置的 全部列表,参见FortiGate 命令句法 config system interface edit adsl set ip 10.10.10.1 255.255.255.0 set mux_type vc-encaps …….. 这些关键字与变量是ADSL接口配置特有的。 而且这些变量也只有在edit 关键字与变量 pppoe-mtu <mtu_bytes> gwaddr<gw_ipv4> mux_type {11c-encap | vc-encaps} 适用于ADSL接口的常规关键字与变量。 联系您的ISP获得有关配置这些设置的信息。 关键字与变量 auth-type <ppp_auth_method> 其它信息。 设备... - Page 55 connection {enable | disable} defaultgw {enable | disable} disc-retry-timeout <pppoe_retry_seconds> dns-server-overrise {enable | disable} edit <interface_name> gwdetect {enable | disable} idle-timeout <pppoe_timeout_seconds> ip <interface_ipv4mask> 只有mode设置为pppoe时, auth-type可用。 启动或撤消与一个PPPoE或 disable PPPoA服务器连接对接口配 置使用PPPoE或PPPoA。 只有当设备运行于NAT/路 由模式,并且mode是dhcp, pppoe或pppoa时,该功能才 可用。 启动或撤消接口作为默认网 disable 关。 设置初始发现超时。重新启 动一个PPPoE发现之前等待 的时间。 将disc-retry-timeout 设备为0,表示撤消该功能。...
- Page 56 Ipunnumbered <unnumbered_ipv4> mode <interface_mode> mtu<mtu_bytes> 对PPPoE或PPPoA启动IP未 没有默认值 编号模式。注明从接口借用 的IP地址。该IP地址可以与 其它接口的地址相同,或是 其它任何地址。未编号的地 址可以用于设置了PPPoE或 PPPoA的接口,在这样的接 口中不没有唯一性的本地地 址。 如果您的ISP提供了一个 IP地址段,您可以将这些地 址中的任意一个添加在未编 号IP中。 对接口配置连接模式。只有 当设备运行于NAT/路由模 式,该功能才可用。 dhcp 配置接口从DHCP服务 器获取IP地址。 pppoe 配置接口从PPPoE服务 器获取IP地址。 pppoa 配置接口从PPPoA服务 器获取IP地址。 在 ADSL EoA 桥 模 式 下,对接口配置静态IP 地址。 ipoa 在ADSL IPoA路由模式...
- Page 57 mtu-override {enable | disable} padt-retry-timeout <padt_retry_seconds> password <pppoe_password> status {down | up} username <pppoe_username> IPOA或EOA举例 以 下 举 例 中 说 明 在 IPOA 模 式 下 IP 地 址 为 10.10.10.1 , 掩 码 为 255.255.255.0使用PPPoE定义VPI与VCI设置。如果将mode更改为eoa, 该例子同时适用。 config system interface edit adsl set mode ipoa set ip 10.10.10.1 255.255.255.0...
-
Page 58: 对Adsl连接添加防火墙策略
置。 config system interface edit adsl set mode dhcp set mux-type 11c-encaps set connection enable PPPoE或PPPoA举例 以下是使用默认的VCI与VPI设置与ISP连接所需设置举例。如果您将 mode关键字更改为pppoa,该例子同样适用于PPPoA设置。 config system interface edit adsl set mode pppoe set username user1 set password hard_to_guess set suth-type pap set mux-type pap set connection enable 对ADSL连接添加防火墙策略... -
Page 59: 无线网络的使用
无线网络的使用 本章是针对FortiWiFi-60设备的说明。 有线网络中,计算机设备是通过线缆联接传输信息的。而无线网络中 是通过无线电波来传输信息。无线电波在空气中的数据传输受很多因 素的影响,在搭建无线网络时需要将这些因素考虑在内。 本章包括以下内容: 建立无线网络 无线网络安全 FortiWiFi-60的操作模式 设置FortiWiFi-60作为访问点 建立无线网络 无线网络的终极简单的形式是,一个无线网络是一个无线设备与一个 访问点之间的通信。一个访问点(AP, asscess point)是能够在无线网 络中提供通讯集点的设备。AP与无线设备使用相同的无线频率。 FortiWiFi-60作为一个AP,将所有的无线用户集中在同一个子网,通 过使用恰当的防火墙策略与路由,无线用户可以与内网或外网(例如 互联网)中的用户通信。 图15:FortiWiFi-60设备作为一个连接点(AP) AP定位 当FortiWiFi-60设备放置在网络中AP,最主要的考虑因素是如果对所 有的用户提供稳定强烈的信号。强的信号可以保证较快的连接速度与 高效的数据传输。信号弱意味着数据传输出错的几率较大,并且需要 重复发送信息,数据传输的速度也就慢。 以下是配置FortiWiFi-60设备作为AP需要考虑的几方面: 物理障碍物可以阻挡无线电信号的传播。固体例如墙壁、家具或 人可以吸收消弱无线电信号。所以,注意办公室内的物理屏障可 以减弱信息。如果有交叉的物理隔断,会有一些死角接收不到信 V. 3.0 MR1 FortiGate-60系列以及 FortiGate-100A设备安装手册 01-30001-0266-20060410... -
Page 60: 无线电频率对接
号。 将FortiWiFi-60作为访问点,放置在空间中中心且突出的位置,避 免放置在拐角。 建筑物或大厦使用的建筑材料也可以削弱无线电信号。混凝土或 金属建筑的墙壁也影响信息的强弱。 无线电频率对接 802.11标准使用的频率是2.4到2.483GHz。 当其它设备正常运行时使 用的频率与FortiWiFi-60作为访问点发送的频率相同时, 就会发生无线 电频率干涉。无线电装置例如2.4GHz无线电话、微波炉与蓝牙设备干 扰无限网络中的数据包传输。 避免无线电频率干涉的方法: 将这些设备从用户使用的无线网络区域移开。一个如果蓝牙启动 的鼠标可能会导致数据传输的中断。 将FortiWiFi-60 AP与无线设备同诸如微波炉与无线电话这样工具 保持至少10英尺的距离。 如果您必须使用无线电话,选择一个频率不在2.4GHz频率范围内 的。 多考虑FortiWiFi-60作为访问点的位置,加强信号的传播。较弱的 信号,与较慢的数据传输是FortiWiFi设备与其它无线设备竞争信 号导致的。 设置用户与FortiWiFi-60 AP使用特定的频道,可以加强信号的质 量。 使用多个访问点 如果由于办公间的布局或建筑材料不能避免上述可能发生导致信号弱 传输慢的结果, 您可以应用多个FortiWiFi-60作为访问点加强信号的传 播。 图16所示怎样在一个固定形状的办公室空间部署FortiWiFi-60设备 传播信号。 图16:使用多个AP提供连续稳定的信号 以上办公室的结构图,洗手间、楼梯间与电梯间处于建筑物中心,这 样使用一台FortiWiFi-60作为AP很难实现高效的稳定的信号传播。电 梯轴与与洗手间的金属隔断削弱了信号。但是,将FortiWiFi-60放置在 V. 3.0 MR1 FortiGate-60系列以及 FortiGate-100A设备安装手册... -
Page 61: 无线安全
办公室拐角相对的位置,可以提供最大的信号覆盖范围。 无线安全 无线电波载无线设备与访问点之间传输提供无线设备与网络服务器之 间的链接。无线网络通过无线电传输信息数据,无线电是公共传输介 质,所以风险比较大。802.11标准中包括安全选项,防止您的信息被 不必要的资源所截取。无线等效协议(WEP)与WPA(WiFi Protected Access)是现行使用的无线加密技术。无线加密只有用字无线设备与 访问点之间。在访问点(AP)发送信息之前将其加密。FortiWiFi-60 设置对以上两种技术均支持。 无线等效协议(WEP) WEP安全技术在无线设备与AP之间应用加密密钥。对于WEP安全技 术,无线设备与AP必须使用相同的加密密钥,而且需要无线用户与管 理员手动输入密钥。密钥激活后,无线设备通过加密密钥使用RSA RC4密码对每帧数据加密。 WEP无线安全技术也存在缺陷。WEP密钥是静态的,必须在无线设备 与AP中手动定期更改密钥。在一个小型的公司,或者拥有很少用户与 AP的网络中,定期更改WEP密钥还不算什么问题。但是,在一个多用 户与AP的网络,定期更改WEP密钥在网络管理中成为一项负担,而且 潜在的引发错误。那么这样下去,密钥更改可能几个月甚至几年发生 一次,给黑客很多大量的时间获取密钥访问网络。 在小型无线网络环境中,激活WEP安全密钥将会减少外部入侵进入您 网络的机会。 但是, 如果能够定期更改WEP密钥, 至少每星期或每月, 无线网络将更加安全。 WPA的发展将要代替WEP标准,提供更高层次的无线网络数据保护。 WPA能够提供两种认证方法,通过802.1X验证或预先共享密钥。 802.1X通过一个EAP服务器验证用户,例如一个RADIUS服务器在用 户连接到网络之前对该用户进行验证。加密密钥不定期的更改减少了 黑客利用密钥入侵网络的机会。 在网络搭建时,RADIUS服务器不是一个可行的选项,WPA也能够提 供使用暂时密钥集成协议(TKIP)利用预共享密钥验证用户。使用 TKIP,加密密钥在用户连接到无线网络时对其实行再加密。这样,对 每个数据包就建立了一个唯一的密钥。能够更进一步确保数据的完整 性,一个数据完整性代码(MIC:Message Integrity Code)将在每个数 据包中合并。8位数据完整性代码通过从每帧数据中的MAC地址与数 据加密并提供更安全的数据包传输。... -
Page 62: 其它的无线网络安全方式
其它的无线网络安全方式 FortiWiFi-60设备具有其它措施保障无线网络的安全。 您可以屏蔽一些 不必要的用户对您无线网络的访问。通过设置几项额外的配置,确保 您的网络以及信息的安全。 MAC地址过滤 为了加强无线网络的安全,在FortiWiFi-60设备中可以启动MAC地址 过滤。通过启动该功能,您可以定义无线设备使用系统MAC地址访问 网络。当一个用户试图访问无线网络时,FortiWiFi-60设备根据您建立 的MAC地址列表查看用户的用户的MAC地址。如果列表中没有用户 地址的记录,用户对无线网络的访问将被拒绝。MAC地址过滤功能对 黑客使用随便的MAC地址访问网络或骗取MAC地址访问网络的机 率。 服务设置标识符(SSID) 服务设置标识符(SSID)是无线网络中所有用户共享的网络名称。无 线用户应该设置其计算机设备与播放其网络名称的网络连接。为了网 络安全,不要将默认的“fortinet”作为网络名称。 网络名称播放可以使无线用户找到使用网络。 FortiWiFi-60设备中的功 能选项可以设置不播放SSID。这提供了额外的安全保护。如果您配置 所有的无线用户使用正确的SSID,则不需要启动SSID播放。 撤消SSID 1. 进入系统>无线>设置。 2. 在SSID选项中选中“撤消”功能框。 3. 点击OK确认。 FortiWiFi-60设备操作模式 FortiWiFi-60设备在无线网络中具有两种操作模式:访问点(AP)与 用户(Client)。 访问点(AP)模式 FortiWiFi-60设备运行于AP模式时,作为一个无线用户能够连接到的 访问点,通过该访问点无线用户发送与接收信息。该模式下,多个无 线网络用户在与FortiWiFi-60没有建立物理连接的情况下访问网络。 FortiWiFi-60能够连接到内部网络并作为防火墙设备在网络中生效。 AP模式是设备默认的模式。 图17:运行于AP模式的FortiWiFi设备 V. 3.0 MR1 FortiGate-60系列以及... -
Page 63: 用户模式
用户模式 FortiWiFi-60设备运行于用户模式时, 作为一个数据接收设备从其它访 问点接收数据。该设置可以使您利用无线网络协议从没有有线设施的 位置连接到远程用户。 举例说明,仓库中,货物的发送与接收分别在库中对角的位置,仓库 中的环境不适合搭建有线。 这个时候,FortiWiFi-60设备可以支持有 线用户使用四个Ethernet接口, 连接到其它无线网络中的访问点 (AP) 。 该连接可以使用802.11无线标准作为主干网与有线网络中的用户连 接。 图18:运行于用户模式的FortiWiFi-60/60M设备 更改操作模式 1. 进入系统>无线>设置。 2. 在操作模式中,点击“更改”。 3. 选择操作模式,并点击“更改”。 V. 3.0 MR1 FortiGate-60系列以及 FortiGate-100A设备安装手册 01-30001-0266-20060410... -
Page 64: 在网络中配置Fortiwifi-60设备作为访问点(Ap
4. 点击OK确认。 注意:IP地址范围必须与子网中接收到的DHCP服务器请求的地 址相匹配。 设置安全选项 设置FortiWiFi-60设备的安全选项,确保对网络的安全进行保护。 设置数据安全 1. 进入系统>无线>设置。 2. 输入SSID。 3. 设置启动或撤消“SSID播放”。 4. 选择“安全模式”。 5. 根据所选择的“安全模式”,输入密钥或预先共享密钥。 6. 点击“MAC过滤”栏目。 7. 启动“MAC过滤”。 8. 输入MAC地址并对每个地址设置无线网络“允许”该地址通过,或 “拒绝”该地址的访问。 输入DHCP服务器的名称。例如,DHCPserver_1。 选中DHCP服务器选项。 除非您配置了远程用户端对WLAN接口使用IPSec VPN连接,设 置为ruglar(常规)。 输入WLAN网络的IP地址范围。例如10.10.80.1到10.10.80.20。 输入您在表9中设置的掩码。 设置域名,例如:www.fortinet.com。 IP地址过期时间。该选项说明地址是未限时或有限时使用。 用于对接口设置几个DNS服务器(包括WIN服务器)。 V. 3.0 MR1 FortiGate-60系列以及 FortiGate-100A设备安装手册 01-30001-0266-20060410... -
Page 65: 配置防火墙策略
置,才能够连接到无线网络。 造成攻击的机会。 配置防火墙策略 FortiWiFi-60设备中带有到互联网连接的WAN接口。通过该接口,您 可以配置内网中有线网络和/或外网中的DMZ接口与无线网络与互联 网连接。 您可以创建防火墙策略控制从WLAN接口到WAN1或WAN2接口的流 量,对无线用户提供安全的互联网访问。 以下是对无线用户(WLAN接口)到互联网(WAN1 接口)之间的流 量创建了防火墙策略, 控制网络流量、 防火墙验证以及默认的“严格型” 内容过滤。 创建防火墙策略 1. 进入防火墙>策略。 2. 点击WLAN到WAN1的蓝色箭头。 3. 点击“新建”。 配置以下设置: 接口/区域源地址 接口/区域目标地址 WAN1 地址名称源地址 地址名称目标地址 时间表 服务 动作 保护内容表 4. 点击“高级选项”。 5. 点击“流量控制”。 6. 根据需要,配置带宽以及流量优先级设置。 7. 点击“OK”。 注意:步骤2与5的设置,同样需要无线网络中的用户作同样的设 注意:强烈建议请不要将这些设置项保留为空,这样容易给黑客... -
Page 66: Fortigate固件
FortiGate固件 Fortinet公司定期更新Fortigate设备固件加强其性能与锁定问题并诊断 的功能。FortiGate设备注册完成后,便可以从fortinet网站的技术支持 中心http://support.fortinet.com 统模块读和写权限的管理员与设备admin用户可以更改FortiGate设备 固件。 本章包括以下内容: 升级为新的固件版本 恢复为旧的固件版本 使用CLI在系统重启过程中安装固件镜像 FortiUSB密钥 在安装前检测新的固件镜像 安装并使用备份的固件镜像(只适用于FortiGate-100A) 注意: 如果FortiGate设备中的固件是较老的版本, 例如FortiOS v.2.50 版,在升级到FortiOS v.3.0版之前请先升级到v.2.80。 升级为新的固件版本 使用基于web的管理器或CLI升级为新的FortiOS固件版本或者同一固 件版本的较新的子版本。 注意:安装固件替代您现行的防病毒与攻击定义。安装固件后,确保 防病毒与攻击定义已经更新。。 详细信息,参见FortiGate 注意:执行以下步骤之前,确认您可以登录使用管理员帐户,或拥有 系统配置读写权限的管理员帐户。 使用基于web的管理器升级固件 1.将固件镜像文件拷贝到您的管理计算机 2.登录基于web的管理器页面 3.进入系统管理>状态. 4.系统选项>固件版本选项下,点击“升级”。 5.输入固件镜像文件的路径与文件名,或点击“浏览”查找文件的位置。 6.点击OK确认。 FortiGate设备上传固件镜像文件、升级到新的固件版本、重新启动并 显示FortiGate登录页面。该操作过程将花费几分钟的时间。 7.登录基于web的管理器。 8.进入系统管理>系统状态,并检查固件版本确认新固件升级成功 9.升级防病毒与攻击定义。有关升级防病毒与攻击定义的详细信息, 参见FortiGate 下载FortiGate设备固件。只有具有对系... -
Page 67: 恢复为旧的固件版本
TFTP服务器的IP地址是192.168.1.168,那么执行以下命令: execute ping 192.168.1.168 5.输入以下命令将固件镜像从TFTP服务器拷贝到FortiGate设备: execute restore image <name_str> <tftp_ip4> <name_str>输入固件镜像名称,<tftp_ip>输入TFTP服务器的IP地址。 例 FGT_3000-v3.0-build183-FORTINET.out , TFTP 服 务 器 的 IP 地 址 是 192.168.1.168,那么输入: execute restore image FGT_3000-v3.0-build183-FORTINET.out 192.168.1.168 FortiGate设备显示以下信息: This operation will replace the current firmware version! Do you want to continue? (y/n) 6.键入y(是)。... - Page 68 FortiGate设备恢复为出厂默认配置。 使用基于web的管理器恢复为旧的固件版本 以下操作将FortiGate设备恢复为出厂默认的配置并删除IPS自定义特 征、网页内容列表、邮件过滤列表以及对替换信息所作的修改。 执行该操作之前,建议您: ·备份FortiGate设备配置。 ·备份IPS自定义特征。 ·备份网页内容与邮件过滤列表。 详细信息,参见FortiGate 恢复为旧的FortiOS版本(例如,从FortiOSv3.0恢复到FortiOSv2.80版 本),从备份的配置文件中,不能恢复旧版本的配置。 注意:新的固件安装后将替代设备现运行的防病毒与攻击定义。新的 固件安装成功后,请下载更新防病毒与攻击定义。 详细信息,参见FortiGate 注意:执行以下步骤,您必须先登录使用管理员帐户,或拥有系统配 置读写权限的管理员帐户。 使用基于web的管理器恢复为旧的固件版本 1.拷贝固件镜像到管理计算机 2.登录到FortiGate基于web的管理器 3.进入系统管理>状态。 4.在系统信息>固件版本菜单项下,点击“升级”。 5.键入固件镜像文件的路径与文件名,或点击“浏览”查找文件。 6.点击OK确认。 FortiGate设备上传固件镜像文件,恢复为旧的固件版本,重新设置配 置并重新启动,同时显示FortiGate登录页面。该操作过程将花费几分 钟时间实现。 7.登录基于web的管理器。 8.进入系统管理>系统状态并检查固件版本,确认固件安装成功。 9.恢复配置。 有关恢复配置的详细信息,参见FortiGate 10.更新防病毒与攻击定义。 有关防病毒与攻击定义更新的详细信息,参见FortiGate 用手册。 使用CLI恢复为旧的固件版本 该操作将FortiGate设备恢复为出厂默认的配置,并删除IPS自定义特 征,网页内容列表,邮件过滤列表以及对替换信息所作的修改。 执行该操作之前,建议您: ·使用命令execute backup ·使用命令execute ·备份网页内容与邮件过滤列表...
- Page 69 例如,如果TFTP服务器的IP地址是192.168.1.168,那么执行以下命令: execute ping 192.168.1.168 5.输入以下命令将固件镜像从TFTP服务器拷贝到FortiGate设备: execute restore image <name_str> <tftp_ip4> <name_str>输入固件镜像名称,<tftp_ip>输入TFTP服务器的IP地址。 例 FGT_3000-v3.0-build183-FORTINET.out , TFTP 服 务 器 的 IP 地 址 是 192.168.1.168,那么输入: execute restore image FGT_3000-v3.0-build183-FORTINET.out 192.168.1.168 FortiGate设备显示以下提示信息: This operation will replace the current firmware version! Do you want to continue? (y/n) 6.键入y。...
-
Page 70: 使用Cli在系统重启过程中安装固件镜像
为以前配置。 11.更新防病毒与攻击定义 详细信息, 参见FortiGate update-now。 使用CLI在系统重启过程中安装固件镜像 该操作可以安装指定的固件镜像并将FortiGate设备恢复为默认的设 置。您可以使用该操作升级为新的固件版本、恢复为旧的固件版本或 重新安装现运行的固件版本。如要执行以上所述操作,您须使用 FortiGate console端口与交叉线连接到CLI。 该操作将FortiGate设备恢复 为出厂默认的配置。 注意:不同的版本的FortiGate BIOS中这一操作略有不同。这些不同将 在向牵涉的步骤中说明。 重启FortiGate设备时,BIOS版本号会在 Console连接的命令行中显示。 执行该操作时,您需要: ·使用RJ-45到DB-9线连接到FortiGate console控制台接口,访问CLI。 ·安装一台您能够从FortiGate内部接口连接到的TFTP服务器。TFTP服 务器应与内部接口处于同一子网中。 执行该操作前,建议您: ·备份FortiGate设备配置 ·备份IPS自定义特征 ·备份网页内容与邮件过滤 详细信息,参见FortiGate 恢复为旧的FortiOS版本(例如,从FortiOSv3.0恢复到FortiOSv2.80版 本),从备份的配置文件中,不能恢复旧版本的配置。 系统重新启动过程中安装固件 1.使用RJ-45到DB-9线与FortiGate console端口连接到CLI。 2.确定TFTP服务器已经运行。 3. 新的固件镜像文件拷贝到TFTP服务器的根目录。 4.确定内部接口与TFTP服务器连接的是同一网络。 5.使用以下操作ping FortiGate设备是否连接到TFTP服务器。例如,如 果TFTP服务器的IP地址是192.168.1.168,执行命令: execute ping 192.168.1.168 6.输入execute reboot命令重新启动FortiGate设备,FortiGate设备显示以... - Page 71 Press any key to display configuration menu... 按任意键中断系统启动。 注意: 3秒内按任意键。如果您没有按下任意键,FortiGate设备继续 重启过程,您须重新登录CLI并重复输入execute reboot命令。 如果您成功中断了重启过程,将显示以下信息之一: ·运行v2.xBIOS的FortiGate设备 Enter TFTP Server Address [192.168.1.168]: 转入步骤 ·运行v3.xBIOS版本的FortiGate设备 [G]: Get firmware image from TFTP server. [F]: Format boot device. [Q]: Quit menu and continue to boot with default firmware.
-
Page 72: Fortiusb 密钥
更改接口地址后, 您可以通过基于web的管理器访问FortiGate设备并恢 复配置。 详细信息,参见FortiGate 恢复为旧的FortiOS版本(例如,从FortiOSv3.0恢复到FortiOSv2.80版 本),从备份的配置文件中,不能恢复旧版本的配置。 FortiUSB 密钥 FortiUSB 密钥在备份配置文件或着安装新的固件镜像方面提供了较 高的灵活性与可操作性。 FortiUSB具有自动安装功能,可以系统重新启动过程中自动安装配置 文件与镜像文件。USB自动安装功能使用存储在FortiUSB密钥中的配 置文件与固件镜像,在系统重新启动时查找并确定是否需要安装这些 文件。如需要,FortiGate设备从FortiUSB中直接将配置文件与固件镜 像文件安装在系统中。 注意:FortiUSB需单独购买。FortiGate设备只支持Fortinet公司售出的 FortiUSB。 从FortiGate设备上插拔FortiUSB 使用以下步骤操作插拔FortiUSB,使FortiGate设备能够识别FortiUSB。 按照操作从FortiGate设备移除FortiUSB,确保USB中存储的文件不被 损坏或非正常性丢失。 注意:如果安插了FortiUSB,FortiGate设备从闪存中启动。如果启动了 USB自动安装功能,设备将检查是否有不同的镜像或配置文件需要安 装。 正确安插FortiUSB密钥 1. 用CLI命令关闭FortiGate设备。 2. 显示以下信息后,将设备断电: The system is halted 3. 将FortiUSB插入USB接口。 4. 将FortiGate设备接电,重新启动系统。 FortiUSB插入FortiGate设备中。 正确移除FortiUSB密钥... - Page 73 统识别FortiUSB从FortiGate设备中拔出。 注意:如果加密固件文件,您只可以保存VPN证书。确保启动了配置 加密程序,那样您可以将VPN证书与配置文件一起保存。 使用基于web的管理器备份FortiGate设备配置 1.进入系统>维护>备份与恢复。 2.将所要备份的配置文件加入USB磁盘列表中。 3.点击“备份”。 如果需要加密配置文件,点击“加密”并输入密码后点击“备份”。该密 码在恢复文件时使用。 使用基于web的管理器恢复FortiGate设备配置 1.进入系统>维护>备份与恢复。 2.从USB磁盘中选出所要恢复的配置文件 3.从列表中选择已经备份的配置文件 如果对配置文件进行了加密,输入密码。 4.点击恢复“恢复” 使用CLI备份配置文件 1.登录到CLI 2.输入以下命令备份配置文件: exec back config usb<filename> 3. 输入以下命令查看配置文件是否备份到了密钥中 Exec usb-disk list 使用CLI恢复配置文件 1.登录到CLI 2.输入以下命令恢复配置文件 exec restore image usb<filename> FortiGate系统回馈以下信息: This operation will replace the current firewear version! Do you want to continue?(y/n) 3.输入y 使用USB自动安装功能...
-
Page 74: 安装固件之前测试新的固件镜像
注意:该功能需要用到不加密的配置文件,配置文件image.out与 fgt_system.conf必须在根目录下。 注意:安装之前,请确定FortiGate设备已经安装了FortiOS v.30 MR 1。 使用基于web的管理器配置USB自动安装功能 1.进入系统>维护>备份与恢复。 2.点击蓝色箭头扩展“高级选项”。 3.选中以下信息: ·如果USB磁盘中有默认的配置文件名,在系统重启时自动升级 FortiGate配置文件。 ·如果USB磁盘中有默认的镜像,在系统重启时自动升级FortiGate固件 镜像。 4.输入配置与镜像的文件名或使用默认的配置文件名 (system.conf) 与 默认的镜像名称(image.out)。 5.点击应用“应用”。 使用CLI配置使用USB自动安装功能 1.登录CLI 2.输入以下命令: config system auto-install set default-config-file <filename> set auto-insatll-config <enable/diable> set default-image-file<filename> set auto-install-image<enable/diable> 3.输入以下命令查看新的固件安装设置: get system statue 配置FortiUSB密钥的其它CLI命令 当您要从FortiUSB密钥中删除文件,或列出密钥中存储的文件,包括... - Page 75 以当前的配置运行使用最初安装的固件镜像。 如果新的镜像运行良好, 您可以使用的“升级为新的固件版本”操作,永久安装使用该镜像。 安装新镜像之前,使用以下操作测试新的固件镜像。执行该操作时, 您需要使用FortiGate console接口与一根交叉线连接到CLI。该操作使 用当前的配置,暂时性的安装新的固件镜像。 执行该操作时,您需要: ·使用RJ-45到DB-9线与FortiGate console端口连接,访问CLI。 ·安装一台您可以通过FortiGate内部接口连接的TFTP服务器。TFTP服 务器应与内部接口处于同一子网。 检测新的固件镜像 1.使用RJ-45到DB-9线与FortiGate console端口连接到CLI。 2.确定TFTP服务器运行。 3.将新的固件镜像拷贝到TFTP服务器的根目录。 4.确认内部接口与TFTP服务器连接的同一网段。 Ping一下FortiGate设备是否连接到TFTP服务器。例如,如果TFTP服务 器的IP地址是192.168.1.168,执行命令: execute ping 192.168.1.168 5.输入以下命令重新启动FortiGate设备: execute reboot 6.FortiGate设备重启时, 按任意键中断系统启动。 FortiGate设备重启时, 显示一系列的系统启动信息: ·运行v2.xBIOS的FortiGate设备 Press Any Key To Download Boot Image. ·运行v3.xBIOS的FortiGate设备 Press any key to display configuration menu. 7.按任意键立即中断系统启动。...
-
Page 76: 安装并使用备份固件镜像
认没有误输入网络中其他设备的IP地址。 显示以下信息: Enter File Name 11.输入固件镜像文件名并按Enter键。 TFTP服务器上传固件镜像到FortiGate设备并显示信息: ·运行v2.x BIOS的FortiGate设备 Do You Want To Save The Image? [Y/n] 键入n ·运行v3.x BIOS的FortiGate设备 Save as Default firmware/Run image without saving: [D/R] 或 saving: [D/B/R] 12. 键入R FortiGate镜像安装在系统内存中,FortiGate设备以当前的配置启动运 行新的固件镜像。 13.您可以使用任何管理帐户登录到CLI或基于web的管理器。 14.在CLI中键入get system status确认新的固件镜像已经安装。 如需要,您可以检测新的固件镜像。 安装并使用备份固件镜像... - Page 77 键中断系统重启,您必须重新登录并再一次输入execute reboot命令。 [G]: Get firmware image from TFTP server. [F]: Format boot device. [Q]: Quit menu and continue to boot with default firmware. [H]: Display this list of options. 输入 G, F, Q, 或 H: 7.键入G从TFTP服务器获得新的固件镜像,显示以下信息: Enter TFTP server address [192.168.1.168]: 8.输入TFTP服务器的IP地址并按Enter键:...