Advertisement
Quick Links
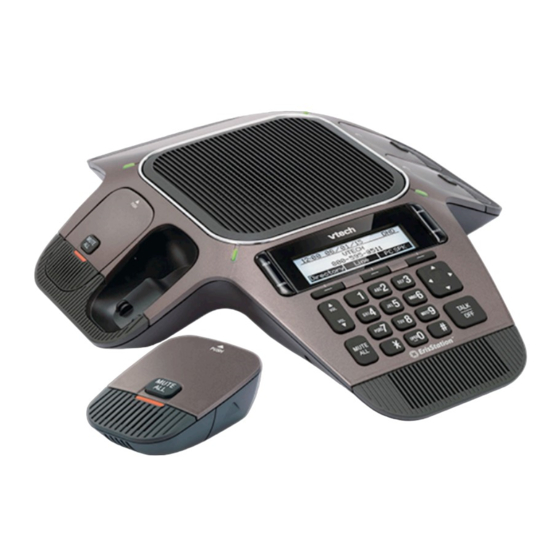
vtech VCS754 Phone
Quick User Guide
Supports up to 3 SIP account registrations
10 ring tones/melodies; 10 ring levels
10 speed dial entries
Do Not Disturb (DND)
3-way local conference
N-way network conference
Caller ID
Call transfer
Call hold
For detailed information please visit the Star2Star
Knowledge Base at:
https://support.star2star.com/
Copyright © 2017, Star2Star Communications, LLC. All rights reserved. Star2Star is a registered Trademark of Star2Star Communications.
INTRODUCTION
This quick start guide provides you with the basic
installation, setup, and operation instructions. A limited set of
features are described in abbreviated form.
PARTS CHECKLIST
Your VCS754 SIP Conference Phone with Four Wireless
Mics package contains the following items:
CONNECT BASE UNIT
Connect the base unit as shown below:
1. Plug one end of the DC power cable into the power jack of
the base unit and plug the other end into the VC754 jack of
the power adapter. Route the cord through the slots.
2. Plug one end of the Ethernet cable into the LAN jack of
the power adapter and plug the other end into a network
switch or router.
3. Plug the small end of the AC power cord into the power
jack of the adapter and plug the large end into a wall outlet
not controlled by a switch.
4. Optional: Plug the mini-USB end of the USB cable to the
base unit. Connect the other end of the USB cable to a PC
(to use PC speakerphone mode).
Page 1 of 2
Star2Star vtech VCS754 Phone Quick User Guide
INSTALL THE WIRELESS MIC BATTERY
1. Plug the battery connector securely into the socket inside
the battery compartment. Insert the battery (with the label
THIS SIDE UP facing up) into the battery compartment.
2. Slide the battery door until it clicks into place.
3. Place the wireless mics into the charging cradles until they
are flush.
Note: The status indicator on the wireless mic turns
orange when charging and turns off when fully charged.
STATUS INDICATORS
Wireless Mic
Advertisement

Related Manuals for VTech Star2Star VCS754


Summary of Contents for VTech Star2Star VCS754
- Page 1 Connect the other end of the USB cable to a PC (to use PC speakerphone mode). Page 1 of 2 Star2Star vtech VCS754 Phone Quick User Guide Copyright © 2017, Star2Star Communications, LLC. All rights reserved. Star2Star is a registered Trademark of Star2Star Communications.
- Page 2 VOLUME During a call, press to adjust the listening volume. Page 2 of 2 Star2Star vtech VCS754 Phone Quick User Guide Copyright © 2017, Star2Star Communications, LLC. All rights reserved. Star2Star is a registered Trademark of Star2Star Communications.