
Related Manuals for Horizon Fitness T101


Summary of Contents for Horizon Fitness T101
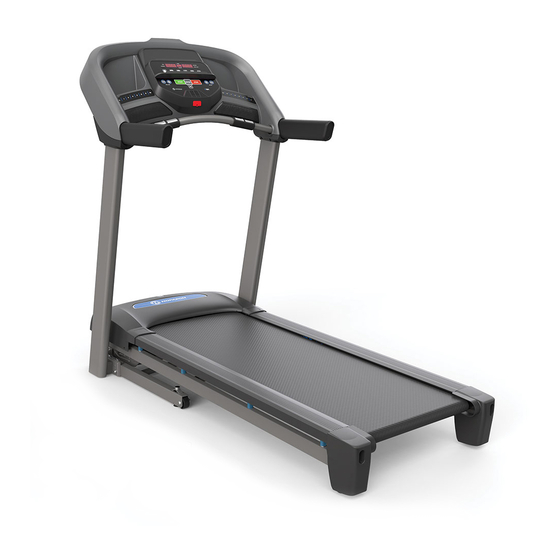
- Page 1 T101 OWNER’S MANUAL Read the TREADMILL GUIDE before using this OWNER’S MANUAL. HZ19_T101-5_OM_r1_0_D.indd 1 3/21/19 10:19 AM...
-
Page 2: Important Precautions
IMPORTANT PRECAUTIONS SAVE THESE INSTRUCTIONS When using an electrical product, basic precautions should always be followed, including the following: Read all instructions before using this treadmill. It is the responsibility of the owner to ensure that all users of this treadmill are adequately informed of all warnings and precautions. - Page 3 WARNING DANGER TO REDUCE THE RISK OF BURNS, FIRE, ELECTRICAL SHOCK OR INJURY TO PERSONS: TO REDUCE THE RISK OF ELECTRICAL SHOCK: • At NO time should pets or children under the age of 13 be closer to the treadmill than 10 feet. •...
-
Page 4: Grounding Instructions
GROUNDING INSTRUCTIONS ASSEMBLY This product must be grounded. If a treadmill should malfunction or breakdown, grounding provides a path of least resistance for electrical current to reduce the risk of electrical shock. This product is equipped with a cord having an equipment-grounding conductor and a grounding plug. -
Page 5: Tools Included
TOOLS INCLUDED: PRE ASSEMBLY WATER BOTTLE HOLDER F 6 mm T-Wrench CONTROL PANEL AND DISPLAY WINDOWS UNPACKING F 5 mm L-Wrench F 4 mm T-Wrench Place the treadmill carton on a level flat surface. It is recommended that you place a WATER BOTTLE HOLDER F Phillips Screwdriver protective covering on your floor. - Page 6 ASSEMBLY STEP 1 ASSEMBLY STEP 2 HARDWARE FOR STEP 2 Open HARDWARE FOR STEP 2. HARDWARE FOR STEP 1 Cut the yellow banding straps and lift the running PART TYPE DESCRIPTION deck upward from the rear to remove all contents PART TYPE DESCRIPTION...
- Page 7 ASSEMBLY STEP 3 ASSEMBLY STEP 4 Open HARDWARE FOR STEP 3. HARDWARE FOR STEP 4 HARDWARE FOR STEP 3 NOTE: Be careful not to pinch any wires while assembling the console. PART TYPE DESCRIPTION PART TYPE DESCRIPTION Attach LEAD WIRE to bottom end of CONSOLE BOLT M8X1.25PX20L BOLT...
-
Page 8: Treadmill Operation
• TENSIONING THE RUNNING BELT • CENTERING THE RUNNING BELT • USING THE HEART RATE FUNCTION T101 Running Area: 140 x 51 cm / 55” x 20” Net Weight: 75 kg / 165 lbs. Dimensions (L×W×H) : 178 x 85 x 140 cm / 70”... -
Page 9: Console Operation
N M O CONSOLE OPERATION Note: There is a thin protective sheet of clear plastic on the overlay of the console that should be removed before use. LED DISPLAY: Incline, Speed, Time, Distance, Calories, Heart Rate WORKOUT QUICK KEYS: press to select your workout. START: press to begin exercising, start your workout, or resume exercising after pause. -
Page 10: Display Windows
GETTING STARTED 1) Check to make sure no objects are placed on the belt that will hinder the movement of the treadmill. 2) Plug in the power cord and turn the treadmill ON. (The ON/OFF switch is next to the power cord.) 3) Stand on the side rails of the treadmill. - Page 11 WORKOUT PROFILES ( mph ) ( km/h ) 1) MANUAL: Adjust your speed and incline manually during your workout. Segment Warm Up Each segment is 30 seconds Cool Down Segment Warm Up Each segment is 30 seconds Cool Down Time 4:00 Mins 4:00 Mins Time...
-
Page 12: Finishing Your Workout
30 seconds and then reset. Dut: Verwijderingsaanwijzing VISION Fitness / HORIZON Fitness / TEMPO Fitness / TREO Fitness producten zijn recyclebaar. Breng het apparaat aan het einde van de gebruiksduur naar een in recycling gespecialiseerd bedrijf (plaatselijk verzamelpunt). - Page 13 Horizon T101 Owner’s Manual 022319’ | © 2019 Horizon Fitness Made in China HZ19_T101-5_OM_r1_0_D.indd 24 3/21/19 10:19 AM...