Advertisement
Available languages
Available languages
Quick Links
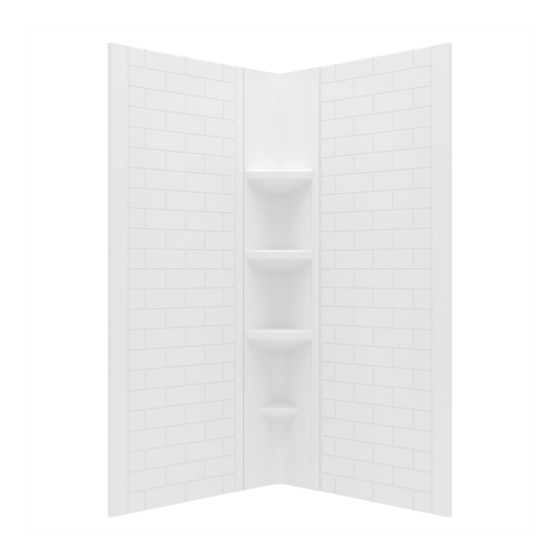
THE BEST BATH OR SHOWER EXPERIENCE?
THE ONE NOBODY INTERRUPTS.
Thank you for buying an American Standard
bath or shower product.
We're so grateful you did, and you will be too. Not just while you're waking
up each morning, but also every time a dirty gardener, sweaty soccer player,
or muddy dog gets cleaned up. How do we know? Just like you, we've lived
with that same beautiful chaos called life for almost 150 years. We believe
that while every home should appreciate in value, we never forget the
sentimental value that grows from enjoying life in the heart of home—
your kitchen and bath. That's why we love your stories and ideas; they help
us innovate with products that make your life easier.
Or, visit americanstandard-us.com/bathroom/tub-and-shower-
walls to watch video, view/download installation manuals
or learn more about your product.
Have a question or need help on install?
For questions or help on installation call us at 800-442-1902.
For a copy of our warranty in additional languages,
please visit Americanstandard.com
Advertisement

Related Manuals for American Standard Elevate 2947SWT36


Summary of Contents for American Standard Elevate 2947SWT36
- Page 1 THE BEST BATH OR SHOWER EXPERIENCE? THE ONE NOBODY INTERRUPTS. Thank you for buying an American Standard bath or shower product. We’re so grateful you did, and you will be too. Not just while you’re waking up each morning, but also every time a dirty gardener, sweaty soccer player, or muddy dog gets cleaned up.
- Page 2 2947SWT36 / 2947SWT38 INSTALLATION INSTRUCTIONS Thank you for selecting American Standard – the benchmark of fine quality for over 150 years. To ensure this product is installed properly, please read these instructions carefully before you begin. Certain installations may require professional help.
- Page 3 RECOMMENDED TOOLS AND MATERIALS Installation steps will indicate which tools should be used with asscociated letter 1234567891 0 11 12 13 14 15 16 17 18 19 20 21 22 23 24 Level Tape Measure Square Pencil Painter’s Caulking Gun Hole Saw Safety Masking Tape...
- Page 4 CORNER STUD INSTALLATION NOTE: Shower walls must be installed over a combination of studs and OSB board. 36" (914 mm) 5" 9-13/16" 9-13/16" 9-13/16" (127 mm) (250 mm) (250 mm) (250 mm) Required 2x4 8-1/4" (210 mm) 36" (914 mm) 12-3/8"...
- Page 5 OSB BOARD INSTALLATION 32-1/8" (816 mm) 32-1/8" (816 mm) FOR 36" CORNER 1X3 FROM LEFT WALL FRAMING 1X3 FROM RIGHT WALL FRAMING 19-1/4" 11-3/8" 19-1/4" 11-3/8" (289 mm) (289 mm) (489 mm) (489 mm) 68-7/8" 68-7/8" (1749 mm) (1749 mm) 2"...
- Page 6 DRY FITTING RIGHT WALL WALL TOP FLANGE POCKET ILLUSTRATION SHOWN USING NEO BASE CORNER FRAMING SIDE VIEW TILE FLANGE 1/8" GAP BETWEEN DECK OF BASE 3a. Place Right Wall Panel (side with corner shelves) into position in the corner until it is correctly in place, fitting squarely on top of shower base with approximately a 1/8"...
- Page 7 FINAL DRY FIT 5a. Once the panels are dry fitted correctly in place with no gaps, secure the bottom of each side panel to the base with tape. 5b. Mark both Left and Right Wall Panel locations, so MARK WALL when the Panels are removed for the addition of ad- LOCATIONS hesive on the OSB board, the panels can be returned...
- Page 8 INSTALLATION OF EXTRUDED WALL CONNECTOR APPROXIMATE SHIM LOCATION PUSH WALL POSITION SIDE CONNECTOR EXTRUDED PANEL UP AGAINST WALL SPACER CONNECTOR AT TANGENT LINE OF RADIUS BARBS OF WALL CONNECTOR SIDE EXTRUDED WALL WALL WALL CONNECTOR CONNECTOR SPACER FIG. C CUTAWAY VIEW LOOKING FIG.
- Page 9 APPLICATION OF ADHESIVE, LEFT SIDE PANEL VERTICAL LINES 6" SPACING Once Left Side Panel is correctly in position, remove the Left Side Panel and apply adhesive on the OSB board around the outer edges in vertical lines with 6" spacings as illustrated. NOTE: Left Side Panel will use approximately 1 tube of adhesive;...
- Page 10 POST INSTALLATION CLEAN-UP Remove all construction debris. Install any accessories, shelves or doors according to manufacturer’s installation instructions. Post installation clean-up can be completed using 50/50 mixture of isopropyl alcohol and water. AFTERCARE AND CLEANING WARNING: Cleaning products with labels that say “not suitable for use with ABS, acrylic or polystyrene” SHOULD NOT BE USED.
- Page 11 State to State. OBTAINING WARRANTY SERVICE If you believe that you have a warranty claim, contact American Standard, either through an authorized AS America, Inc. dealer or re-seller, by writing to the addresses below, or visiting the website below:...
- Page 12 Please leave us a product review or story at americanstandard.com/reviews Great Tub 03/13/2018 06:52:29 CDT American Standard Bathtubs Saver 60 Inch by 34 Inch Integral Apron Bathtub. Left Hand Drain Love the tub. It is very roomy and would definitely buy it again.
- Page 13 CELLE QUE PERSONNE N’INTERROMPT. Merci d’avoir acheté une baignoire ou une douche American Standard. Nous sommes si contents que vous l’ayez fait, vous le serez également. Pas seulement au réveil le matin, mais aussi chaque fois qu’un jardinier sale, qu’un joueur de soccer en sueur ou qu’un chien couvert de boue doit se nettoyer.
- Page 14 Certaines installations peuvent nécessiter l’aide d’un professionnel. Assurez-vous que votre installation respecte les codes locaux. Les murs de douche Elevate d’American Standard sont conçus pour être installés avec la base de douche ou une baignoire Elevate d’American Standard. PRÉPARATION DE L’INSTALLATION •...
- Page 15 OUTILS ET MATÉRIEL RECOMMANDÉS Les outils à utiliser seront indiqués par la lettre correspondante à chacune des étapes de l’installation. 1234567891 0 11 12 13 14 15 16 17 18 19 20 21 22 23 24 Niveau Ruban à mesurer Équerre Crayon Ruban masque...
- Page 16 INSTALLATION DES MONTANTS POUR COIN REMARQUE : Les murs de douche doivent être installés sur une combinaison de montants et de panneaux OSB. 36 po (914 mm) 5 po 9-13/16 po 9-13/16 po 9-13/16 po (127 mm) (250 mm) (250 mm) (250 mm) Obligatoire 2x4 8-1/4 po...
- Page 17 INSTALLATION DES PANNEAUX OSB POUR COIN DE 36 po 32-1/8 po (816 mm) 32-1/8 po (816 mm) 1 X 3 DE LA STRUCTURE DU MUR DE GAUCHE 1 X 3 DE LA STRUCTURE DU MUR DE DROIT 19-1/4 po 11-3/8 po 19-1/4 po 11-3/8 po (289 mm)
- Page 18 MONTAGE SANS ADHÉSIF DES PAROIS DROITE BRIDE SUPÉRIEURE POCHETTE MURALE ILLUSTRATION MONTRÉ À CADRE L’UTILISATION D’ A LCÔVE VUE DE BASE NEO CÔTÉ BRIDE DE CARREAU PRÉVOIR UN ESPACE DE 1/8 PO ENTRE LA PLATE-FORME DE BASE DE DOUCHE 3a. Placez le panneau du mur de droite (côté avec les tablettes d’angle) dans le coin jusqu’à ce qu’il soit parfaitement installé...
- Page 19 AJUSTEMENT FINAL À SEC 5a. Une fois que les panneaux sont fixés sans adhésif et correctement en place, sans espace, fixez le bas de chaque panneau latéral à la base avec du ruban adhésif. MARQUEZ L’EMPLACEMENT 5b. Marquez les emplacements des panneaux muraux DES MURS gauche de sorte que lorsque les panneaux sont retirés pour l’ajout d’adhésif sur le panneau OSB, les...
- Page 20 INSTALLATION DES CONNECTEUR MURAUX EXTRUDÉS EMPLACEMENT APPROXIMATIF DES CALES POUSSER LE PANNEAU CONNECTEUR PLACEZ LE MURAL CONTRE LATÉRAL CONNECTEUR CETTE SURFACE MURAL À LA TANGENTE DU RAYON BARBES CONNECTEUR MURAL PANNEAU LATÉRAL CONNECTEUR BANDE DE CONNEXION MURALE MURAL ESPACEUR EXTRUDÉ FIG.
- Page 21 APPLICATION D’ADHÉSIF, PANNEAU CÔTÉ GAUCHE VERTICAL LINES 6" SPACING Une fois le panneau latéral gauche correctement installé, retirez-le pour appliquer de l’adhésif sur le pan- neau OSB autour des bords extérieurs en lignes verticales espacées de 6 po comme le montre l’illustration. REMARQUE : Il faudra environ un tube d’adhésif pour le panneau latéral gauche.
- Page 22 NETTOYAGE APRÈS L’INSTALLATION Retirez tous les débris de construction. Installez tous les accessoires, étagères ou portes, selon les consignes d’installation du fabricant.. Pour le nettoyage après installation, vous pouvez utiliser un mélange 50/50 d’eau et d’alcool isopropylique. ENTRETIEN ET NETTOYAGE AVERTISSEMENT: Les produits nettoyants comportant la mention «ne convient pas à...
- Page 23 Enregistrez votre porte de douche au www.americanstandard.com. Conservez votre preuve d’achat (ticket de caisse). Si vous avez besoin d’aide ou n’avez pas accès à notre site Web, veuillez appeler le service à la clientèle d’American Standard au numéro suivant : 800 442-1902. Un représentant d’American Standard vous aidera à remplir l’enregistrement de la garantie.
- Page 24 à americanstandard.com/reviews Baignoire géniale 03/13/2018 06:52:29 HAC American Standard Économiseur de baignoire 60 pouces par 34 pouces intégral Baignoire à tablier. Renvoi à gauche J’adore la baignoire. Il est très spacieux et l’achèterait certainement à nouveau. Notre vieille baignoire s’est fissurée, alors nous avons eu celle-ci pour la remplacer.
- Page 25 ¿LA MEJOR EXPERIENCIA DE TINA O DUCHA? LA QUE NADIE INTERRUMPE. Gracias por comprar una tina o ducha American Standard. Estamos muy agradecidos y usted también lo estará. No solo cuando se esté despertando cada mañana, sino también cada vez que se lave un jardinero sucio, un jugador de fútbol sudado o un perro embarrado.
- Page 26 Algunas instalaciones pueden requerir ayuda profesional. Asimismo, asegúrese de realizar la instalación de conformidad con los códigos locales. Las paredes de ducha Elevate de American Standard están diseñadas para ser instaladas junto con las tinas y bases de ducha de American Standard. .
- Page 27 HERRAMIENTAS Y MATERIALES RECOMENDADOS Los pasos de instalación le indicarán qué herramientas deben utilizarse con la letra asociada 1234567891 0 11 12 13 14 15 16 17 18 19 20 21 22 23 24 Nivel Cinta métrica Escuadra Lápiz Cinta selladora Pistola de calafateo Taladro Sierra de perforación Lentes de seguridad...
- Page 28 INSTALACIÓN DE LOS MONTANTES DE LA ESQUINA NOTA: Las paredes de la ducha deben instalarse sobre una combinación de montantes y tableros OSB. 36" (914 mm) 9-13/16" 9-13/16" 9-13/16" 5" (250 mm) (250 mm) (250 mm) (127 mm) Requerido 2x4 8-1/4"...
- Page 29 INSTALACIÓN DE TABLEROS OSB PARA ESQUINA DE 36" 32-1/8" (816 mm) 32-1/8" (816 mm) 1X3 DEL MARCO DE LA PARED IZQUIERDA 1X3 DEL MARCO DE LA PARED DERECHA 11-3/8" 11-3/8" 19-1/4" 19-1/4" (289 mm) (289 mm) (489 mm) (489 mm) 68-7/8"...
- Page 30 MONTAJE A SECO DE LAS PAREDE DERECHO CAVIDAD BRIDA SUPERIOR DE LA PARED ILUSTRACIÓN MOSTRADA CON NEO BASE ESTRUCTURA DE LA ALCOVA VISTA LATERAL BRIDA DEL AZULEJO DEJE UN ESPACIO DE 1/8" ENTRE LA CUBIERTA DE BASE 3a. . Coloque el panel de pared derecho (lado con estantes esquineros) en su posición en la alcoba hasta que la esquina esté...
- Page 31 AJUSTE EN SECO FINAL 5a. Una vez que los paneles estén montados a seco y correctamente colocados en su sitio, sin huecos, fije la parte inferior de cada panel lateral a la base con MARQUE LAS cinta adhesiva. UBICACIONES DE LOS 5b.
- Page 32 INSTALACIÓN DE LOS CONECTORE DE PARED UBICACIÓN APROXIMADA DE LOS CALCES EMPUJE EL CONECTOR PANEL POSICIONAR DE PARED CONTRA LATERAL EL CONECTOR ESTA SUPERFICIE DE PARED EN LA LÍNEA TANGENTE DEL RADIO BARBAS CONECTOR DE PARED CONECTOR PANEL LATERAL DE PARED EXTRUIDO TIRA DEL CONECTOR DE PARED ESPACIADOR...
- Page 33 APLICACIÓN DE ADHESIVO, PANEL LATERAL IZQUIERDO VERTICAL LINES 6" SPACING Una vez que el panel izquierdo esté correctamente colocado, retire el panel izquierdo y aplique el adhesivo en el tablero OSB alrededor de los bordes exteriores en líneas verticales con espaciamientos de 6” como se ilustra.
- Page 34 LIMPIEZA POSTERIOR A LA INSTALACIÓN Retire todos los desechos de construcción. Instale todos los accesorios, estantes o puertas según las instrucciones de instalación del fabricante. La limpieza posterior a la instalación puede realizarse con una mezcla de mitad alcohol isopropílico y mitad agua. CUIDADO Y LIMPIEZA ADVERTENCIA: Los productos de limpieza cuyas etiquetas indiquen “no adecuado para usar con ABS, acrílico o poliestireno”...
- Page 35 Registre la puerta de la ducha en www.americanstandard.com. Guarde el comprobante de compra (recibo de compra). Si necesita asistencia o no puede acceder a nuestro sitio web, comuníquese con Atención al Cliente de American Standard llamando al: (800) 442-1902. Un representante de American Standard lo ayudará a completar la inscripción de la garantía.
- Page 36 Gran tina 03/13/2018 06:52:29 CDT American Standard Tina de 60 pulg. por 34 pulg. Integral Tina con delantal. Drenaje izquierdo Amo la bañera. Es muy espacioso y definitivamente lo compraría de nuevo. Nuestra vieja bañera se rompió, así que compramos esta para reemplazarla.