
Related Manuals for Janome CoverPro 3000


Summary of Contents for Janome CoverPro 3000
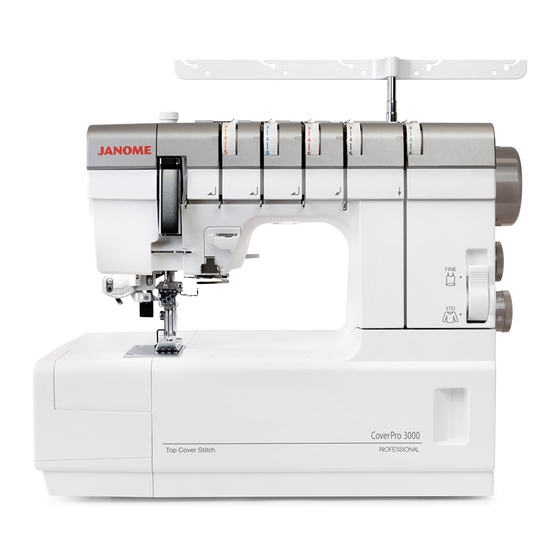
- Page 1 Janome CoverPro 3000 Coverstitch Machine View & Buy Here: https://www.thesewingstudio.co.uk/janome-coverpro-3000-professional-coverstitch- machine.ir...
- Page 2 Instruction Book...
- Page 3 IMPORTANT SAFETY INSTRUCTIONS When using an electrical appliance, basic safety precautions should always be followed, including the following: This sewing machine is designed and manufactured for household use only. Read all instructions before using this sewing machine. DANGER — To reduce the risk of electric shock: 1.
-
Page 4: Table Of Contents
TABLE OF CONTENTS ESSENTIAL PARTS Names of Parts ..............2 Standard Accessories ............3 GETTING READY TO SEW Connecting the Machine to the Power Supply....4 Controlling Sewing Speed ..........4 How to Turn the Handwheel ..........5 Opening and Closing the Looper Cover ......5 Extension Table ............... -
Page 5: Essential Parts
ESSENTIAL PARTS Names of Parts Differential feed dial Stitch length dial Handwheel Spool stand !3 !2 Spool holder Spool pin Thread guide bar Thread guide post Carrying handle Thread guide plate Looper thread tension dial Top cover stitch thread tension dial Right needle thread tension dial Center needle thread tension dial Left needle thread tension dial... -
Page 6: Standard Accessories
Standard Accessories Part Name Part No. Set of needles: Schmetz EL X 705 80/12 X 3 778805005 Schmetz EL X 705 90/14 X 2 w Screwdriver (Large) 784810002 e Screwdriver (Small) 792030005 r Tweezers 624801001 t Net X 5 624806006 y Spool holder cap X 5 822020503 u Lint brush... -
Page 7: Getting Ready To Sew Connecting The Machine To The Power Supply
GETTING READY TO SEW Connecting the Machine to the Power Supply WARNING: While in operation, always keep your eyes on the sewing area, and do not touch any moving parts such as the thread take-up lever, loopers, handwheel or needle. Always turn off the power switch and unplug the machine from the power supply: - when leaving the machine unattended. -
Page 8: How To Turn The Handwheel
How to Turn the Handwheel Always turn the handwheel toward you (counterclockwise). Match the mark on the machine with the setting mark on the handwheel when threading needles, turning the fine mode switching lever or raising/lowering the top cover stitch spreader. q Handwheel w Mark e Setting mark... -
Page 9: Retractable Sewing Light
Retractable Sewing Light In addition to the twin LED lights, the machine is equipped with a retractable light. Place your finger in the groove and slide the arm towards you. The light will turn on automatically. q Arm w Groove Push back the arm to turn the light off and store it. -
Page 10: Replacing The Presser Foot
Replacing the Presser Foot CAUTION: Turn off the power switch when changing the presser foot. Removing the Presser Foot Turn off the power switch. Turn the handwheel toward you to raise the needle to its highest position. Raise the presser foot lifter. Press the lever located on the back of the foot holder. -
Page 11: Adjusting The Presser Foot Pressure
Adjusting the Presser Foot Pressure It is not necessary to adjust the presser foot pressure for regular sewing. When sewing heavyweight fabrics, increase the foot pressure by turning the adjusting screw in the direction of “+”. 10 mm When sewing lightweight fabrics, decrease the foot pressure by turning the adjusting screw in the direction of “–”. -
Page 12: Adjusting The Thread Tension
Adjusting the Thread Tension The thread tension can be adjusted by turning the thread tension dials and the fine mode switching lever (refer to page 26 - 33 for thread tension dials). NOTE: Match the mark on the machine with the setting mark on the handwheel when turning the fine mode switching lever. -
Page 13: Changing Needle
Changing Needle NOTE: Use Schmetz EL X 705 80/12 or 90/14 needles. The machine is installed with Schmetz EL X 705 90/14 needles. WARNING: Turn off the power switch and unplug the machine before changing needles. z Turn the handwheel toward you to raise the needle to its highest position. -
Page 14: Setting The Thread Guide Bar
Setting the Thread Guide Bar Pull the thread guide bar up as far as it will go. Turn the thread guide post so that the thread guides are right above the spool pins. q Thread guide bar w Thread guide post e Thread guide r Spool pin t Stoppers... -
Page 15: Threading The Machine
Threading the machine WARNING: Turn off the power switch before threading the machine. Threading preparation q Looper thread w Left needle thread e Center needle thread r Right needle thread t Top cover stitch thread z Raise the needle to the highest position by turning the handwheel toward you to match the mark on the machine with the setting mark on the handwheel. -
Page 16: Threading The Looper
Threading the Looper Open the looper cover by sliding it to the right (refer to page 5). Turn the handwheel toward you to align both guide holes with the eye of the looper thread take-up lever as shown. q Guide holes w Eye of looper thread take-up lever... - Page 17 Thread the looper in the following steps: z Draw the thread through the right side thread guide from back to front as shown. q Thread guide bar NOTE: If the thread slips out from the thread guide notch, pass the thread through the thread guide hole again as shown.
- Page 18 b Turn the handwheel toward you several times to align the eye of the looper take-up lever and both guide holes. Pass the thread through the eye of the looper take-up lever and both guide holes. i Looper take-up lever o Guide holes n Slip the thread behind looper thread guide (B) from the right.
-
Page 19: Threading The Needles
Threading the Needles ⁄0 Thread each needle in the following steps: z Draw the thread through the left side thread guide from back to front as shown. q Thread guide bar NOTE: If the thread slips out from the thread guide notch, pass the thread through the thread guide hole again as shown. - Page 20 c Draw the thread along the slit and pass it through the tension dial. t Tension dial y Tension disks NOTE: Hold the thread at both ends and tug gently to ensure the thread is correctly inserted between the tension disks. v Pass the thread through thread guide (A) from the right.
- Page 21 , Thread each needle as follows: Left Needle (A): Pass the thread behind the thread guide plate from the left. Pass the thread between the first and second prongs from the left. !1 Thread guide plate !2 Prongs !3 Needle bar thread guide Center needle (B): Pass the thread behind the thread guide plate from the right.
-
Page 22: Built-In Needle Threader
Built-in Needle Threader Thread the needles with the built-in needle threader. CAUTION: Turn off the power switch before threading the machine. Make sure the top cover stitch spreader is stored to the machine when using the built-in needle threader (refer to page 38). NOTE: Do not use #30 or thicker threads. - Page 23 v Pull down the needle threader lever as far as it will go. y Needle threader lever b Draw the thread along the guide on the needle threader lever from the left and under the hook. u Guide i Hook n Slowly raise the threader lever so that a loop of the thread is pulled up through the needle.
-
Page 24: Handy Needle Threader
Handy Needle Threader z Hold the grip of the threader with the triangle mark up. Insert the thread into the slit of the Y-shaped notch. q Triangle mark w Y-shaped notch x Place the V-shaped notch over the needle just above the needle eye. -
Page 25: Threading The Top Cover Stitch Guides And Spreader
Threading the Top Cover Stitch Guides and Spreader... - Page 26 Threading preparation NOTE: Raise the top cover stitch spreader when using the built-in needle threader. z Raise the needle to the highest position by turning the handwheel toward you to match the mark on the machine with the setting mark on the handwheel. q Handwheel w Mark e Setting mark...
- Page 27 Thread the top cover stitch thread in the following steps: z Draw the thread through the right side thread guide from back to front as shown. q Thread guide bar NOTE: If the thread slips out from the thread guide notch, pass the thread through the thread guide hole again as shown.
- Page 28 b Thread the top cover stitch thread in order as shown. NOTE: Do not push the top cover stitch thread guide (E) to the right while threading. u Top cover stitch thread guide (A) i Top cover stitch thread guide (B) o Top cover stitch thread guide (C) !0 Top cover stitch thread guide (D) !1 Top cover stitch thread guide (E)
-
Page 29: Top Cover Stitch
STITCH TYPES AND TENSION SETTINGS Type of Fabric Needle Size Type of Thread Fine Knits 80/12 or Fine #60-90 Spun Fine Jersey 90/14 Standard to Jersey 80/12 or #60 Spun Heavy Fleece 90/14 NOTE: • The machine is installed with Schmetz EL X 705 90/14 needles. -
Page 30: Balancing The Thread Tension
Balancing the thread tension z Set the tension dials as follows: 【1】 For Triple top cover stitch 【1】 q w e r q Left needle thread tension dial: w Center needle thread tension dial: e Right needle thread tension dial: r Top cover stitch thread tension dial: t Looper thread tension dial: 【2】... -
Page 31: Triple Cover Stitch
Triple Cover Stitch The triple cover stitch is sewn with all three needles and four threads. This stitch forms three parallel rows of the straight stitch on the right side, ideal for hemming, attaching elastics, decorative stitches, etc. q Left needle w Center needle e Right needle Balancing the thread tension... -
Page 32: Cover Stitch
Cover Stitch This stitch is sewn with two needles and three threads and forms two parallel rows of the straight stitch on the right side, widely used on cuffs and stretch welts of T-shirts, etc. There are three types of cover stitch: •... -
Page 33: Balancing The Thread Tension
Balancing the thread tension z Set the tension dials as follows: 【1】 For narrow 3 mm (left) 【1】 q w e r q Left needle thread tension dial: w Center needle thread tension dial: e Right needle thread tension dial: r Top cover stitch thread tension dial: t Looper thread tension dial: 【2】... -
Page 34: Chain Stitch
Chain Stitch This stitch is sewn with a single needle and two threads and forms a chain of looper thread on the wrong side of the fabric. This is a durable and flexible stitch used for seaming knit fabrics, attaching elastics, attaching bias tapes, etc. Thread one of the three needles and looper. -
Page 35: Stitch And Thread Tension Chart
Stitch and Thread Tension Chart q w e r z x c Standard to Heavy fabrics When sewing standard to heavy fabrics, turn the fine mode switching lever to STD. and adjust the thread tension dials referring to the chart below. Use Schmetz EL X 705 80/12 or 90/14 needles and #90 to #60 spun threads. For top cover stitch, #30 and #8 spun thread can also be used (refer to pages 9, 12 - 18, 22 - 31). -
Page 36: Fine Fabrics
Stitch and Thread Tension Chart Fine fabrics When sewing fine fabrics, turn the fine mode switching lever to FINE and adjust the thread tension dials referring to the chart below. Use Schmetz EL X 705 80/12 or 90/14 needles and #90 to #60 spun thread. Thread tension dials Needle Thread... -
Page 37: Beginning And End Of The Seam
Beginning and End of the seam At the beginning of the seam, use a piece of scrap fabric to achieve the best results. At the end of the seam, you can choose either to end sewing with the thread chain or without thread chain (A thread chain is a chain of threads knit without fabric). -
Page 38: End Of The Seam With Thread Chain
End of the seam with thread chain NOTE: Turn the stitch length dial to 4 when sewing the triple cover stitch. z Stop sewing at the end of the work fabric. Turn the stitch length dial to 4 and start the machine to slowly produce approximately 5"... -
Page 39: End Of The Seam Without Thread Chain
End of the seam without thread chain z Stop sewing at the end of the work fabric. Turn the handwheel toward you to bring the needle to its highest position. q Handwheel x Raise the presser foot with the presser foot lifter. w Presser foot lifter c Pull the needle threads before the needle eyes using the tweezers. - Page 40 n Hold the seam tightly and pull the fabric to the rear, then cut the looper thread with the thread cutter. t Thread cutter NOTE: Pull the fabric to the rear to prevent threads get tangled in needle holes.
-
Page 41: Beginning Of The Seam For Top Cover Stitch
Beginning of the seam for top cover stitch z After threading the top cover stitch thread, turn the handwheel toward you for several times and sew 3 to 5 top cover stitches on a piece of scrap fabric. Cut the loose top cover thread. q Loose top cover stitch thread x Depress the foot control to start sewing slowly. -
Page 42: Knotting The Threads
Knotting the threads For cover stitches and top cover stitches If the threads are shown on the right side of the fabric, draw them to the wrong side of the fabric by using a pair of tweezers and knot them together. For chain stitches Draw the threads to the wrong side of the fabric by using a pair of tweezers and knot them together. -
Page 43: Hemming With The Cover Stitch
Hemming with the Cover Stitch Fold up the edge of the fabric to the wrong side and press. Draw a line with a tailor’s chalk on the right side of the fabric to mark the fabric edge. Place the fabric so the left needle drops just to the left side of the marked line. -
Page 44: Triple Cover Stitch Applications
Triple Cover Stitch Applications Hemming on sleeves and waistlines q Sleeve w Waistline Attaching laces and tapes q Tape or lace w Right side of the fabric e Wrong side of the fabric Attaching elastics q Right side of the fabric w Wrong side of the fabric e Elastic Decorative stitch q Right side of the fabric... -
Page 45: Care Of Your Machine Cleaning The Feed Dogs And Looper Area
CARE OF YOUR MACHINE Cleaning the Feed Dogs and Looper Area WARNING: Turn off the power switch and unplug the machine before cleaning. Do not dismantle the machine in any way other than what is explained in this section. z Remove the presser foot and needles (refer to pages 7 and 10). -
Page 46: Troubleshooting
Troubleshooting Problem Cause Reference Needle thread 1. The machine is not threaded correctly. Refer to pages 12 - 25 breaks. 2. The thread tension is too tight. Refer to pages 26 - 33 3. The needle is bent or blunt. Refer to page 10 4. - Page 47 EC DECLARATION OF CONFORMITY Manufacturer: Janome Sewing Machine Co., Ltd. Address: 1463 Hazama-machi, Hachioji-shi, Tokyo 193-0941, Japan This machine complies with the following regulations: EN 60335-1:2012;A11;A13;A1;A14;A2 EN 60335-2-28:2003;A1;A11 EN 62233:2008 EN 55014-1:2017;A11 EN 55014-2:2015 EN IEC 61000-3-2:2019 EN 61000-3-3:2013;A1 Version 1.00...
- Page 49 778-800-055 (EN)