
Related Manuals for Asko W6124X.W.U


Summary of Contents for Asko W6124X.W.U
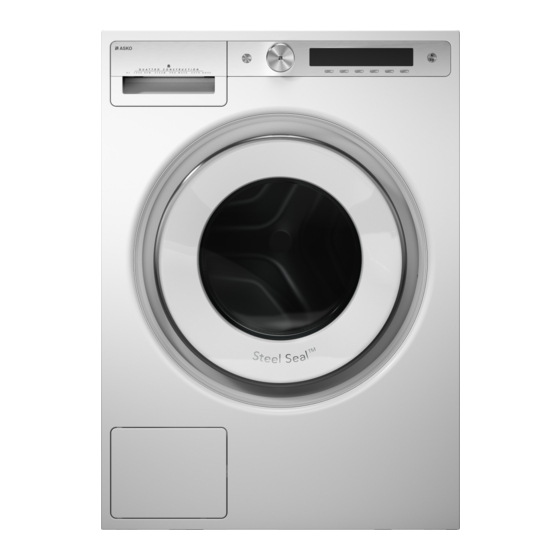
- Page 1 INSTRUCTIONS FOR USE Washing machine W6124X.W.U WM85.2 Carefully read the instructions for use before using the washing machine.
-
Page 2: Table Of Contents
Dear Customer, We thank you for purchasing this quality ASKO product. We hope it meets all your expectations. Scandinavian design combines pure lines, everyday functionality, and high quality. These are the key characteristics of all our products, and the reason why they are highly appreciated across the globe. -
Page 3: Important Safety Instructions
IMPORTANT SAFETY INSTRUCTIONS GENERAL SAVE THESE INSTRUCTIONS FOR FUTURE REFERENCE! To reduce the risk of fi re, electric shock, or injury to persons when using your appliance, follow basic precautions, including the following: 1. Read all instructions before using the appliance. 2. - Page 4 This appliance must be properly grounded. This manual WARNING! - does not cover every possible condition and situation that may occur. Use common sense and caution when installing, operating, and maintaining any appliance. WARNING! PROPOSITION 65 FOR CALIFORNIA RESIDENTS Cancer and Reproductive Harm – www.P65Warnings.ca.gov WARNING! Certain internal parts are intentionally not grounded and may present a risk of electric shock only during servicing.
- Page 5 KIDSAFE™ CHILD SAFETY WARNING! - Keep an eye on children! • Laundry detergents are corrosive, so always keep them out of reach of children. • Should a child swallow detergent, give plenty to drink immediately, i.e., one or two glasses of milk or water. Do not try to induce vomiting. Seek medical advice immediately: The National Poison center phone number is 1-800-222-1222.
- Page 6 WATER OVERFLOW PROTECTION • If the water level in the appliance rises above the normal level, then the excessive water level protection will be activated. It will shut off the water supply and start pumping out the water. If the water level does not decrease in 60 seconds, the program will be interrupted (see chapter "ERRORS AND TROUBLESHOOTING").
-
Page 7: Washing Machine Description
WASHING MACHINE DESCRIPTION Main switch (ON/OFF) Program selector knob Display unit Program settings buttons Button (start/pause) Detergent compartment QR and AUID code (on the inside of the washing machine door) Rating plate with information about the washing machine (on the inside of the washing machine door) Washing machine door 10. -
Page 8: Before Using The Appliance For The First Time
BEFORE USING THE APPLIANCE FOR THE FIRST TIME PACKAGING Remove all packaging. Please sort the materials in compliance with local recommendations (see chapter ”DISPOSAL”). TRANSPORT PROTECTION Before using the appliance, remove the three transport bolts and plastic plugs which protect the appliance during transport. - Page 9 CLEANING Disconnect the washing machine from the power mains and open the door. Clean the washing machine drum with a damp cloth and a mild detergent. Connect the washing machine to the power mains and run the dedicated drum cleaning program. See chapter "WASHING PROCESS"...
- Page 10 The amount of detergent also depends on the hardness of water. For details, see the detergent packaging. Please contact your local water supply company to check the water hardness in your area. In models with ADS the amount of detergent dispensed also depends on the water hardness setting. Before using the AD system for the fi...
-
Page 11: Installation And Connection
If the appliance is installed on a plinth or a similar structure, then the appliance must be fi xed to it, to avoid the risk of falling. ASKO original accessories are available for this purpose, complete with fi xing instructions. Improper connection of the equipment- grounding conductor can result in a risk of electric shock. - Page 12 Stacked installation ASKO washers should never be stacked on a counter or a dryer. You can, however, stack an ASKO dryer on an ASKO washer. Refer to your Dryer Use and Care Guide for instructions on how to do this.
- Page 13 ADJUSTING THE FEET MOVING THE WASHING MACHINE AND TRANSPORT AFTER INSTALLATION Place the washing machine so that it is stable. It is important that the machine is level to prevent If you are moving the washing machine without excessive vibrations during spin cycles. Each foot packaging, open the washing machine door and pull of the washer is adjustable, so you can level the the appliance by holding the washing assembly, as...
- Page 14 If your appliance has connections for both hot and cold water, then connect one hose to the cold Since ASKO washers have a built-in heating water connection and the other hose to the hot element, you only need a cold water inlet. The...
- Page 15 The hose should be extended over a suitable an ASKO Dryer. If the washer is used separately or sink edge or drain pipe at a height of 24" to 36" (610 mm with another dryer, it must be on a separate 208-240 to 914 mm) above the bottom of the unit.
- Page 16 Connection upon delivery TYPE: WMXX.XXXXX MODEL: XXXXXX.X Art.No.: XXXXXX/XX Ser.No.: XXXXXXXX X kg XXX-XXX V ~ XXXX W IPX4 XX Hz XX-X MPa Information about your washing machine is indicated on the rating (type) plate. Use the type A diff erential current protection switch. We recommend using over-voltage protection to protect the appliance in case of a lightning strike.
- Page 17 ASKO LAUNDRY CARE - HIDDEN HELPERS* Laundry care ironing board The ironing board is a clever solution. It is always handy when you need to iron your clothes, and it can be easily, safely and invisibly stored away when not in use.
- Page 18 *AVAILABILITY DEPENDING ON MARKET DENOMINATION ART. No. IRONING BOARD HI1153 White 576552 IRONING BOARD HI1153 Titanium 576553 LAUNDRY CARE DOUBLE HDB1153 White 576554 LAUNDRY CARE DOUBLE HDB1153 Titanium 576555 LAUNDRY CARE SINGLE HSS1053 White 576730 LAUNDRY CARE SINGLE HSS1053 Titanium 576732 LAUNDRY CARE HB1153 White 576733...
-
Page 19: Tips Before Washing
TIPS BEFORE WASHING This chapter includes several tips on how to prepare the laundry for washing. LAUNDRY SORTING Sort the laundry according to: • how soiled it is, • colour, • material. CLOTHING 1. Close the zips and hook-and-loop fasteners so that they do not damage the fabric. - Page 20 LAUNDRY SYMBOLS Observe the laundry symbols. Wash cycle Tumble dry cycle Normal wash cycle Machine dry Permanent Press or Wrinkle Normal setting Resistant setting Permanent Press or Wrinkle Gentle/Delicate setting Resistant setting Hand wash only Gentle or Delicate setting Do not wash Do not tumble dry Do not wring.
- Page 21 COLOURED COTTON ECONOMY AND EFFICIENCY Colored cotton items labeled (140 °F / 60 °C) (HOT) You can save a lot of energy by not using the should be washed at HOT the fi rst time in order to programs operating at higher temperatures. remove any excess dye.
-
Page 22: Washing Process
WASHING PROCESS WARNING! - To reduce the risk of electric shock or injury to persons, read the "IMPORTANT SAFETY INSTRUCTIONS" section before operating this appliance. STEP 1: SORT THE LAUNDRY See chapter "TIPS BEFORE WASHING" Use a washing net for underwire bras. Empty the pockets. Coins, nails etc. could damage the machine and the fabric. - Page 23 STEP 3: OPEN THE WASHING MACHINE DOOR AND INSERT THE LAUNDRY. Open the washing machine door by pulling the handle towards you. Place the laundry into the washing machine drum. Before doing so, make sure the drum is empty. Do not overload the drum! If the washing machine drum is too full, the laundry will not be washed as thoroughly.
- Page 24 Recommended powder detergents ASKO washers use 50% to 75% less detergent than most other washers. This is because of their low water consumption and the fact that all the wash water is repeatedly circulated through the laundry, ensuring that all the detergent is fully utilized.
- Page 25 We recommend adding the powder detergent immediately before the washing cycle. Otherwise, make sure the detergent compartment in the detergent compartment is completely dry before adding the powder detergent, as otherwise, the powder detergent may cake before the start of the washing process. Detergent Amounts Based on Water Hardness The amount of detergent needed can vary due to diff...
- Page 26 STEP 5: CHOOSE THE PROGRAM. Choose the program by rotating Program selector knob in either direction. Confi rm the program selection by pressing the button under the program. Choose the program depending on the type of laundry and how heavily soiled it is (see chapter "TIPS BEFORE WASHING").
- Page 27 Program Description QUICK PROGRAM Program for lightly soiled cotton and/or linen clothes for daily use up to a full (Quick) load. You can select "Cold" (incoming water temperature), WARM, HOT or EXTRA HOT. The lower the selected temperature, the shorter the program time. Garments worn next to the skin should be washed at EXTRA HOT.
- Page 28 Program Description STAIN PROGRAM Choose the fabric and stain type from the menu, and the right stain removal program will be automatically selected. You can choose between the following types of stains: red wine, blood, grass, blueberries, butter/grease, chocolate, coffee/tea, egg, dairy products, kids, baby. After selecting the type of stain, select the type of fabric (Cotton or Synthetics) and washing temperature for the selected type of fabric.
- Page 29 STEP 6: CHOOSING THE PROGRAM SETTINGS Using the program settings, the washing programs can be further adjusted to your wishes. Some program settings may not be available for your selected program. Selected program settings will remain stored after the end of the washing cycle and may be changed subsequently (except for Start delay and Anti-crease, which are not stored after the wash is complete).
- Page 30 3. Temperature The following temperatures are available for the selected program: Cold / Warm / Hot / Extra Hot The actual available temperature options will depend on the selected program. WASH TEMPERATURE WASH / RINSE Cold No Heating Warm 40°C / 105°F Warm / Cold 60°C / 140°F Hot / Cold...
- Page 31 Selecting extra functions (Options/more options) Press the button to confi rm the extra settings. Then, use the Program selector knob to scroll the list of functions or options. Confi rm your selection by pressing the button under the selected function or option. The following extra functions are available: Favourite programs/Add to fav? To store the selected program as a favourite, press the...
- Page 32 STEP 7: START THE WASH Close the washing machine door and press the Start /Pause button. Start (short press of the button – start/resume) Pause (short press of the button – pause) Cancel (press and hold the button for 3 seconds) Washing process (circle) is coloured: Warm blue: beginning of the washing cycle...
- Page 33 The door may be opened when the water is pumped from the machine (but not completely pumped out). Then, add or remove the laundry. Close the door and continue the program. Press the Start /Pause button. The program will resume from the point at which it was interrupted. If the door cannot be opened, it is Warm possible that the temperature in the...
- Page 34 STEP 8: END OF PROGRAM After the end of the washing program, Warm the display will indicate that the program 00:00 Wash finished has been successfully completed ("Wash fi nished"). Warm 00:00 Wash finished Auto Warm If you have selected the Anti-Crease extra function, gentle tumbling will Wash finished continue after the end of the washing...
-
Page 35: Settings
SETTINGS Warm In the Main menu, use the Program selector knob to select Settings. Confi rm the selection by pressing the Quick Pro Rinse Spin Drain Drum cleaning Settings button under the desired setting. Then, use the Program selector knob to scroll the list of the following settings that you can adjust: Child lock °C / °F •... - Page 36 LANGUAGE You can choose between 24 languages. Set language to: GB English Press the button. Use the Program selector knob to scroll the list of languages. Confi rm selection with button under chosen language. Use the button to return to Settings. AUTOMATIC DOSING SYSTEM (ADS) For ADS settings, see chapter "SPECIAL FEATURES".
- Page 37 Water Hardness levels hardness °dH (°N) m mol/l °fH(°F) p.p.m. 1 – soft < 8,4 < 1,5 < 15 < 150 2 – normal 8,4 - 14 1,5 - 2,5 15 - 25 150 - 250 3 – hard > 14 >...
- Page 38 DISPLAY UNIT Set the brightness and logo display. Display settings ASKO Brightness Logo Brightness Use the program selector knob or buttons to choose the brightness. Logo Confi rm your selection with the button under the logo display on/off option. ASKO...
-
Page 39: Special Features
SPECIAL FEATURES DOSE MODES 1. Display in the Main menu (see chapter "SETTINGS") 2. Choosing the DOSE MODES in the Main menu. Press the button under icon Choose between: • Dosing detergent from detergent compartment A/B, if you have previous selected ADS (On) (see »SETTINGS«). - Page 40 AUTO DOSE SYSTEM (ADS) Filling the ADS tank Choosing the ADS settings by opening the detergent compartment Switching off the automatic dosing function in the ADS menu With this setting, you will choose which tank (A or B) the detergent will be dispensed from. Auto Dose System can be set for each washing cycle separately.
- Page 41 a, b. Amount of liquid detergent (ml/cycle from the compartment, A or B. Choose the amount of detergent according to liquid detergent manufacturer's recommendations specifi ed on the packaging. For thus washing machine model, observe the recommendations for 6–8 kg (13.2-17.6 lbs) loads, medium water hardness and medium-soiled laundry.
- Page 42 The compartment may be additionally rinsed with an extra amount of water via detergent compartment inlet. (500 ml of water). Open the detergent compartment to the fi nal position and add water to the compartment to be cleaned. Then, close the detergent compartment and press the Start button (maximum amount of detergent that can be added to selected detergent tank is 1.5 l (0.39 gal)) If you do not wish to rinse the tank with...
- Page 43 Filling the compartment with liquid detergent Before adding the liquid detergent into the tank, pull out the detergent compartment as far as it will go. (If the detergent compartment is not fully opened, the liquid detergent will not fl ow into the tank.) The washing machine has to be switched on.
- Page 44 Do not mix diff erent liquid detergents. Before changing the liquid detergent (depending on the type of laundry), the tanks have to be cleaned. See sections c, d. Cleaning the tanks. Switching off the automatic dosing function in the ADS menu Press the button under the ADS in the Warm Warm...
-
Page 45: Cleaning And Maintenance
CLEANING AND MAINTENANCE CLEANING THE FILTER The washing machine has a fi lter that will retain smaller objects such as coins, buttons, hair etc. Before cleaning, drain the water from the washing machine using the Drain program, and disconnect the washing machine from the power mains. Open the pump fi... - Page 46 CLEANING THE DETERGENT COMPARTMENT AND DOOR RUBBER GASKET Press the tab to completely remove the detergent compartment from its housing. Rinse and thoroughly clean the tray. You may also remove the cap from the plug in the conditioner compartment (A). Clean any residue from the cap and tube.
- Page 47 CLEANING THE AUTO DOSE SYSTEM (ADS) Cleaning the detergent compartment: Remove the detergent compartment from the detergent compartment housing by pulling it out and pressing the release tab (1). Open the cover for detergent compartment A and B (2). Rinse the detergent compartment by directing a stream of running water through it.
- Page 48 CLEANING THE APPLIANCE EXTERIOR Clean the appliance exterior and the display unit using a soft damp cotton cloth and water. Do not use solvents or abrasive cleaners that could damage the appliance (please observe the recommendations and warnings provided by the manufacturers of the cleaning agents). Do not clean the washing machine with a jet of water! Always disconnect the washing machine from the power mains before cleaning.
- Page 49 CLEANING THE RINSING HOLES (UNDER THE AGITATOR IN THE DRUM) If you believe that objects like nails or paper clips fell into the washing machine drum, check the area underneath the agitator. Such objects may rust (corrode) and cause stains on your clothes. Nails and other sharp objects can also cause holes in the fabric.
-
Page 50: Errors And Troubleshooting
ERRORS AND TROUBLESHOOTING Disturbances from the environment (e.g. the power grid) may result in various error reports (see Troubleshooting table). In such case: • Switch off the appliance, wait for 1 minute, switch the appliance back on, and repeat the washing program. •... - Page 51 Problem/error Cause What to do? There are traces • The laundry was very greasy. • Wash the laundry again. When your laundry is of grease (or this heavily soiled, add more washing powder or grease rolls) on the use a liquid detergent in combination with a more clothes.
- Page 52 Manual opening of washing machine door Washing machine door may be opened manually if the appliance is not connected to the power mains and if the water has been pumped out of the machine. A Choose the Spinning or Drain program to pump the water from the machine. If this does not work, water has to be drained from the washing machine drum manually.
- Page 53 FAILURE DISPLAY In case of a failure while a program is in progress, the relevant Error XX is indicated on the display unit. Press the INFO button to display the Error error description. Error XX Info Exit Switch off the appliance and turn it back Errors indicated on the display unit may include the following: Error Error indication on the display unit What to do? Restart the program.
- Page 54 Error Error indication on the display unit What to do? MOTOR ERROR / MOTOR Restart the program. If the error reoccurs, call a service CONTROL ERROR technician. E13.1 UNBALANCE EMPTY DRUM Call a service technician. E13.2 INERTIA ERROR Call a service technician. DOOR UNLOCK ERROR Door is closed, but it cannot be unlocked.
-
Page 55: Service
ASKO Products must appliance. be fi led with ASKO within two (2) years from date of 8. Expenses for travel and transportation for product purchase. service if your appliance is located in a remote... - Page 56 DISLCAIMER OF IMPLIED WARRANTIES YOUR SOLE AND EXCLUSIVE REMEDY UNDER THIS LIMITED WARRANTY SHALL BE PRODUCT REPAIR AS PROVIDED HEREIN. ASKO SHALL NOT BE LIABLE FOR INCIDENTIAL OR CONSEQUENTIAL DAMAGES. Some states and provinces do not allow the exclusion or limitation of incidental or consequential damages, so these limitations and exclusion may not apply to you.
-
Page 57: Service
XXX-XXX V ~ XXXX W IPX4 XX Hz XX-X MPa Should you need further assistance, you can write to ASKO Appliances with any questions or concerns at the address below: ASKO Appliances Inc. Customer Care Center PO Box 940609 Plano, Texas 75094-0609... - Page 58 TECHNICAL INFORMATION Height 850 mm (33 15/32") Width 595 mm (23 27/64") Depth 695 mm (27 23/64") Weight 93 kg (205 lbs) Drum volume 80 l (2.82 cu.ft) Rated power See rating plate Heater power See rating plate Water pressure 0.1–1 MPa 1–10 kp/cm 10–100 N/cm...
-
Page 59: Program Table
PROGRAM TABLE Program Universal wash 12 (26.5) 2.80 2:31 Cotton WARM 12 (26.5) 1.90 2:59/1:33 Mix/Synthetics WARM 4.5 (9.9) 0.70 1:57 Wool/Hand wash WARM 3 (6.6) 0.28 0:52 Dark wash WARM 4 (8.8) 0.66 1:15 Time program WARM 2 (4.4) Auto program WARM 12 (26.5) - Page 60 Adjustment of the displayed washing time Advanced technology allows the appliance to sense the amount of laundry and add the required amount of water during the washing process. Depending on the washing load, washing time can be longer or shorter and the time displayed will be adjusted accordingly.
- Page 61 TABLE: WASHING MODE/TEMPERATURE Washing mode Program cold, warm, hot, warm, hot, cold, warm, warm, hot, cold, warm, warm, hot, Universal wash extra hot extra hot hot, extra hot extra hot hot, extra hot extra hot Cotton cold, warm, cold, warm, hot, warm, hot, cold, warm, warm, hot,...
- Page 62 TABLE OPTIONS Options Program Universal wash Cotton Mix/Synthetics Wool/Hand wash Dark wash Time program MIN/MAX Auto program Quick program MIN/MAX Heavy Easy care Jeans Shirts program Steam Refresh Quick Pro MIN/MAX Sanitize Sportswear Conditioning Stain program Bedding program Allergy program cotton Allergy program synthetics Rinse Spin...
-
Page 63: Disposal
DISPOSAL Disposal / recycling of packaging Our product packaging is made of environmentally friendly materials that can be recycled, disposed of, or destroyed without any hazard to the environment. To this end, packaging materials are labelled appropriately. The symbol on the product or its packaging indicates that the product should not be treated as normal household waste. - Page 64 NOTES Customer Care Center, 1-800-898-1879, www.askona.com...
- Page 65 NOTES Customer Care Center, 1-800-898-1879, www.askona.com...
- Page 66 NOTES Customer Care Center, 1-800-898-1879, www.askona.com...
-
Page 67: Quick Guide
QUICK GUIDE SORT THE LAUNDRY. Close the zippers. Empty the pockets and turn them inside out. Check the laundry care symbols. Sort the laundry based on how heavily soiled it is, by colour, and by material. SWITCH ON THE MAIN ON/OFF SWITCH (ON/OFF) OPEN THE WASHING MACHINE DOOR AND INSERT THE LAUNDRY. - Page 68 www.askona.com WM85.2 US/CA en (08-21)