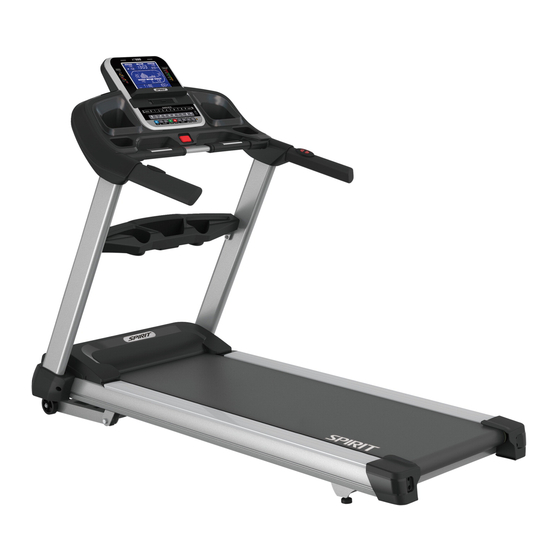
Spirit XT685 Owner's Manual
Hide thumbs
Also See for XT685:
- Owner's manual (39 pages) ,
- Owner's manual (39 pages) ,
- Owner's manual (42 pages)
Advertisement
Quick Links
Advertisement

Related Manuals for Spirit XT685


Summary of Contents for Spirit XT685
- Page 1 XT685 Treadmill OWNER’S MANUAL...
-
Page 3: Table Of Contents
XT685 ASSEMBLY INSTRUCTIONS CONSOLE OPERATION PROGRAMMABLE FEATURES USING HEART RATE TRANSMITTER USING THE SPIRIT FIT APP GENERAL MAINTENANCE MANUFACTURER’S LIMITED WARRANTY Thank you for purchasing our product, please save these instructions. Please do not perform or attempt any customizing, adjustments, repair or maintenance that is not described in this manual. - Page 4 Through your dealer, Spirit Fitness will do all we can to make your ownership experience as pleasant as possible for many years to come.
-
Page 5: Important Safety Instructions
or plug, if it is not working properly, if it has been Important Safety Instructions dropped or damaged, or dropped into water. Return WARNING the appliance to a service center for examination and repair. When using an electrical appliance, basic precautions should •... -
Page 6: Important Electrical Instructions
Fitness Equipment Safety Instructions • Do not operate equipment on deeply padded, plush or shag carpet. Damage to both carpet and equipment may result. Before beginning this or any exercise program, consult a physician. This is especially important for persons over the age •... - Page 7 Circuit Breakers: Some circuit breakers used in homes are not rated for high inrush currents that can occur when a treadmill is first turned on or even during use. If your treadmill is tripping the house circuit breaker (even though it is the proper current rating) but the circuit breaker on the treadmill itself does not trip, you will need to replace the home breaker with a high inrush type.
-
Page 8: Important Operation Instructions
Important Operation Instructions • NEVER operate this treadmill without reading and completely understanding the results of any operational change you request from the computer. Understand that changes in speed and incline do not occur immediately. Set your desired work level on the computer •... - Page 9 Please record the serial number of this fitness product in the space provided below. Serial Number Location Serial Number: Register Y our Purchase The self-addressed product registration card must be completed in full and returned to Spirit Fitness. You can also go to https://www.spiritfitness.com/ residentialwarrantyregistration.html under the Support tab to register online.
- Page 10 XT685 PRE ASSEMBLY UNPACKING TOOLS INCLUDED: 1. Cut the straps, then lift the box over the unit and unpack. ‰ L Allen Wrench ‰ Phillips Head Screwdriver 2. Carefully remove all parts from the carton and inspect for any damage ‰...
- Page 11 SPEAKERS CONSOLE CONSOLE FAN UPRIGHTS HANDLES MOTOR COVER BELT SIDE RAILS END CAPS...
- Page 12 XT685 STEP ONE HARDWARE FOR STEP 1 PART TYPE DESCRIPTION 5/16” X 3/4” BOLTS Ø8 X 23 X 1.5T CURVED WASHERS 3/8” X 2-1/2” BOLTS FLAT WASHER Ø3/8” × Ø19 × 1.5T Ø10 × 2.0T SPRING WASHER 1. Gather HARDWARE FOR STEP 1.
- Page 13 XT685 STEP TWO HARDWARE FOR STEP 2 PART TYPE DESCRIPTION M5 X 10MM PHILLIPS HEAD SCREWS 1. Gather HARDWARE FOR STEP 2. 2. Install the CONSOLE MAST SIDE CAP (L 98, R 99) onto the MAIN FRAME (1) and secure it using...
- Page 14 XT685 STEP THREE HARDWARE FOR STEP 3 PART TYPE DESCRIPTION 3/8” X 1-3/4” BOLTS Ø10 × 2.0T SPLIT WASHER 1. Gather HARDWARE FOR STEP 3 2. Connect the SPEED ADJUSTMENT SWITCH W/ CABLE (37) with the UPPER SPEED CABLE (34).
- Page 15 XT685 STEP FOUR HARDWARE FOR STEP 4 PART TYPE DESCRIPTION 3.5 × 16MM SHEET METAL SCREWS 1. Gather HARDWARE FOR STEP 4. 2. Slide CONSOLE MAST COVER RIGHT AND LEFT (53, 52) up the uprights. Secure them with 8 SHEET METAL SCREWS (125) using the PHILLIPS HEAD SCREW DRIVER (126).
- Page 16 XT685 STEP FIVE HARDWARE FOR STEP 5 PART TYPE DESCRIPTION 5/16” X 3/4” BOLTS 1. Gather HARDWARE FOR STEP 5. 2. Place the HANDRAIL SUPPORT (3) between the LEFT AND RIGHT UPRIGHTS (5, 4) and use the COMBINATION ALLEN WRENCH &...
-
Page 17: Console Operation
XT685 CONSOLE OPERATION Muscle Activation Profile Large LCD with scrolling feedback Heart Rate % Profile and scrolling message center Integrated Speakers for MP3 Player Swivel Fan to keep you cool Audio Jack T en innovative Select Keys Control programs offer a Speed &... - Page 18 Handrail Adjustments The XT685 treadmill allows you to make speed and incline changes on the side handrails. You can also choose to turn these off if you frequently hold on to these rails. This is achieved by pressing the disable button on the right side of the lower portion of the console.
- Page 19 determine which lower body muscles will be activated by automatically adjusting the incline. Generally the following guidelines hold true: • The upper body LED’s will light any time your hands aren’t in contact with the pulse grip sensors The lower body lights will activate in three degrees of engagement: Green represents minimal muscle •...
- Page 20 Dot Matrix Center Display Twenty columns of boxes (10 high) indicate each segment of a workout. The boxes only show an approximate level (resistance) of effort. They do not necessarily indicate a specific value - only an approximate percent to compare levels of intensity. In Manual Operation the resistance dot matrix window will build a profile “picture”...
- Page 21 Calorie Display Displays the cumulative calories burned at any given time during your workout. Note: This is only a rough guide used for comparison of different exercise sessions, and is not to be used for medical purposes. Speakers The console has built-in Speakers and an audio input jack. There is no volume control on the console. The volume must be controlled on the Audio Source.
- Page 22 This will slowly decelerate the tread-belt to a stop. The incline will go to zero percent. The Time, Distance and Calorie readings will hold while the unit is in the pause mode. After 5 minutes the display will reset and return to the start up screen. 2.
- Page 23 Selecting a Program The XT685 offers nine factory preset-programs, two user defined programs and one Manual program. Each preset program has a maximum speed level that is displayed when a desired workout is chosen. The maximum speed that the particular program will achieve will be displayed in the Speed window.
- Page 24 1. Press the desired Program (Hill, Fat burn, Cardio, Strength, or Interval)key. Press Enter to select the program. The display will prompt you through the programming or you can just press Start to begin the program with default values. 2. If Enter was pressed, the Message center will now be blinking a value, indicating your Age (default is 35).
-
Page 25: Programmable Features
speed changes throughout; this allows you to limit the highest speed the program can reach. 6. The Message Center will be blinking the preset top incline of the selected program. Use the Incline + / - keys to adjust, then press Enter. You are now done programming data and may press Start to begin your workout or Stop to go back one level to change data entered in the programming phase. - Page 26 Examples: If you increase your current speed 1 mph, the remaining segment speeds will increase by 1 mph. If you decrease your current speed .5 mph, the remaining segment speeds will decrease by .5 mph, etc. Press the Start button to begin the workout and also save the program to memory. The profile picture will be re-scaled to fit in the window, but the actual speed and incline settings will remain the same as programmed.
- Page 27 •When the Start key is pressed, the program begins with a 3:00 warm up (1:00 @ 1mph/kmph, 1:00 @ 2mph/kmph, and 1:00 @ 3mph/kmph) or you have the option of pressing the Start again to bypass and begin the workout. •When the program begins both the Calorie and Time windows will count down to 0.
- Page 28 to adjust, then press Enter. The Message Center will be blinking the # of intervals desired (default is 10; you may select 10, 20, or 30). Use the speed + or – keys to adjust, then press Enter. The Message Center will be blinking the desired Interval time (default is 1:00). The time you select will be the duration of both the cardio &...
- Page 29 Caution: Exercises that require dumbbell use - Select a pair of dumbbells that you will be able to safely and effectively maneuver over the strength interval time you have chosen. DUMBBELL BENT OVER ROW EMPHASIS: MID/UPPER BACK & FRONT OF ARMS Grasp the dumbbells with an overhand grip and arms fully extended in front of thighs;...
- Page 30 DUMBBELL SHOULDER PRESS EMPHASIS: SHOULDERS Hold the dumbbells at shoulder height with an overhand (palms facing forward) or neutral (palms facing one another) grip Press the dumbbells straight overhead until your arms are fully extended Slowly lower to the start position Repeat this sequence for the duration of the strength interval DUMBBELL TRICEP OVERHEAD EXTENSION EMPHASIS: BACK OF ARMS...
- Page 31 Preset Programs The treadmill has seven different programs that have been designed for a variety of workouts. These five programs have factory preset work level profiles for achieving different goals. Hill This program follows a triangle or pyramid type of gradual progression from approximately 10% of maximum effort (the level that you chose before starting this program) up to a maximum effort which lasts for 10% of the total...
- Page 32 Incline: The elevation in this program is moderate. There are several elevation spikes at different points of the workout. Segment 15 is maximum elevation for this program. Strength This program has a gradual progression of resistance up to 100% of maximum effort that is sustained for 25% of workout duration.
- Page 33 Incline: The treadmill elevation is a quick and sustained progression up to the maximum value (default or user input) for 90% of the workout duration. Fusion (Speed/Incline profile graphs are similar to the Interval Program) Resistance: This program takes you through high levels of cardio & strength intensity followed by recovery periods of low intensity.
- Page 34 Heart Rate Programs The old motto, “no pain, no gain”, is a myth that has been overpowered by the benefits of exercising comfortably. A great deal of this success has been promoted by the use of heart rate monitors. With the proper use of a heart rate monitor, many people find that their usual choice of exercise intensity was either too high or too low and exercise is much more enjoyable by maintaining their heart rate in the desired benefit range.
- Page 35 Consult your physician before participating in any exercise program. With all Spirit Fitness Heart Rate programs you may use the heart rate monitor feature without using the Heart Rate program. This function can be used during manual mode or during any of the nine...
- Page 36 Rate of Perceived Exertion Heart rate is important but listening to your body also has a lot of advantages. There are more variables involved in how hard you should workout than just heart rate. Your stress level, physical health, emotional health, temperature, humidity, the time of day, the last time you ate and what you ate, all contribute to the intensity at which you should workout.
- Page 37 Wearing The Chest Strap Attach the transmitter to the elastic strap using the interlocking key. Adjust the strap as tightly as possible as long as the strap is not too tight to remain comfortable. Position the transmitter with the logo centered in the middle of your torso facing away from your chest (some people must position the transmitter slightly left of center).
-
Page 38: Using The Spirit Fit App
MapMyFitness, Record, Fitbit, etc, in order for the icon to be active and available. *Note: Your device will need to be running on a minimum operating system of iOs 7 or Android 4.4 for the Spirit Fit App to operate... - Page 39 Some people have problems with the transmitter picking up a signal from their skin. If you have problems try wearing the transmitter upside down. Normally the transmitter will be oriented so the Spirit Fitness logo is right side up. The antenna that picks up your heart rate is very sensitive. If there is an outside noise source, turning the whole machine 90 degrees may de-tune the interference.
- Page 40 The Message Center will ask you to enter your Age. You may enter your age, using the Speed + or - keys, then press the Enter key to accept the new value and proceed on to the next screen. You are now asked to enter your Weight. You may adjust the weight value using the Speed + or - keys, then press Enter to continue.
-
Page 41: General Maintenance
GENERAL MAINTENANCE Belt/Deck Your treadmill uses a very high-efficient low-friction hard waxed deck. Performance is maximized when the deck is kept as clean as possible. Use a soft, damp cloth, or paper towel, wipe the edge of the belt and the area between the belt edge and the frame. - Page 42 When an adjustment is made to the belt tension, you must be sure to turn the bolts on both sides evenly or the belt could start tracking to one side instead of running in the middle of the deck. DO NOT OVERTIGHTEN – Over tightening will cause belt damage and premature bearing failure. If you tighten the belt a lot and it still slips, the problem could actually be the drive belt - located under the motor cover - that connects the motor to the front roller.
- Page 43 Calibration Procedure Remove the safety key Press and hold down the Start and Fast + buttons and replace the safety key. Continue to hold the Start and Fast key until the window displays “Factory settings”, then press the Enter key. You will now be able to set the display to show Metric or English settings (Miles vs.
- Page 44 Engineering Mode Menu The console has built in maintenance/diagnostic software. The software will allow you to change the console settings from English to Metric and turn off the beeping of the speaker when a key is pressed for example. To enter the Engineering Mode Menu, press and hold down the Start, Stop and Enter keys.
- Page 45 16 gauge minimum. Low voltage. Contact an electrician or your Spirit Fitness dealer. A minimum of 110 volt AC current is required. Tread-belt stops quickly/suddenly when tether cord is pulled High belt/deck friction.
-
Page 46: Manufacturer's Limited Warranty
T readmill Warranty - Effective August 22, 2018 Spirit Fitness, Inc. (Spirit Fitness) warrants all its treadmill parts for a period of time listed below from the date of retail sale, as determined by sale receipt, or in the absence of a sales receipt eighteen (18) months from the original factory shipping date. Spirit Fitness’ responsibilities include providing new or remanufactured parts, at Spirit Fitness’... - Page 47 Products that do not have a warranty registration card on file at Spirit Fitness. Spirit Fitness reserves the right to request proof of purchase if no warranty record exists for the product. THIS WARRANTY IS EXPRESSLY IN LIEU OF ALL OTHER WARRANTIES EXPRESSED OR IMPLIED, INCLUDING THE WARRANTIES OF MERCHANTABILITY AND/OR FITNESS FOR A PARTICULAR PURPOSE.
- Page 48 800.258.4555 Spirit Fitness spiritservice@spiritfitness.com 3000 Nestle Road www.spiritfitness.com Jonesboro, AR 72401 XT685 Owners Manual © 2018 All Rights Reserved Revision: 08.22.2018 Ver. 6.0...