
Related Manuals for Spirit XT600


Summary of Contents for Spirit XT600
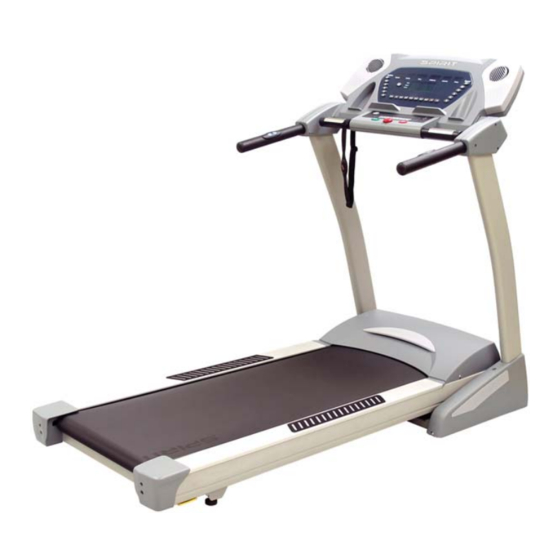
- Page 1 Owner’s Manual Model No. XT600 XT800 •Assembly •Operation •Adjustments •Parts •Warranty Caution: Read and understand this manual before operating unit. Retain For Future Reference...
-
Page 2: Table Of Contents
Table of Contents Product Registration……………………………………………………………………………..2 Important Safety Instructions……………………………………………………………….…..3 Important Electrical Information…………………………………………………………….…..4 Important Operation Instructions…………………………………………………………….…5 Assembly instructions……………………………………………………………………………6 Folding & Transport Instructions…………..………………………………………………….14 Operation of Your New Treadmill…………………………………………………………….15 Programmable Features……………………………………………………………………….18 Target Heart Rate………………………………………………………………………………20 Using a Heart Rate Transmitter……………………………………………………………….21 Heart Rate Control Operation…………………………………………………………………22 Parts list and diagram ET600 ……………….………………………………………………23 Parts list and diagram ET800 ……………………………………………………………….29 General Maintenance.……………….…………………………………………………………34 Service Checklist - Diagnosis Guide………………………………………………………….36... -
Page 3: Product Registration
Thank you for your purchase of this quality treadmill from Flaman Fitness. Your new treadmill was manufactured by one of the leading fitness manufacturers in the world and is backed by one of the most comprehensive warranties available. Through your dealer, Flaman Fitness will do all we can to make your ownership experience as pleasant as possible for many years to come. - Page 4 THIS UNIT IS INTENDED FOR HOUSEHOLD USE ONLY READ ALL INSTRUCTIONS BEFORE USING THIS TREADMILL CAUTION: Before starting any exercise program, it is recommended that you consult your physician. WARNING: Connect this unit to a properly grounded outlet only. DANGER: To reduce the risk of electric shock, always unplug the treadmill from the electrical outlet immediately after using and before cleaning.
-
Page 5: Important Safety Instructions
12. Care must be taken when lifting or moving the equipment, so as not to injure your back. Always use proper lifting techniques. 13. User weight should not exceed 375 lbs. (XT600) / 400 lbs. (XT800) WARNING: BEFORE BEGINNING ANY EXERCISE PROGRAM CONSULT YOUR PHYSICIAN. -
Page 6: Important Electrical Information
Important Electrical Information WARNING! NEVER use a ground fault circuit interrupt (GFCI) wall outlet with this treadmill. Route the power cord away from any moving part of the treadmill including the elevation mechanism and transport wheels. NEVER remove any cover without first disconnecting AC power. If voltage varies by ten percent (10%) or more, the performance of your treadmill may be affected. -
Page 7: Important Operation Instructions
operational change you request from the computer. Understand that changes in speed and incline do not occur immediately. Set your desired speed on the computer console and release the adjustment key. The computer will obey the command gradually. NEVER use your treadmill during an electrical storm. Surges may occur in your household power supply that could damage treadmill components. -
Page 8: Assembly Instructions
Assembly Instructions (XT600) HARDWARE LIST #138. 5/16” x 15m/m Button Head Bolt (8 pcs) #134. 5/16” x 2” Button Head Bolt (4pcs) #139. 8 x 23 x 1.5T Flat Washer (4pcs) #135. 3.5 x 40m/m Self Tapping Screw (6 pcs) #81.Safety Key (1pc) - Page 9 ASSEMBLY (XT600) It will take two people to assemble your unit. STEP 1 Remove all the components from the carton. STEP 2 Remove the bottom side covers that are pre-assembled on the frame. Connect the computer extension wire (50) to the lower computer wire (49).
- Page 10 Assembly drawing (XT600)
- Page 11 Assembly Instructions (XT800) HARDWARE LIST #108.3/8" x 2.0T Spring Washer (2pcs) #102. 5/16” x 15m/m Button Head Socket Screw (6pcs) #121. 8m/m Raised Washer (2pcs) #110. 8 x 23 x 1.5T Curved Washer (4pcs) #101. 5/16” x 2” Button Head Socket Screw (4pcs) #122.
- Page 12 #84. M5 Iron Plate Nut (4 pcs) #92. 5 x 16m/m Tapping Screw (6 pcs) #63.Safety Key (1pc) #113. 12m/m Wrench (1 pc) #111. Combination M5 Allen Wrench & Screwdriver (1 pc) #104. 5/16” x 1-3/4” Button Head Socket Screw (4pcs) #87.
- Page 13 Assembly Unpack the treadmill and locate the hardware pack. The hardware pack is separated into: one section containing tools and four sections labeled steps 1- 4 which contain the hardware needed for assembly of each step. The assembly steps below are numbered one through four and correspond to the hardware in the numbered sections of the hardware pack.
- Page 14 1. Install Handpulse Tube (7) onto the inside of the Left and Right Handrails (4,5) with 4pcs of 5/16” x 1-3/4” Button Head Socket Screws(104) and 4pcs of 8 x 23 x 1.5T Curved Washers (110 by using the Combination M5 Allen Wrench & Screwdriver (111)(hand tighten only). Carefully feed the wires on the sides into the center hole in the Handrail and snake them out of the top of the Handrails (4,5).
- Page 15 Assembly drawing (XT800)
-
Page 16: Folding & Transport Instructions
XT600 Folding Instructions Do not attempt to move the unit unless it is in the folded and locked position. Be sure the power cord is secured to avoid possible damage. Use both handrails to maneuver the unit to the desired position. -
Page 17: Operation Of Your New Treadmill
Operation of Your Treadmill Getting familiar with the control panel XT600 / XT800 Console Getting started: Power the treadmill on by plugging it into an appropriate wall outlet, then turn on the power switch located at the front of the treadmill below the motor hood. Ensure that the safety key is installed, as the treadmill will not power on without it. -
Page 18: Incline Feature
STEP 1: Press and release the Start key to wake display up (if not already on). Note: Installing the tether key will also wake up the console. STEP 2: Press and release the Start key to begin belt movement, at .5 mph, then adjust to the desired speed using the Fast / Slow keys (console or hand rail). - Page 19 1/4 Mile Track: The 1/4 mile track will be displayed around the dot matrix window. The flashing dot indicates your progress. Once the 1/4 mile is complete this feature will begin again. Pulse Grip Feature: The Pulse (Heart Rate) console window will display your current heart rate in beats per minute during the workout.
-
Page 20: Programmable Features
Programmable Features The treadmill offers 7, factory preset programs, 2 user defined programs and one Manual program. Each preset program has a maximum speed level that is displayed when a desired workout is chosen. The maximum speed that the particular program will achieve will be displayed in the Speed window. - Page 21 STEP 3: The Calorie window will now be blinking a bodyweight value. Enter your bodyweight and press Enter. STEP 4: The Pulse window will now be blinking an Age value. Adjust the age and press enter. STEP 5: The first column (segment) will now be blinking. Using the Fast / Slow keys, adjust the speed level to your desired effort for the first segment then press enter.
-
Page 22: Target Heart Rate
Maximum Heart Rate on a schedule approved by your physician. Consult your physician before participating in any exercise program. With all Spirit Heart Rate Control treadmills, you may use the heart rate monitor feature without using the Heart Rate Control program. This function can be used during manual mode or during any of the nine different programs. -
Page 23: Using A Heart Rate Transmitter
2. Adjust the strap as tightly as possible as long as the strap is not too tight to remain comfortable. 3. Position the transmitter with the Spirit logo centered in the middle of your body facing away from your chest (some people must position the transmitter slightly left of center). Attach the final end of the elastic strap by inserting the round end and, using the locking parts, secure the transmitter and strap around your chest. -
Page 24: Heart Rate Control Operation
Selecting a Heart Rate Control Program: You have the option, during the setup mode, to choose either the Weight Control (H-1) program or the Cardiovascular (H-2) program. Weight Control attempts to maintain your heart rate at 70% of your Maximum Heart Rate. Cardiovascular attempts to maintain your heart rate at 90% of your Maximum Heart Rate. -
Page 25: Parts List And Diagram Et600
Parts List and Diagram PARTS LIST XT600 KEY NO. PART NO. 160001 160002 160003 160004 160005 160006 160007A 160007B 160008 160009 160010 160011 160012 160013 160014 160015 160016 160017 160018 160019 160020 160021 160022 160023 160024 160025 160026 160027 160028... - Page 26 KEY NO. PART NO. DESCRIPTION 160041 BREAKER 160042 POWER SOCKET 160043 ON / OFF SWITCH 160044 POWER CORD 160045 10mm x 764 x 764 CONNECTING CABLE (BLACK) 160046 300mm x 764 x 764 CONNECTING CABLE (WHITE) 160047 300mm x 764 x 764 CONNECTING CABLE (BLACK) 160048 UPPER COMPUTER EXTENSION WIRE 700 m/m 160049...
- Page 27 KEY NO. PART NO. DESCRIPTION 160075 MOTOR COVER ANCHOR 160076 10 x 24 x 3T_NYLON WASHER (A) 160077 50 x 13 x 3T_NYLON WASHER (B) 160078 30 x 3/8" _FOOT PAD 160079 NON-SLIP RUBBER (L) 160080 NON-SLIP RUBBER (R) 160081 SAFETY KEY 160082 BELT GUIDE...
- Page 28 KEY NO. PART NO. DESCRIPTION 1600117 5x16m/m_TAPPING SCREW 1600118 5x19m/m_TAPPING SCREW 1600119 3.5x12mm_SELF TAPPING SCREW 1600120 5 x 16m/m_TAPPING SCREW 1600122 4 x 14 x 1.0T_ FLAT WASHER 1600123 3.5x25 m/m_ SELF TAPPING SCREW 1600124 3x10 m/m_ TAPPING SCREW 1600125 4x38m/m_SELF TAPPING SCREW 1600126 3.5 x 16 m/m_ TAPPING SCREW...
- Page 29 PARTS DIAGRAM XT600...
-
Page 31: Parts List And Diagram Et800
KEY NO. PART NO. DESCRIPTION 180001 MAIN FRAME 180002 INCLINE BRACKET 180003 HANDRAIL SUPPORT 180004 RIGHT HANDRAIL 180005 LEFT HANDRAIL 180006 CONSOLE SUPPORT 180007 HANDPULSE TUBE 180008A RIGHT HANDGRIP 180008B LEFT HANDGRIP 180009 DECK CROSS BRACE 180010 FRONT ROLLER W/ PULLEY 180011 REAR ROLLER 180012... - Page 32 KEY NO. PART NO. DESCRIPTION 180037-18 PLASTIC WASHER 37~18 180037-19 AUDIO CABLE 37~19 180037-20 SPEAKER 37~20 180037-21 700m/m RECEIVER CABLE (UPPER) 37~21 180037-22 500m/m RECEIVER CABLE (LOWER) 37~22 180037-30 FAN SWITCH 37~30 180038 SPEED ADJUSTMENT SWITCH W/CABLE 180039 INCLINE ADJUSTMENT SWITCH W/CABLE 180040 MOTOR BASE CAP (L) 180041...
- Page 33 KEY NO. PART NO. DESCRIPTION 180078 19 x 10 x 1.5T FLAT WASHER 180079 25 x 10 x 1.5T FLAT WASHER 180080 4 x 14 x 1T FLAT WASHER 180081 3x8 m/m SELF TAPPING SCREW 180082 M5 RAISED WASHER 180083 5 x 25 x 1.5T x5.8H CONCAVE WASHER 180084 M5 IRON PLATE NUT...
- Page 34 37-20 37-18 37-3 37-15 37-14 37-15 37-16 37-15 37-14 37-16 90 90 37-19 37-17 50-2 50-3 50-3 37-1 37-21 50-1 37-20 37-18 37-30 50-1 37-12 37-13 37-17 50-2 37-2 37-22...
-
Page 36: General Maintenance
General Maintenance Belt and Bed - Your treadmill uses a very high-efficient low-friction bed. Performance is maximized when the bed is kept as clean as possible. Use a soft, damp cloth or paper towel to wipe the edge of the belt and the area between the belt edge and frame. Also reach as far as practical directly under the belt edge. -
Page 37: To Set Treadbelt Tracking
ATTENTION: DAMAGE TO THE RUNNING BELT RESULTING FROM IMPROPER TRACKING / TENSION ADJUSTMENTS IS NOT COVERED UNDER THE SPIRIT WARRANTY. BELT / DECK LUBRICATION: once a month. For optimal performance, the walking board may require periodic lubrication. It is recom- mended that every 30 days or after 30 hours of operation, you check the board surface. -
Page 38: Service Checklist - Diagnosis Guide
Service Checklist - Diagnosis Guide Before contacting your dealer for aid, please review the following information. It may save you both time and expense. This list includes common problems that may not be covered under the treadmill’s warranty. PROBLEM Display does not light Treadbelt does not stay centered Treadmill belt hesitates when walked/run on Motor is not responsive / Display is lit... -
Page 39: Manufacturer's Limited Warranty
Warranties may vary in other countries Flaman Fitness extends the following exclusive, limited warranty of the Spirit ET600/ET800 treadmills, which shall apply only to the use of the device in the home, for residential, non-commercial purposes only. Any other use of the device shall void this warranty.