Advertisement
Quick Links
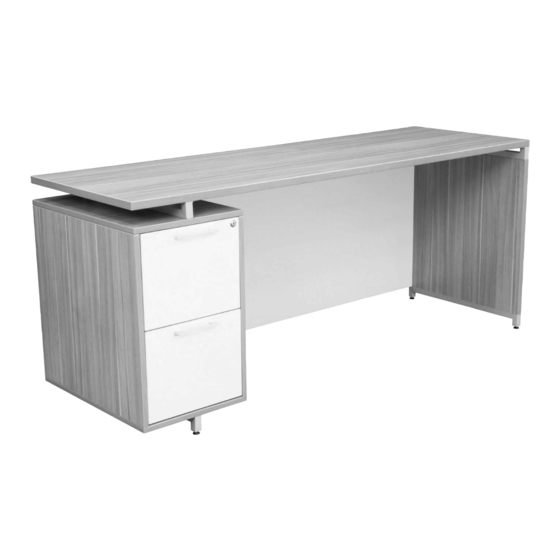
71" Single Pedestal Credenza
Organize your parts and hardware. You will need (2) people, a Phillips head screwdriver and rubber mallet.
TT-F
PED-H
PED-F
Parts :
TT-F: Desk Top
(71" x 23.5" x 1")
Quantity: 1
LG-D: Leg
(24.5" x 23.5" x 1")
Quantity: 1
IMPORTANT NOTICE:
Place all wooden parts on a clean and smooth surface such as a rug or carpet to avoid the parts from being scratched.
Check to be sure that you have all parts and hardware.
Remove all wrapping materials, including staples & packing straps before you start to assemble.
Do not tighten all screws/bolts until completely assembled.
Keep all hardware parts out of reach of children.
CARTONS: TT7124, LG2824, MP5424, PFF24
PED-F: File File Pedestal
(15.5" x 23.5" x 25")
(15.5" x 23.5" x 25")
Quantity: 1
LG-E: Leg Foot Bracket
(23.5"D)
Quantity: 1
LG-F: Leg Top Bracket
(23.5"D)
Quantity: 1
Any problems or questions call Regency Office Furniture at 1-866-816-9822
• ONCSSP7124 •
MP-D
PED-G
PED-G: Ped Foot Bracket
(23.5"D)
Quantity: 1
PED-H: Ped Top Bracket
(23.5"D)
Quantity: 1
71" Single Pedestal Credenza
INSTRUCTIONS
MP-D: Modesty
(54" x 25" x 1")
Quantity: 1
Figure 1:
Cam Lock Assembly:
To open Cam, point arrow
toward Cam Pin hole. To
lock Cam, turn clockwise.
Page 1
LG-F
LG-D
LG-E
Advertisement

Related Manuals for Regency ONCSSP7124


Summary of Contents for Regency ONCSSP7124
- Page 1 Remove all wrapping materials, including staples & packing straps before you start to assemble. Do not tighten all screws/bolts until completely assembled. Keep all hardware parts out of reach of children. Any problems or questions call Regency Office Furniture at 1-866-816-9822...
- Page 2 Quantity: 2 Quantity: 4 Quantity: 8 Quantity: 1 NOTE : PRODUCT IS REVERSIBLE. SOME STEPS INCLUDE BOTH RIGHT AND LEFT ORIENTATIONS. Please examine all parts before assembly. Hardware placement is critical. Any problems or questions call Regency Office Furniture at 1-866-816-9822...
- Page 3 Note: Attach the Leg(LG-D) so that the inserts for a Bridge are toward the front of the Credenza(Figure 2). Leg(LG-D) so that the inserts for a Bridge are toward the front of the Credenza LG-D O(3) O(3) Figure 2 TT-F Any problems or questions call Regency Office Furniture at 1-866-816-9822...
- Page 4 This will unlock the drawer and release it. and press the other side down and simultaneously pull the drawer out. Any problems or questions call Regency Office Furniture at 1-866-816-9822...
- Page 5 Screws(M). Also, insert 2 Glides(S) into Ped Foot Bracket(PED-G). NOTE: Flange on Ped Foot Bracket should face toward your Cam Pin location from STEP 6. PED-G PED-G Flange PED-F PED-F Any problems or questions call Regency Office Furniture at 1-866-816-9822...
- Page 6 Modesty(MP-D) with Cam Caps(N). STEP 11B : If the cam pin inserts are not being utilized for a bridge connection, cover all cam pin inserts on the Leg(LG-D) with Insert Covers(T). Any problems or questions call Regency Office Furniture at 1-866-816-9822...