Advertisement
Quick Links
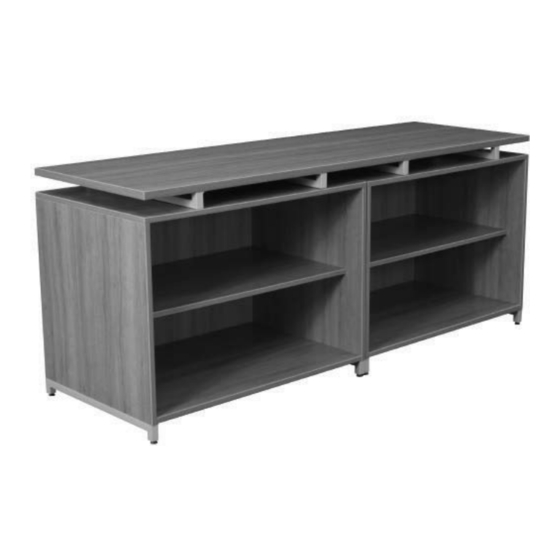
Double Shelf Credenza • ONCSBKBK7124 • INSTRUCTIONS
Storage Cabinet/ Single Shelf Credenza • ONCSSCBK7124 • INSTRUCTIONS
Double Storage Cabinet Credenza • ONCSSCSC7124 • INSTRUCTIONS
CARTONS: OTT7124, (2)OPSC3624, (2)OSCD3624
Organize your parts and hardware. You will need (2) people, a Phillips head screwdriver and a rubber mallet.
Hardware :
A: Glides(8) • B: Assembly Key • C: Shelf Pins(8) • D: Cam Pins(22) E: Wood Screws(12) • F: Small Bolts(24)
G: Medium Bolts(20) • H: Cam Covers(8) • I: Cam Caps(18) • T: Long Bolts(4) • U: Washers(12)
A
B C
Parts :
J: Back Panel(2) • K: Base Panel(2) • L: Floating Top • M: Left Side Panel(2) • N: Right Side Panel(2)
O: Shelf(2) • P: Top Panel(2) • Q: Foot Bracket(4) • R: Top Bracket(4) • S: Leg Connector Bracket(2)
J
N
STEP 1 : Insert 2 Cam Pins(D) into Back Panel(J). Attach
Base Panel(K) to Back Panel by inserting Cam Pins into
Cam Locks. Lock Cams (Figure 1).
D
IMPORTANT NOTICE:
Place all wooden parts on a clean and smooth surface such as a rug or carpet to avoid the parts from being scratched.
Check to be sure that you have all parts and hardware.
Remove all wrapping materials, including staples & packing straps before you start to assemble.
Do not tighten all screws/bolts until completely assembled.
Keep all hardware parts out of reach of children.
Any problems or questions call Regency Office Furniture at 1-866-816-9822
CARTONS: OTT7124, (2)OPSC3624
CARTONS: OTT7124, (2)OPSC3624, OSCD3624
D
E F
G H
K
O
J
D
K
I
T
U
L
P
STEP 2 : Insert 4 Cam Pins(D) into Left Side Panel(M) &
Right Side Panel(N).
M
D
D
Figure 1: To open
Cam, point arrow toward
Cam Pin hole. To lock
Cam, turn clockwise.
M
Q
R
D
D
N
D
D
D
S S
D
Advertisement

Summary of Contents for Regency ONCSBKBK7124
- Page 1 Remove all wrapping materials, including staples & packing straps before you start to assemble. Do not tighten all screws/bolts until completely assembled. Keep all hardware parts out of reach of children. Any problems or questions call Regency Office Furniture at 1-866-816-9822...
- Page 2 4 Bolt(G) and 2 long bolts(T) according to placement below. Finish fastening with 6 Screws(E). NOTE: When the two units are next to each other the long bolts are next to each other (see step 11). Figure 2 Any problems or questions call Regency Office Furniture at 1-866-816-9822...
- Page 3 3 Long Bolts(G) per Top Bracket(R). STEP 11 : Connect the two center Foot Brackets(Q) to each other by momentarily removing existing Long Bolts(T), placing Leg connector Bracket(S), then re-inserting Bolts. Bolts. Any problems or questions call Regency Office Furniture at 1-866-816-9822...
- Page 4 STEP 12 : Insert 8 Shelf Pins(C) at desired height. Place Shelves(O). Finish by concealing Cam Locks with Cam Caps(I) & Cam Covers(H). IF YOU HAVE DOORS, PLEASE CONTINUE INSTRUCTIONS. Any problems or questions call Regency Office Furniture at 1-866-816-9822...
- Page 5 STEP D : Attach 4 Hinges(B) to Doors(J,K) with 8 Wood Screws(F). STEP C : Attach 1 Handle(A) to each Door(J,K) with 2 Bolts(E). Any problems or questions call Regency Office Furniture at 1-866-816-9822...
- Page 6 Your Final Door(O,P) interior should look like this. STEP E3: If you are building a DOUBLE STORAGE CABINET CREDENZA, repeat steps A-E STORAGE CABINET/ SINGLE SHELF CREDENZA DOUBLE STORAGE CABINET CREDENZA Any problems or questions call Regency Office Furniture at 1-866-816-9822...


